
Homemade Date Paste
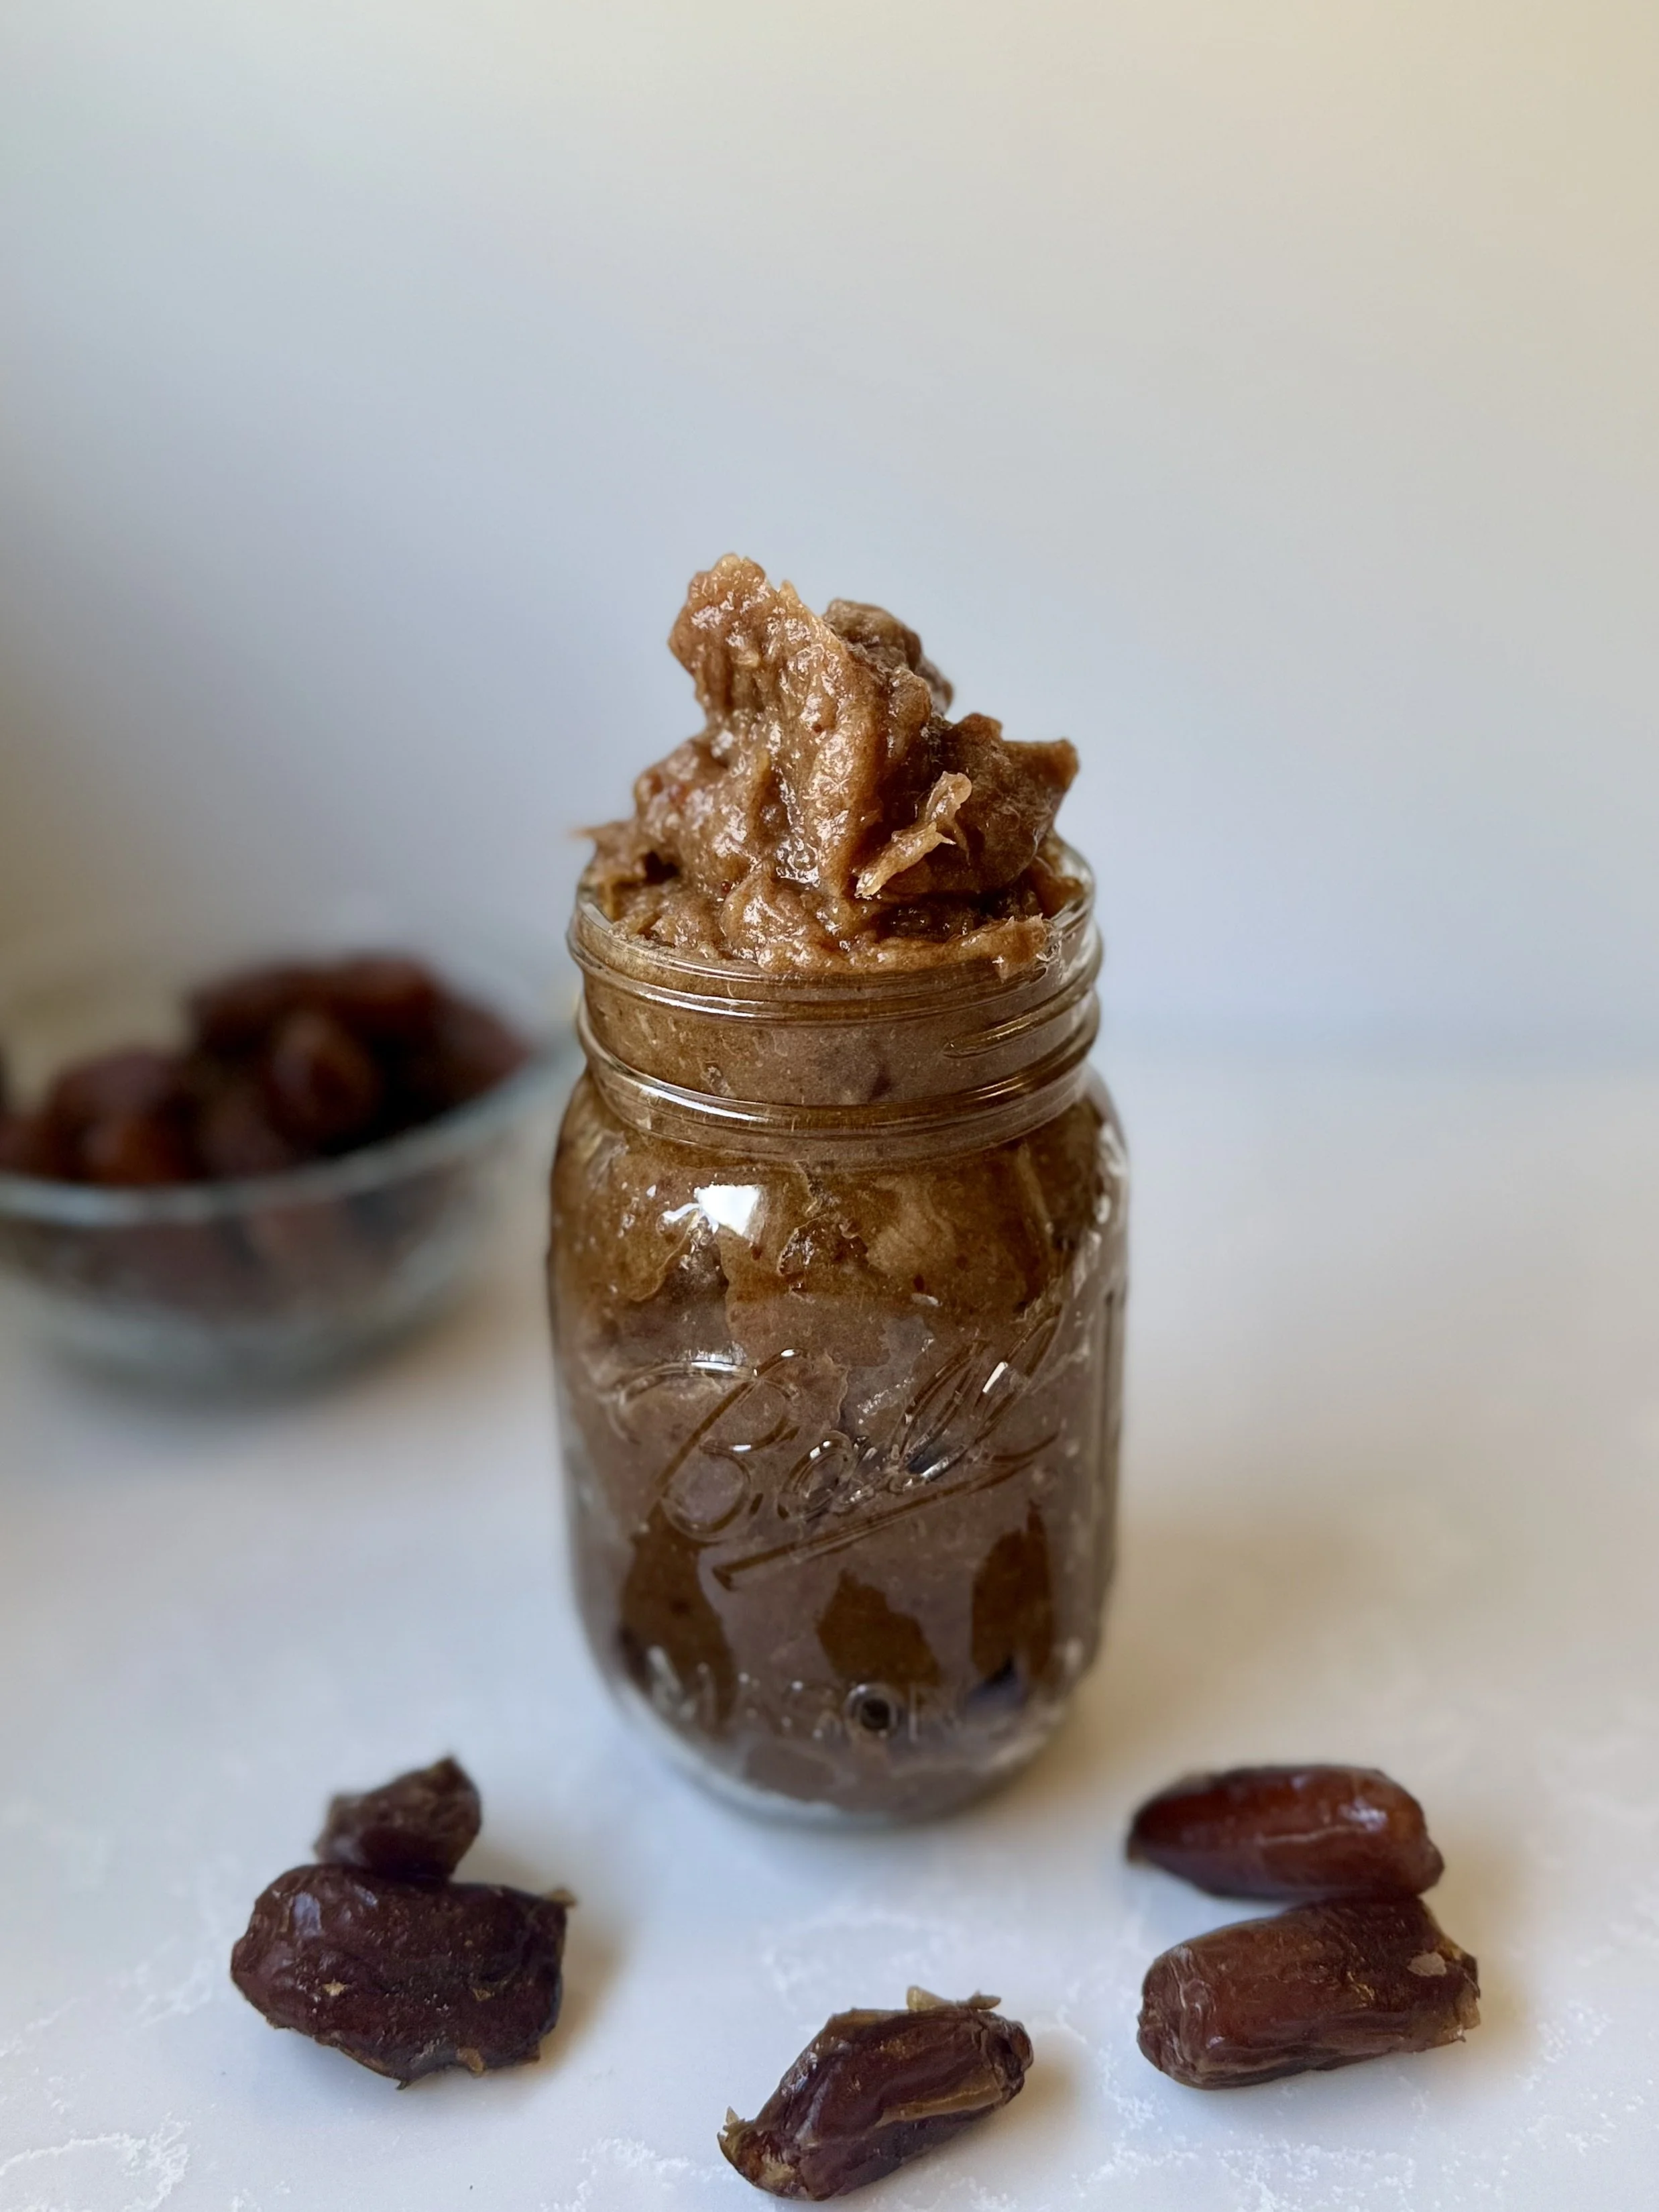
How to Make Homemade Date Paste (Naturally Sweet & Simple)
If you're looking for a wholesome, unrefined sweetener to use in your favorite recipes, homemade date paste is a game-changer. With just three ingredients and a blender, you can create a rich, caramel-like spread that’s naturally sweet, nutrient-dense, and incredibly versatile. Whether you're baking, blending, or just spooning it into your oatmeal, this date paste is a healthy substitute for refined sugar that doesn't compromise on flavor.
Ingredients
2 cups packed dates (pitted)
1 cup boiling water
Pinch of salt
Instructions
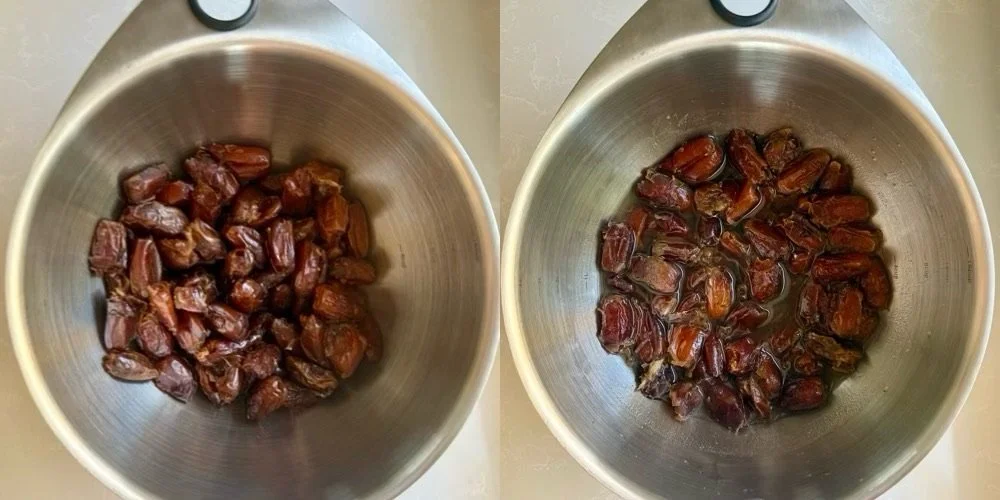
Soften the Dates
Place the pitted dates into a heat-safe bowl. Pour 1 cup of boiling water over the dates and add a pinch of salt (this enhances the natural sweetness and balances the flavor).Cover and Soak
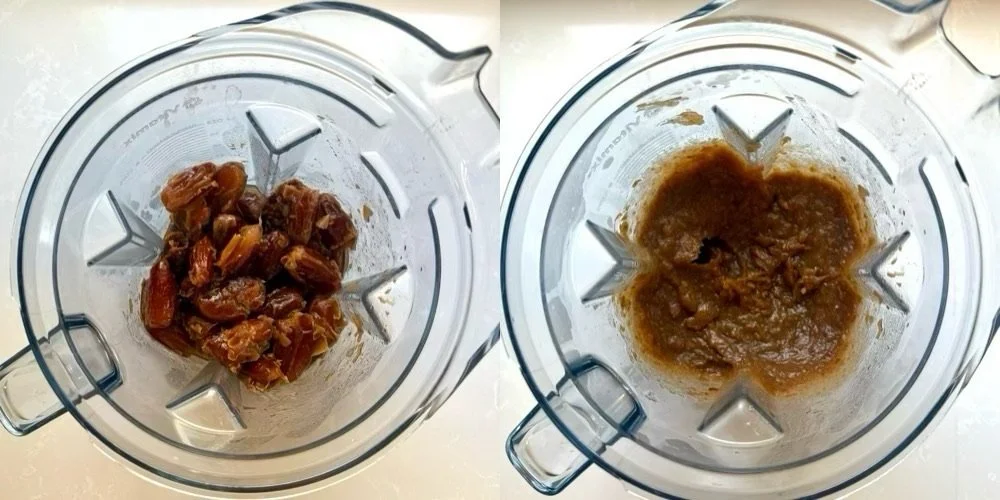
Cover the bowl with a plate, plastic wrap, or anything that helps trap the steam and moisture. Let the dates soak for at least 20 minutes, or until they’re soft and squishy to the touch. The heat will help break down the dates, making them easier to blend into a smooth paste.Blend Until Smooth
Transfer the softened dates, along with the soaking water, into a high-speed blender or food processor. Blend until the mixture is completely smooth and creamy, scraping down the sides as needed. The result should be thick but spreadable, similar to the consistency of natural peanut butter or thick applesauce.
Storage Tips
Refrigerator: Store your date paste in an airtight container in the fridge for up to 1 week.
Freezer: For longer storage, freeze it in portions (ice cube trays work great!) for 3 to 6 months. Once frozen, pop the cubes into a freezer-safe bag or container for easy use later on.
Helpful Tips
Type of Dates: Medjool dates work best for their soft texture and rich flavor, but any variety can work, just be sure they’re pitted and fresh.
Consistency Control: If your paste is too thick, add a tablespoon of warm water at a time until you reach your desired texture.
Make it in Batches: This recipe is easy to double or triple if you like keeping natural sweeteners on hand.
Sweetening Ratio: Date paste can be used as a 1:1 substitute for sugar in many baking recipes, though you may need to slightly reduce the liquid in your recipe depending on the dish.
Leave a comment below if you make this date paste and what you’ve used it in!

Date Paste
Homemade date paste is a naturally sweet, wholesome alternative to refined sugar, made by blending soaked dates into a smooth, caramel-like spread. It's perfect for sweetening baked goods, smoothies, or sauces.
Ingredients
- 2 cups packed dates (pitted)
- 1 cup boiling water
- pinch of salt
Instructions

Perfect Cornbread
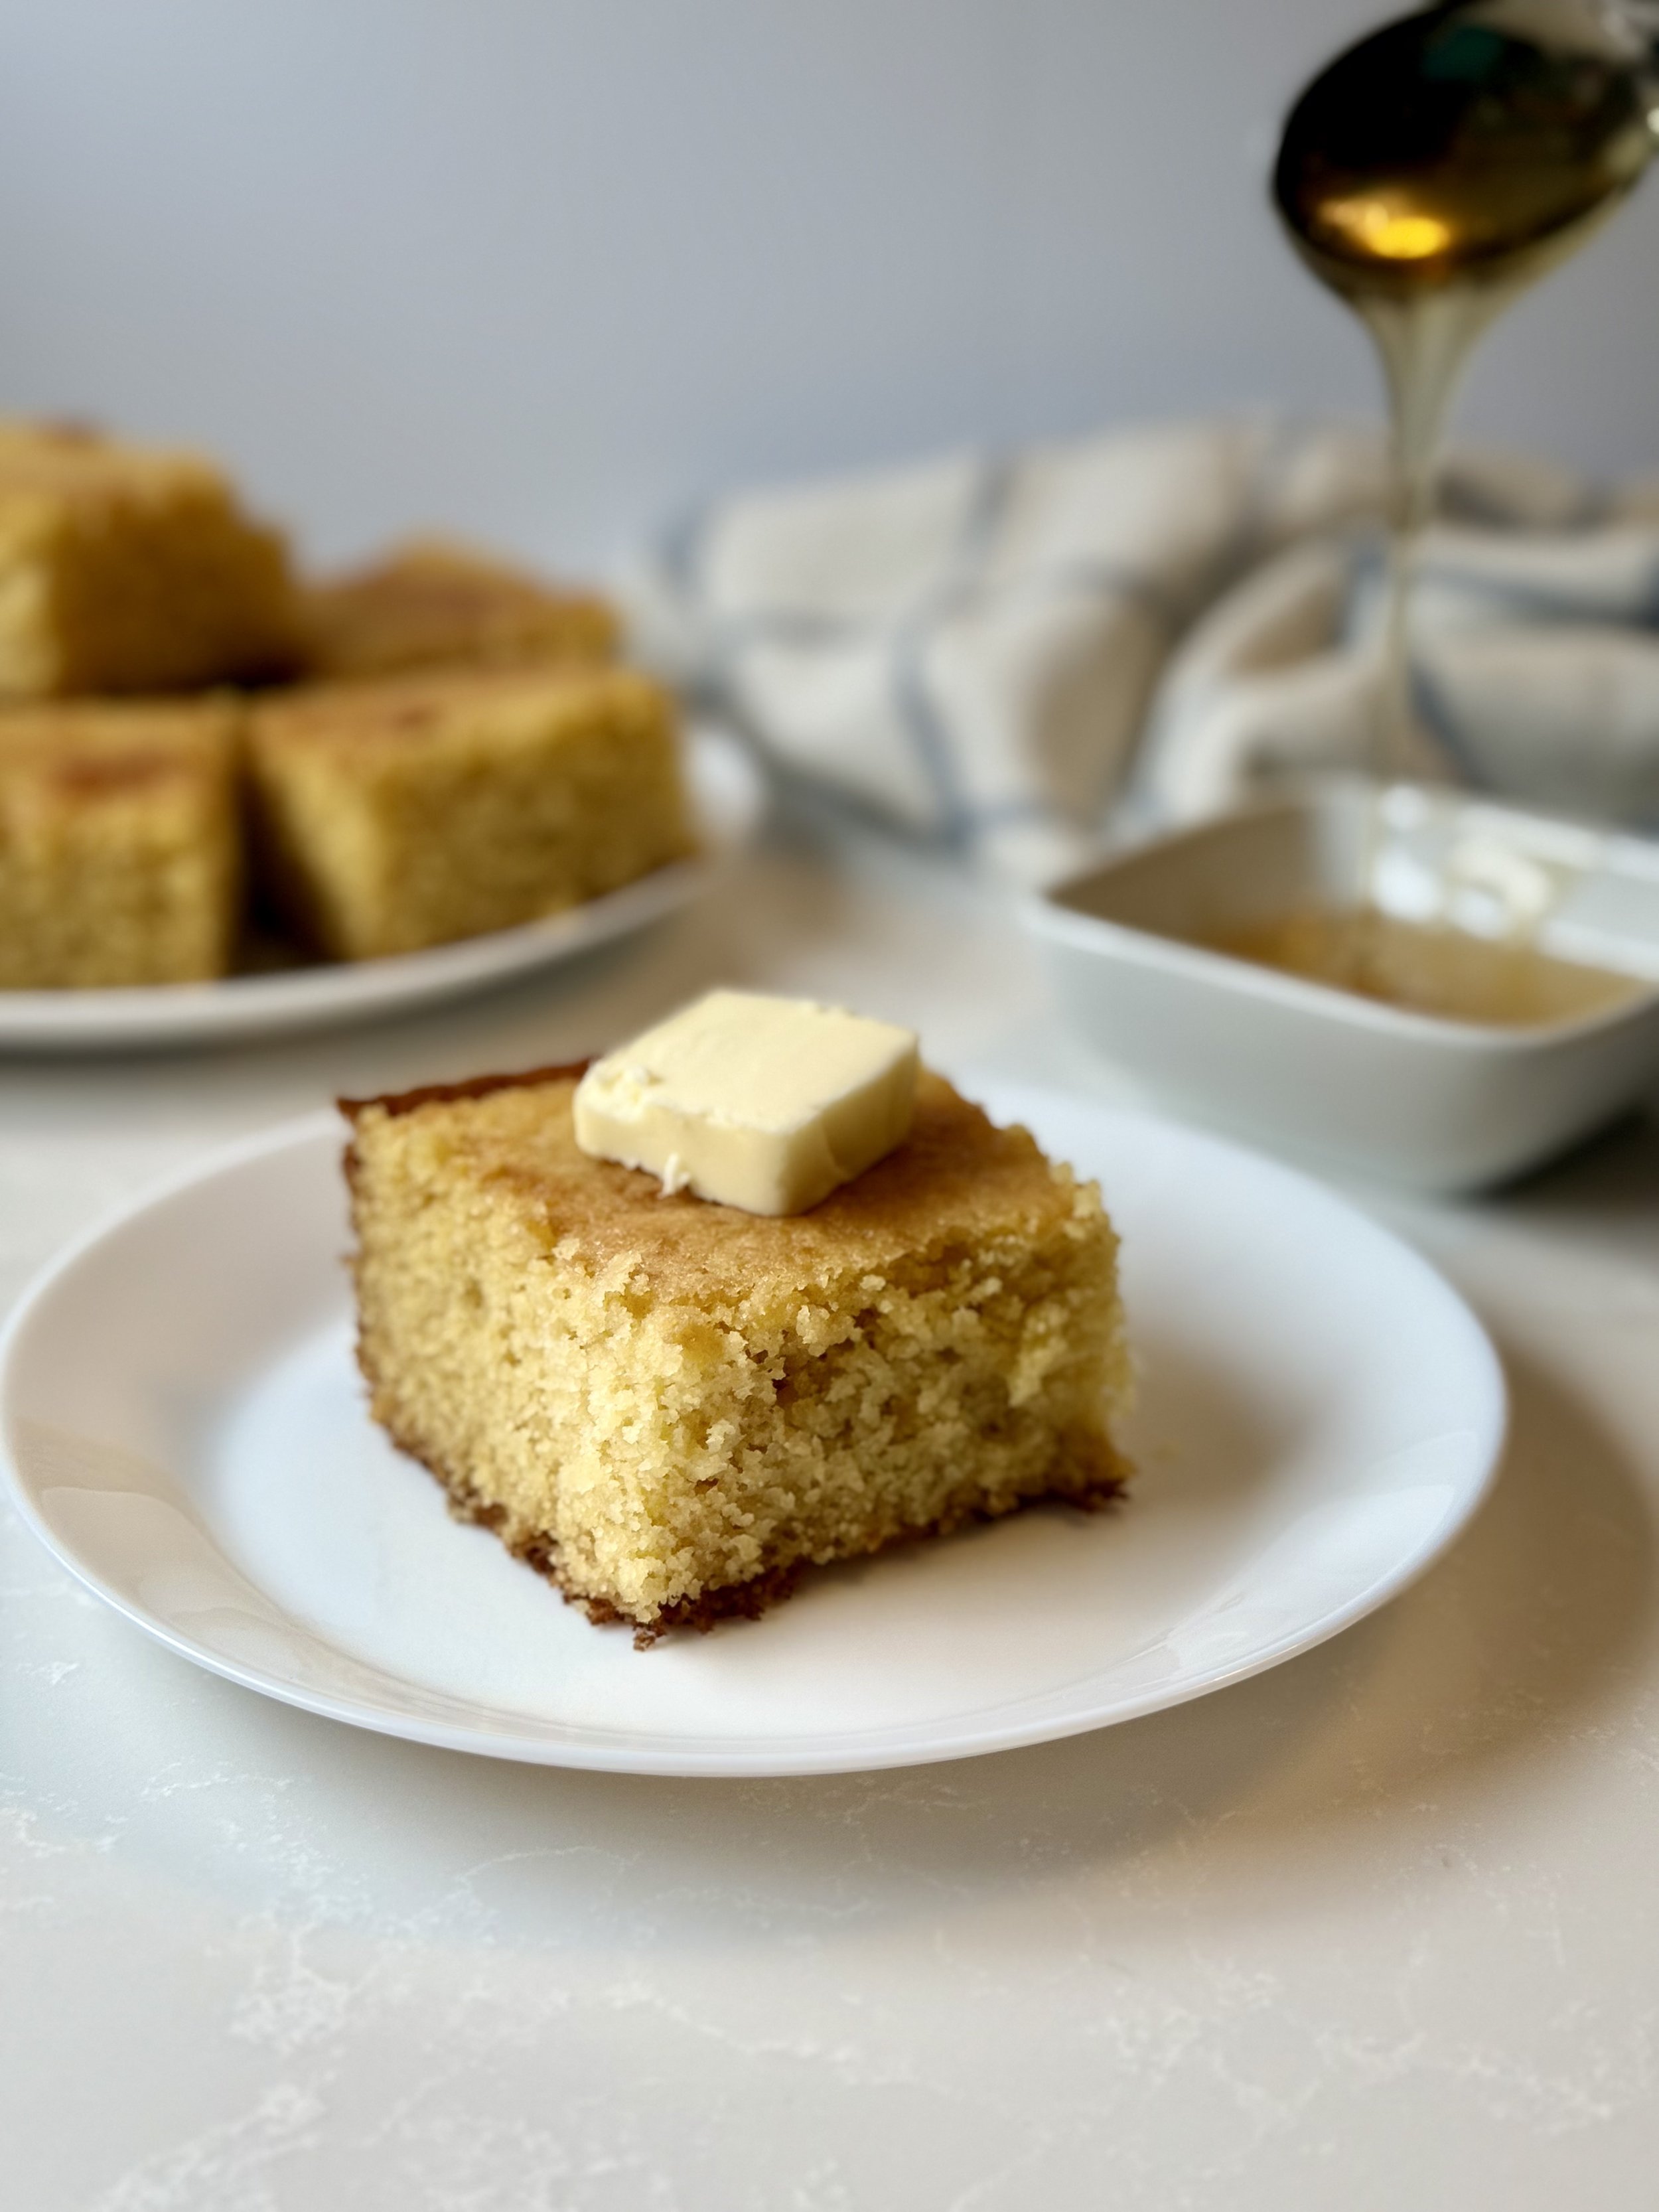
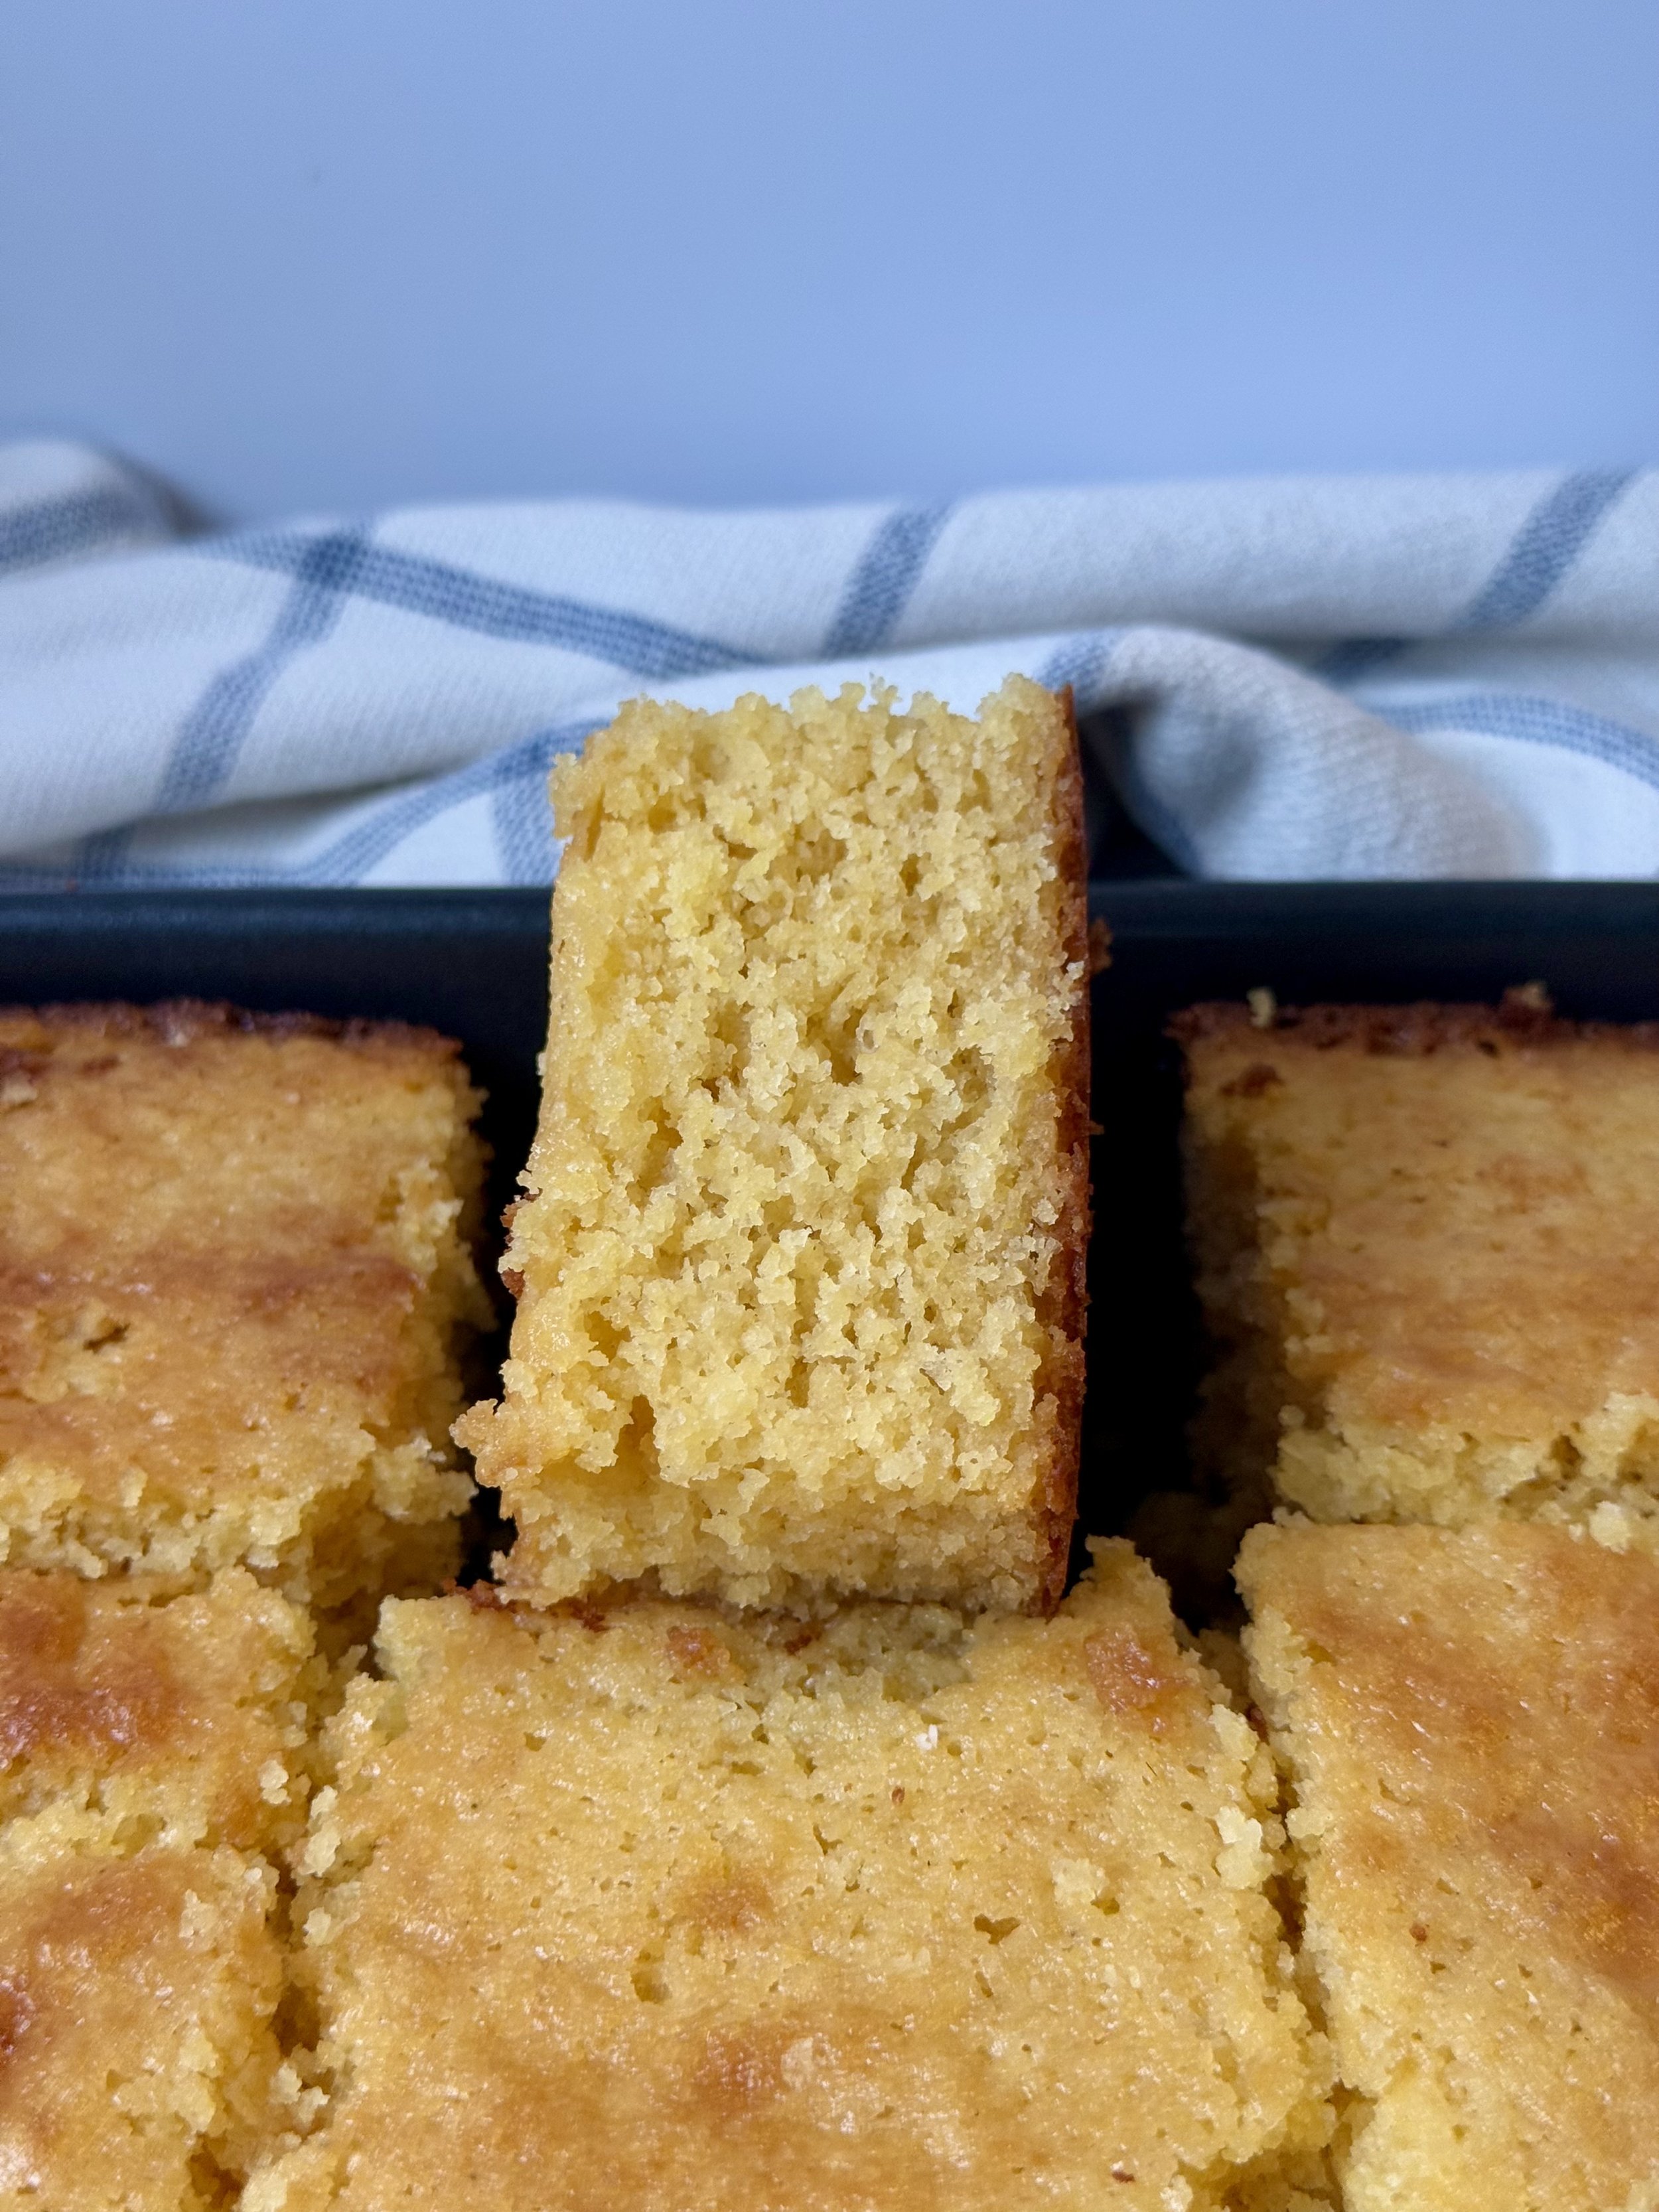
If you’ve ever had dry, crumbly cornbread and felt a little let down, this recipe will change your mind. This cornbread is everything it should be—moist, tender, and just the right balance of sweet and savory. It bakes up with a golden crust and a soft, fluffy center that holds together beautifully. Whether you're pairing it with a hearty bowl of chili or enjoying a warm slice with butter and honey, this is cornbread at its best: simple, satisfying, and seriously delicious.

Ingredients
| Ingredient | Purpose |
|---|---|
| 1 cup all-purpose flour | Provides structure and stability |
| 3/4 cup yellow cornmeal | Adds classic cornbread texture and flavor |
| 1 teaspoon salt | Enhances overall flavor |
| 1/2 teaspoon baking soda | Helps with leavening when combined with acidic buttermilk |
| 2 teaspoons baking powder | Provides additional lift and fluffiness |
| 1/2 cup butter + extra to coat pan | Adds richness and moisture; greases pan for non-stick surface |
| 1/4 cup vegetable oil | Keeps crumb moist and tender |
| 1/4 cup granulated sugar | Sweetens and balances flavors |
| 1/4 cup light brown sugar | Adds sweetness and a hint of molasses flavor |
| 1/3 cup honey | Deepens sweetness and adds moisture |
| 2 eggs | Bind ingredients and add structure |
| 1 1/4 cups buttermilk | Adds moisture, tang, and activates baking soda |
All of these ingredients come together perfectly, making the best flavor combo. What I love best about this recipe is the brown sugar. It’s a simple swap that makes a big difference. While white sugar adds sweetness, brown sugar brings depth. That hint of molasses in brown sugar gives the cornbread a richer flavor and a slightly more caramel-like warmth that pairs beautifully with the cornmeal’s nuttiness. The molasses flavor of brown sugar also enhances the sweetness of cornmeal, making it a perfect pairing.
Brown sugar also helps keep the cornbread moist. The molasses attracts and holds onto moisture, so you end up with a softer, more tender crumb that doesn’t dry out as quickly. That means your cornbread stays just as delicious the next day—if it lasts that long.

How to Store Moist Cornbread
To keep your cornbread soft and fresh, let it cool completely before storing. Once cool, wrap it tightly in plastic wrap or foil, or place it in an airtight container. It’ll stay moist at room temperature for up to 3 days.
For longer storage, refrigerate it—just be sure it’s well-wrapped or placed in an airtight container to prevent it from drying out. It’ll stay fresh in the fridge for about 5–6 days. Want to hang onto it even longer? Freeze it! Wrap individual slices and pop them in a freezer-safe bag. They’ll last up to 3 months. Just thaw at room temperature or warm in the oven or microwave to return that just-baked texture.
This perfect cornbread recipe is great for any occasion, perfectly complementing a variety of meals and adding it as a nice sweet side dish. If you love this recipe or have made any yummy changes, let me know in the comments below! 🤗🤗

Perfect Cornbread
This golden, crumbly cornbread has a hint of sweetness and a buttery crust—perfect for a BBQ, or enjoyed on its own as a warm, comforting treat.
Ingredients
- 1 cup all-purpose flour
- 3/4 cup yellow cornmeal
- 1 teaspoon salt
- 1/2 teaspoon baking soda
- 2 teaspoons baking powder
- 1/2 cup butter (1 stick) + plus extra to coat pan
- 1/4 cup vegetable oil
- 1/4 granulated sugar
- 1/4 light brown sugar
- 1/3 cup honey
- 2 eggs
- 1 1/4 cups buttermilk
Instructions

Easy Jalapeño Cheddar Bread

| Ingredient | Purpose in the Recipe |
|---|---|
| 3 cups all-purpose flour or bread flour | Provides structure to the bread; bread flour gives a chewier texture while all-purpose makes it softer |
| 1 teaspoon active dry yeast | Leavens the dough; allows the bread to rise during the long rest |
| 1 teaspoon salt | Enhances the overall flavor and helps control yeast activity |
| 1.5 cups lukewarm water | Hydrates the flour and activates the yeast; lukewarm temperature is critical for proper fermentation |
| 1 tablespoon olive oil | Adds flavor, promotes a softer crumb, and prevents sticking |
| 2–3 jalapeños, chopped | Provides heat and a fresh, spicy flavor; you can adjust based on your spice tolerance |
| 8 oz cheddar cheese, cubed | Creates melty, flavorful pockets inside the bread and a golden crust on top |

Step-by-Step Instructions
- Mix the dry ingredients: In a large bowl, add 3 cups of flour, 1 tsp of active yeast, and 1 tsp of salt. Mix them together using a spatula.
- Add the water: Pour in 1.5 cups of lukewarm water. Stir and fold with your spatula until a thick, shaggy dough forms (about 1–2 minutes).
- Oil & rest: Drizzle 1 tbsp of olive oil over the dough ball. Cover the bowl with a kitchen towel and let it rest at room temperature overnight (6–8 hours).
- Prep mix-ins: Preheat the oven to 450°F. Line a baking sheet with parchment paper. Slice and deseed the jalapeños, then chop. Cube the cheddar cheese.
- Incorporate jalapeños & cheese: Gently loosen the dough from the bowl edges. Add chopped jalapeños and cheese (reserve some for topping). Fold them into the dough with care. Don’t worry if the dough tears a bit — just fold and gather into a ball.
- Shape the dough: Lightly flour a surface. Place dough on it and shape into a round loaf. Cut a shallow slit on top to help it expand while baking.
- Top & bake: Place reserved jalapeños and cheese on top. Transfer loaf to your lined baking sheet. Bake at 450°F for 30–35 minutes, or until golden and firm.
💡 Tips for Success
- Flour type: Bread flour gives a chewier texture, while all-purpose makes it softer.
- Water temp: Make sure water is just lukewarm (about 100°F). Too hot and it will kill the yeast.
- No kneading needed: The long rest does the gluten development for you!
- Spice level: Use fewer jalapeños or remove all seeds for milder heat. Add more for a spicier loaf.
- Cheese options: Sharp cheddar works great. Mix in pepper jack or gouda for variety.
Storage & Reheating
- Room Temp: Store in a sealed bag or container for up to 2 days.
- Freezer: Wrap tightly and freeze for up to 1 month. Slice before freezing for easy toastable pieces.
- To Reheat: Toast slices in the oven at 350°F for 5–10 minutes, or air fry for a crisp crust.
Common Baking Troubleshooting
- Dough too sticky? Lightly flour your hands and work surface — don’t add too much flour to the dough itself.
- No rise overnight? Check your yeast freshness. Was your kitchen too cold? Try placing the dough in the oven (off) with the light on for warmth.
- Cheese leaking out? That’s normal — it makes crispy, cheesy edges. You can mix the cheese more deeply into the dough if desired.
- Bottom too hard? Use parchment paper or a baking stone for a more even bake.
Bake it. Slice it. Share it. Enjoy the heat and the cheese in every bite! 🌶️🧀

Final Thoughts
Whether you’re a first-time bread baker or a seasoned pro looking to spice things up, this Jalapeño Cheddar Bread is a flavorful, crusty, cheesy masterpiece that’s surprisingly easy to pull off. The slow overnight rise does the hard work for you, and the combo of melty cheddar with spicy jalapeños makes every slice totally irresistible.
Serve it warm with a pat of butter, toast it for breakfast, or pair it with your favorite chili or soup — this bread always finds a way to steal the show.
Did you try this recipe? Let me know how it turned out in the comments below! 👇 I’d love to hear your thoughts, any tweaks you made, or ideas for what I should bake next.

Easy Jalapeño Cheddar Bread
Ingredients
- 3 cups all-purpose flour (or bread flour)
- 1 teaspoon active yeast
- 1 teaspoon salt
- 1.5 cups lukewarm water
- 1 tablespoon olive oil
- 2-3 Jalapeños (2 large or 3 small).
- 8 ounce brick of cheddar cheese - cubed.
Instructions
- Add 3 cups of all-purpose flour, 1 teaspoon of active yeast, and 1 teaspoon of salt in a large bowl. Using a spatula, mix the ingredients into the flour.
- Add 1.5 cups of lukewarm water (not hot, or it can kill the yeast). Using your spatula, mix and fold until you form a thick dough ball (1-2 minutes). Drizzle the top of the dough ball with olive oil.
- Cover with a kitchen towel and let rest overnight- at least 6-8 hours.
- When ready, preheat the oven to 450 degrees Fahrenheit and line a baking sheet with parchment paper.
- Slice the jalapeños in half and remove the seeds. Chop the jalapeños. Next, cut your cheese brick into small cubes.
- Using a spatula, slightly release the top edges of the dough so it doesn't stick to the sides as easily. Add the jalapeños and cheddar cheese into the bowl, reserving a few to top the dough. Push the mix-ins inward toward the center while slightly grabbing and folding the dough without ripping it. (It's okay if you do! No need to panic) until everything is together in a dough ball.
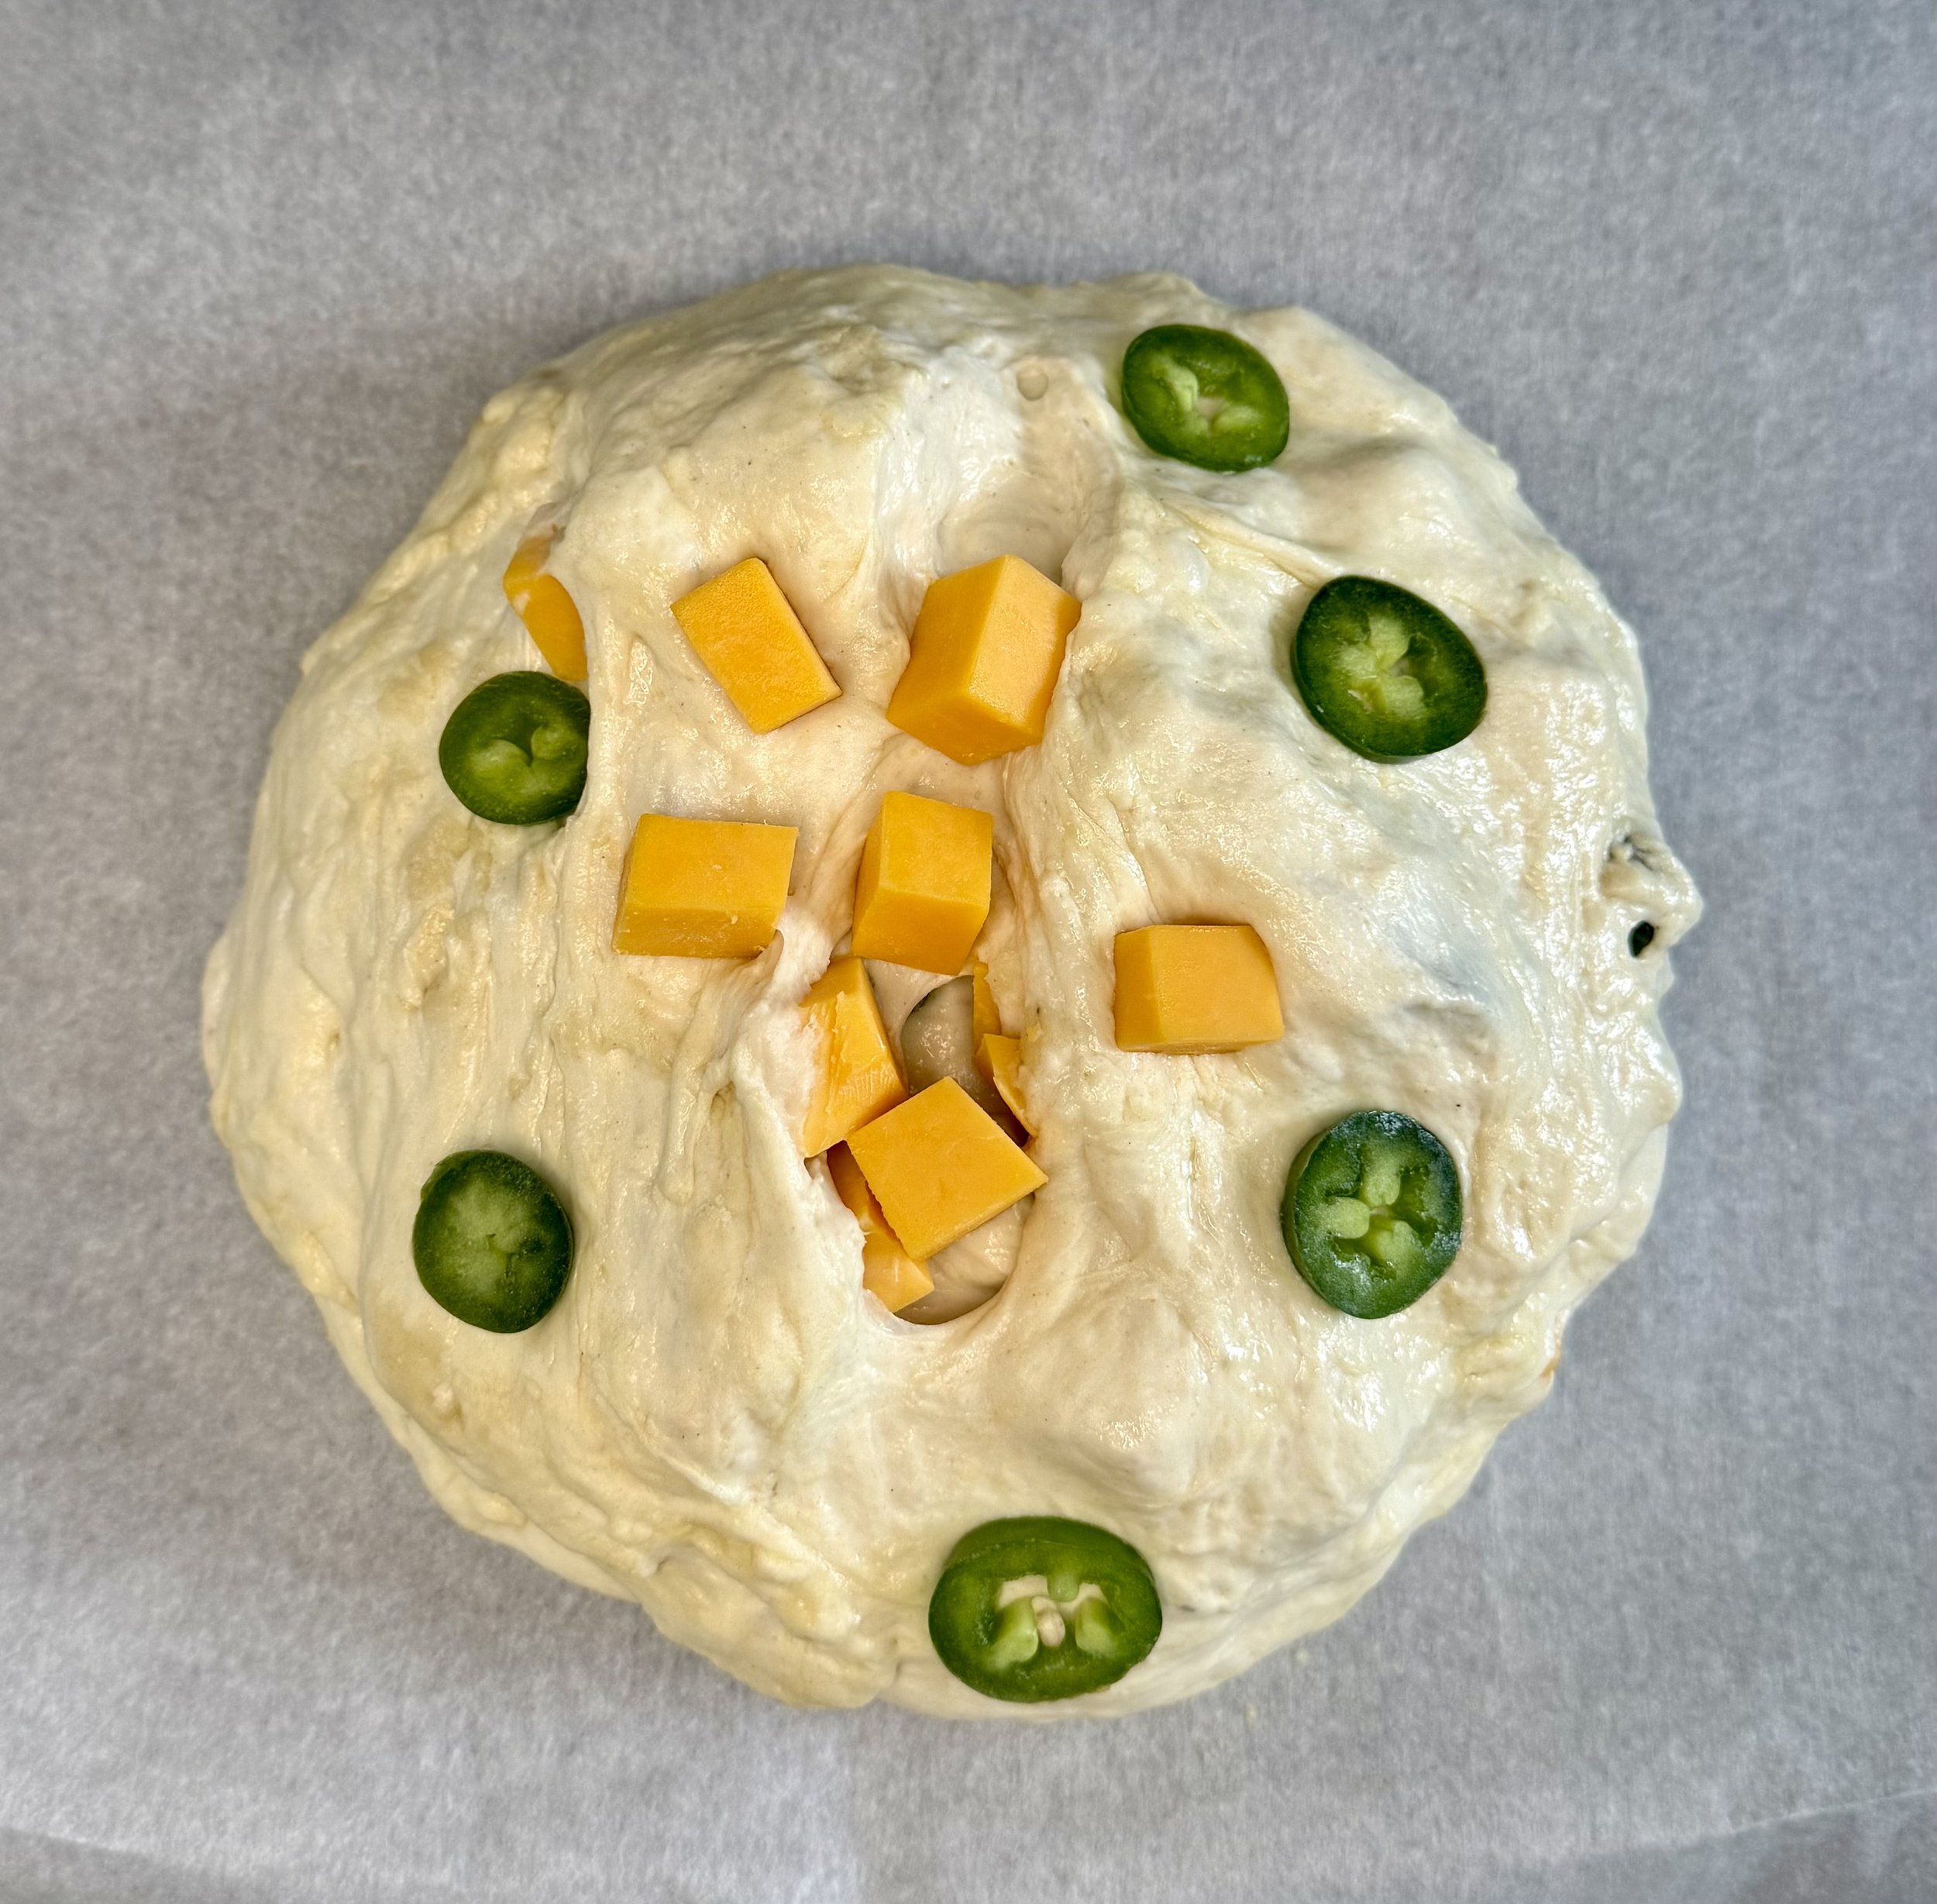
- Place your dough ball on a lightly floured surface and shape it into a circle. Make a slit at the top so the bread can breathe as it cooks. Add the few remaining jalapeños and cheese cubes to the top.
- Place the dough ball on a baking sheet and bake for 30-35 minutes.
Easy Focaccia

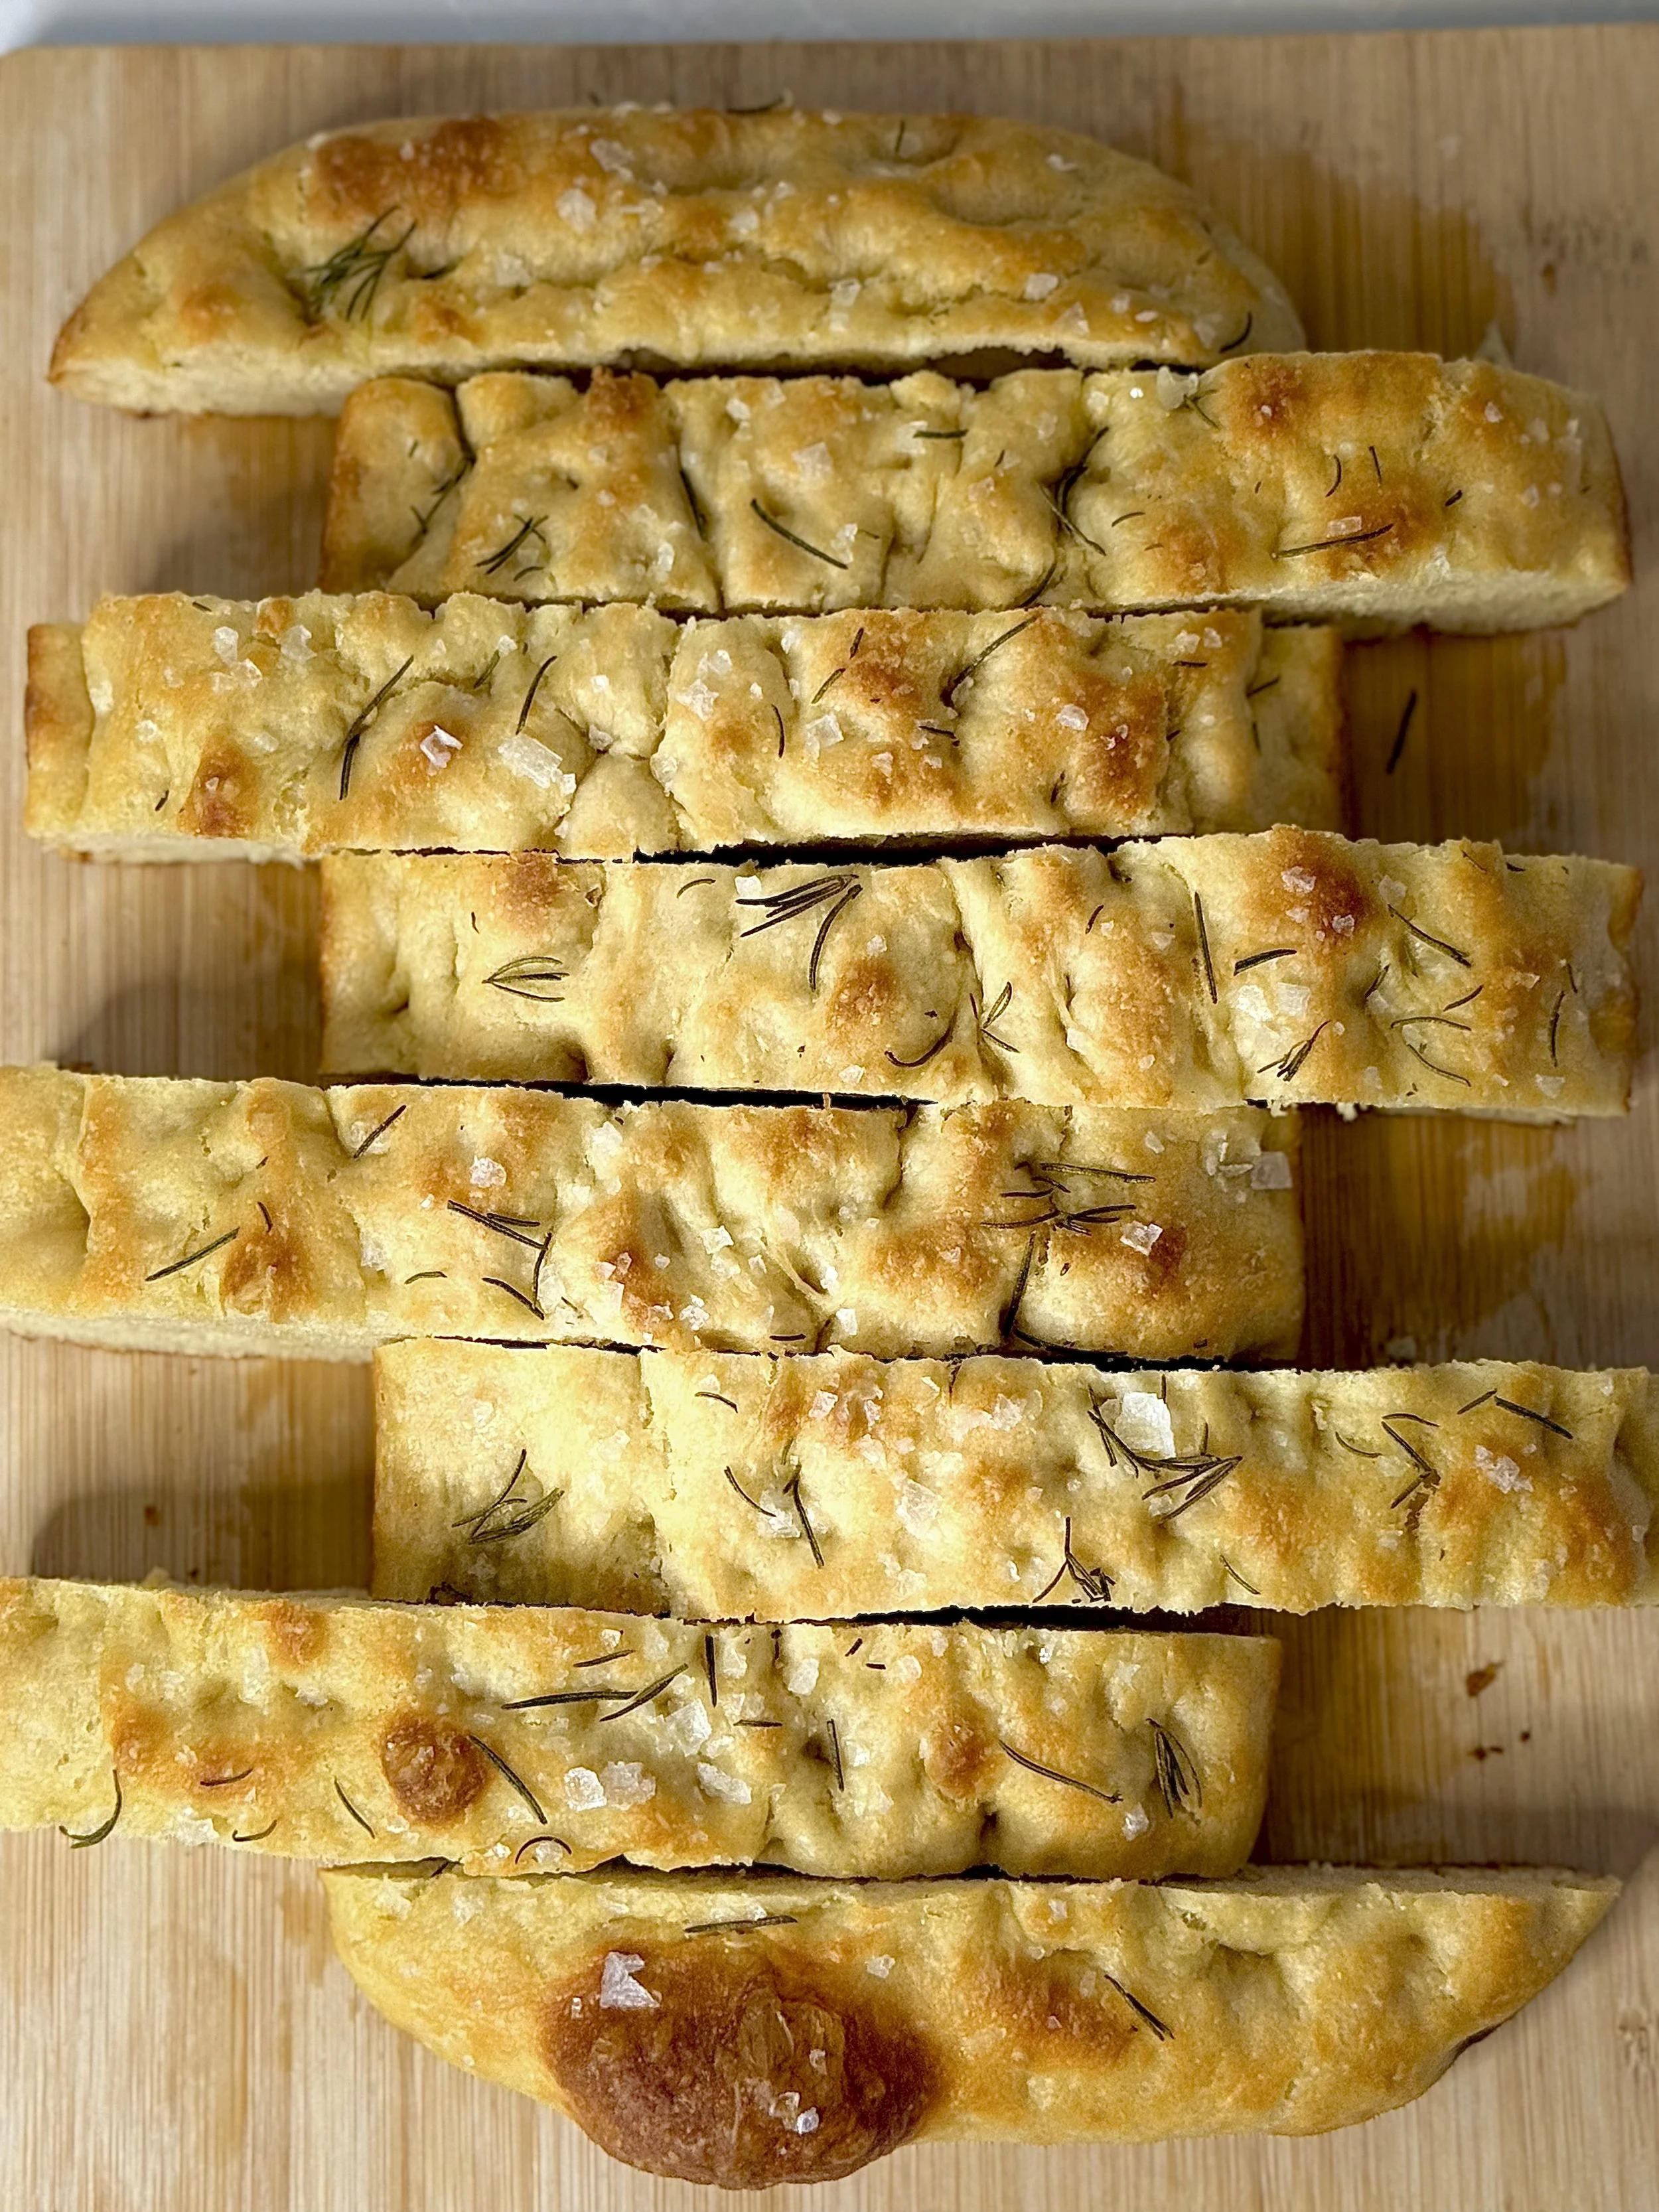
Focaccia bread, often hailed as Italy's answer to pizza, is a warm, pillowy, and aromatic flatbread that boasts a rich history and a world of flavor possibilities. This rustic yet elegant bread has been a staple of Italian kitchens for centuries and continues to be a favorite in homes and restaurants worldwide. Perfectly crispy on the outside and soft on the inside, focaccia is versatile and can be dressed up with a variety of toppings—from fresh herbs and garlic to sun-dried tomatoes and olives.
Origins and History
Focaccia traces its roots to ancient Roman times when it was known as "panis focacius," meaning "hearth bread." This simple bread was traditionally baked on the stones of an open hearth, and it quickly became a go-to for early Romans, thanks to its easy preparation and satisfying texture. Over the centuries, focaccia evolved into the beloved Italian specialty we recognize today, particularly in the regions of Liguria and Genoa, where it remains a local delicacy.
The Perfect Focaccia Dough
The secret to making great focaccia is in the dough. It’s typically made with a basic mixture of flour, water, yeast, salt, and olive oil. The dough should be kneaded until smooth, then left to rise until it’s doubled in size. Olive oil is key to achieving that golden, crisp exterior while also adding richness to the flavor profile. It’s common to dimple the dough with your fingers before baking, creating signature pockets that absorb any toppings and olive oil drizzle.
Flavor Variations
The beauty of focaccia is in its adaptability. Classic focaccia is topped simply with sea salt and rosemary, but there’s no limit to the variations you can experiment with. Consider adding:
Salt and rosemary: A timeless pairing, infusing the bread with fragrant aromas.
Olives or sun-dried tomatoes: Add depth and savory notes.
Cheese: A grated Parmesan or mozzarella sprinkle makes for an irresistible, melty topping.
Caramelized onions: Their natural sweetness complements the saltiness of the bread.
Balsamic glaze: Drizzled over the top for a sweet-and-savory finish.
Focaccia as a Versatile Dish
While focaccia is often enjoyed as an appetizer or side dish, it can also stand as the main event. Serve it with soups, salads, or as a sandwich base stuffed with ingredients like prosciutto, cheese, and fresh greens. In fact, a slice of focaccia can make an outstanding sandwich that’s as satisfying as any gourmet loaf.
Another fun way to enjoy focaccia is as a snack—dipped in balsamic vinegar and olive oil or served with a spread of hummus or tapenade.
Don’t be discouraged!
Don’t be discouraged by the long prep time! The longest part is the dough rising in the fridge. The rest of the steps take 10-15 minutes and are worth every second.
I like to start on my dough the day before I plan to serve it. For example, if I want to have it around 7:00 pm on a Saturday, I’ll start prepping my dough between 5:00 pm - 7:00 pm on Friday. It seems intimidating but I promise it’s very easy!
Why refrigerate the dough?
Better Flavor: The slow, cold rise gives the dough more time to develop a tastier, richer flavor.
Better Texture: The dough gets soft and chewy inside, with a crispy outside, because the cold rise helps keep moisture in.
Easier to Shape: Chilled dough is firmer and easier to handle, so it won’t spread out too much when you're shaping it.
More Time to Bake: You can leave the dough in the fridge overnight or for a day, making it easier to bake when it's convenient for you.
Less Chance of Overproofing: The cooler fridge slows down the yeast, so you won’t accidentally let the dough rise too much and lose its structure.
In short, rising in the fridge helps make the focaccia tastier, easier to work with, and more flexible for your schedule!

Start out with oiled hands to then grab, stretch, and fold the dough into a rough ball before transferring to prepared oiled pan. Roll the dough ball in an oiled pan, tossing to coat. Allow to rest for another 2-4 hours before moving on to the best part! Dimpling the dough. Using all ten fingers generously dimple the dough. I like to try and spread the dough out some while dimpling to spread it more evenly throughout the pan.

Once you’re done putting dimples throughout the dough, bake, slice, and enjoy!

Making focaccia might sound like something best left to experienced bakers, but trust me—this recipe is incredibly simple and absolutely worth the effort! With just a handful of pantry staples like flour, olive oil, salt, and yeast, you’ll have everything you need to create this beautiful, golden flatbread right at home. And the best part? No fancy techniques are required.
The Simplicity of the Process
One of the things I love most about this focaccia recipe is how approachable it is for bakers of all levels. If you’ve never worked with yeast before, don’t worry—it’s really easy! You’ll mix together the ingredients, knead the dough for a few minutes (don’t stress if it’s not perfect—this bread is forgiving), then let it rise while you relax. After that, it’s just about drizzling with olive oil and your favorite toppings (rosemary and sea salt are classic, but you can get creative!). The oven will do the rest, baking up a warm, fluffy, and crispy masterpiece.
The "Worth It" Factor
You might be thinking, “But why make it from scratch when I can buy it from the store?” Well, that’s exactly what makes this recipe so special. Freshly baked focaccia is in a league of its own—nothing you buy can compare to the taste, aroma, and texture of bread straight from the oven. The satisfying crunch on the outside, the soft, airy crumb inside, and the aromatic olive oil all come together for an experience that’s truly worth the little bit of effort you put in.
Plus, there’s something incredibly rewarding about creating bread from scratch, and sharing it with friends and family is an experience that goes beyond the flavors. It’s perfect for gatherings or even just a cozy meal at home. And let’s be honest—making your own focaccia is a lot of fun, and it gives you full control over the flavors, allowing you to experiment with whatever toppings or additions you crave.
It’s the Perfect Combination of Easy and Impressive
This recipe takes very little hands-on time, but the end result is so impressive—your guests will think you spent hours on it (you don’t have to tell them how easy it was!). Whether you serve it as an appetizer, pair it with a delicious soup, or turn it into a sandwich, this focaccia will shine on your table.
Trust me, once you make this focaccia, you’ll never look at store-bought versions the same way again. The satisfaction of having baked something so incredibly delicious from scratch will have you making this again and again.
Ready to bake up a batch of this delicious focaccia magic? Trust me, you won’t regret it! It’s easy, impressive, and downright delicious. Grab your ingredients, preheat that oven, and let’s make some warm, golden perfection.
Once you’ve made it (or even just taken a bite—no judgment!), I’d love to hear what you think! Drop a comment below and let me know how it turned out, any fun toppings you tried, or how much you loved that crispy, doughy goodness. I can’t wait to see your creations and share the bread love with all of you!
Happy baking, and don’t forget to tag me in your focaccia photos—I’m here for it! 😋🍞

Easy Focaccia
Ingredients
- 4 cups all-purpose flour
- 2 teaspoons active yeast
- 2 teaspoons salt
- 2 cups water (lukewarm)
- 6 tablespoons olive oil
- 2 teaspoons of coarse salt
- 2 teaspoons of fresh rosemary
Instructions
- Add the all-purpose flour, yeast, and salt in a large bowl. Use a spatula to mix these ingredients together.
- Add 2 cups of lukewarm water and fold the ingredients together with your spatula until you have a nice dough ball. It will be tough.
- Drizzle the dough with roughly one tablespoon of olive oil, coating the entire dough ball.
- Cover the bowl (I use saran wrap) and place in refrigerator for at least 20 hours and up to 48 hours.
- When ready, remove the bowl from the refrigerator (The dough should have noticeably risen). With olive-oiled hands, form the dough into a ball, grabbing from the edges and folding it into the center. About 4-6 grabs, then pulls, then folds. Do not pull too hard to where it rips the dough.
- In a 9x13 pan, add 2 tablespoons of olive oil and place the dough ball in the dish, flipping it around in the olive oil to coat.
- Let rest at room temperature for 2-4 hours.
- Next, dimple the dough with all ten fingers, creating multiple dimples throughout the dough. Then top with coarse salt and rosemary.
- Preheat oven to 425 degrees and bake for 25-30 minutes.
- Bowl
- Spatula
- 9x13 baking pan
Notes
- If your dough does not rise in the refrigerator, your yeast could be bad, or the water may be too hot.
Fluffy Buttermilk Pancakes
Buttermilk Pancakes: A Fluffy Delight on Your Plate
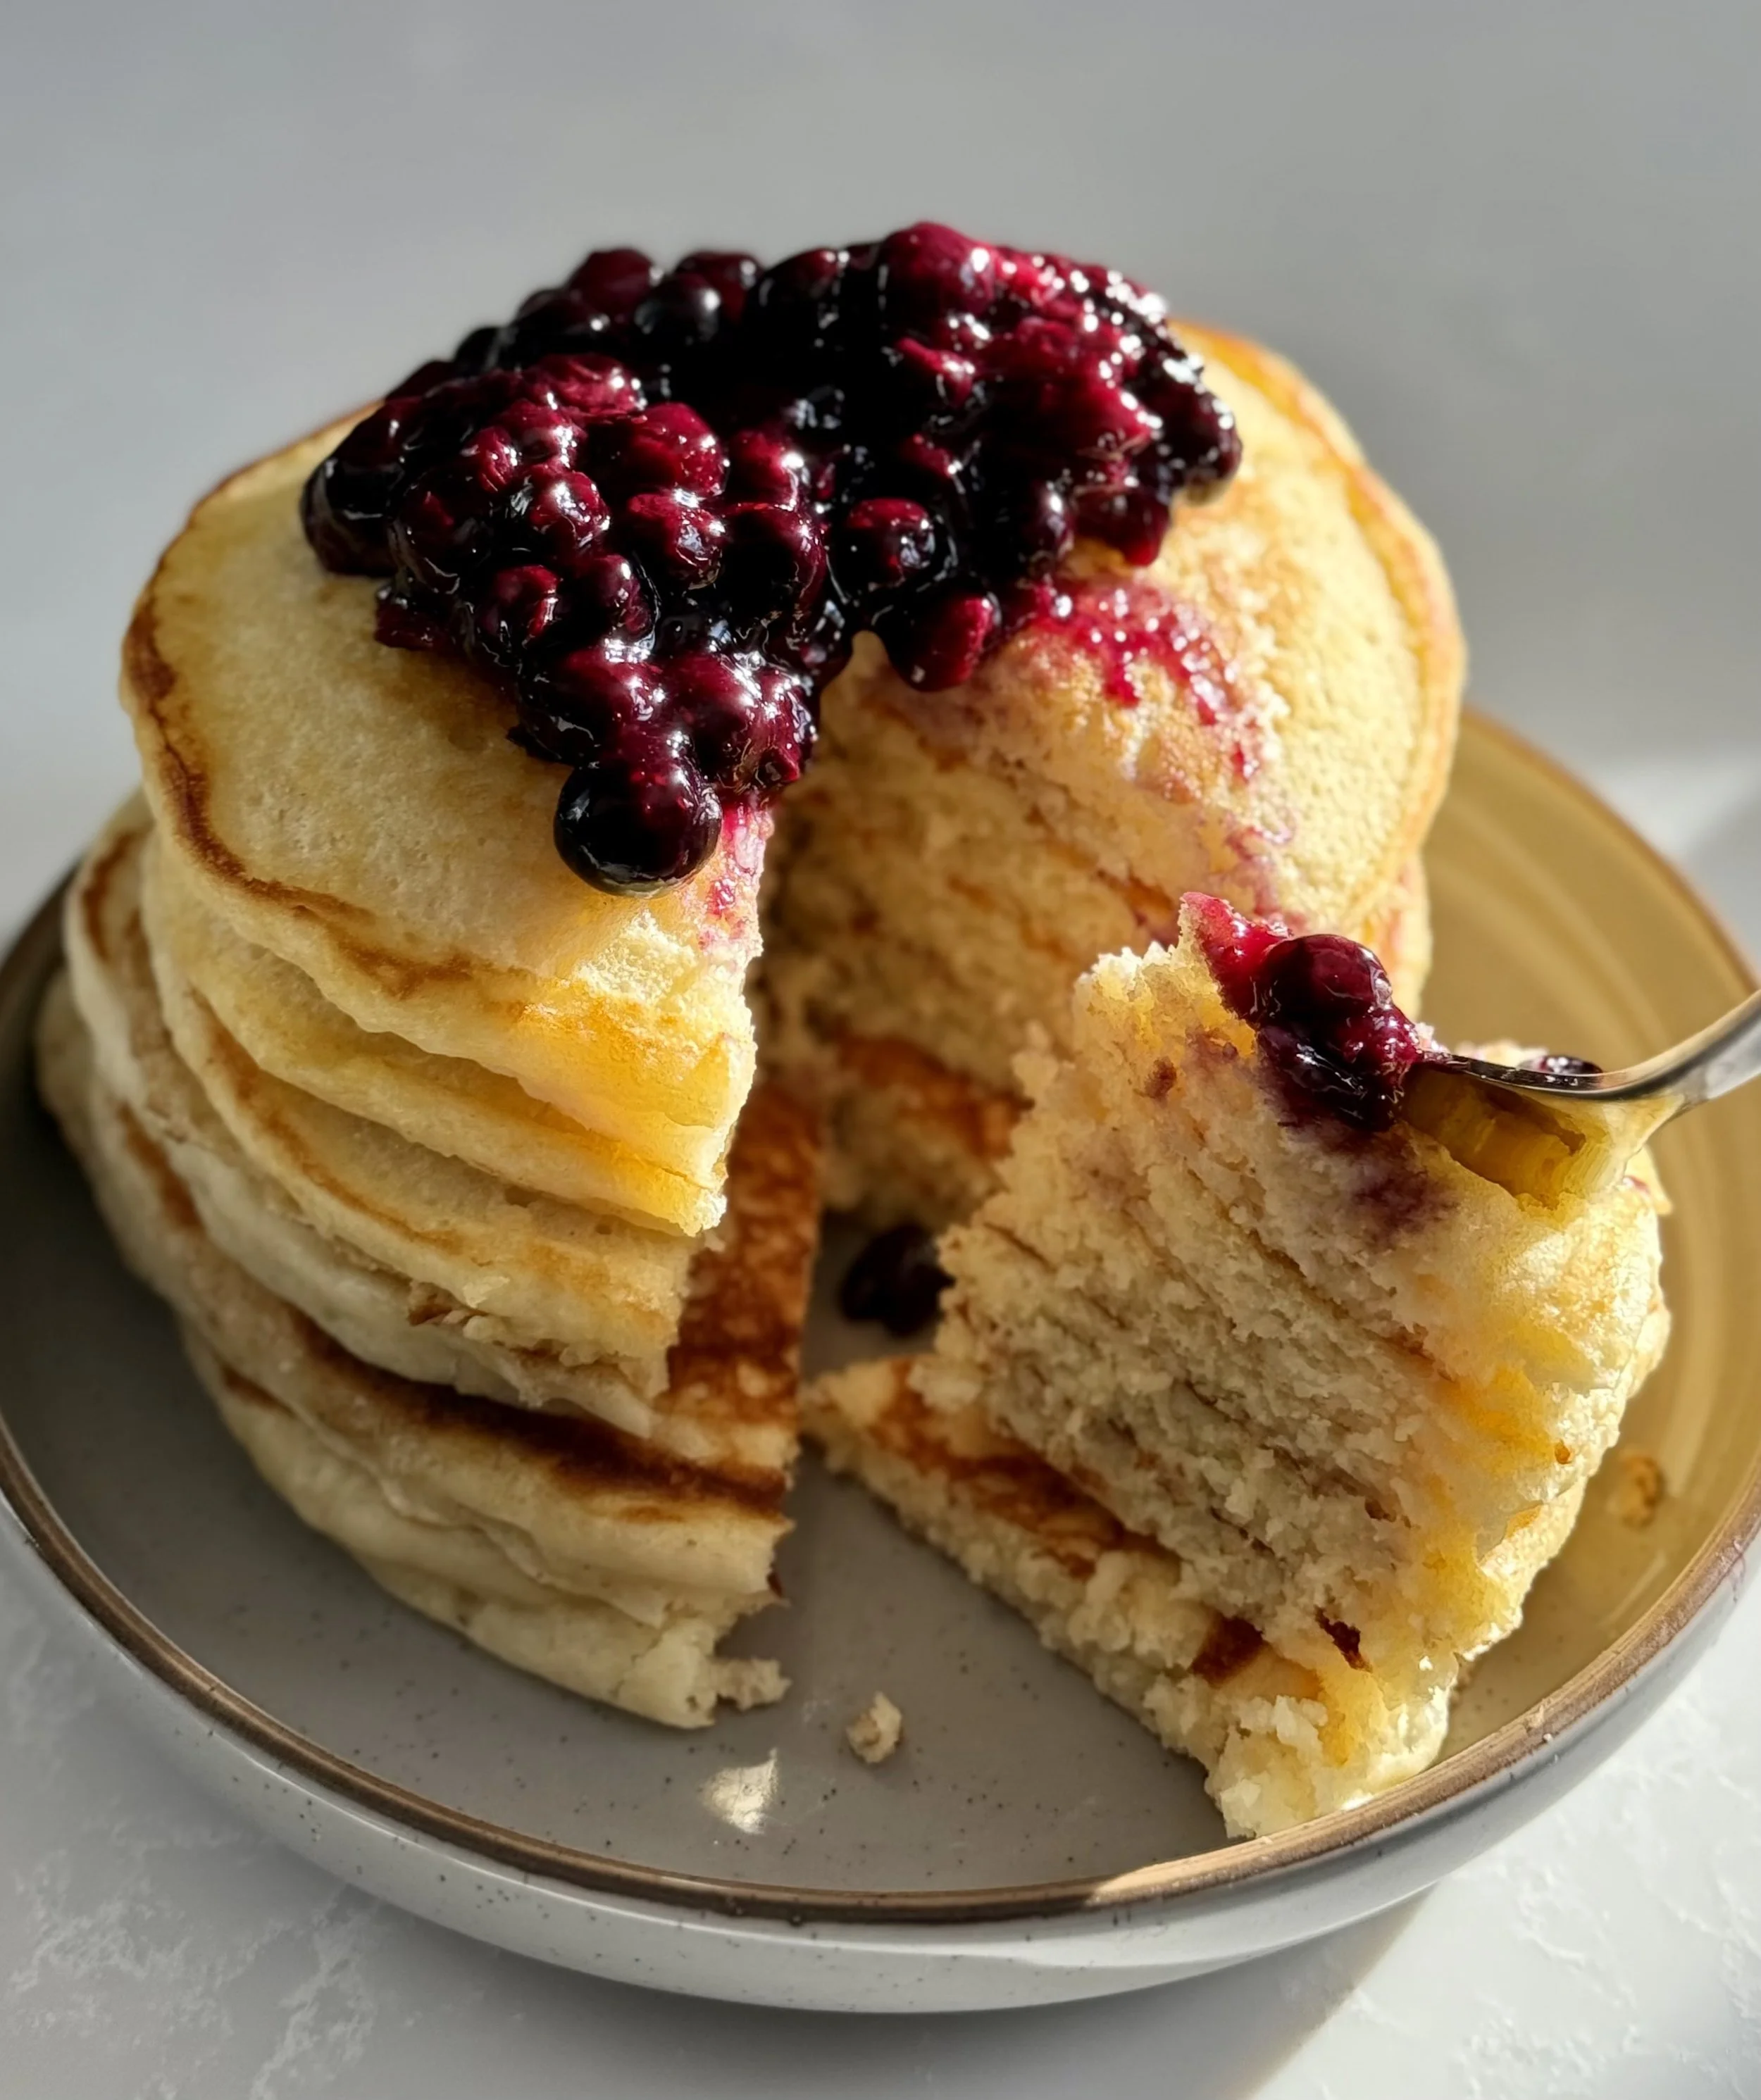
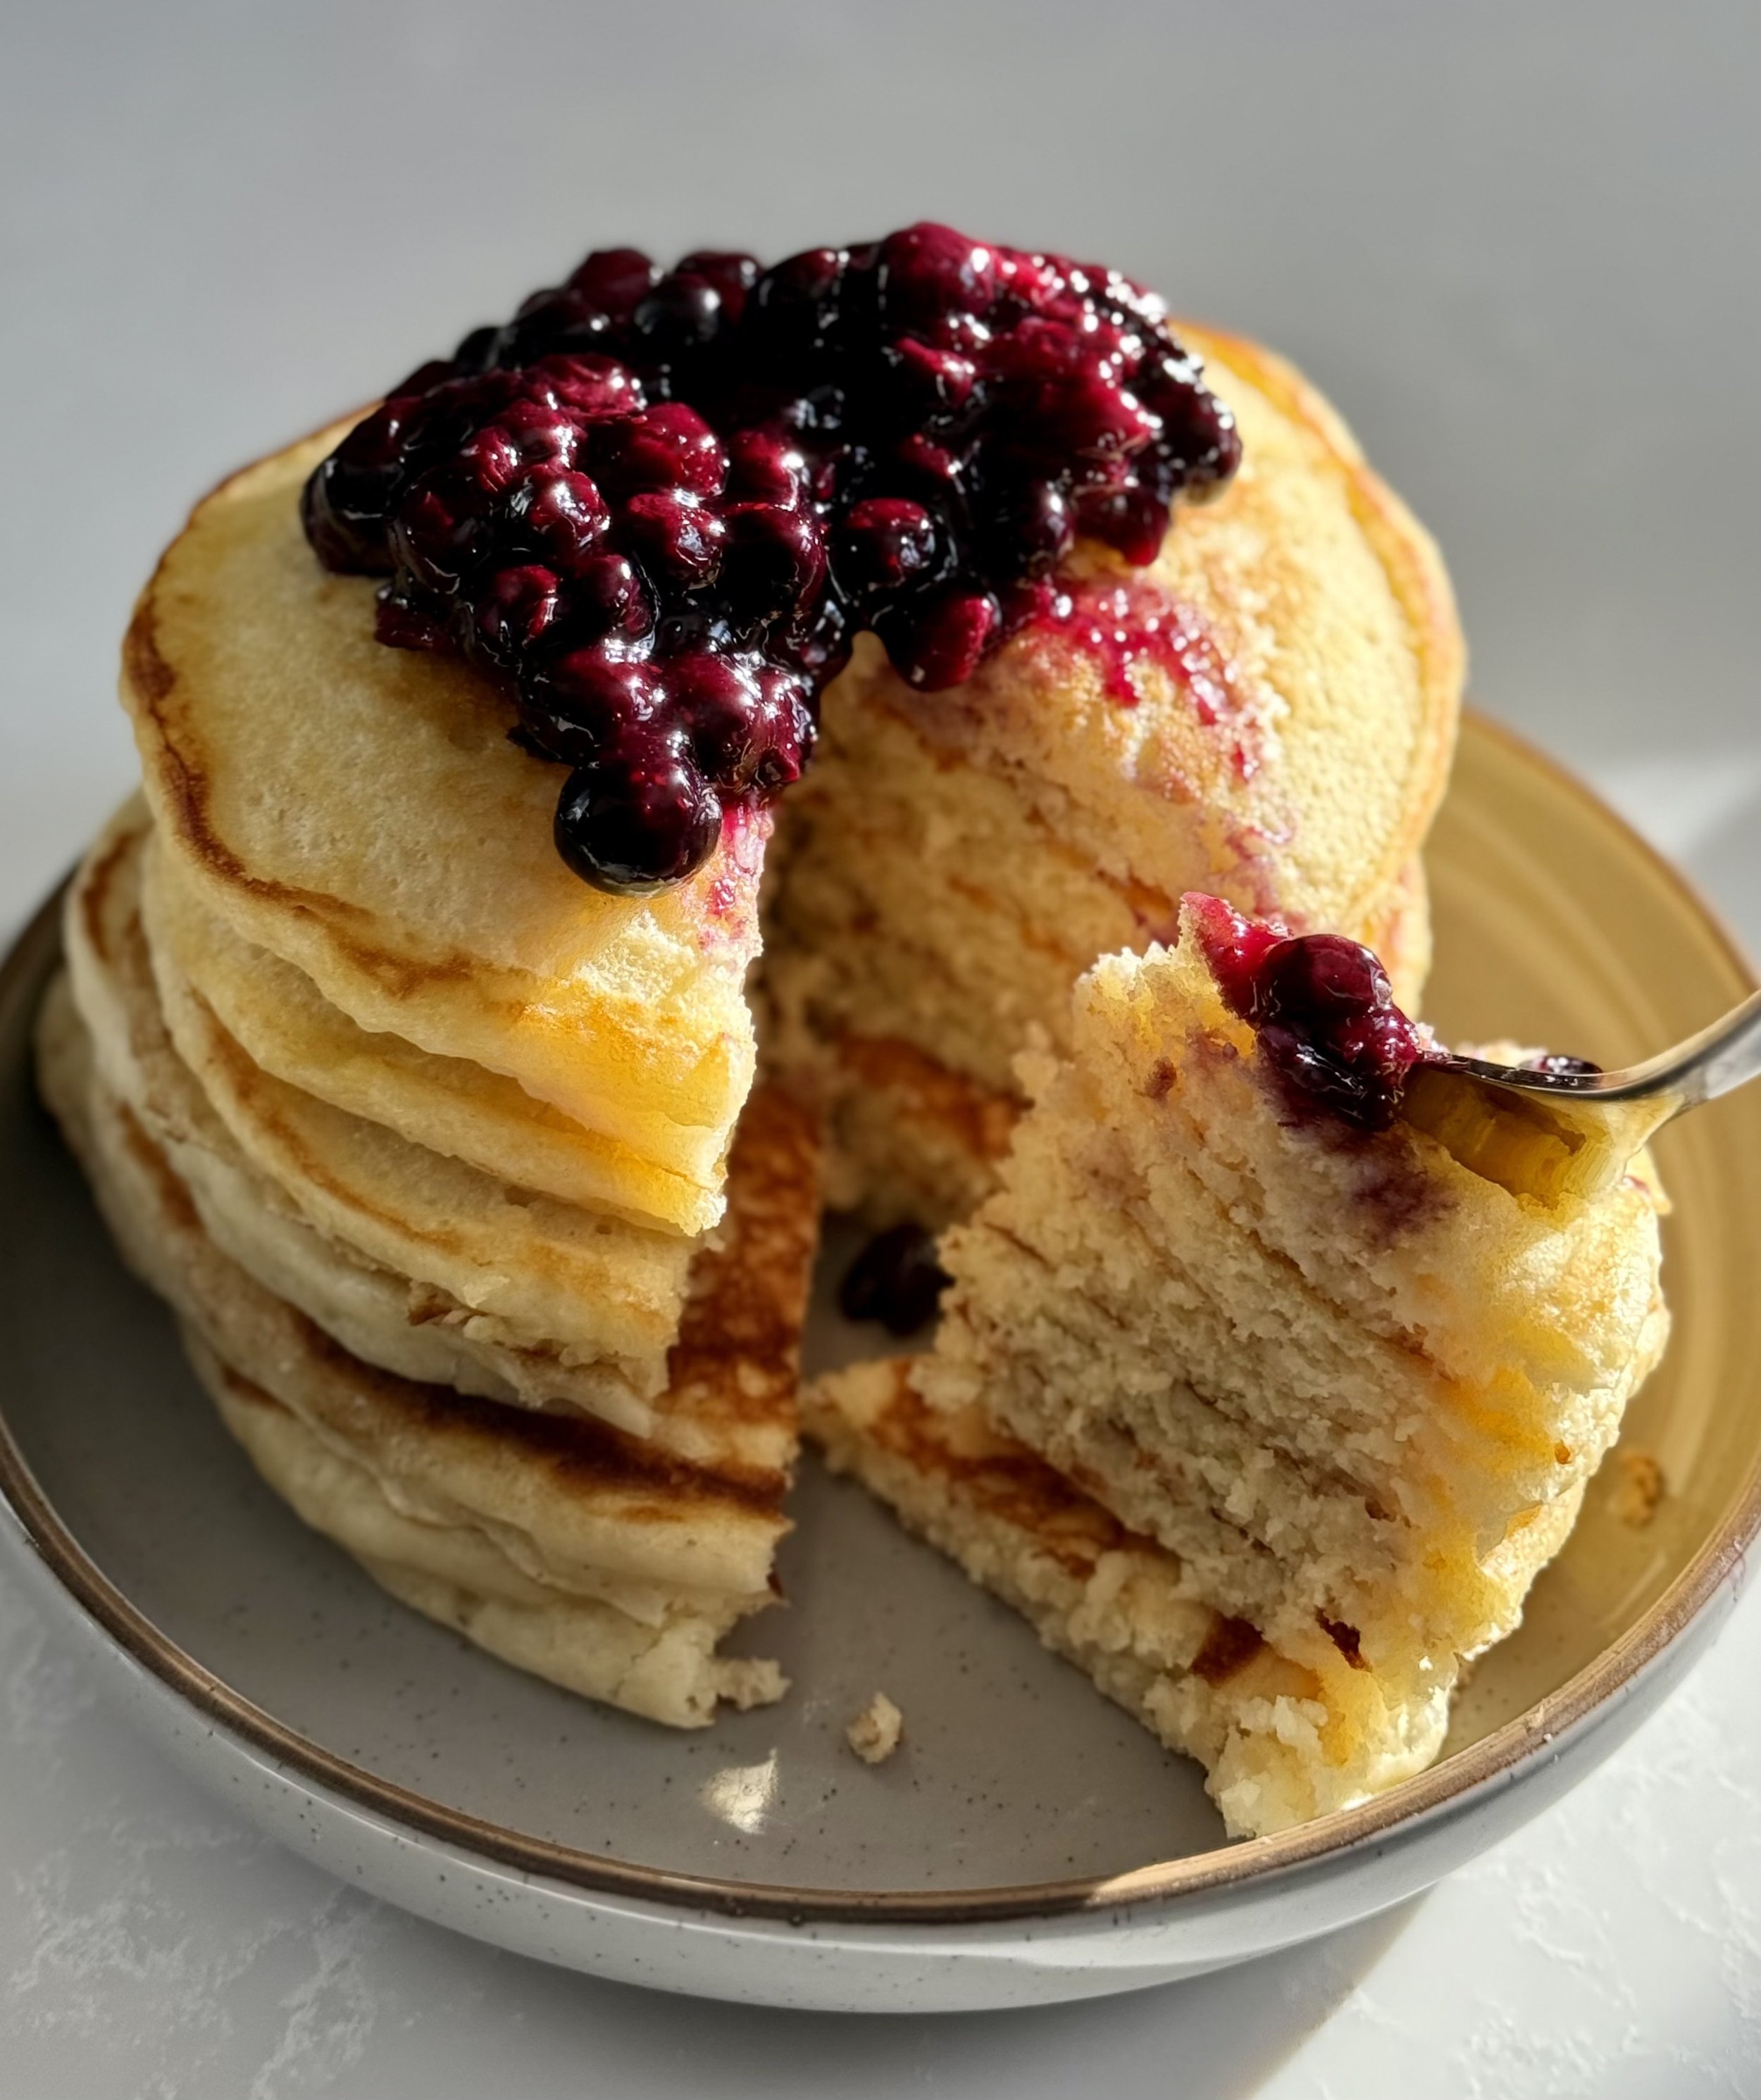
Imagine waking up to a stack of golden buttermilk pancakes, each one a cloud of fluffy goodness, just waiting to be drenched in syrup. The secret to their light, tender texture lies in the buttermilk, which not only adds a delightful tang but also helps create the perfect lift.
As you take your first bite, you’re greeted with a soft, pillowy crumb that melts in your mouth, reminiscent of lazy weekend mornings. Their lightly crisped edges contrast beautifully with the airy interior, making each pancake a delightful experience for your taste buds.
These pancakes are incredibly versatile. Top them with a generous pat of butter that slowly melts and seeps into every crevice, drizzle warm maple syrup for that classic touch, or my personal favorite is topped with a blueberry topping.
If you’re feeling adventurous, you can add fresh berries, banana slices, or a sprinkle of chocolate chips for an irresistible twist. For a little zing, a dollop of whipped cream or a smear of peanut butter can elevate your breakfast to a whole new level of indulgence.
Whether stacked high on your plate or enjoyed as a single fluffy masterpiece, buttermilk pancakes are the ultimate breakfast treat. So grab that skillet, whip up a batch, and let the syrup flow—because life is too short for flat pancakes!

Blueberry topping is a delightful burst of flavor that dances on your taste buds! Imagine plump, juicy blueberries, their deep indigo hue glistening with a hint of natural sweetness. When gently cooked, the berries release their vibrant juices, creating a luscious sauce that's both tart and sweet. This topping is perfect for drizzling over pancakes, waffles, or a warm slice of cheesecake.
It's not just a treat for your palate; the bright blue color adds a pop of fun and whimsy to your favorite desserts, making everything look as good as it tastes. Whether fresh, cooked down into a syrup, or swirled into creamy yogurt, blueberry topping is the playful companion every dessert needs to dazzle your senses!

Fluffy Buttermilk Pancakes
Ingredients
- 1/4 cup unsalted butter (½ stick) melted and slightly cooled
- 2 ¼ cup of buttermilk
- 2 eggs
- 2 tsp vanilla extract
- 3 tbsp sugar
- 2 ¼ cup of all-purpose flour
- 3 tsp of baking powder
- 1 tsp baking soda
- 1 tsp salt
- 1 ½ cup frozen blueberries
- ¼ cup water
- 1 tbsp cornstarch
- 2 tbsp sugar
Instructions
- In a bowl, melt half a stick of butter and let cool.
- In a large bowl, pour in the buttermilk, add the eggs, vanilla extract, and sugar, and whisk until combined.
- In a third bowl, mix the flour, baking powder, baking soda, and salt.
- Pour the dry ingredients into the wet mixture and whisk together until just combined.
- Allow the mixture to set for at least 10 minutes for the ingredients to set.
- Optional: while the mixture sets making some blueberry topping. In a small saucepan, add the frozen blueberries. In a measuring cup, add ¼ cup of water, 1 tbsp cornstarch, 2 tbsp sugar, and mix until combined. Pour the water mixture into a saucepan and cook on medium until the blueberry mixture thickens.
- Place a griddle pan (or pan of your choice) over medium heat. Allow the pan to warm for a couple of minutes, and place some butter on the pan.
- Scoop about ½ cup of batter into a dollop on the pan (I use about two scoops with an ice cream scoop). When the pancakes begin visibly rising and creating air bubbles, carefully flip the pancakes with a spatula. Allow the pancakes to continue cooking on the opposite side for 2-4 minutes or until slightly golden in color.
- Repeat until all mixture is gone (roughly 9 pancakes). Serve with blueberry topping or any other toppings. Enjoy!
- Bowls
- Whisk
- Spatula
- Griddle pan