Ultimate Brown Butter Chocolate Chip Cookies

Ultimate Brown Butter Chocolate Chip Cookies
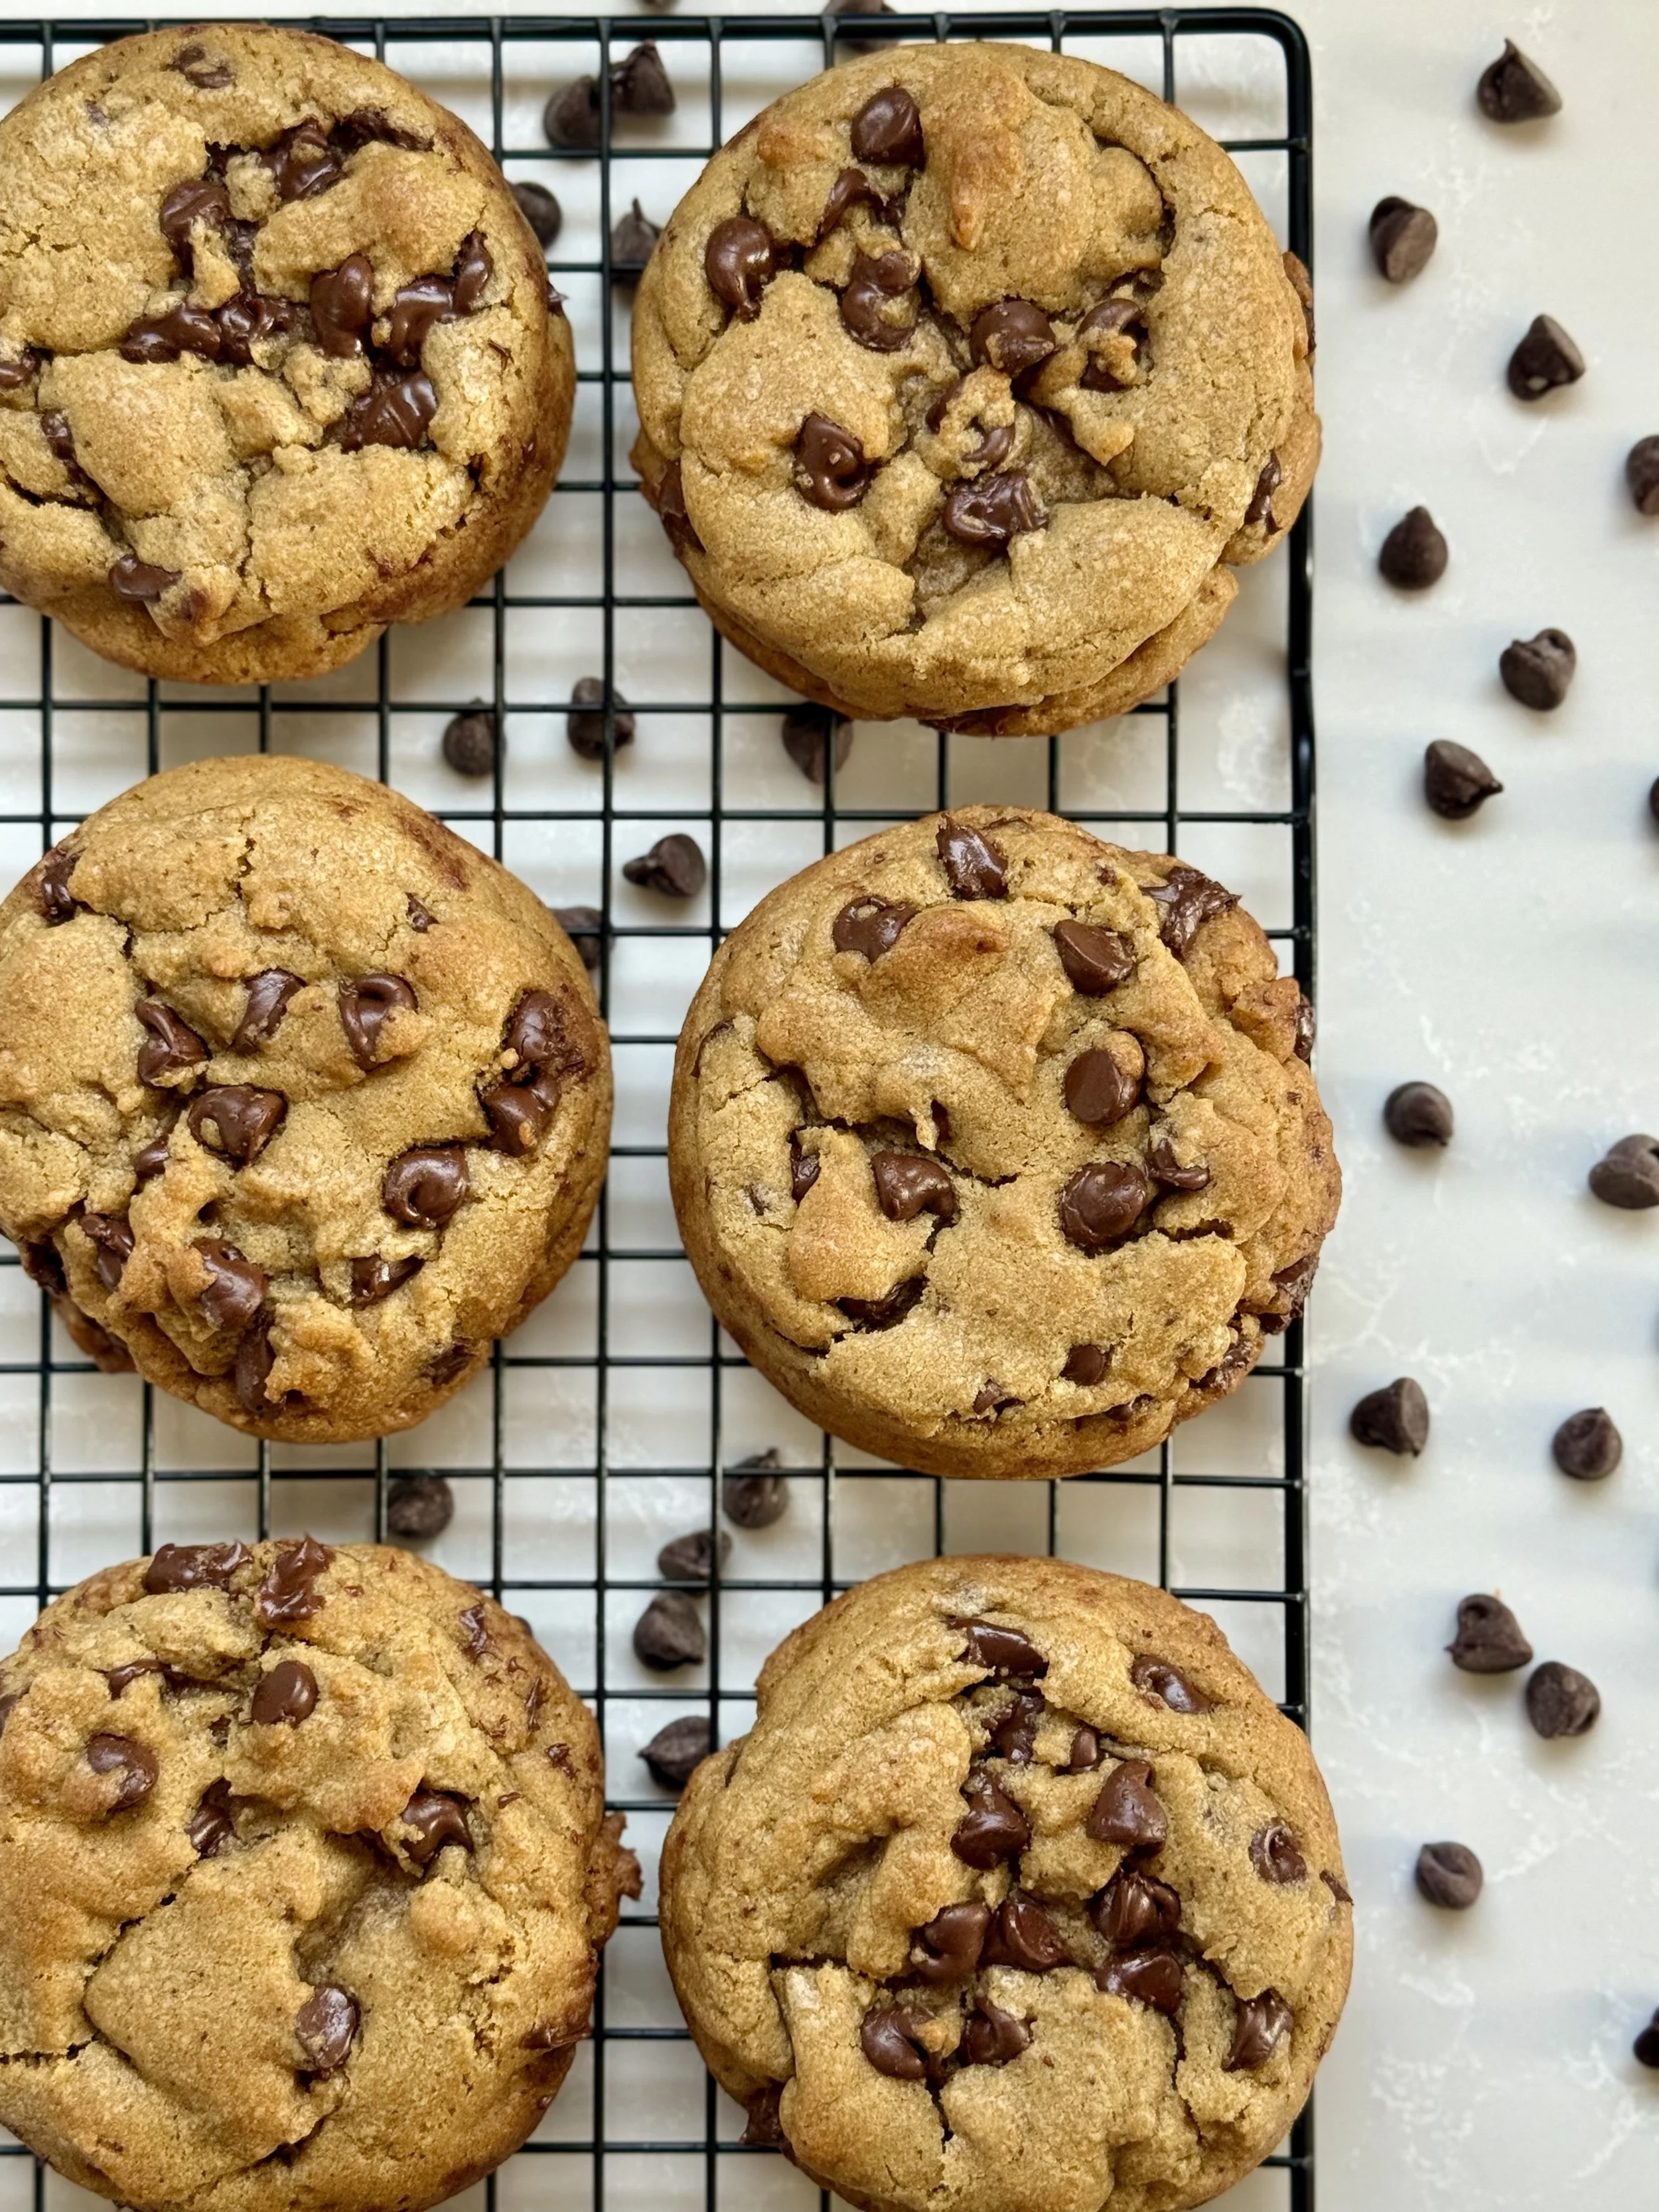
There’s something about brown butter that transforms a classic chocolate chip cookie into something unforgettable. The deep, nutty aroma, the rich caramelized flavor, and those golden, crisp edges paired with soft, gooey centers—this is the kind of cookie that feels straight out of a high-end bakery.
These ultimate brown butter chocolate chip cookies are everything you want in a cookie: thick, chewy, perfectly balanced, and loaded with melty chocolate in every bite. If you’ve been searching for the chocolate chip cookie recipe, this might just be the one you come back to again and again.
Why You’ll Love This Recipe
Rich, nutty flavor from perfectly browned butter
Soft and chewy centers with crisp edges
Thick, bakery-style cookies
Easy to make with simple ingredients
Perfect for beginners and experienced bakers alike

Ingredients
Salted butter
Brown sugar
Granulated sugar
Eggs
Vanilla extract
Cake flour
All-purpose flour
Cornstarch
Baking soda
Salt
Chocolate chips
(Full measurements are in the recipe card below!)
How to Make Brown Butter
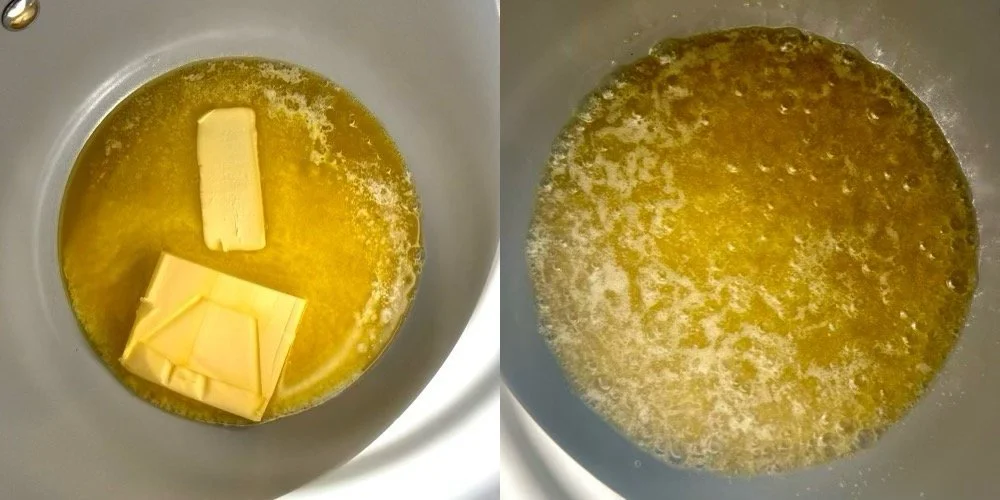
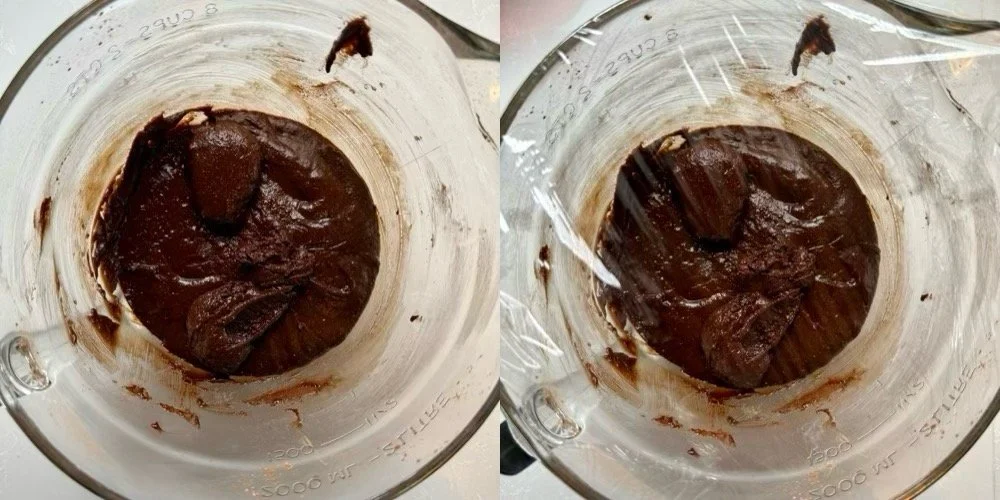
Browning butter is a simple step that adds a deep, rich flavor to your cookies. Start by adding the butter to a saucepan over medium heat and allow it to melt completely. Once melted, the butter will begin to foam—this is the water evaporating.
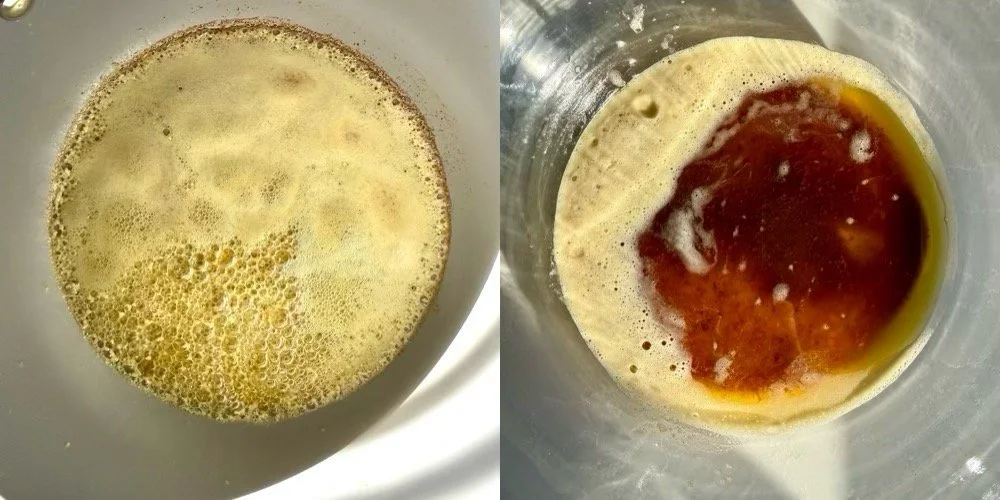
Continue cooking, stirring frequently and scraping the bottom of the pan to prevent burning. After a few minutes, you’ll notice the butter turn a golden color, followed by small brown specks forming at the bottom. These are the milk solids toasting, which create that signature nutty, caramel-like flavor.
Keep a close eye on it—brown butter can quickly turn from perfectly toasted to burnt. As soon as it smells rich and nutty and turns an amber brown, remove it from the heat. Immediately pour it into a bowl, making sure to scrape in all those browned bits, as they hold the most flavor.
Let the butter cool slightly before using so it doesn’t scramble your eggs when mixing the dough.
How to Make Brown Butter Chocolate Chip Cookies
Start by browning your butter; this is where all the magic happens. As the butter melts and cooks, it develops a rich, nutty aroma and golden brown specks that give these cookies their signature flavor.
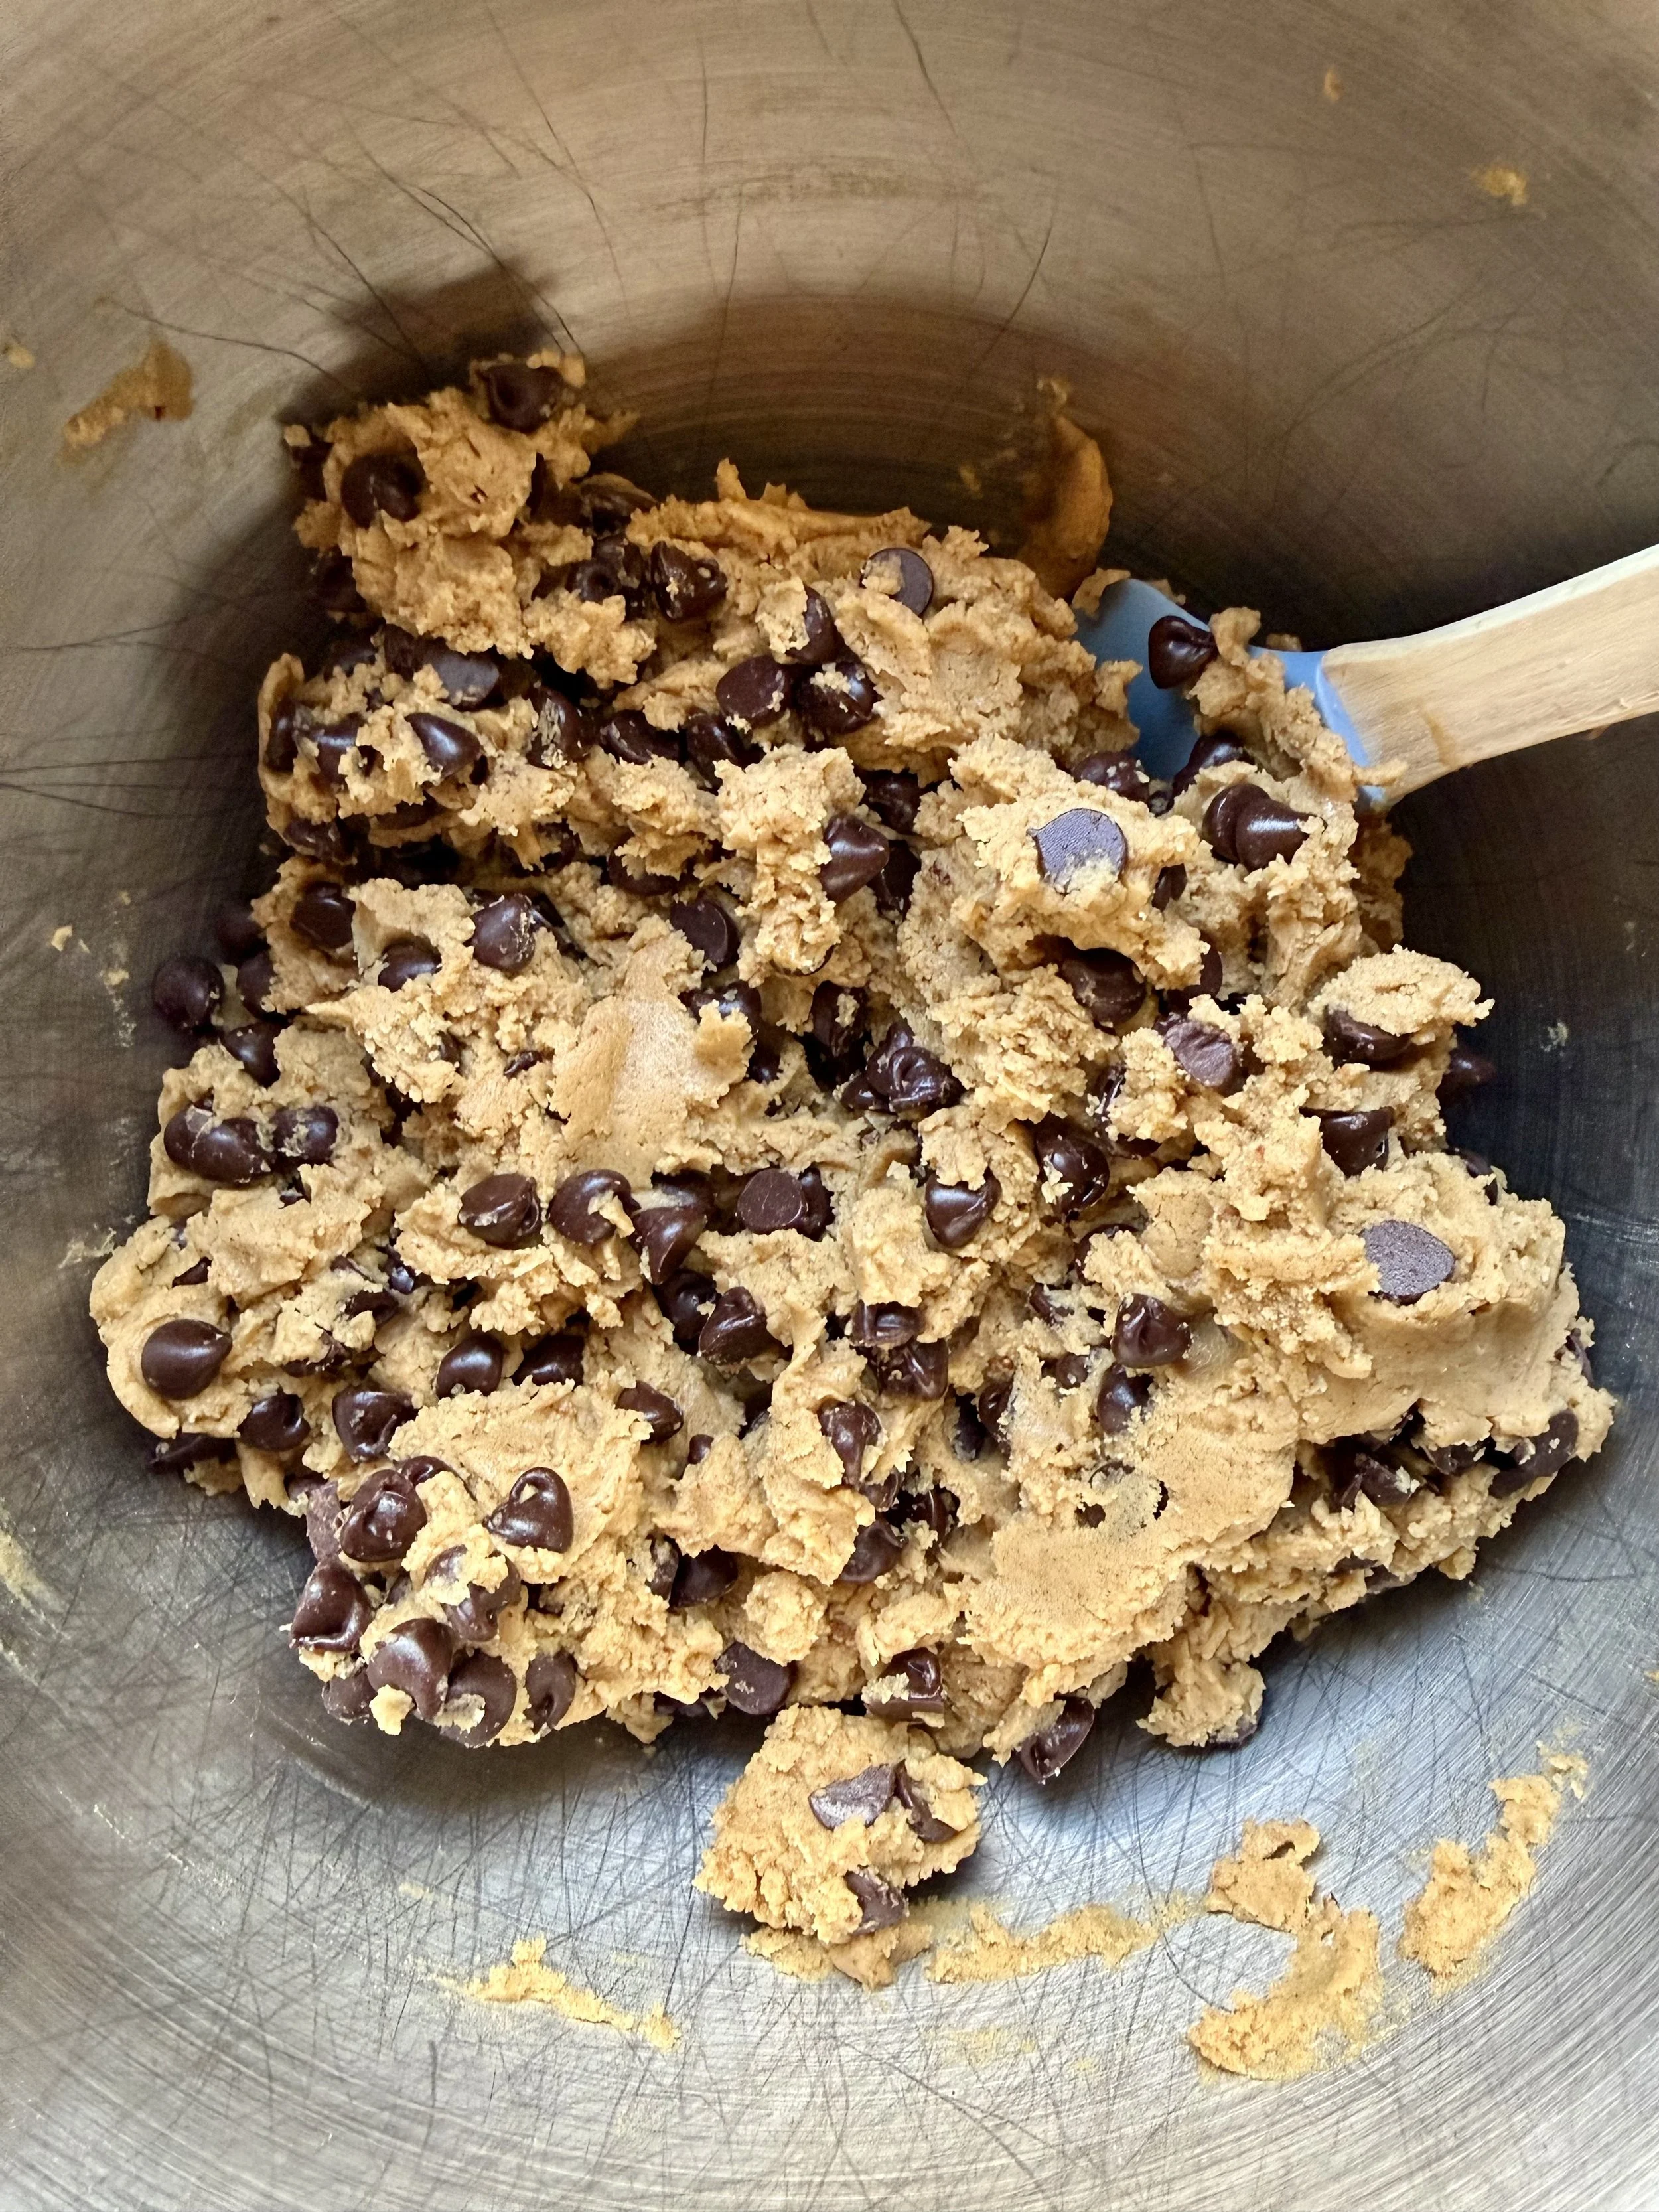
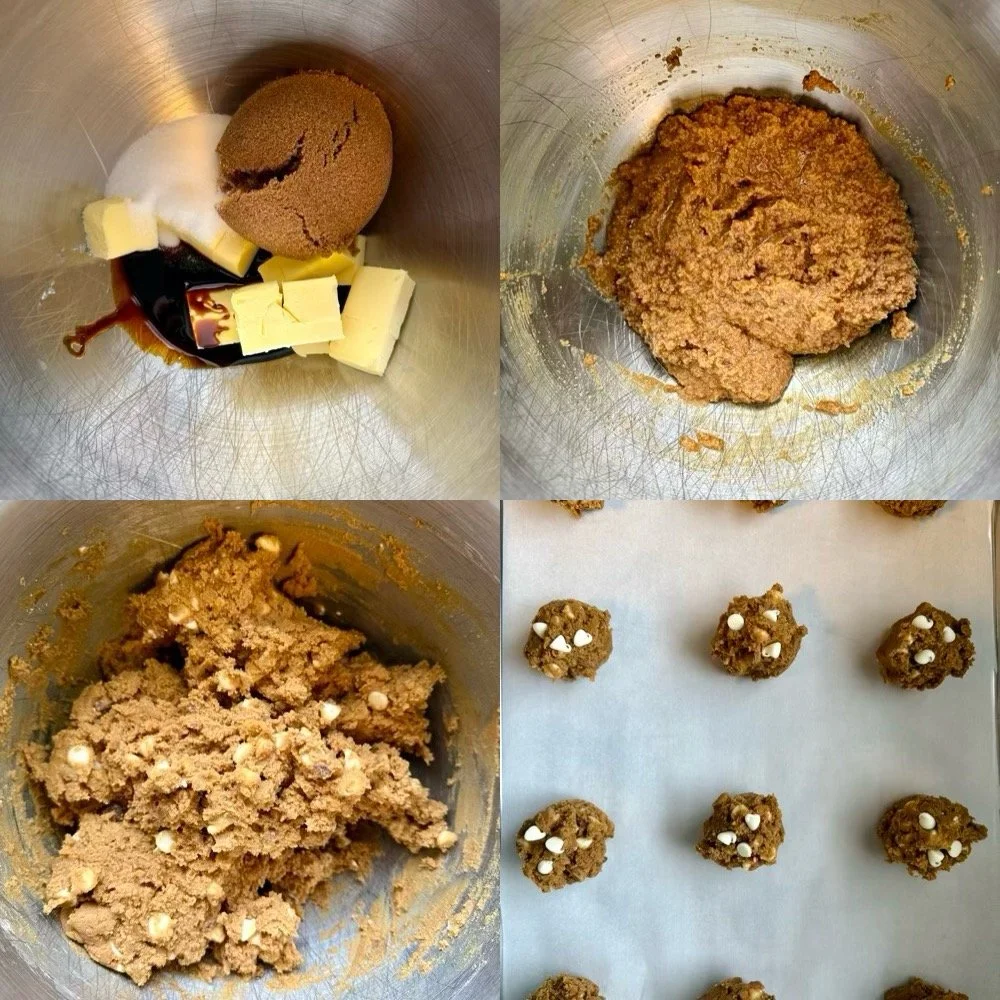
Once your butter has cooled slightly, you’ll mix it with both sugars until smooth and glossy. Add in the eggs and vanilla, then gently incorporate the dry ingredients. Be careful not to overmix here; this helps keep the cookies soft and tender.
Add in the chocolate chips and mix just until evenly distributed, then scoop large portions of dough to get that bakery-style look. Let the dough chill to deepen the flavor and improve texture.
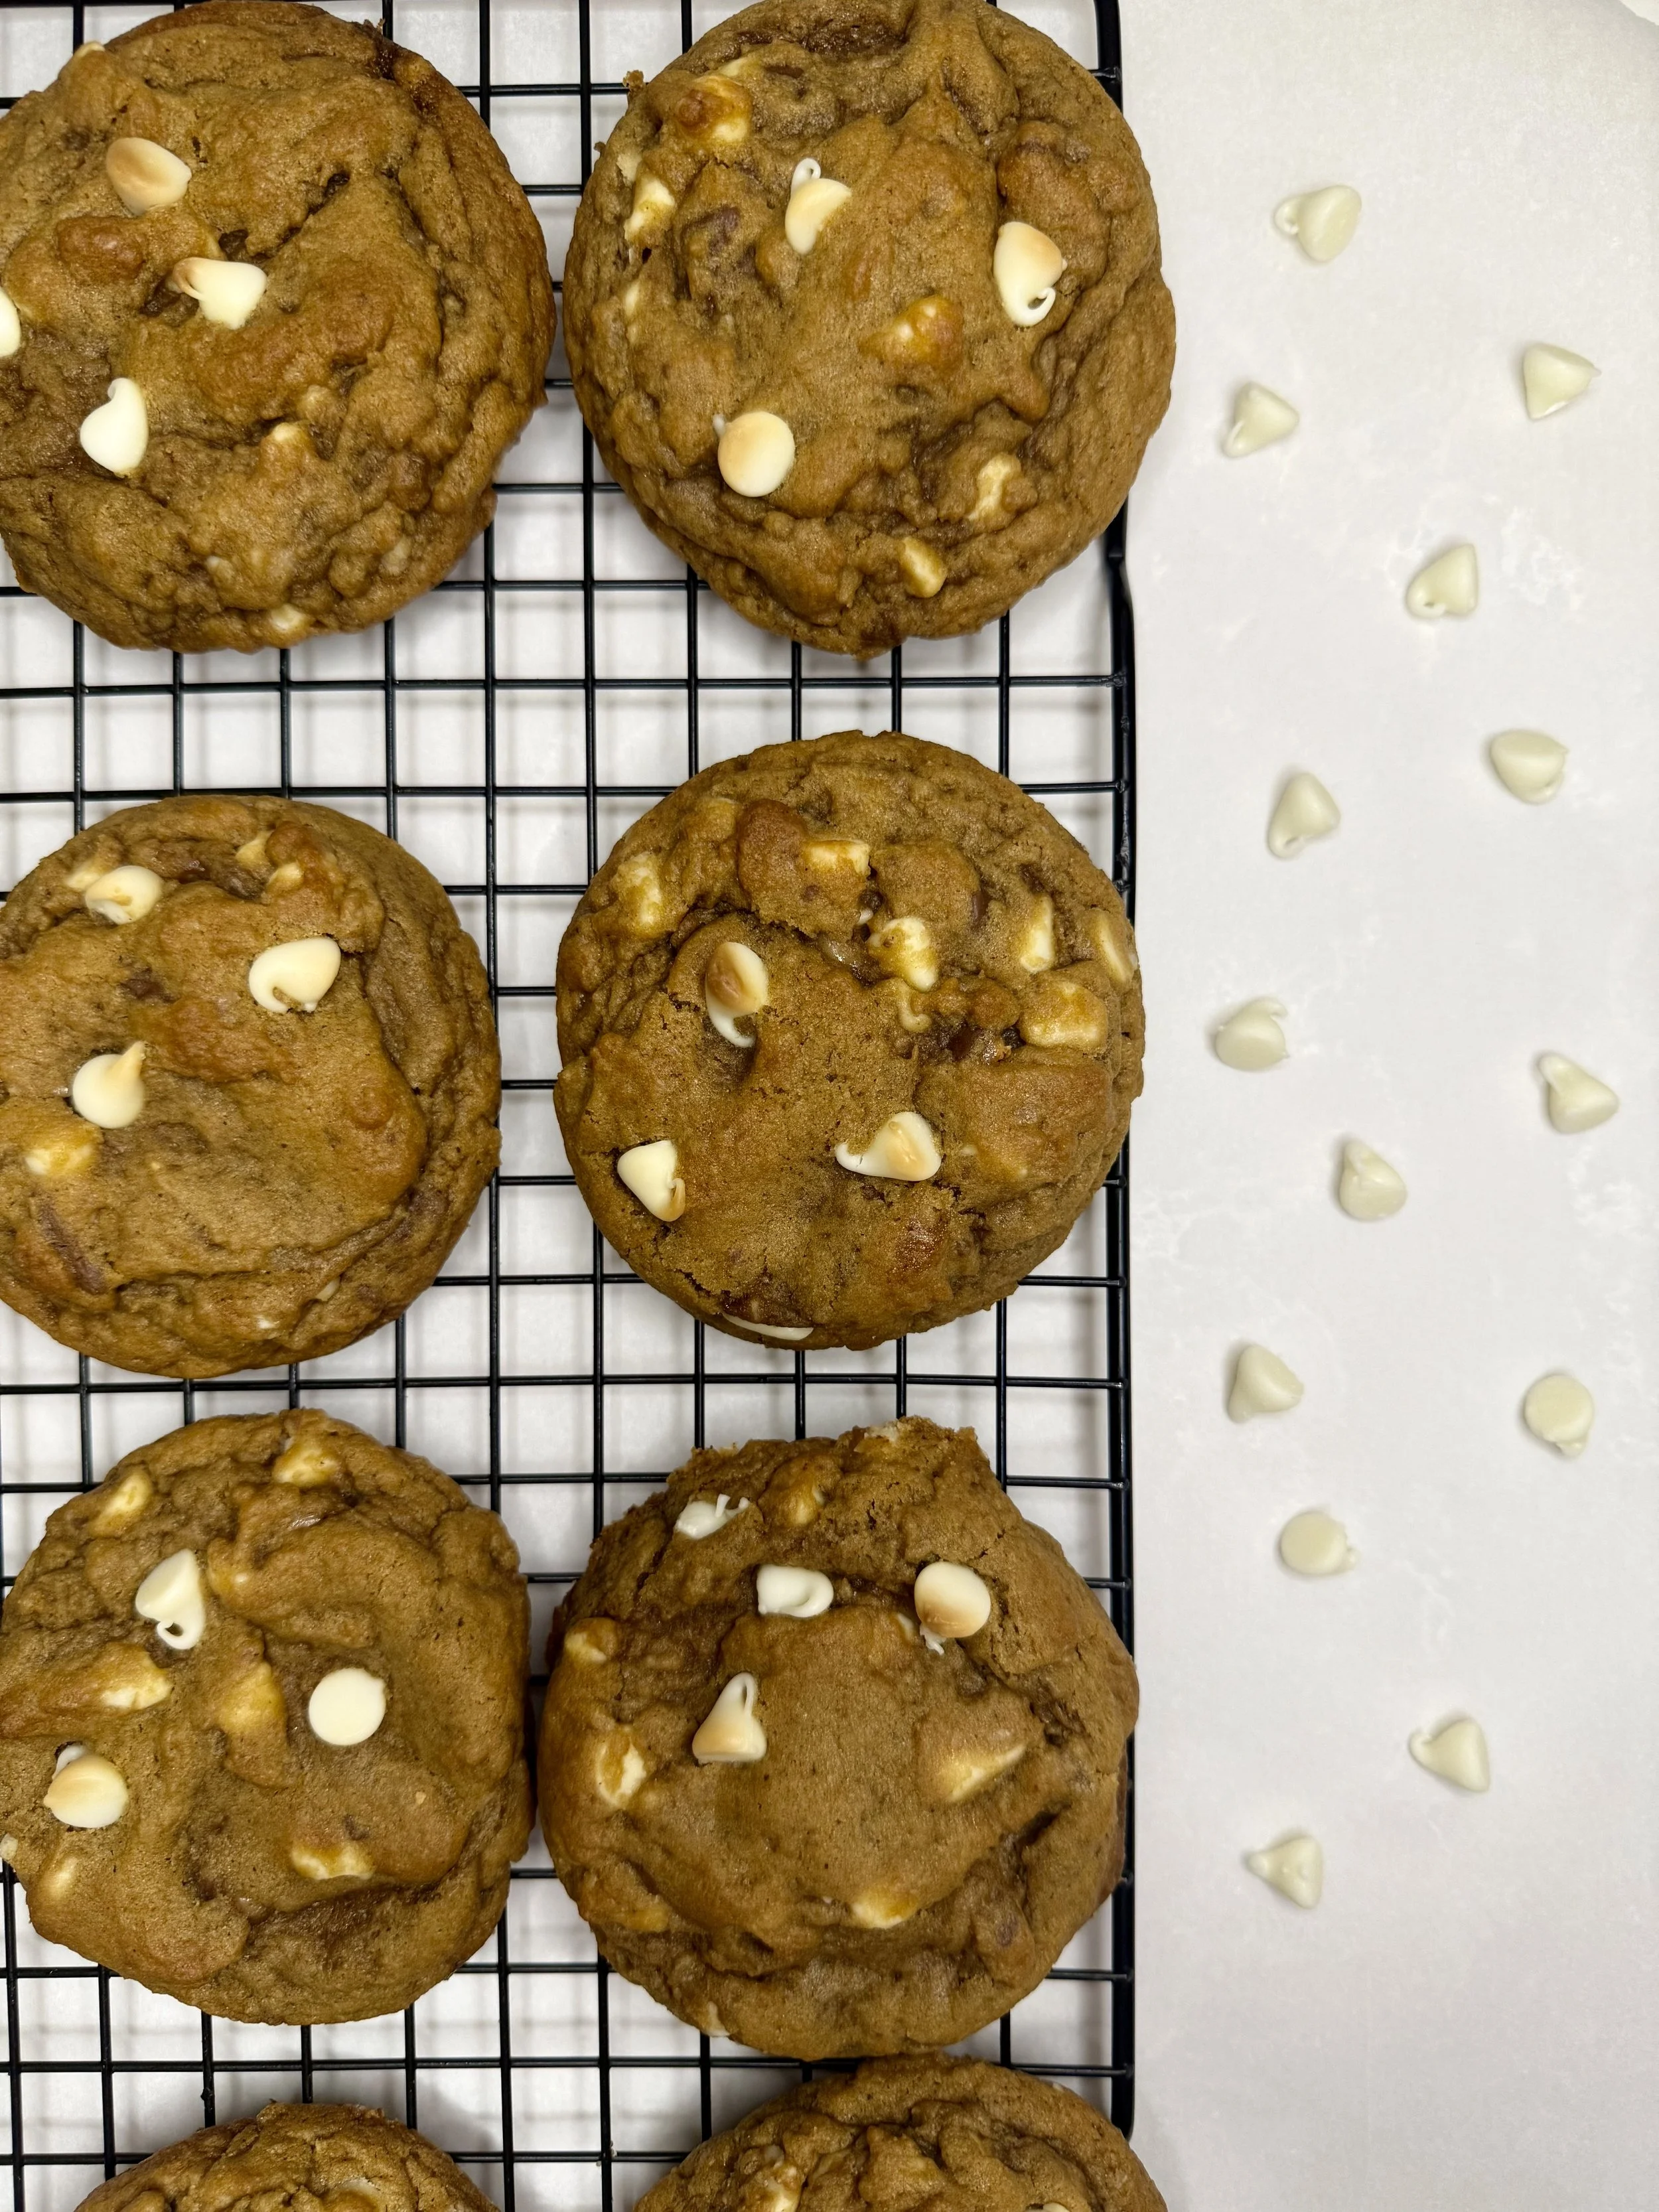
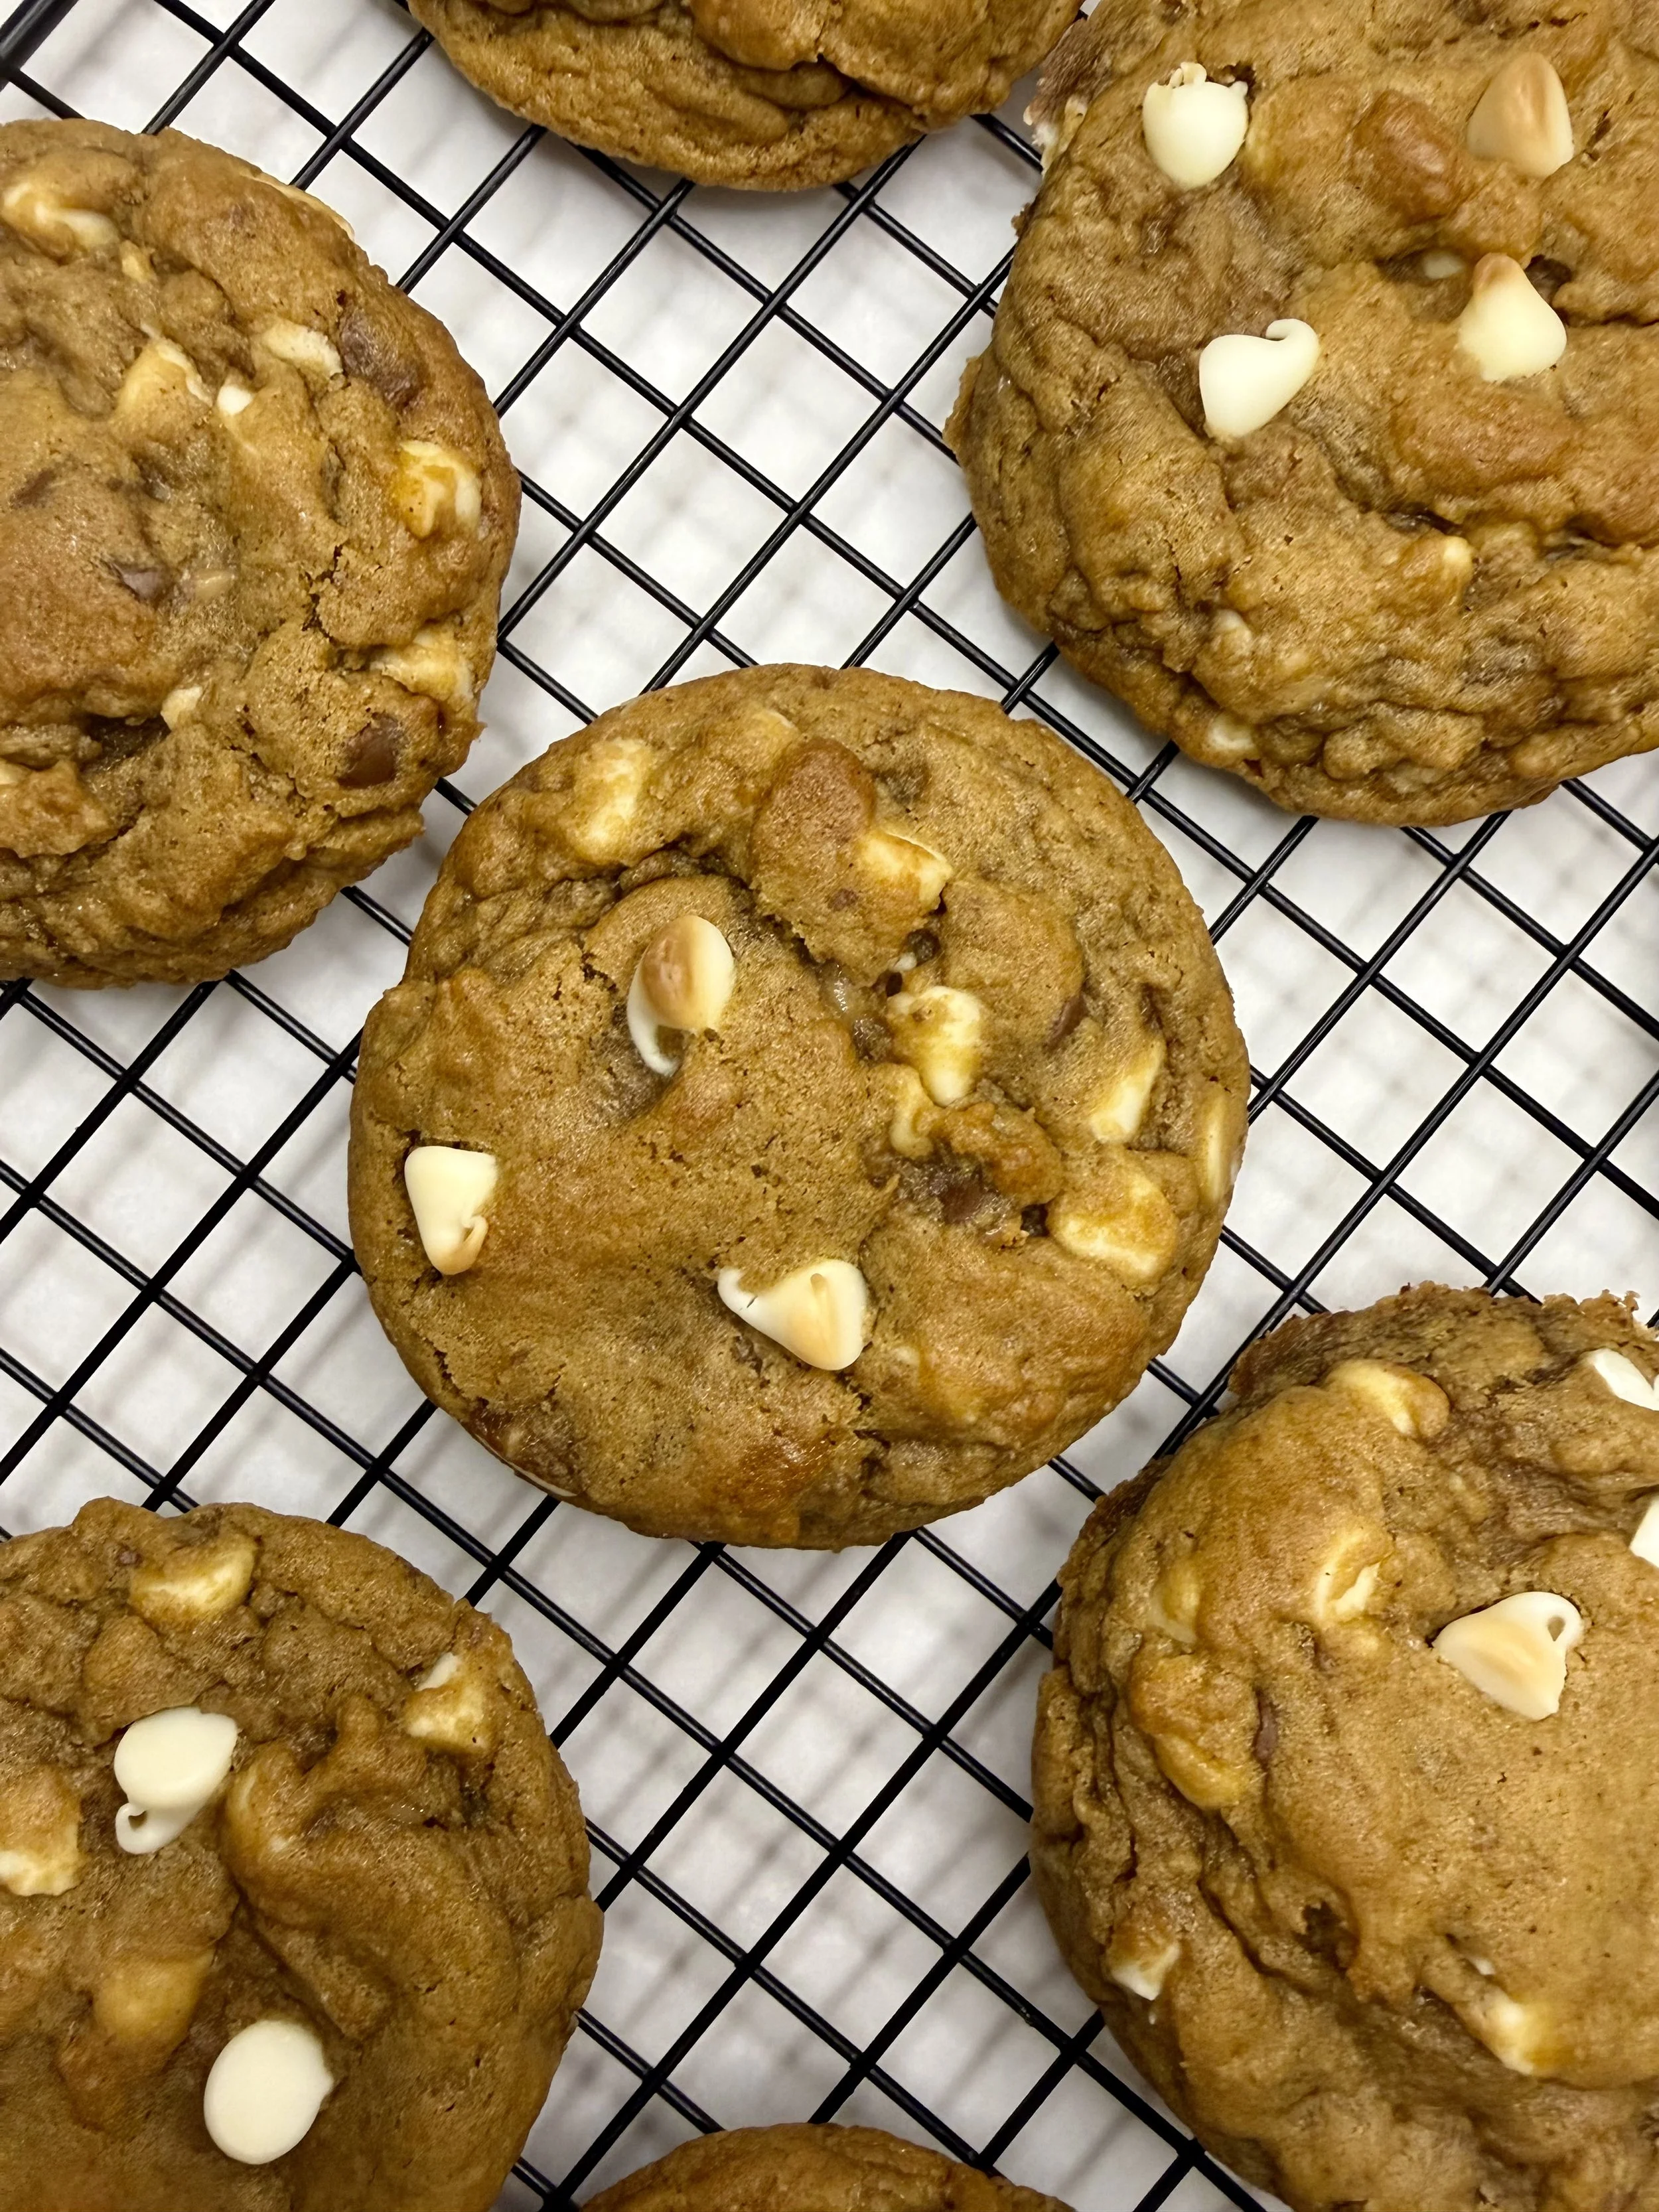
When baked, the cookies should have golden edges with soft, slightly underbaked centers. They’ll continue to set as they cool, creating that perfect chewy bite.
Tips for Perfect Cookies
Don’t skip browning the butter — this is what gives the cookies their rich, caramel-like flavor
Chill the dough to prevent spreading and enhance flavor
Use a large scoop for thick, bakery-style cookies
Slightly underbake for soft, gooey centers
Add extra chocolate chips on top right after baking for that bakery finish
Scoot your cookies with a round cutter right out of the oven to make them perfectly circular
Storage Tips
Store cookies in an airtight container at room temperature for up to 4 days. You can also freeze the dough balls and bake straight from frozen—just add an extra minute or two to the bake time.
Final Thoughts
These cookies are the definition of comfort baking. Whether you’re making them for a cozy night in, sharing with friends, or adding to your baking rotation, they deliver every single time. One bite in, and you’ll understand why they’re called ultimate.

Ultimate Brown Butter Chocolate Chip Cookies
Rich, nutty brown butter takes these chocolate chip cookies to the next level, creating a deep caramelized flavor in every bite. With crisp golden edges, soft chewy centers, and melty pools of chocolate, these cookies truly live up to their “ultimate” name.
Ingredients
- 1 cup salted butter (2 sticks) + 2 tablespoons - see notes
- 1 cup brown sugar
- 1/2 cup granulated sugar
- 2 eggs
- 1 tbsp vanilla extract
- 1 1/2 cups cake flour
- 1 1/2 cups all-purpose flour
- 1 1/2 teaspoon cornstarch
- 3/4 teaspoon baking soda
- 3/4 teaspoon salt
- 2 cups chocolate chips
Instructions
Notes
- This recipe uses an extra 2 tablespoons of butter to account for moisture loss during browning.
- For perfectly round cookies, gently “scoot” them with a round cutter immediately after baking.
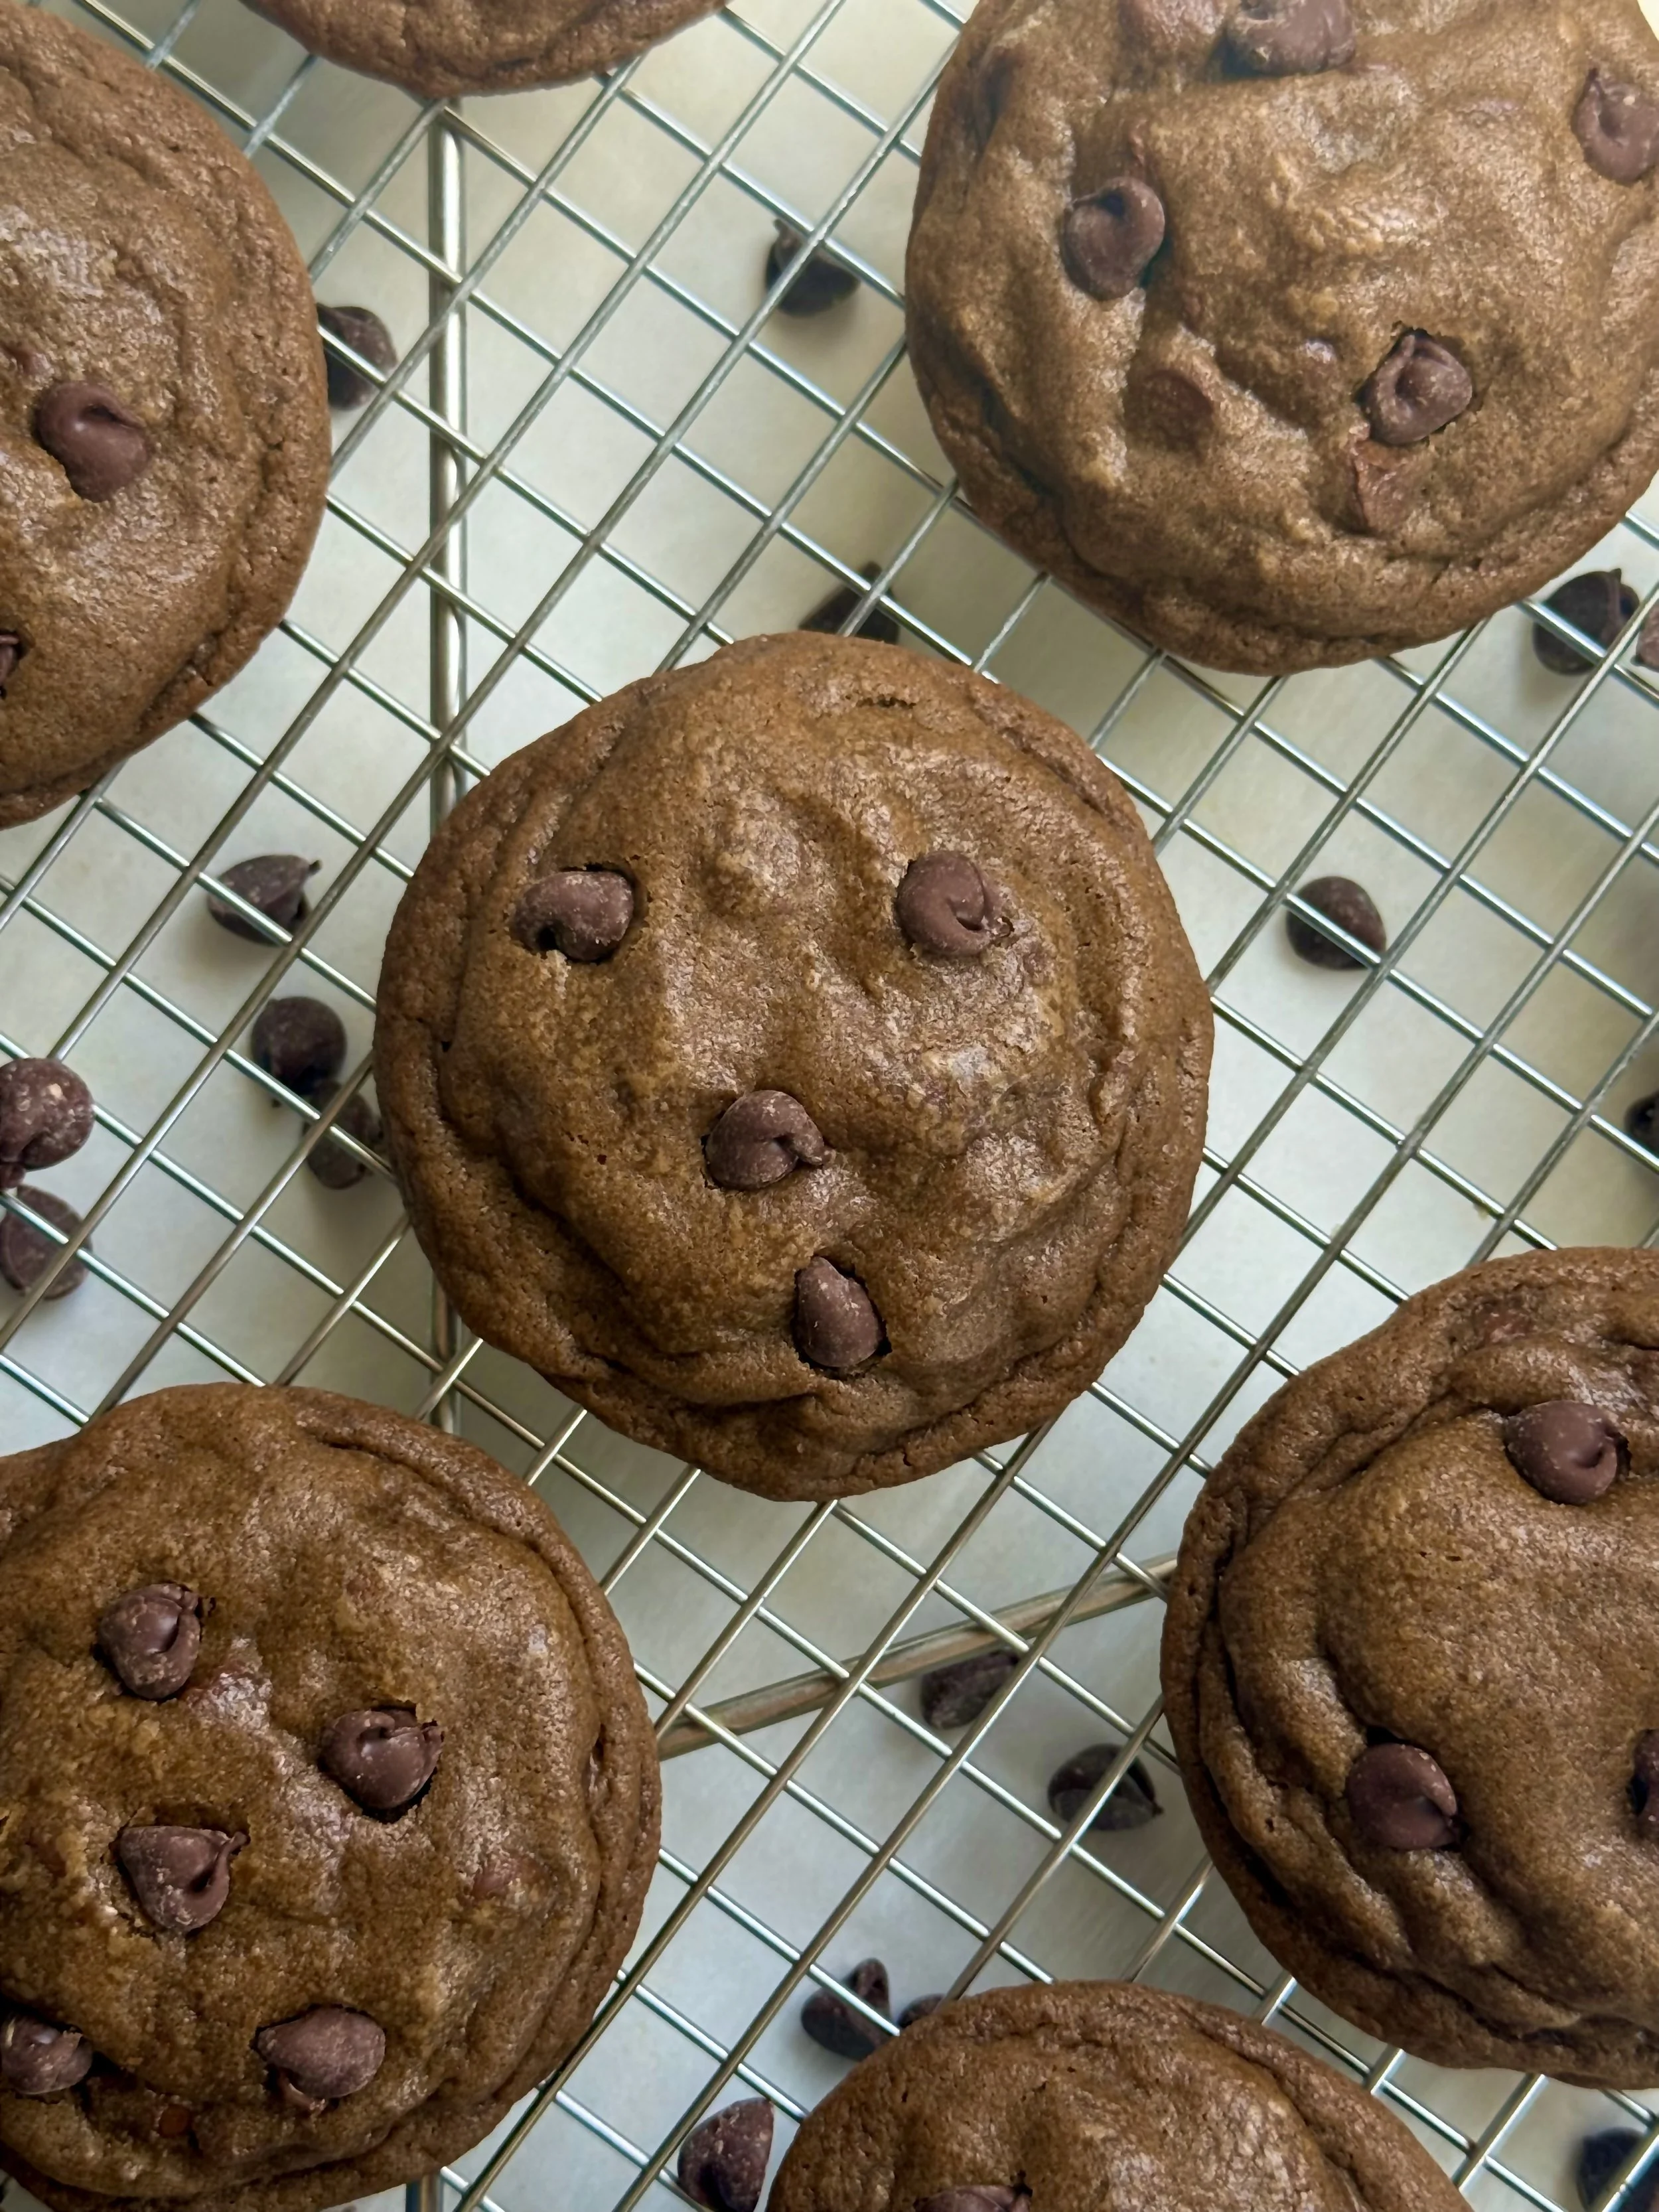
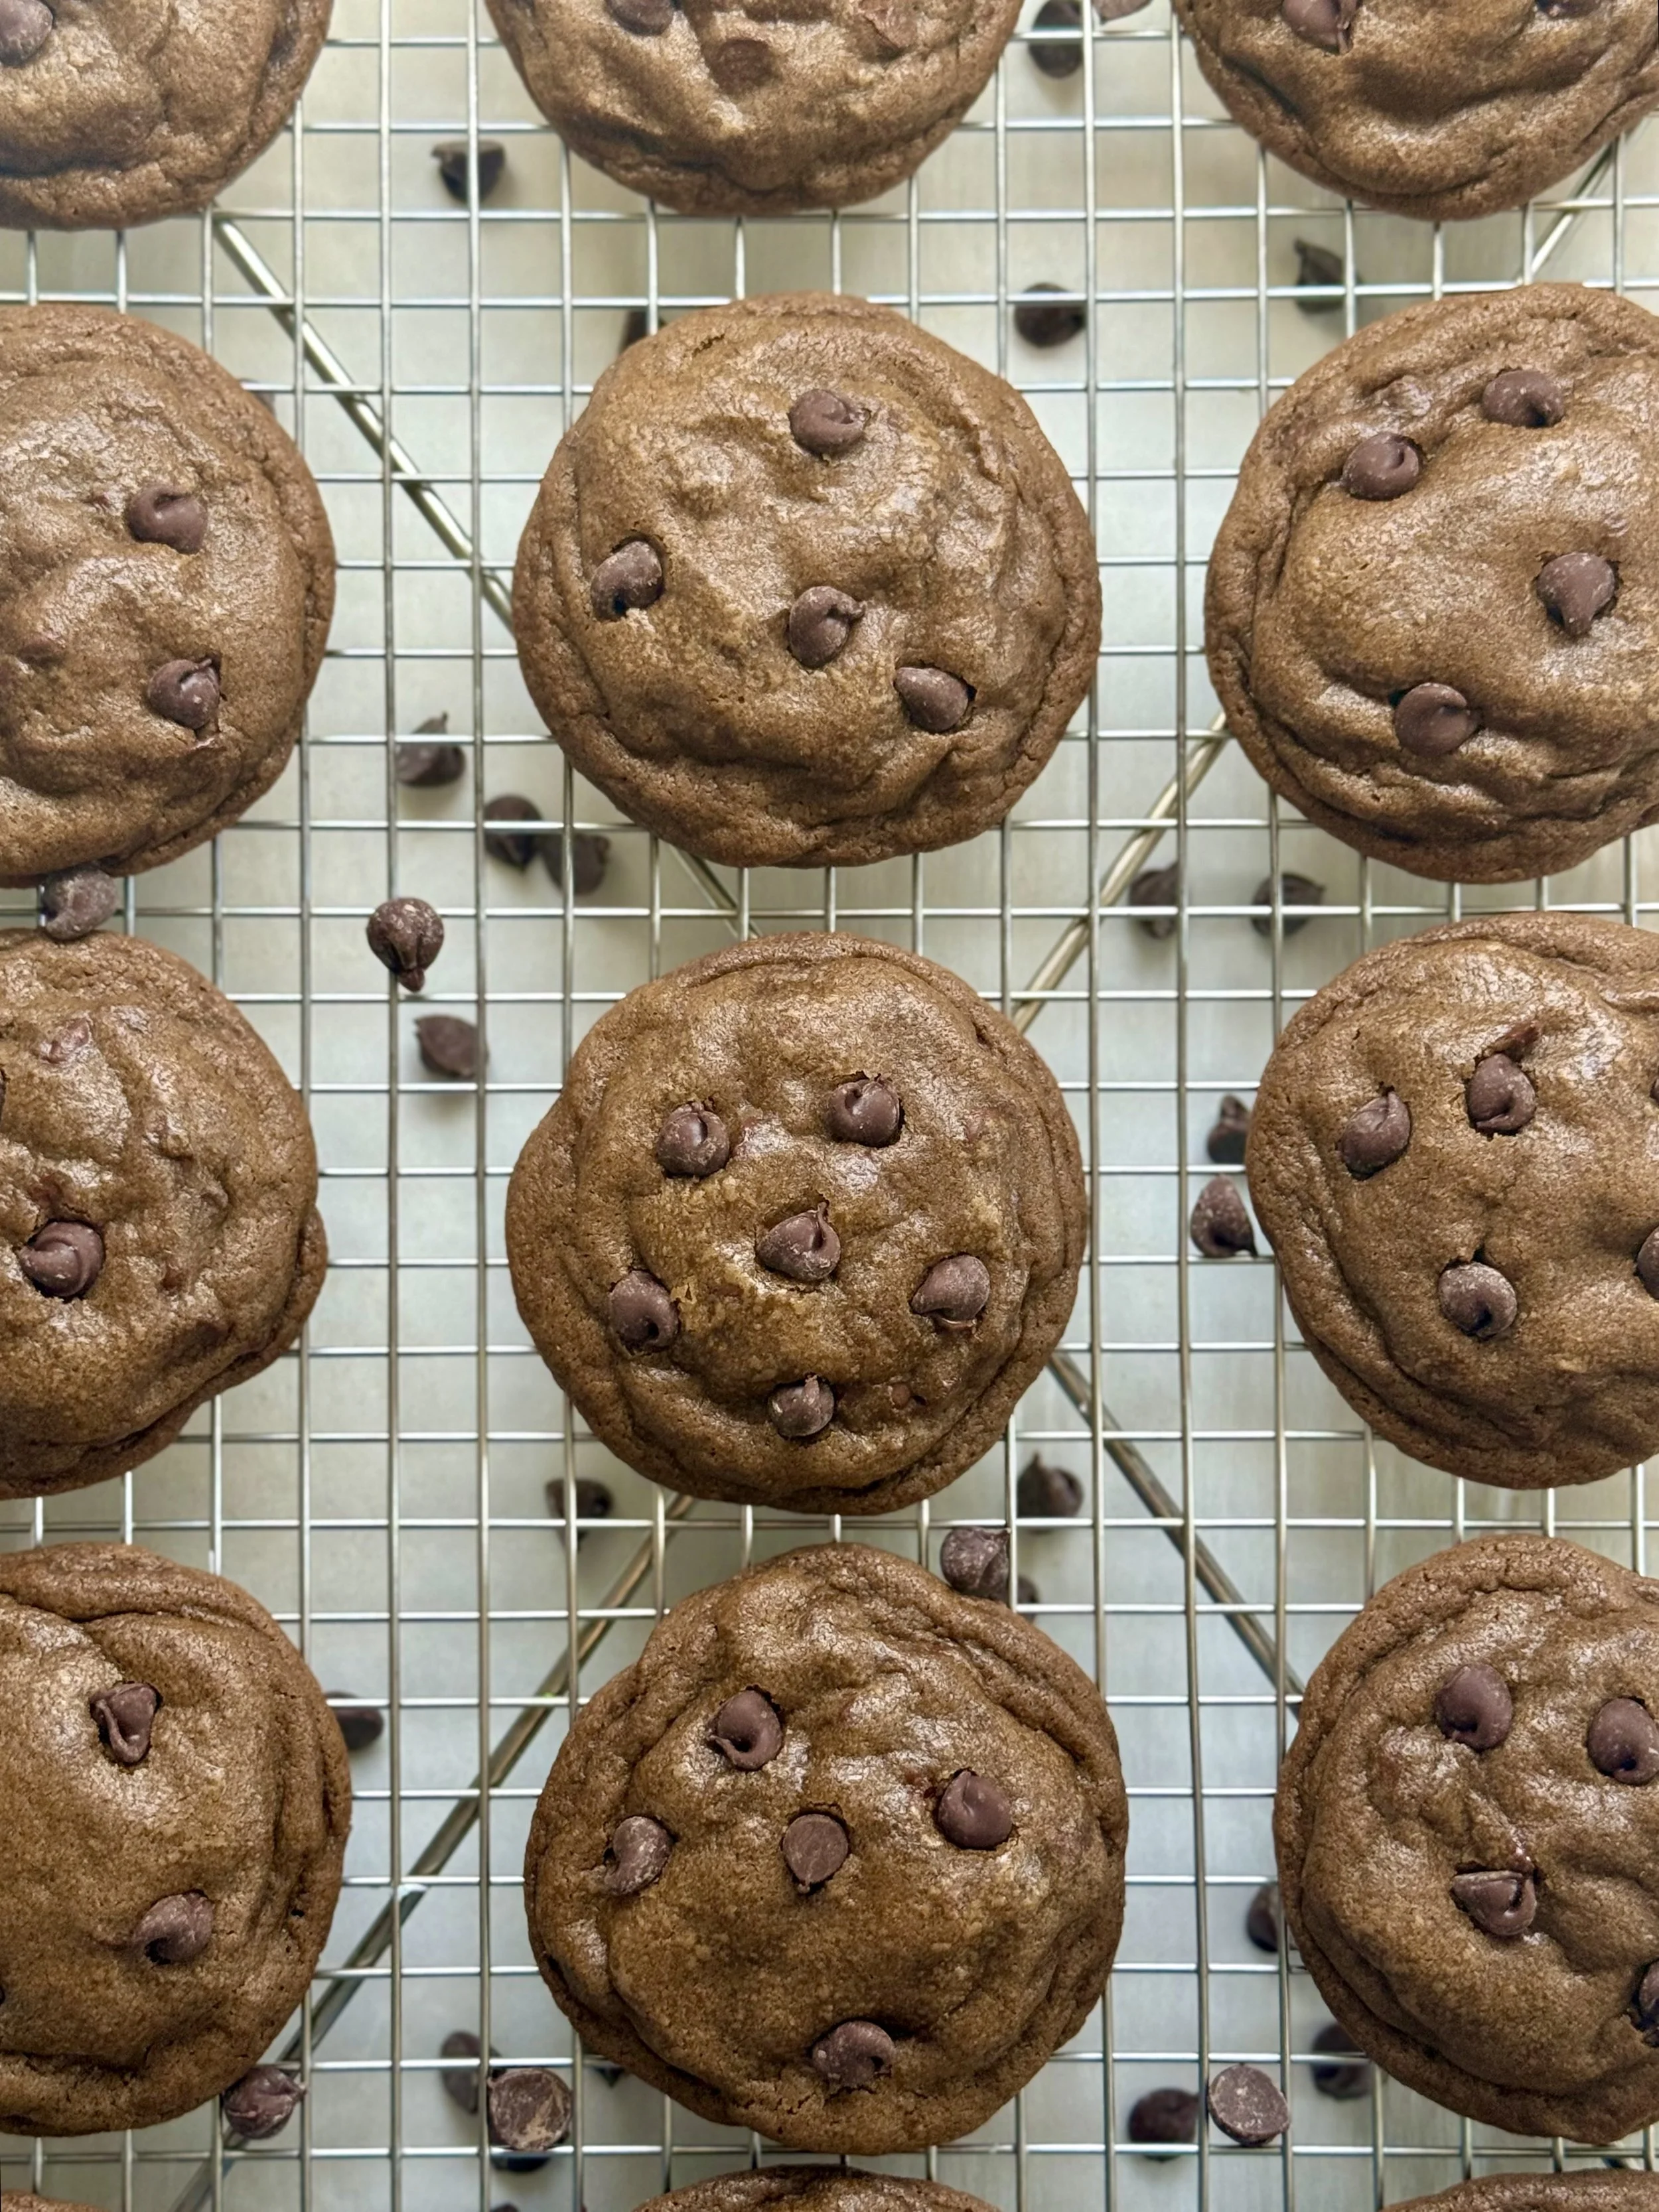
Fudgy Double Chocolate Cookies

Fudgy Double Chocolate Cookies
If you’re craving a thick, bakery-style cookie that’s loaded with deep chocolate flavor and melty pockets of chocolate chips, these fudgy double chocolate cookies are about to be your new obsession. They’re rich, soft in the center, slightly crisp on the edges, and made with cold butter so they bake up extra thick and decadent—no flattening here!
Whether you’re a chocoholic or just love a good gooey cookie, this recipe delivers perfection every single time.
Ingredients
To see the full recipe with exact measurements, scroll down to the recipe card below.
Cold salted butter
Brown sugar
Granulated sugar
Eggs
Vanilla extract
Cake flour
All-purpose flour
Cocoa powder
Cornstarch
Baking soda
Salt
Chocolate chips
Why You’ll Love These Cookies
Thick and fudgy thanks to the cold butter and cornstarch
Deep chocolate flavor from the cocoa powder and chocolate chips
No chill required—just a quick rest for best results
Bakery-style texture with crisp edges and gooey centers
Perfect for freezing ahead or baking fresh
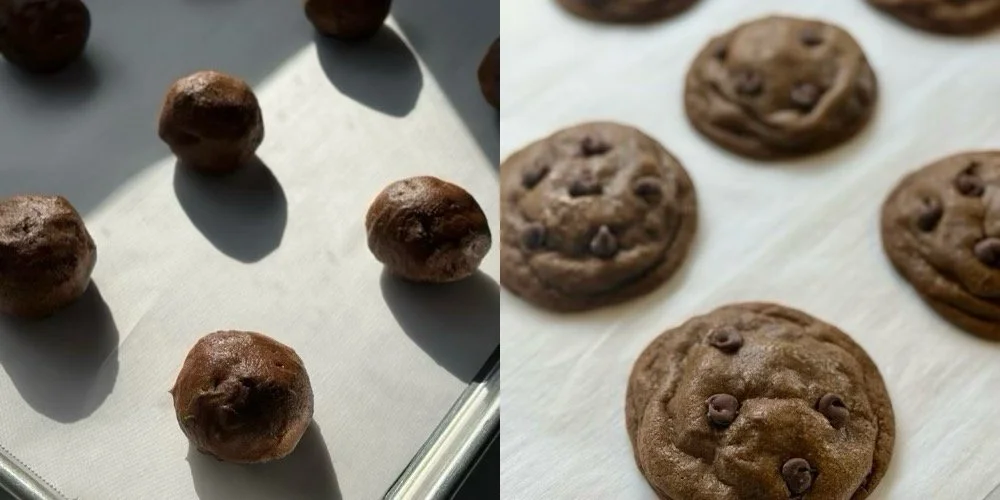
Baking Tips for Perfect Double Chocolate Cookies
1. Use cold butter for extra thickness.
Cold, cubed butter helps the cookies keep their shape while still getting that soft, rich center.
2. Don’t overmix once the flour goes in.
This keeps the cookie texture soft rather than cakey.
3. Chill the dough briefly.
A 30–60 minute chill keeps the cookies thick and prevents spreading.
4. Add extra chocolate chips once the cookies cool slightly.
Pressing a few chips onto the tops makes them look perfectly bakery-style and extra indulgent.
5. Use a glass to “scoot” the cookies while warm.
Lightly scoot a glass around the edges of each cookie right after baking to make them perfectly round.
6. Underbake for maximum gooeyness.
Take them out when the centers still look slightly soft—they firm up as they cool.
Storage & Freezing
Room Temperature: Store in an airtight container for up to 4 days.
Freezer: Freeze baked cookies for up to 2 months. You can also freeze the dough balls and bake straight from frozen—just add 1–2 extra minutes.

Fudgy Double Chocolate Cookies
Ultra-fudgy and loaded with cocoa and chocolate chunks, these double chocolate cookies deliver deep, intense flavor in every soft, gooey bite.
Ingredients
- 1 cup cold salted butter (2 sticks), cut into cubes
- 1 cup brown sugar
- 1/2 cup granulated sugar
- 2 eggs
- 1 tbsp vanilla extract
- 1 1/4 cups cake flour
- 1 1/2 cups all-purpose flour
- 1/4 cup cocoa powder
- 1 1/2 teaspoons cornstarch
- 3/4 teaspoon baking soda
- 3/4 teaspoon salt
- 2 cups chocolate chips
Instructions

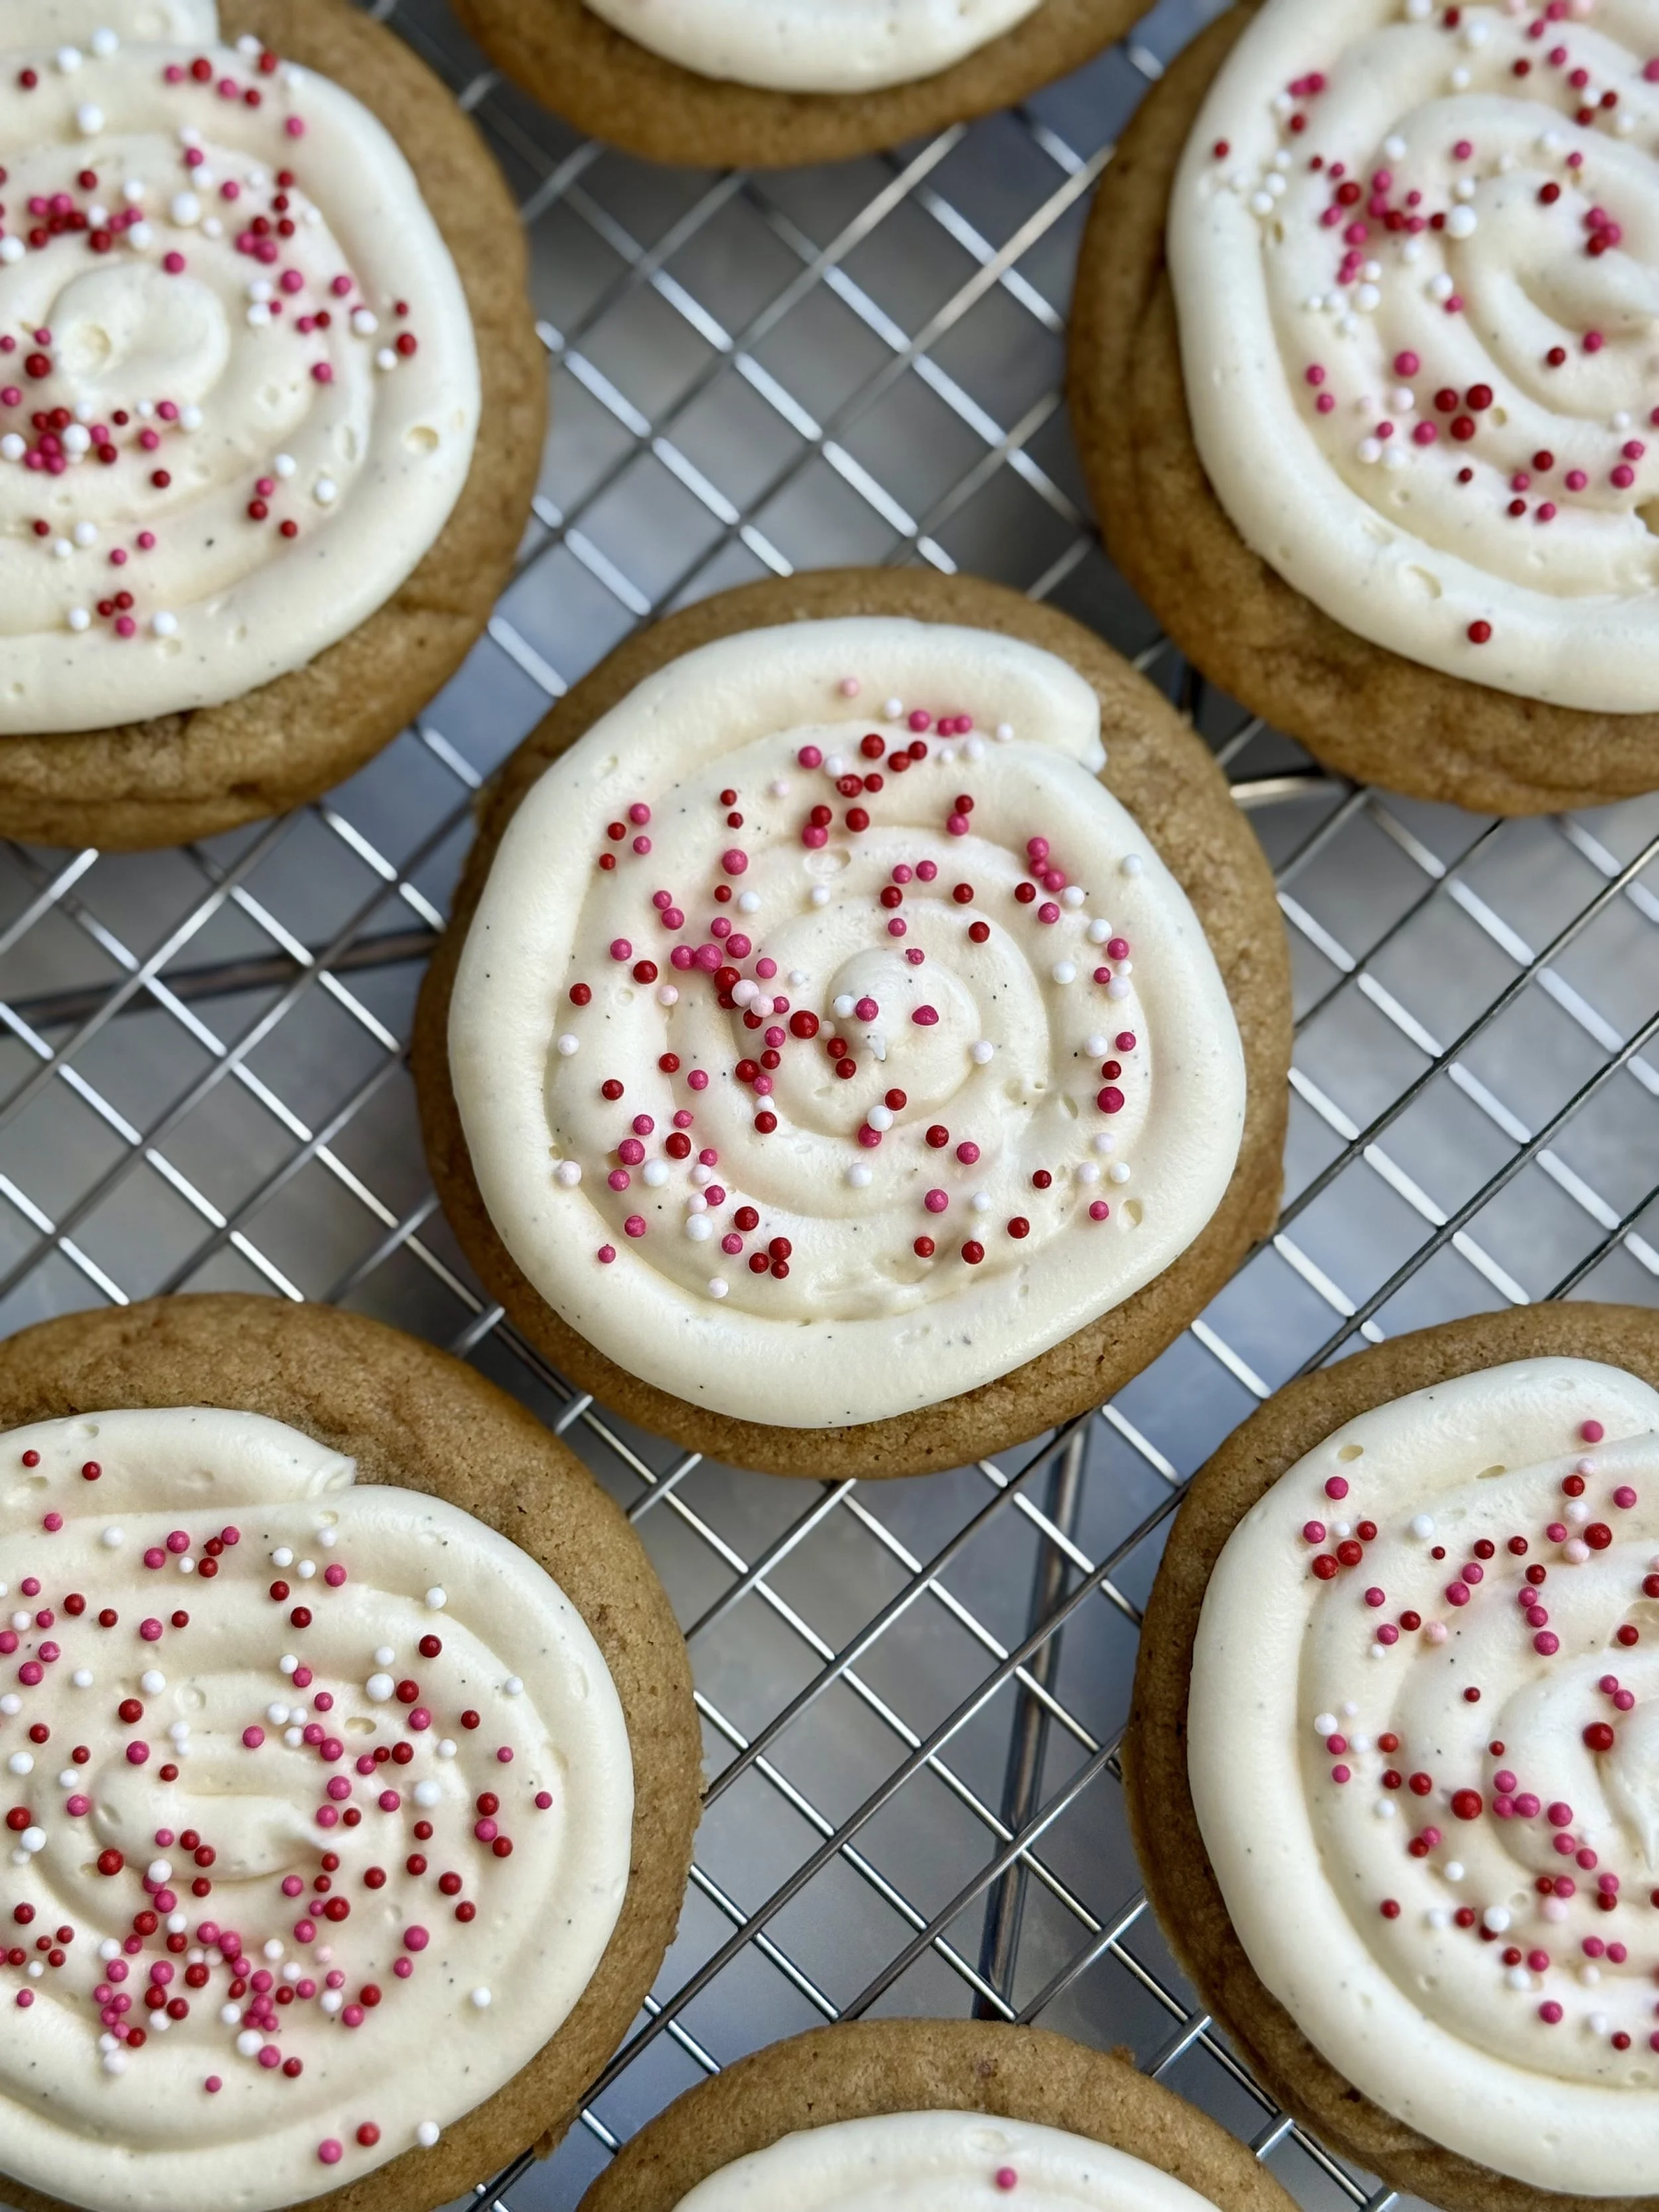
Brown Butter Cookies with Cream Cheese Frosting
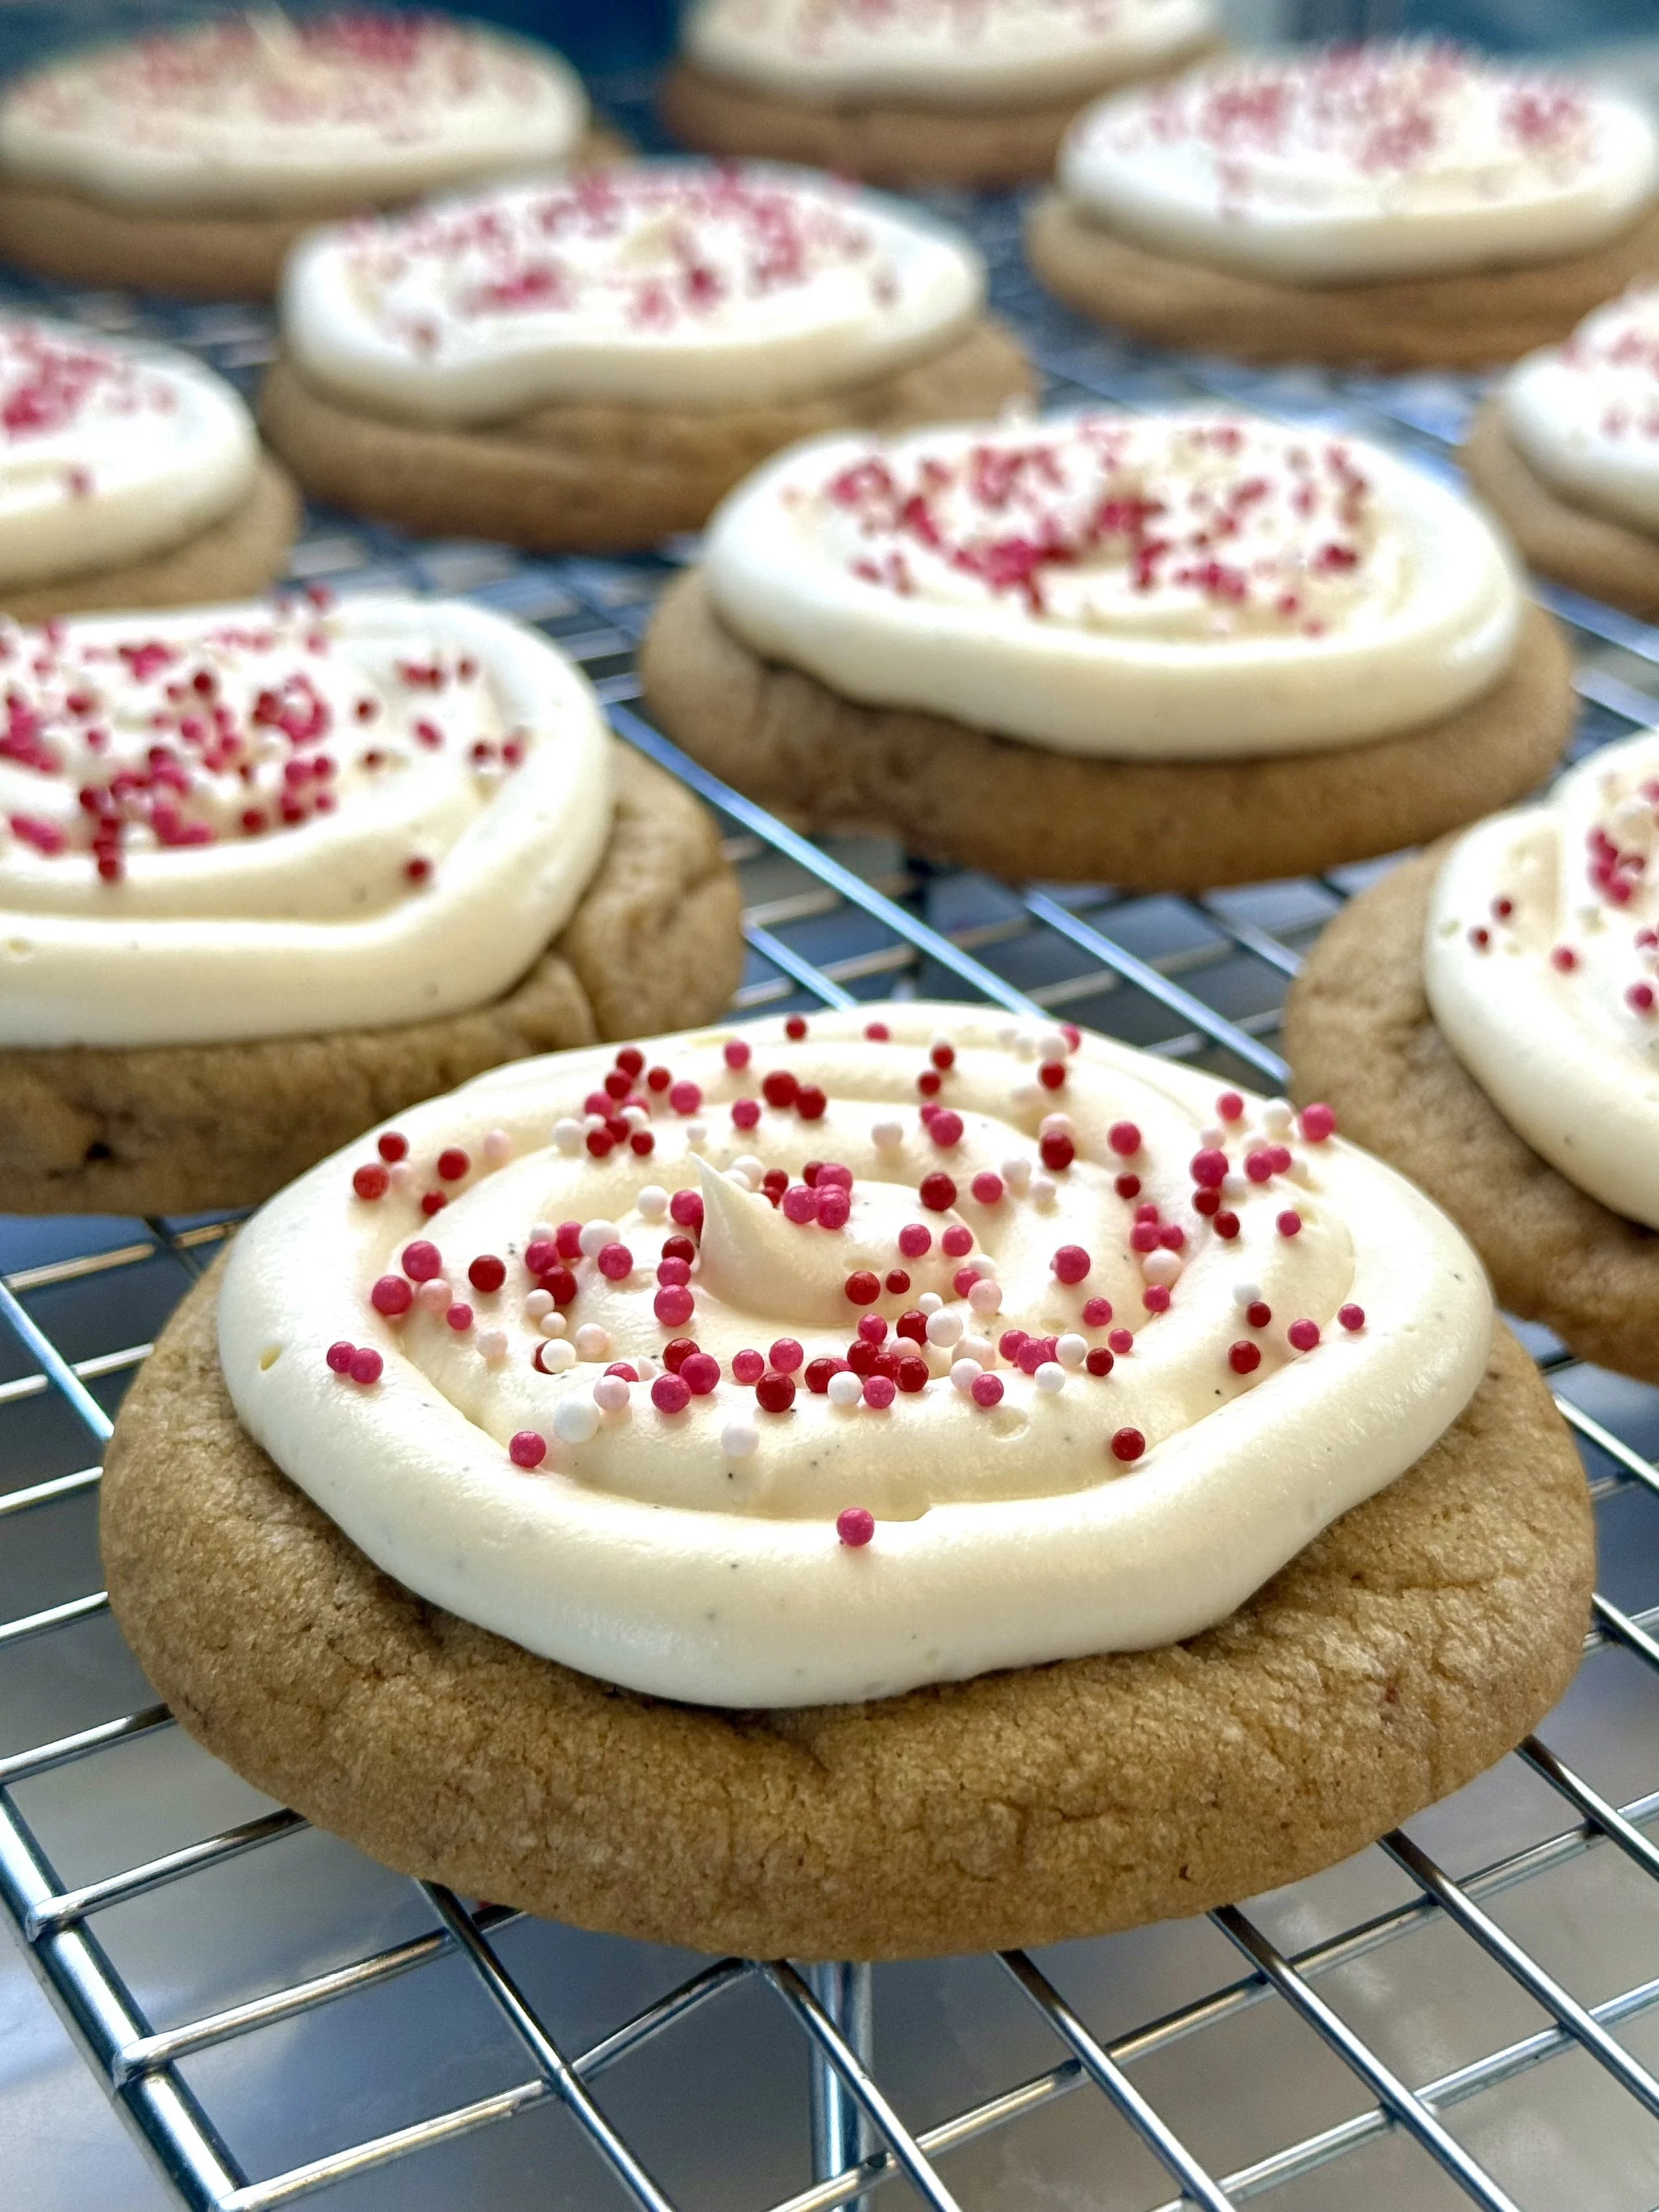
Brown Butter Cookies with Cream Cheese Frosting
Soft, thick, bakery-style cookies made with nutty brown butter and finished with a smooth, lightly tangy cream cheese frosting. These cookies have crisp edges, plush centers, and perfectly smooth tops ,ideal for any occasion.
If you love classic brown butter cookies but want something a little more elevated, these cookies are the answer. Browning the butter adds a subtle caramelized depth that pairs beautifully with the creamy frosting, creating a cookie that feels both nostalgic and indulgent.
Why You’ll Love These Cookies
Made with brown butter for rich, nutty flavor
Thick and soft with smooth, frostable tops
No chilling overnight—just 30–60 minutes
Perfect for anytime you want a bakery-style treat at home
Ingredients You’ll Need
Brown Butter Cookies
Salted butter
Brown sugar
Granulated sugar
Eggs
Vanilla extract
Cake flour
All-purpose flour
Cornstarch
Baking soda
Salt
Cream Cheese Frosting
Unsalted butter
Cream cheese
Vanilla bean paste or vanilla extract
Powdered sugar
Salt
(Full measurements and instructions are in the recipe card below.)
How to Brown Butter (Don’t Skip This!)
Browning butter might sound fancy, but it’s simple and totally worth it. As the butter melts and cooks, tiny specs (milk solids) will fall to the bottom and begin to toast and turn golden brown, creating a warm, nutty aroma and deeper flavor.
Pro tip: Let the butter cool before mixing. Using butter that’s too warm can cause the cookies to spread too much in the oven.

Tips for Perfect Frosted Brown Butter Cookies
Use cake flour + all-purpose flour: This combo creates a soft, tender cookie that still holds its shape.
Chill the dough: Even 30 minutes makes a huge difference in thickness and texture.
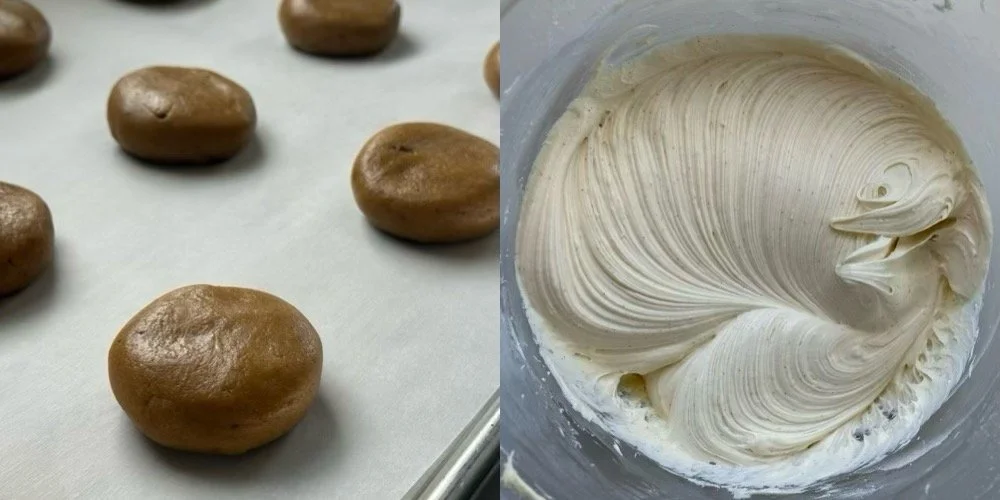
Shape the dough into pucks: This encourages even spreading and smooth tops.
Scoot the cookies: Right out of the oven, gently swirl a round cutter around each cookie to make them perfectly round.
Cool completely before frosting: Cream cheese frosting will melt if the cookies are even slightly warm.
Make Them Your Own
Add festive sprinkles or sanding sugar on top
Pipe frosting with a pipping tip for a bakery finish
Add a touch of lemon zest or almond extract to the frosting for a flavor twist
Storage Tips
Store frosted cookies in an airtight container in the refrigerator for up to 4 days
Bring to room temperature before serving for the best texture and flavor

Brown Butter Cookies with Cream Cheese Frosting
These soft and buttery brown butter cookies have lightly crisp edges finished with a rich cream cheese frosting.
Ingredients
- 1 cup salted butter (2 sticks) + 2 tablespoons - see notes
- 1 cup brown sugar
- 1/2 cup granulated sugar
- 2 eggs
- 1 tbsp vanilla extract
- 1 ½ cups cake flour
- 1 ½ cups all-purpose flour
- 1 teaspoon cornstarch
- 3/4 teaspoon baking soda
- 3/4 teaspoon salt
- 1/2 cup unsalted butter (1 stick), at room temperature
- 8 ounces of cream cheese, at room temperature
- 1 teaspoon vanilla bean paste (can substitute for extract)
- 3 cups of powdered sugar
- 1/4 teaspoon salt
Instructions
Notes
- This recipe uses an extra 2 tablespoons of butter to account for moisture loss during browning.
- Cookies must be fully cooled before frosting to prevent melting.
- For perfectly round cookies, gently “scoot” them with a round cutter immediately after baking.

Chunky Red Velvet Cookies
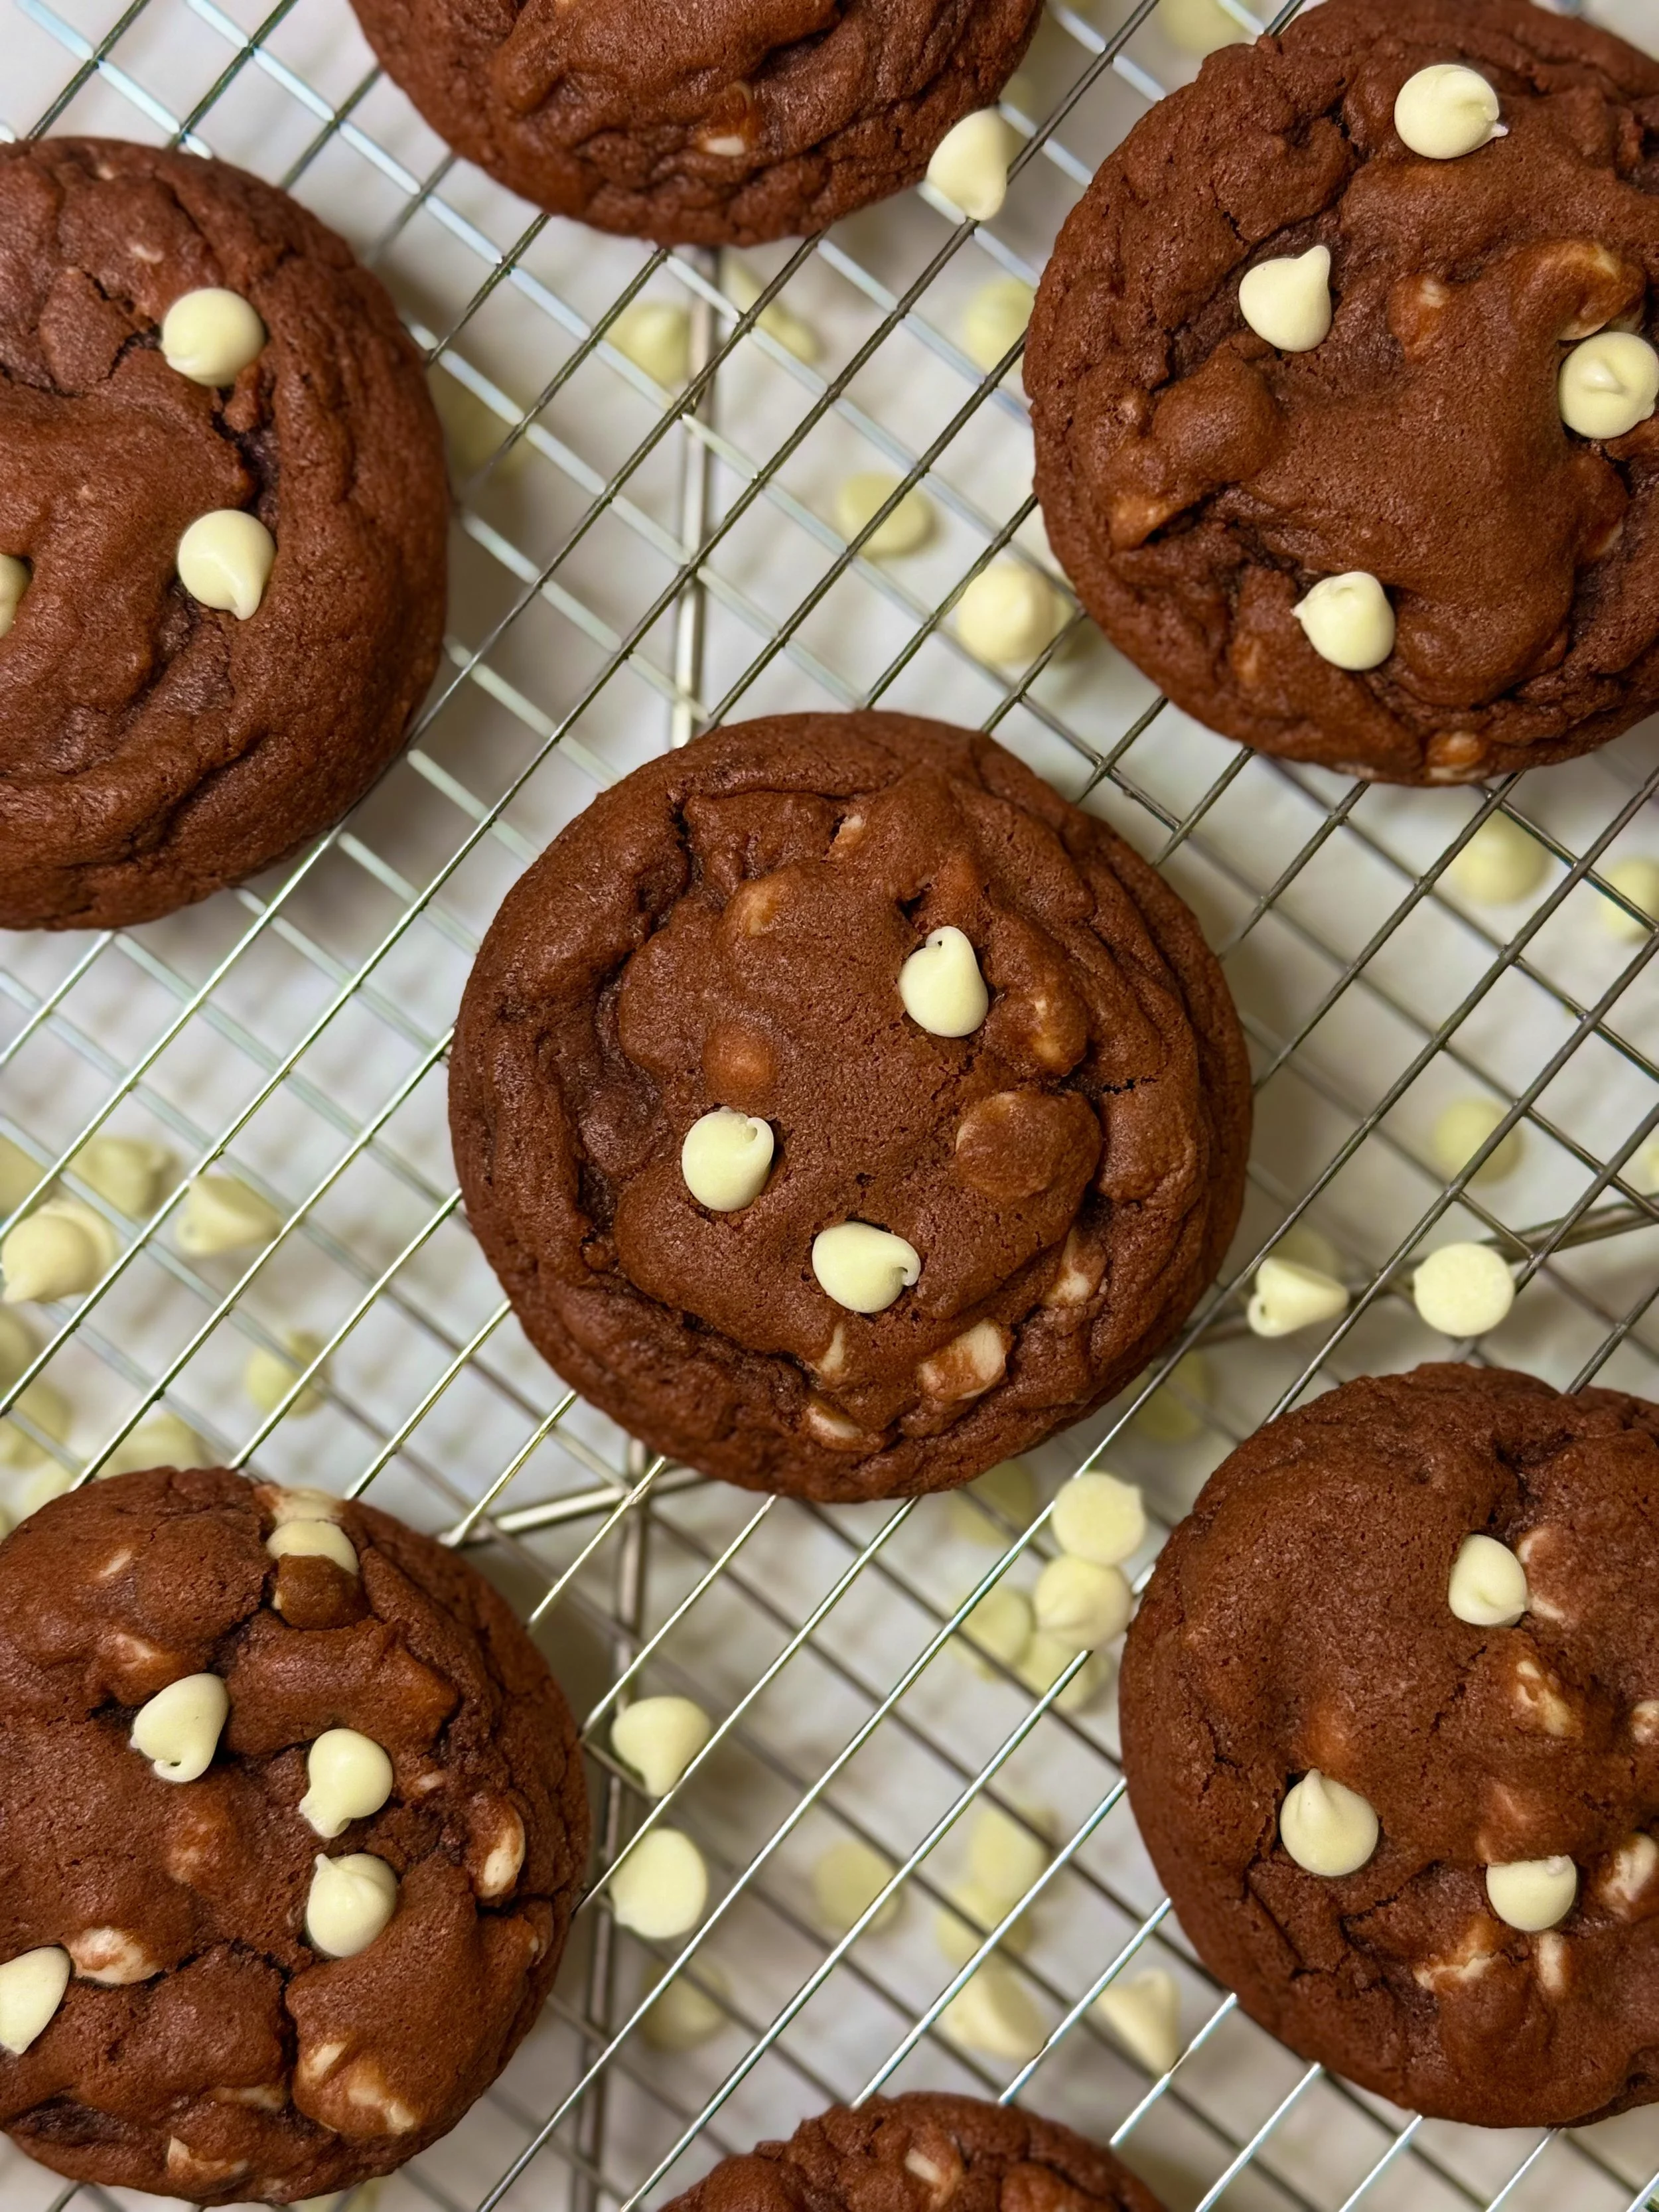
Chunky Red Velvet Cookies with White Chocolate Chips
If you love thick, bakery-style cookies with soft, gooey centers and crisp edges, these chunky red velvet cookies are about to become a new favorite. They’re rich and cocoa-kissed, packed with creamy white chocolate chips, and finished with that classic red velvet color that makes them perfect for holidays, Valentine’s Day, or anytime you’re craving something extra special.
These cookies are made with cold butter and a combination of cake flour and all-purpose flour, which gives them that irresistible thick and tender texture straight out of the oven. Chilling the dough helps them bake up tall and chunky while keeping the centers soft and melty.
Why You’ll Love These Cookies
Thick, bakery-style cookies with gooey centers
Soft texture thanks to cake flour and cornstarch
Rich cocoa flavor balanced by sweet white chocolate
Perfect for gifting, holidays, or special occasions
Easy to make with simple ingredients

Ingredient Overview
(Full measurements are listed in the recipe card below)
Salted butter
Brown sugar
Granulated sugar
Eggs
Vanilla extract
Red gel food coloring
Cake flour
All-purpose flour
Cocoa powder
Cornstarch
Baking soda
Salt
White chocolate chips
Tips for Perfect Chunky Red Velvet Cookies
Use cold butter
Starting with cold butter helps create thicker cookies with less spread, giving you that bakery-style look.
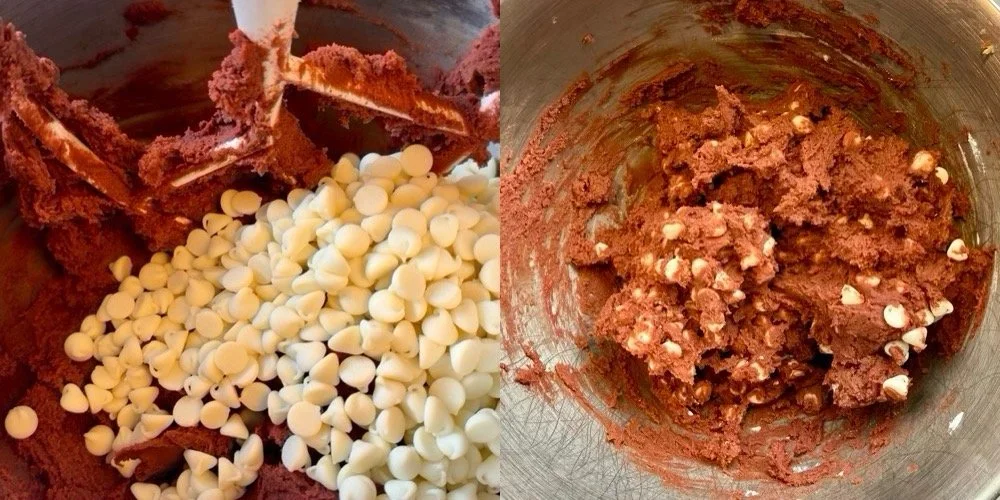
Don’t overmix the dough
Once the dry ingredients are added, mix just until combined. Overmixing can lead to dense cookies instead of soft, tender centers.
Chill the dough
Chilling the dough for 30–60 minutes helps the cookies hold their shape and bake up tall and chunky.
Bake until the edges are set
The centers should still look slightly underbaked when you pull them from the oven—they’ll continue to set as they cool.
Add extra white chocolate chips for a bakery finish
When the cookies come out of the oven and have cooled slightly, gently press a few extra white chocolate chips on top. This gives them that classic bakery-style look with chocolate visible on the surface.
“Scoot” the cookies for perfectly round edges
While the cookies are still warm, use a round glass or cookie cutter slightly larger than the cookie and gently “scoot” it around the edges. This helps shape the cookies into perfectly round, bakery-style cookies.

Storage & Freezing
Room Temperature: Store in an airtight container for up to 4 days.
Freezer-Friendly: Freeze baked cookies or unbaked dough balls for up to 2 months. Bake frozen dough with 1–2 extra minutes added to the bake time.
If you make these cookies, I’d love to hear how you liked them in the comments below! Happy baking :)

Chunky Red Velvet Cookies
These chunky red velvet cookies are soft and gooey in the center with crisp golden edges, packed with creamy white chocolate chips in every bite. Rich cocoa flavor, a tender bakery-style texture, and that classic red velvet color make them completely irresistible.
Ingredients
- 1 cup cold salted butter (2 sticks) cut into cubes
- 1 cup brown sugar
- 1/2 cup granulated sugar
- 2 eggs
- 1 tbsp vanilla extract
- 5 drops of red gel food coloring. (or until desired color is reached)
- 1 1/4 cup cake flour
- 1 1/2 cups all-purpose flour
- 1/4 cup cocoa powder
- 1 1/2 teaspoons cornstarch
- 3/4 teaspoon baking soda
- 3/4 teaspoon salt
- 2 cups white chocolate chips
Instructions

Reese’s Peanut Butter Cookies
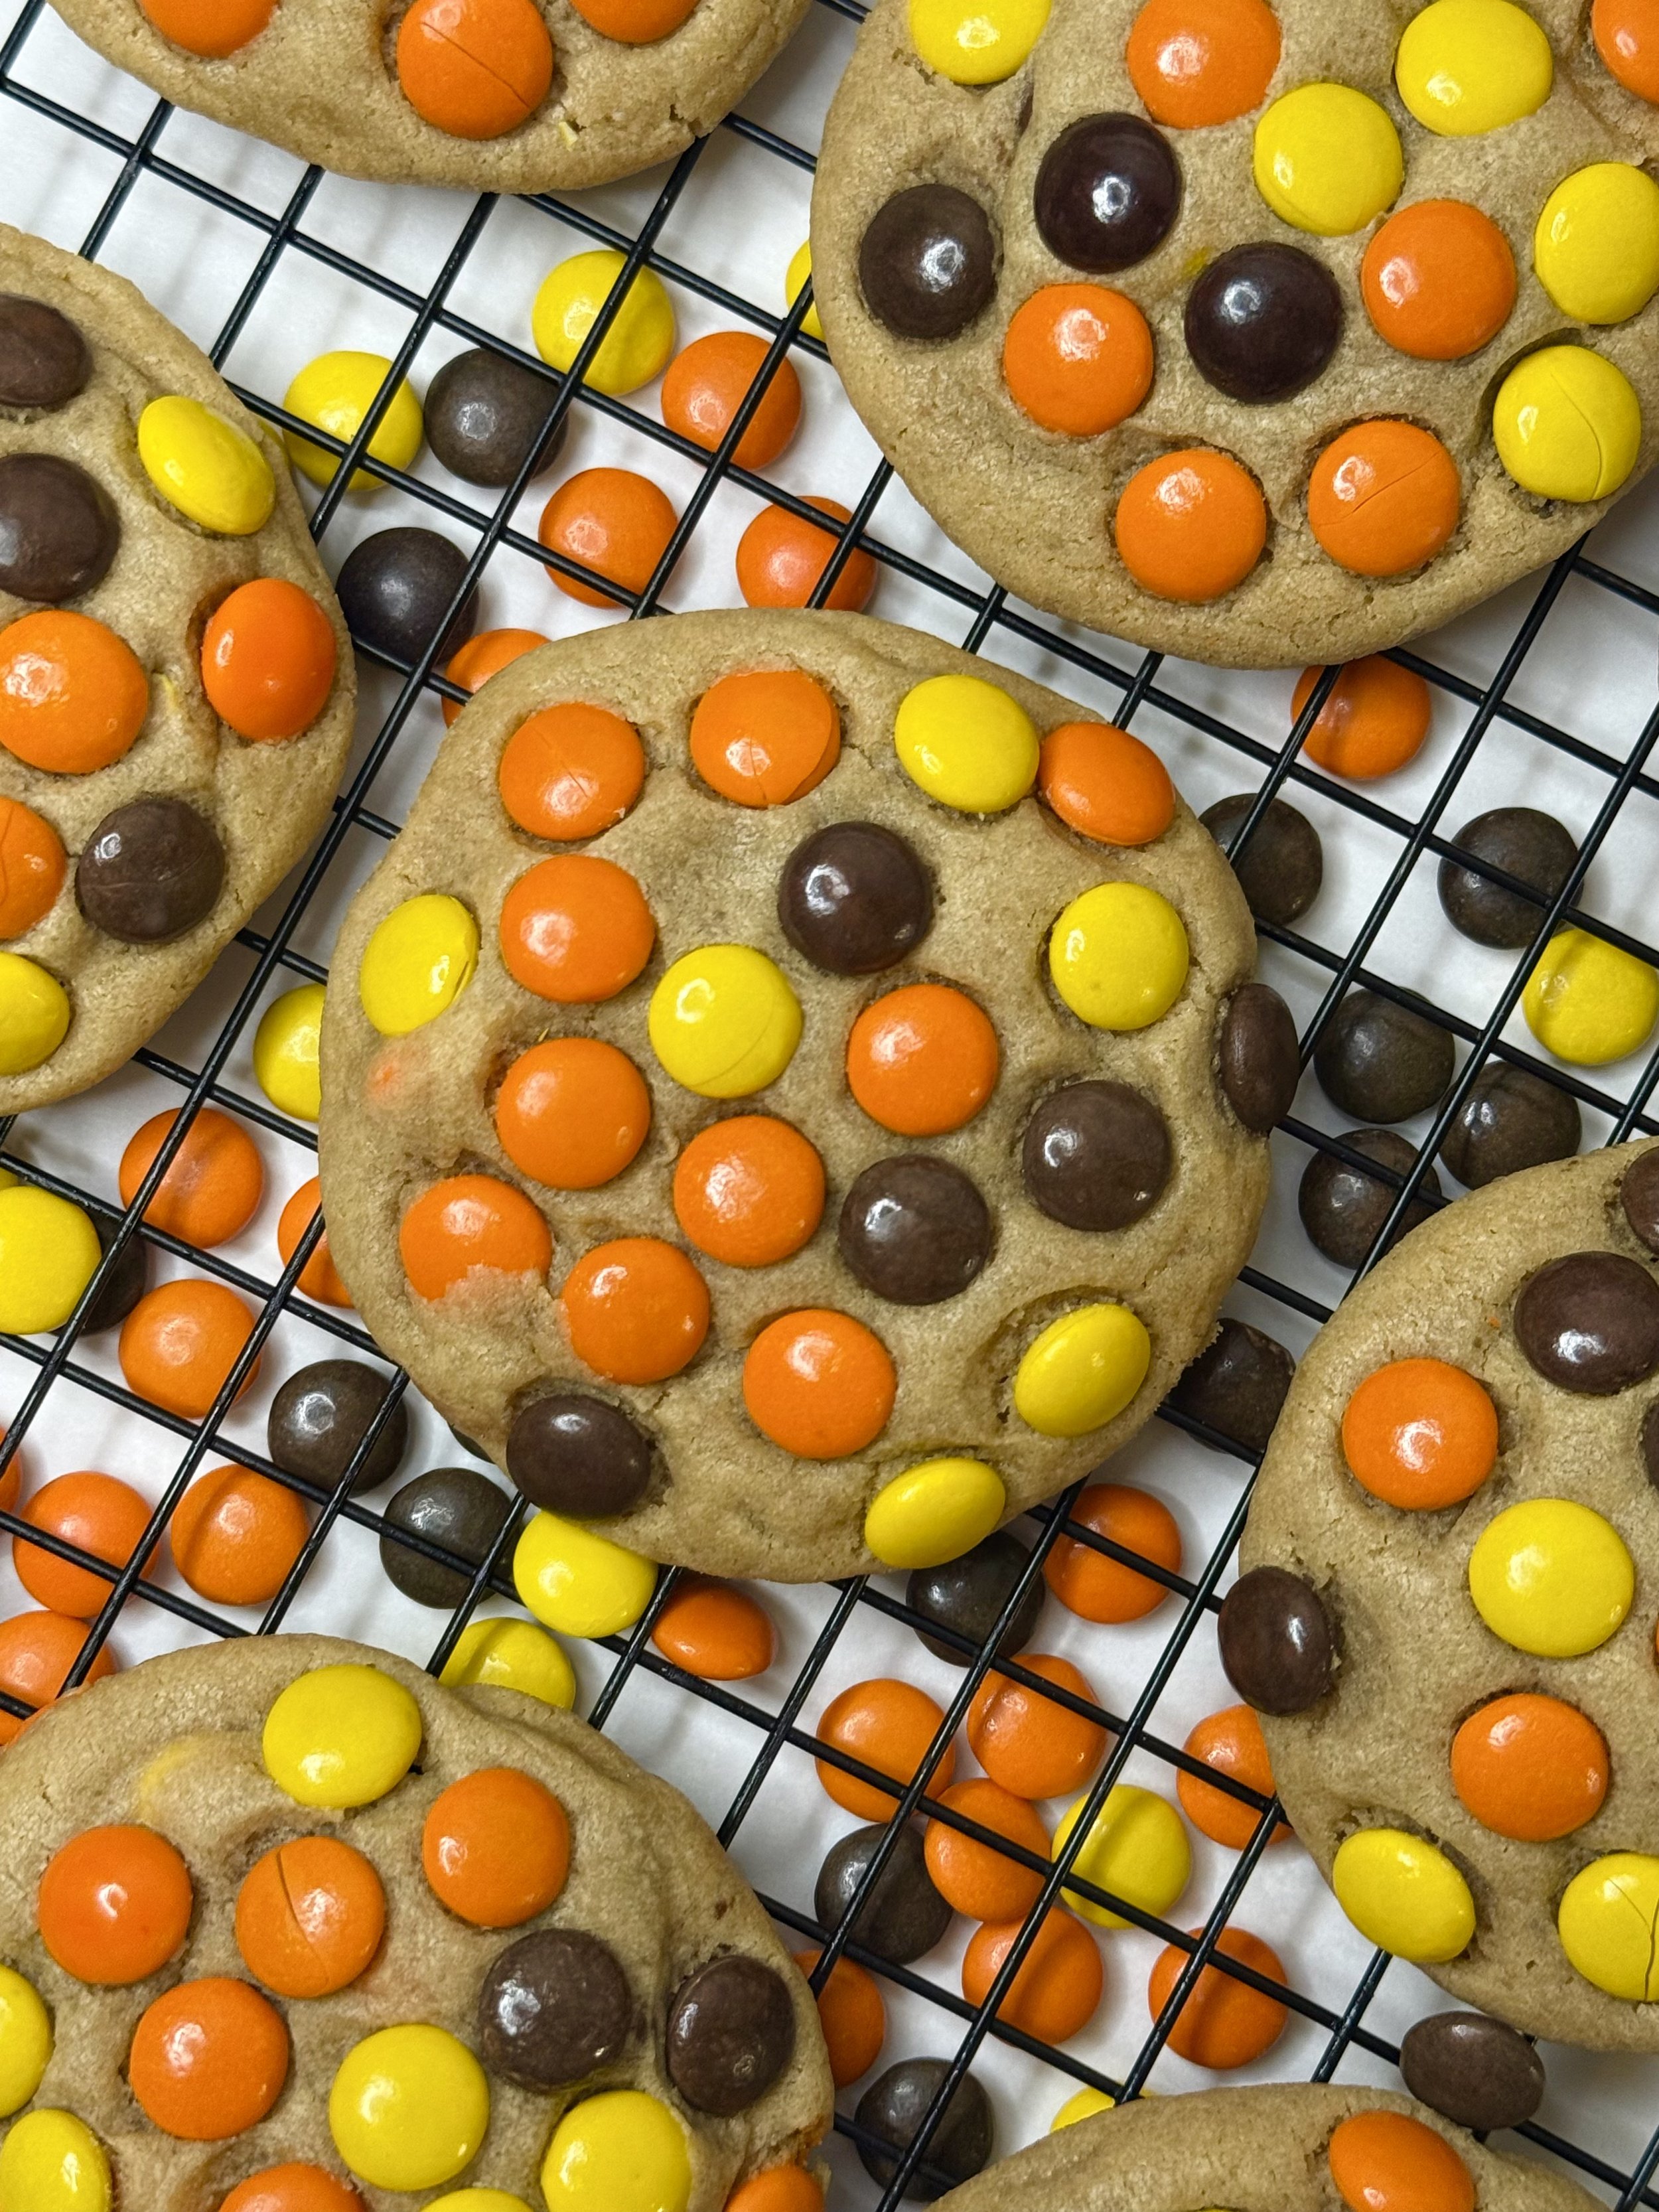
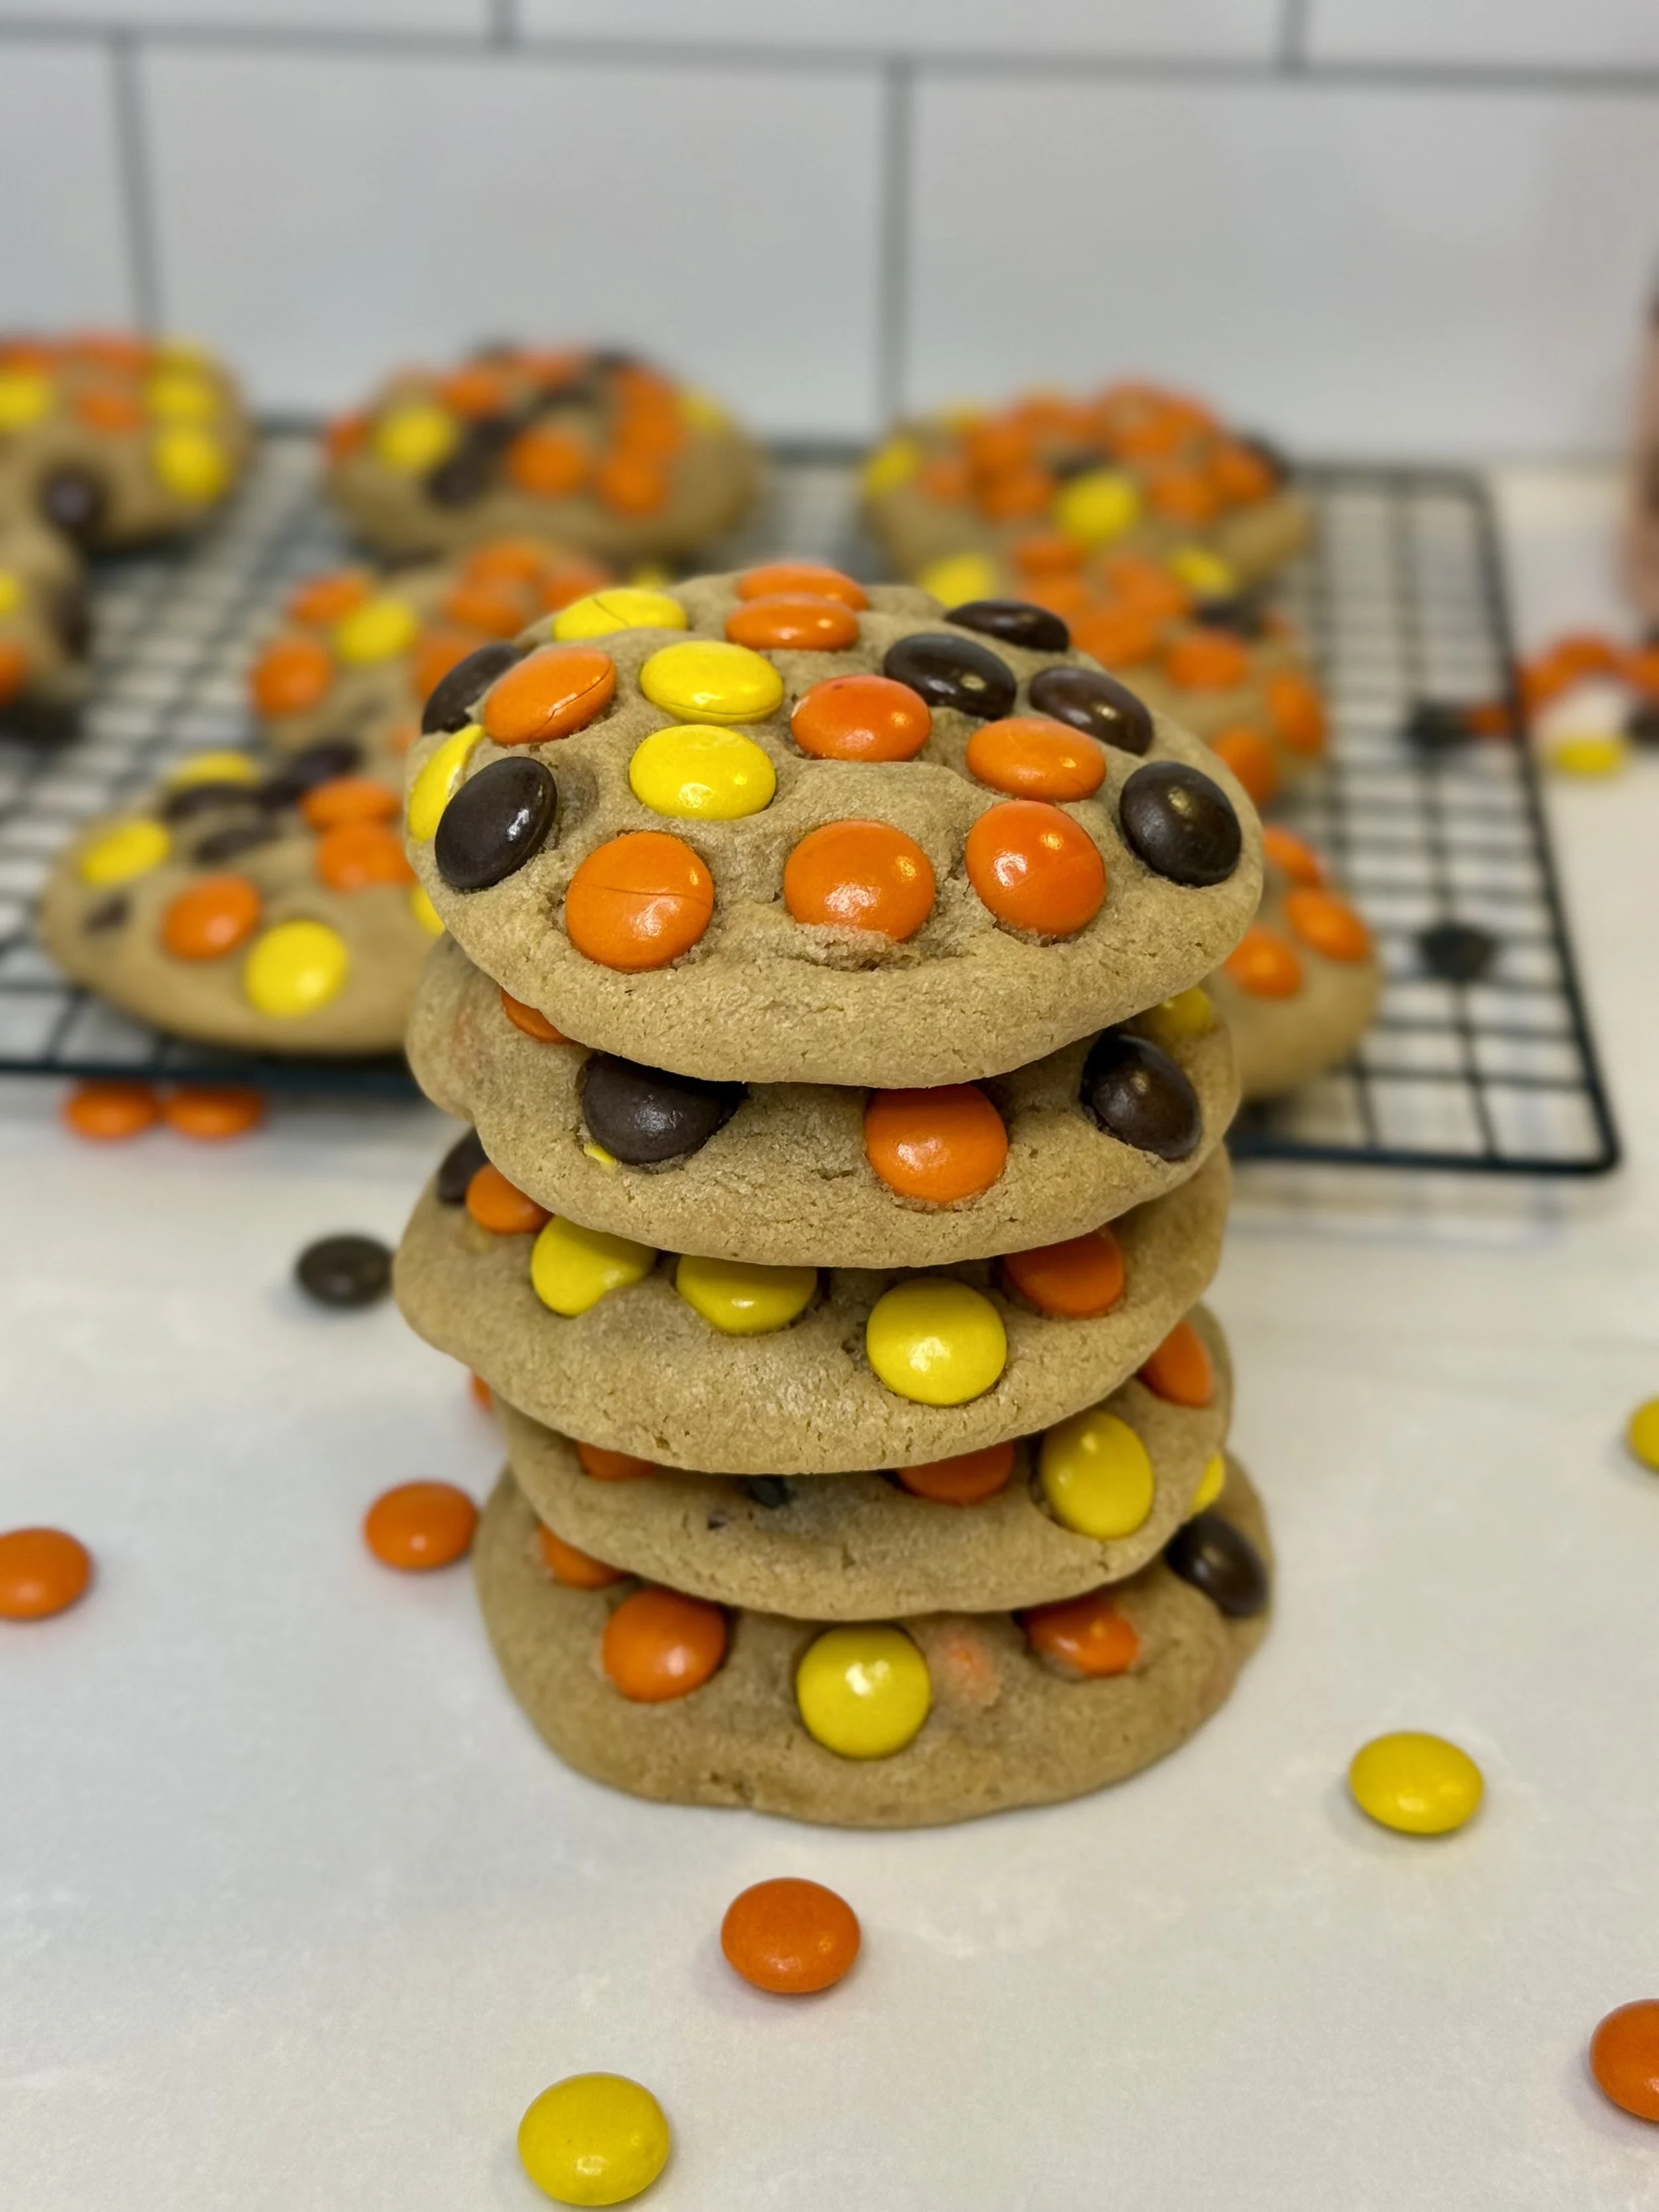
Reese’s Peanut Butter Cookies
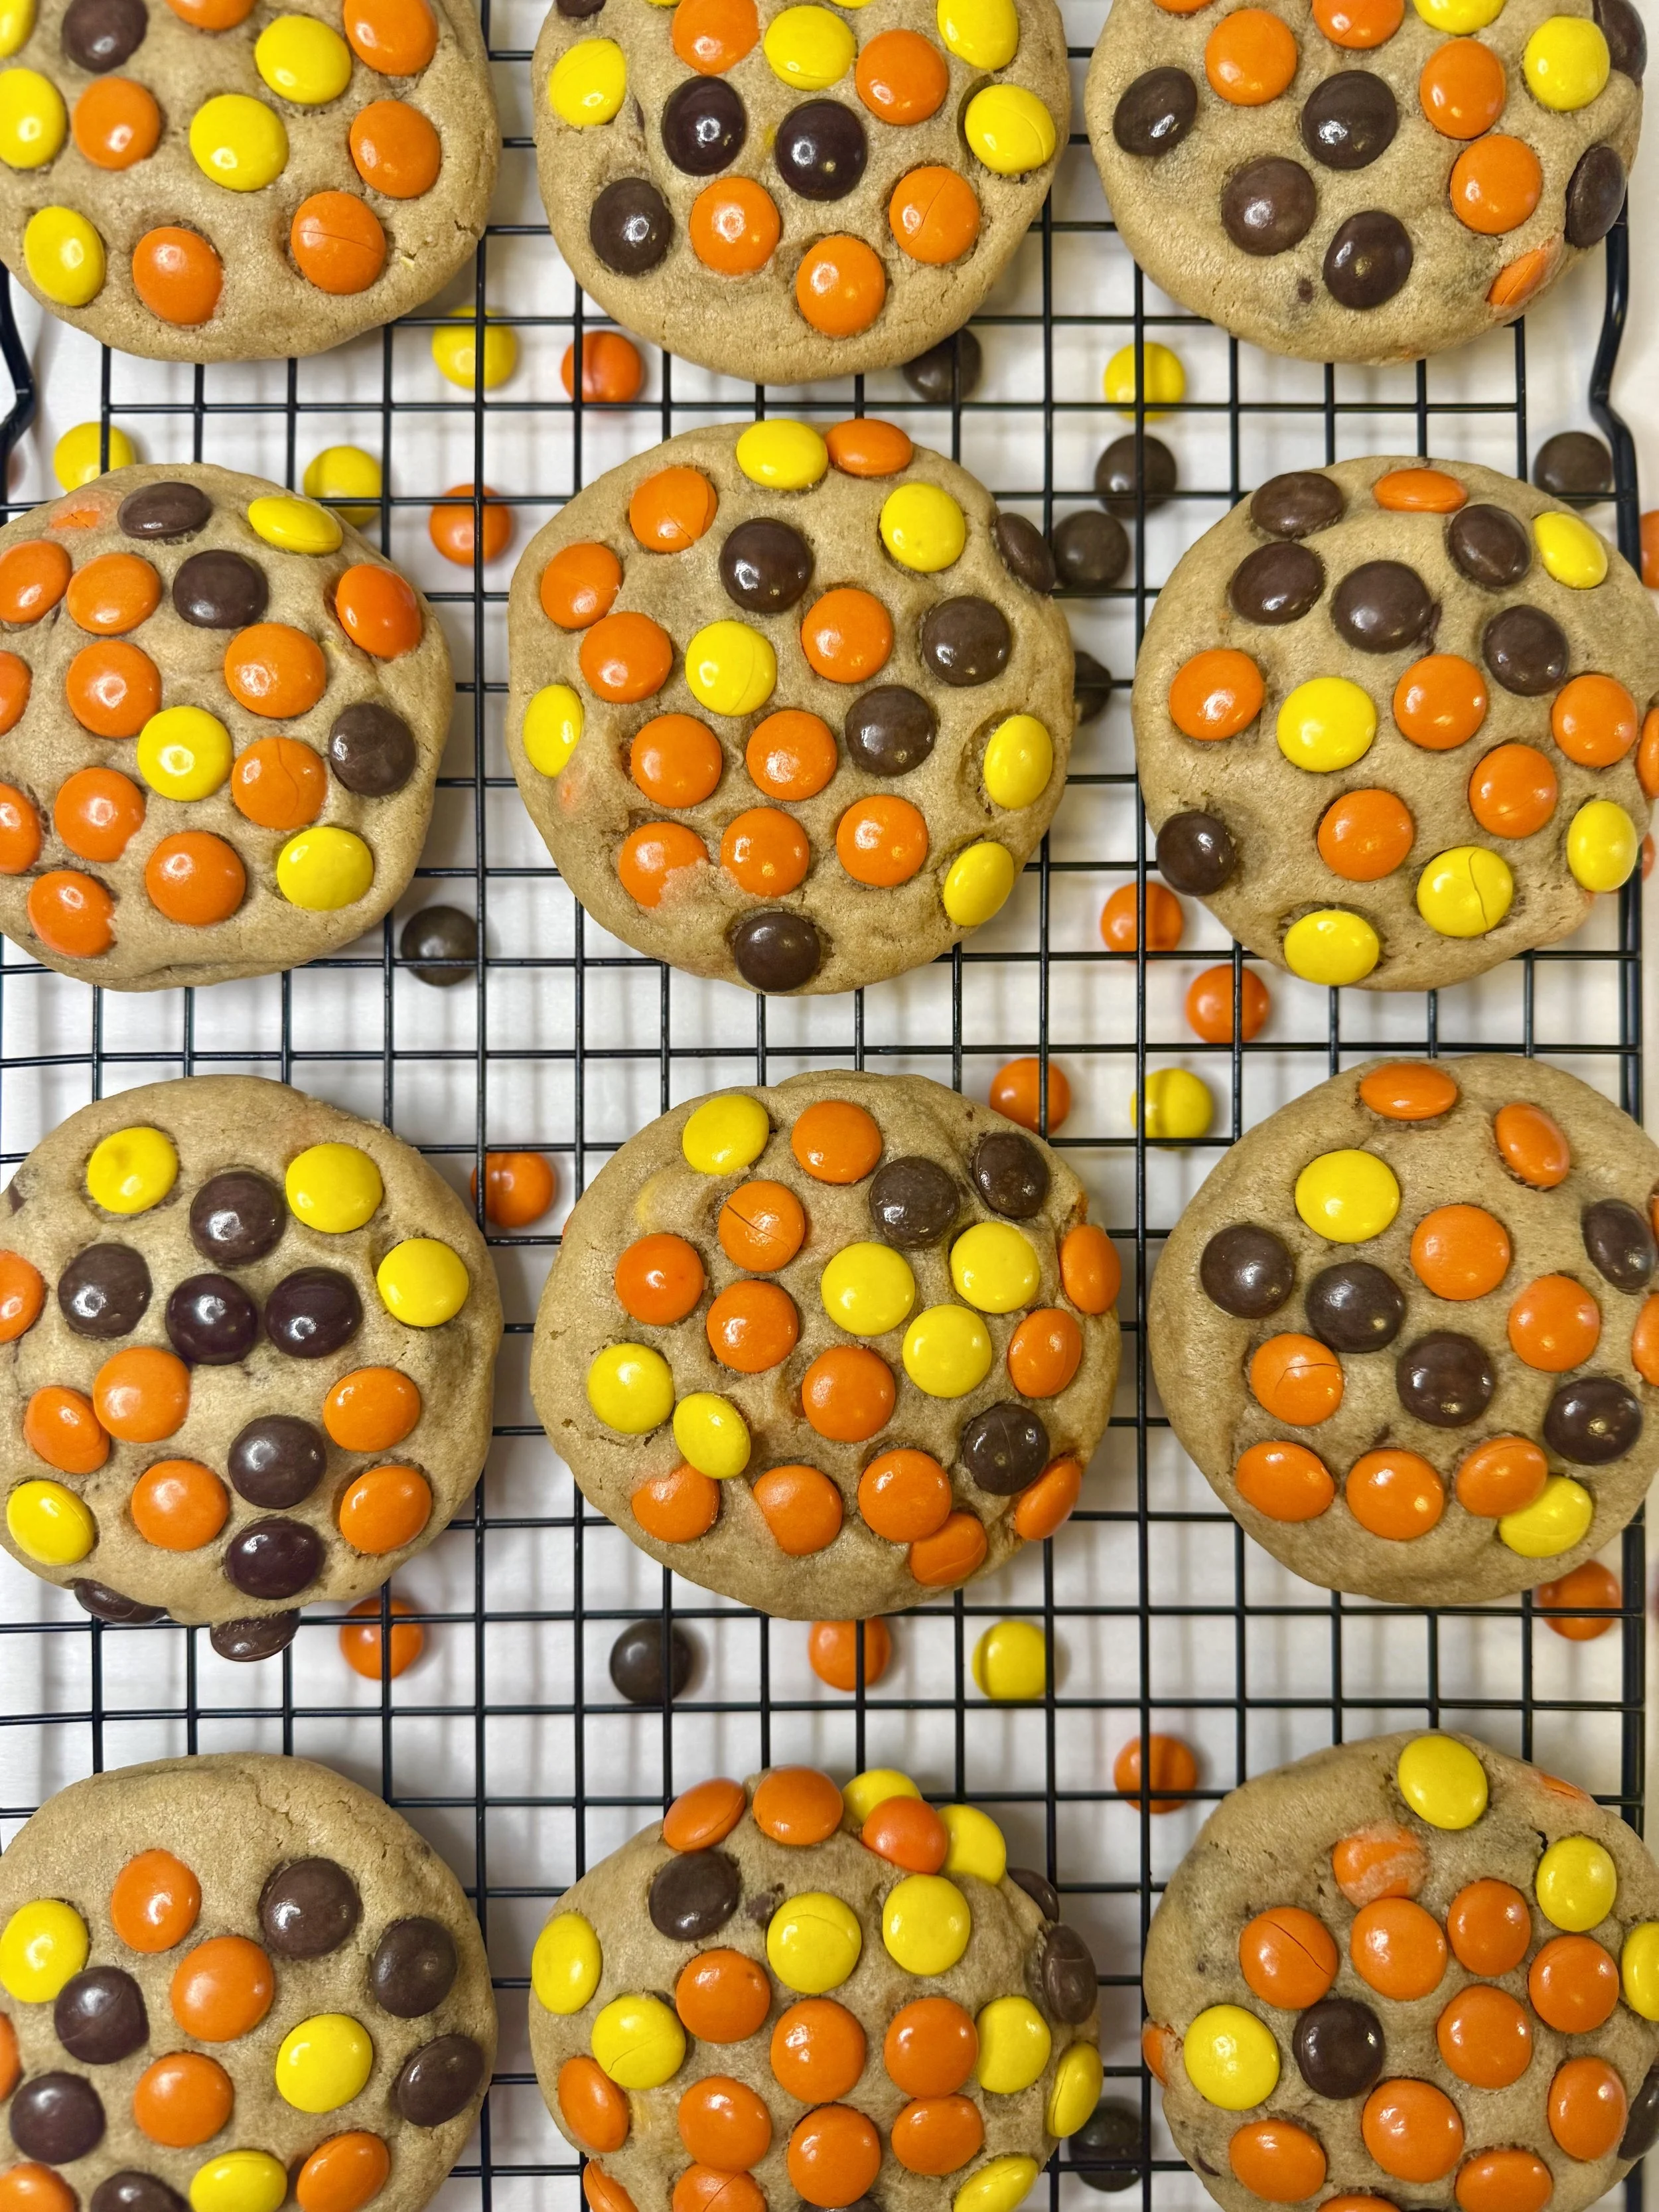
Thick, bakery-style peanut butter cookies loaded with Reese’s Pieces and chocolate chips, then rolled in extra Reese’s for a crunchy, candy-coated top. Golden on the edges, soft and gooey in the center, and perfect for peanut butter lovers.
Why You’ll Love This Recipe
Thick, bakery-style cookies every time
Packed with peanut butter flavor
Crispy Reese’s coating with soft, gooey centers
No fancy steps required
Instructions
1. Cream the butter & sugars
In a stand mixer fitted with the paddle attachment, beat the cold cubed butter, peanut butter, brown sugar, and granulated sugar on medium-high speed for 3–4 minutes, until light and fluffy.
2. Add the eggs & vanilla
Scrape down the sides of the bowl. Add the eggs and vanilla extract, mixing until just combined.

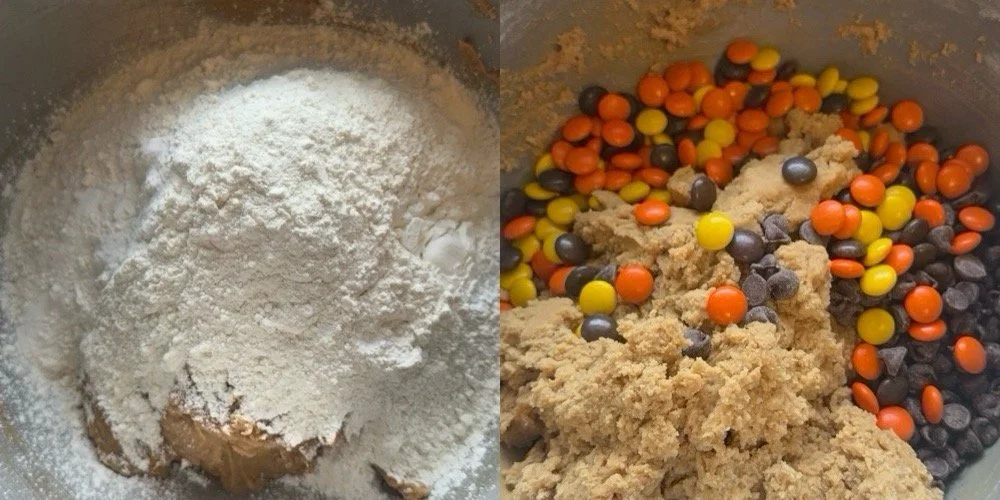
4. Combine
Add the dry ingredients to the stand mixer (cake flour, all-purpose flour, cornstarch, baking soda, and salt) and mix on low speed until just combined, with no streaks of flour remaining. Do not overmix; the dough will be thick.
5. Add the mix-ins
Gently mix in 1 cup of Reese’s Pieces and the chocolate chips until just combined.
6 . Scoop, roll & coat
Using a large cookie scoop, scoop the dough and roll it between your hands to form a ball. Dunk the top of each dough ball into the remaining 1 1/2 cups of Reese’s Pieces, coating the entire top.
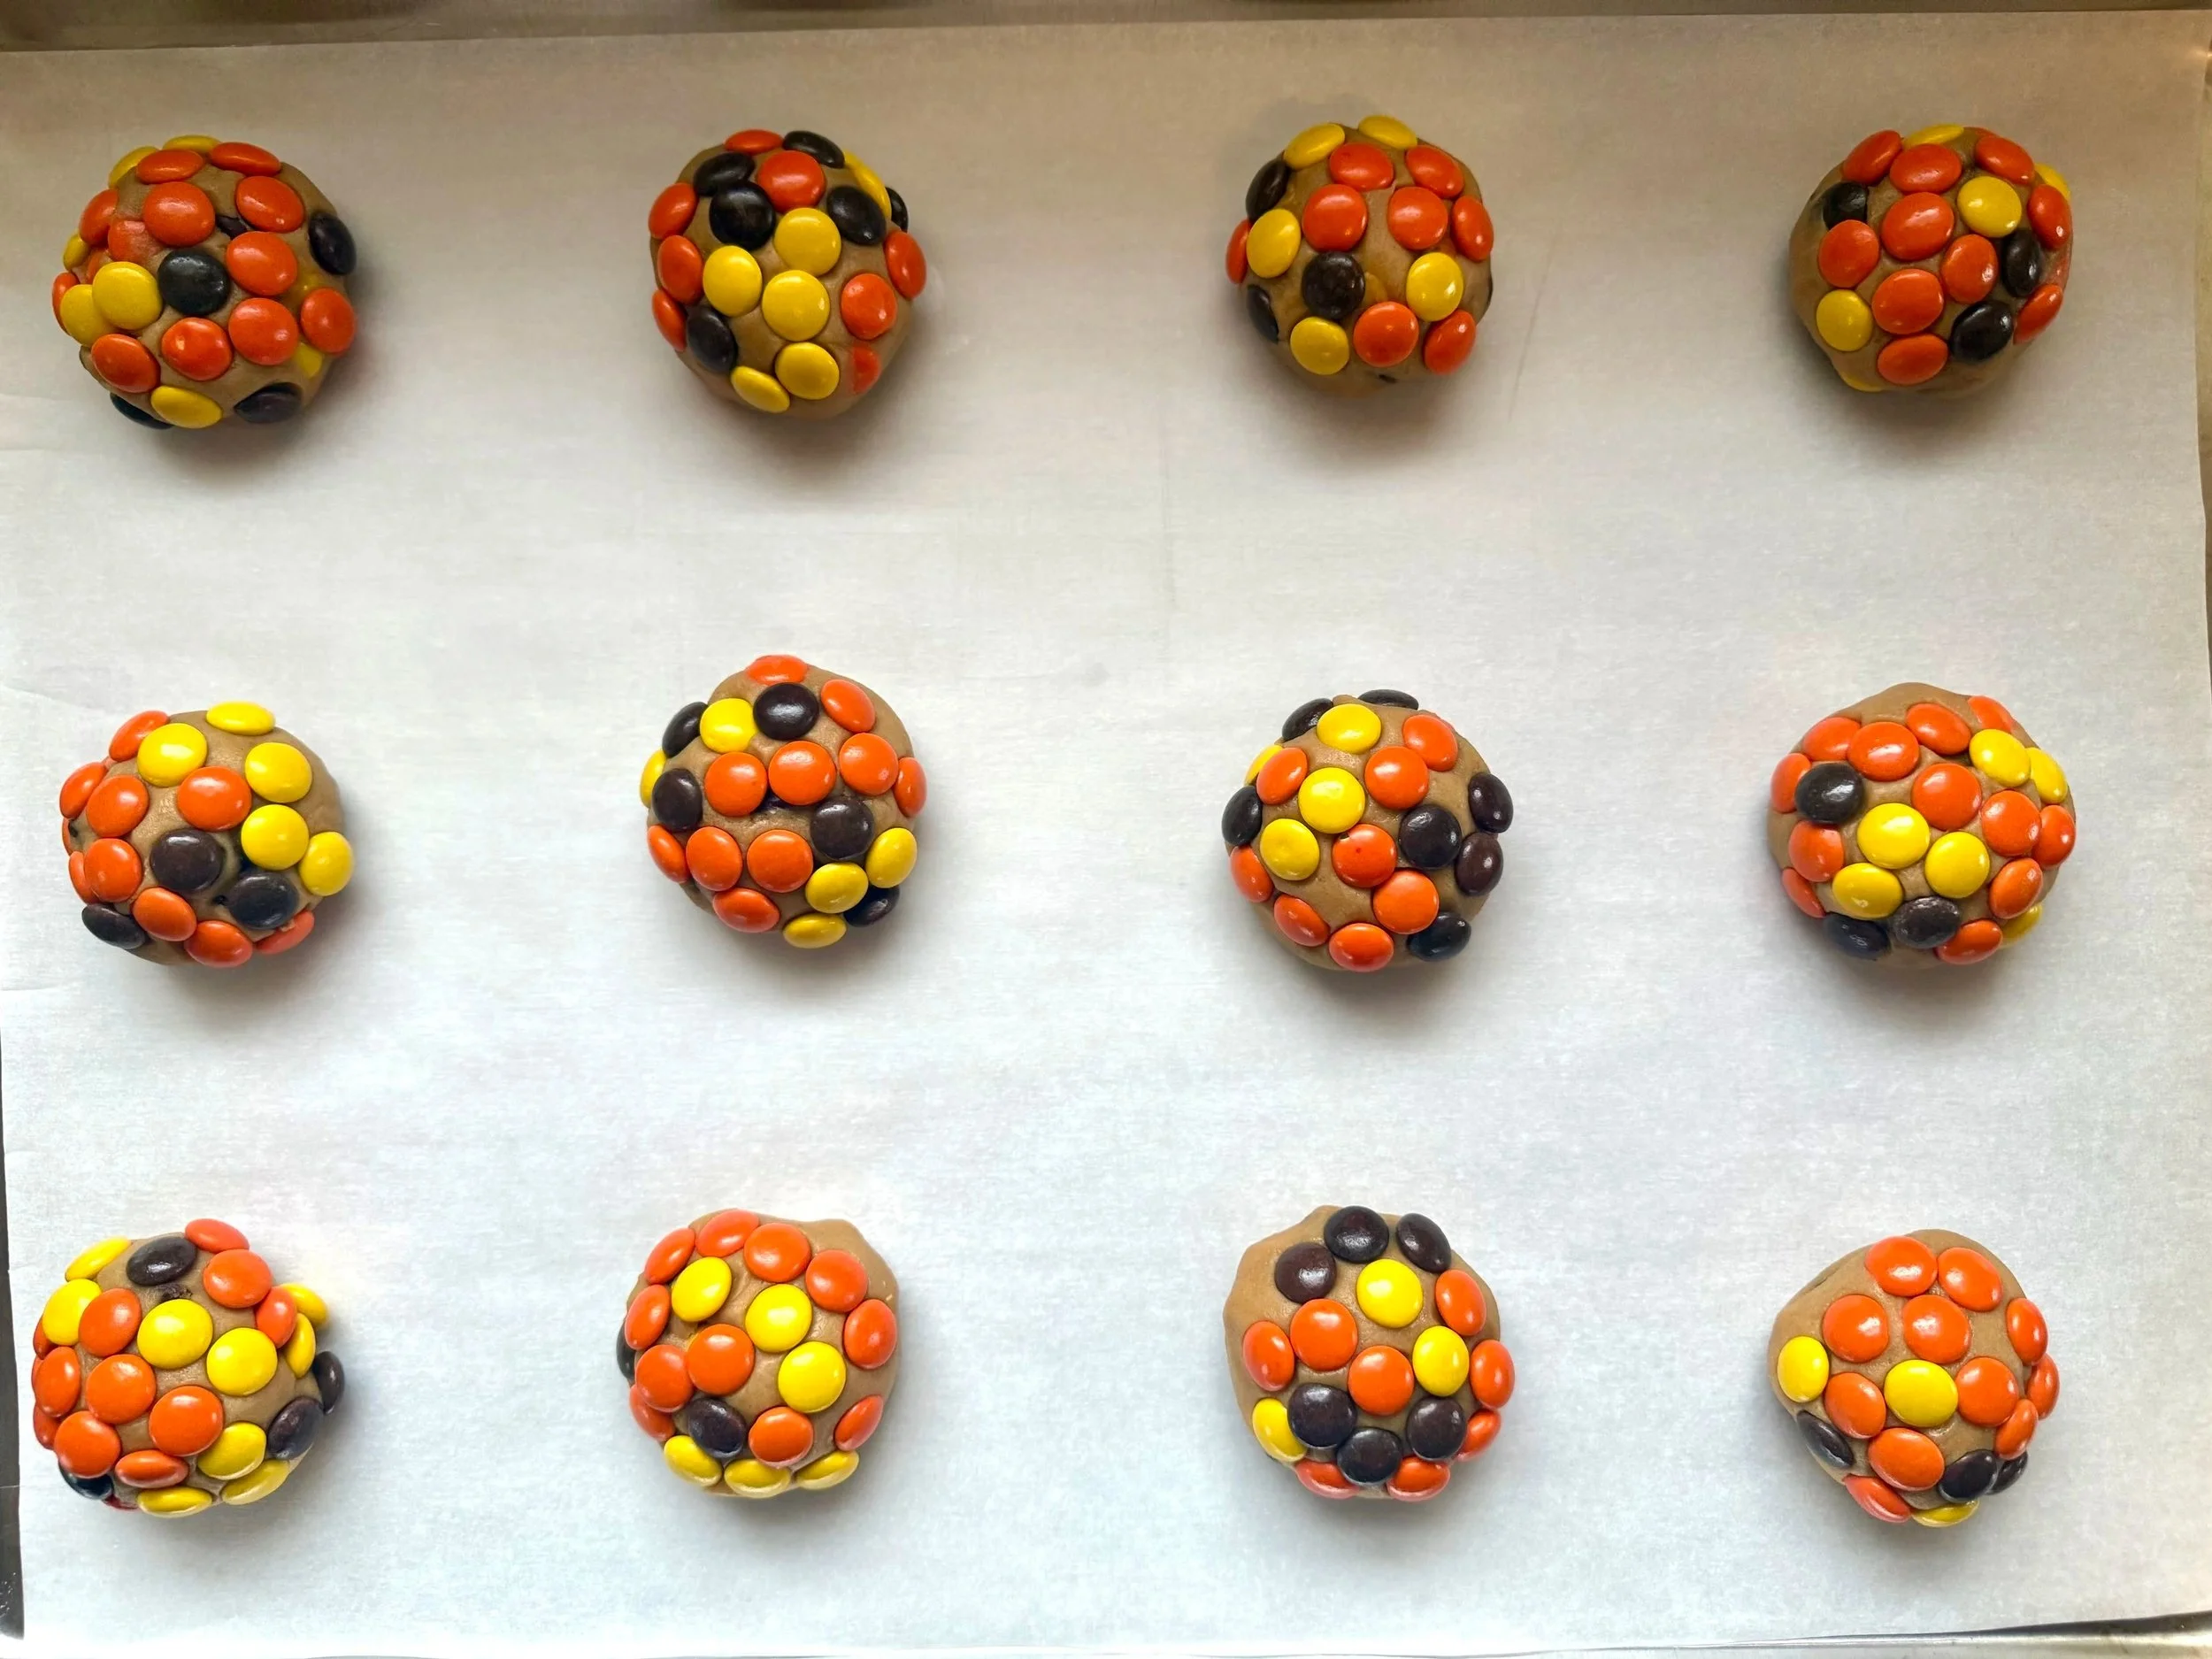
7. Chill
Place the dough balls 2 inches apart on a prepared baking sheet. Cover with plastic wrap and refrigerate for 30–60 minutes.
8. Bake
When ready to bake, preheat the oven to 350°F (177°C).
Bake for 14–16 minutes, until the edges are lightly golden and the centers look slightly underbaked.
9. Cool
Let the cookies cool on the baking sheet for at least 10 minutes before transferring. Enjoy warm or fully cooled.
Helpful Tips
Do I really need to chill the dough?
Yes. Chilling helps the cookies stay thick, prevents spreading, and reduces cracking in the Reese’s coating.Why use cold butter instead of room temperature butter?
Cold butter creates taller, bakery-style cookies and slows spreading, which is especially important with candy-coated dough.How do I know when the cookies are done?
The edges should look set and lightly golden while the centers still appear slightly underbaked. They will continue to firm up as they cool.Can I make the dough ahead of time?
Yes! The dough can be refrigerated for up to 48 hours. Let it sit at room temperature for about 10 minutes if it’s too firm to scoop.Can I freeze these cookies?
You can freeze the dough balls (before rolling in Reese’s Pieces) for up to 2 months. Roll in Reese’s Pieces and bake from chilled, adding 1–2 extra minutes.Why did my Reese’s coating crack?
Cracking usually means the oven was too hot, the cookies baked too long, or the dough wasn’t chilled enough before baking.Can I use a smaller cookie scoop?
Yes, just reduce the bake time to about 10–12 minutes and watch closely.
Storing These Cookies
Store baked cookies in an airtight container at room temperature for up to 3 days. For longer storage, freeze the cookies in a sealed container for up to 2 months and thaw at room temperature before serving.
Craving more peanut butter recipes?
If you make these cookies, I’d love to hear what you think! Leave a comment below and let me know how they turned out. 😊

Reese's Peanut Butter Cookies
Thick, bakery-style peanut butter cookies loaded with Reese’s Pieces, chocolate chips, and dunked in extra Reese’s for a sweet, crunchy coating. Baked until golden on the edges with soft, gooey centers in every bite.
Ingredients
- 1 cup cold salted butter (2 sticks), cut into cubes
- 1 cup brown sugar
- 1/2 cup sugar
- 1/2 cup creamy peanut butter
- 2 eggs
- 1 tbsp vanilla extract
- 1 1/2 cup cake flour
- 1 1/2 cups all-purpose flour
- 1.5 tsp cornstarch
- 3/4 teaspoon baking soda
- 3/4 tsp salt
- 1/2 cup chocolate chips
- 2 1/2 cups of Reese's pieces. (1 cup for filling and 1.5 cups for rolling).
Instructions

Chewy Sprinkle Sugar Cookies
Chewy Sprinkle Sugar Cookies
If you’re looking for the perfect chewy sprinkle sugar cookie, this is the recipe you’ll come back to again and again. These cookies are soft in the center, lightly crisp on the edges, and rolled in sugar for that classic bakery-style finish. Finished with colorful sprinkles, they’re festive, nostalgic, and perfect for birthdays, holidays, or just because 🍪✨
What makes these cookies truly special is their chewy texture, thanks to a balance of butter, cornstarch, and careful baking. They’re easy enough for beginner bakers but impressive enough to share.
Why You’ll Love These Cookies
Soft and chewy centers with lightly crinkled edges
No chilling required
Simple pantry ingredients
Fun, colorful sprinkles in every bite
Perfect for make-ahead baking or freezing
Ingredients
Butter
Granulated sugar
Egg
Vanilla
All-purpose flour
Baking soda
Baking powder
Cornstarch
Salt
Sprinkles
How to Make Chewy Sprinkle Sugar Cookies
1. Prep the Oven
Preheat your oven to 350°F (175°C) and line baking sheets with parchment paper.
2. Cream the Butter and Sugar
In a stand mixer fitted with the paddle attachment, beat the softened butter and 1 ¼ cups sugar on medium-high speed for about 2 minutes, until light, fluffy, and pale in color.
This step is key for soft, chewy cookies; don’t rush it.
3. Add the Wet Ingredients
Scrape down the sides of the bowl, then add the egg and vanilla extract. Mix until fully combined and smooth.
4. Combine the Dry Ingredients
In a separate bowl, whisk together the flour, baking soda, baking powder, cornstarch, and salt.
5. Bring the Dough Together
Add the dry ingredients to the wet ingredients and mix on low speed until just combined and no streaks of flour remain.
The dough should be soft and thick, not sticky or crumbly.
6. Fold in the Sprinkles
Gently mix in the sprinkles until evenly distributed throughout the dough.
7. Scoop and Roll
Using a medium cookie scoop or about 2 tablespoons of dough per cookie, roll the dough into balls. Roll each ball in the remaining ½ cup of granulated sugar.
Place cookies 2 inches apart on the prepared baking sheets.
8. Bake
Bake for 12–14 minutes, until the cookies have puffed up and the edges are set and lightly crinkled.
The centers should still look slightly underbaked—this is what keeps them chewy.
9. Cool
Let the cookies cool on the baking sheet for 5 minutes, then transfer to a wire rack to cool completely.
Tips for Perfect Chewy Sugar Cookies
Room temperature butter matters: Too cold won’t cream properly; too soft can cause spreading.
Don’t overmix after adding the flour. Overmixing leads to dense cookies.
Watch the bake time closely: Pull them out while the centers still look soft. They’ll finish setting as they cool.
Use Jimmy-style sprinkles if possible; nonpareils can bleed color into the dough.
Troubleshooting
Cookies spread too much
Butter may have been too soft. Let the dough rest for 10 minutes before baking.
Cookies too cakey
Too much flour or overmixing can cause this. Spoon and level your flour for accuracy.
Cookies not chewy enough
They may be overbaked. Reduce bake time by 1–2 minutes next batch.
Storage & Make-Ahead Tips
Store baked cookies in an airtight container at room temperature for up to 4 days.
Cookie dough balls can be frozen (before rolling in sugar) for up to 2 months. Bake from frozen, adding 1–2 minutes to the bake time.
Leave a comment below or tag me on socials to show me your bakes! Happy Baking 😊

Chewy Sprinkle Sugar Cookies
Sugar cookies are soft, buttery treats with a sweet, vanilla flavor and a delicate, crisp edge. They have a smooth, slightly chewy texture, making them a simple yet delicious snack.
Ingredients
- 1 cup salted butter (2 sticks) (softened at room temperature)
- 1 ¼ cup sugar (plus an extra 1/2 cup for rolling)
- 1 egg (room temperature)
- 1 tbsp vanilla extract
- 2 ½ cups all-purpose flour
- 1/2 tsp baking soda
- 1/2 tsp baking powder
- 1 tsp cornstarch
- 1/4 tsp salt
- 1 cup of sprinkles
Instructions
Christmas Sprinkle Cookies

Chunky Christmas Sprinkle Cookies
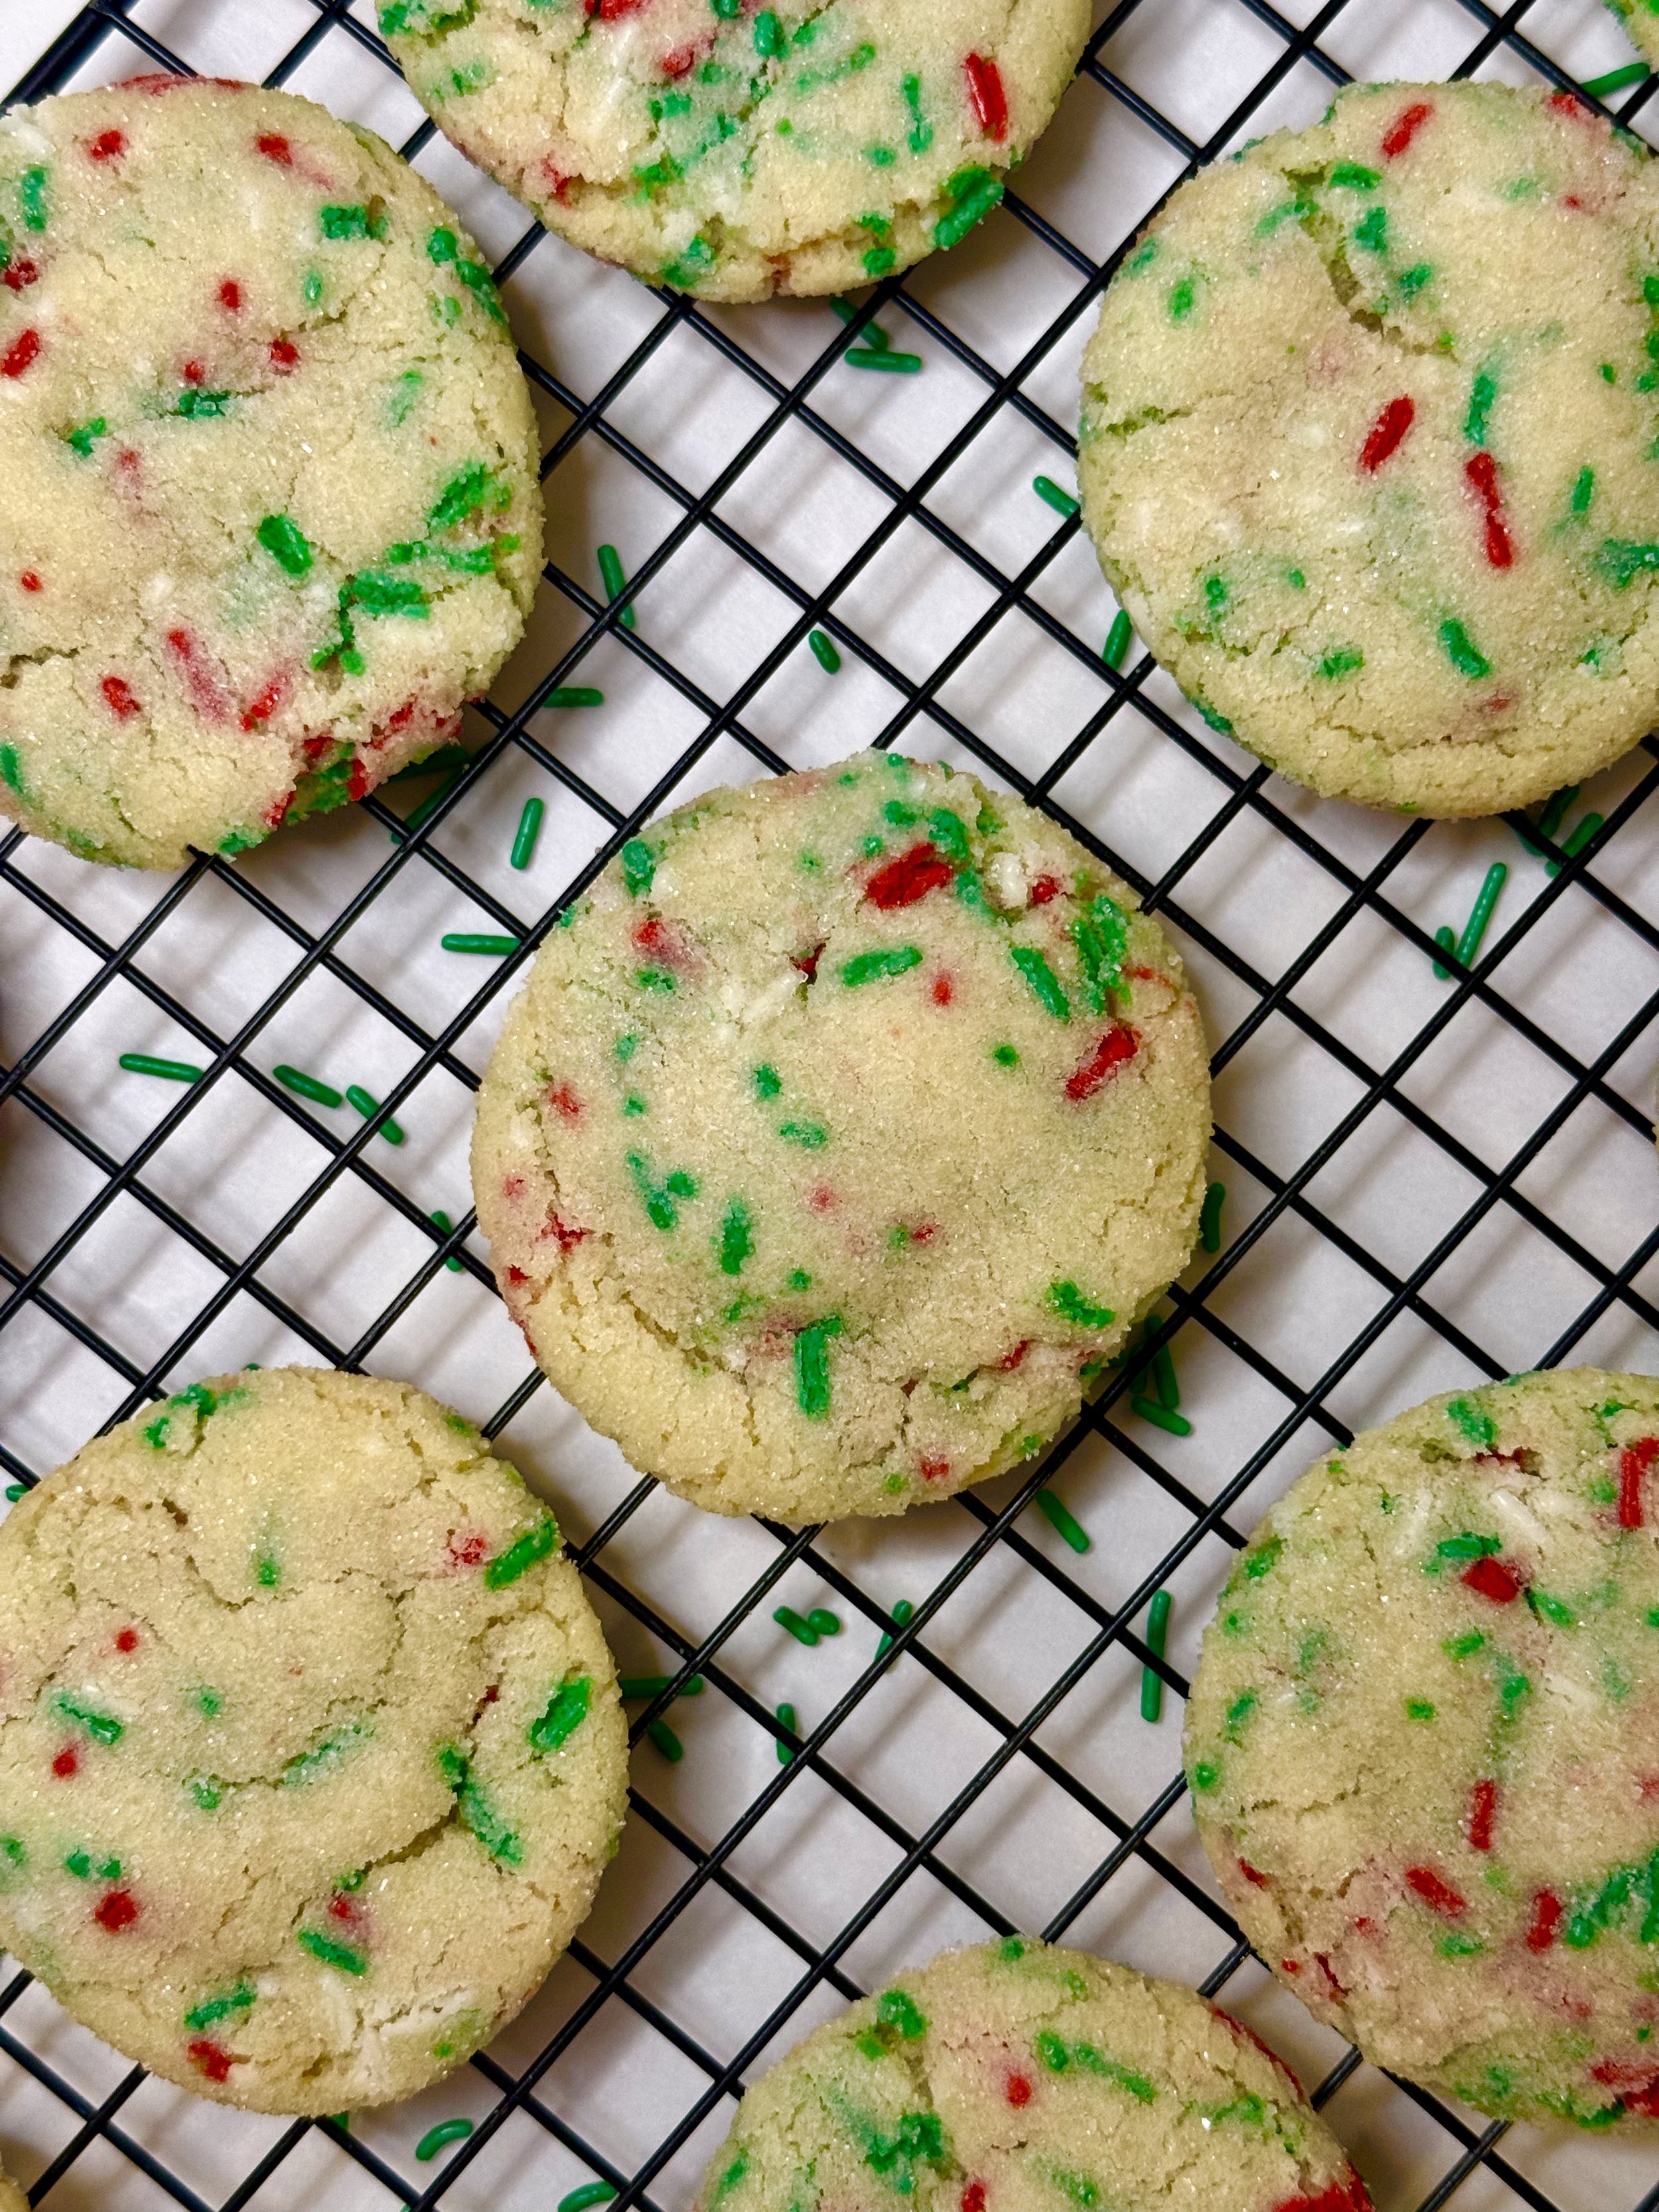
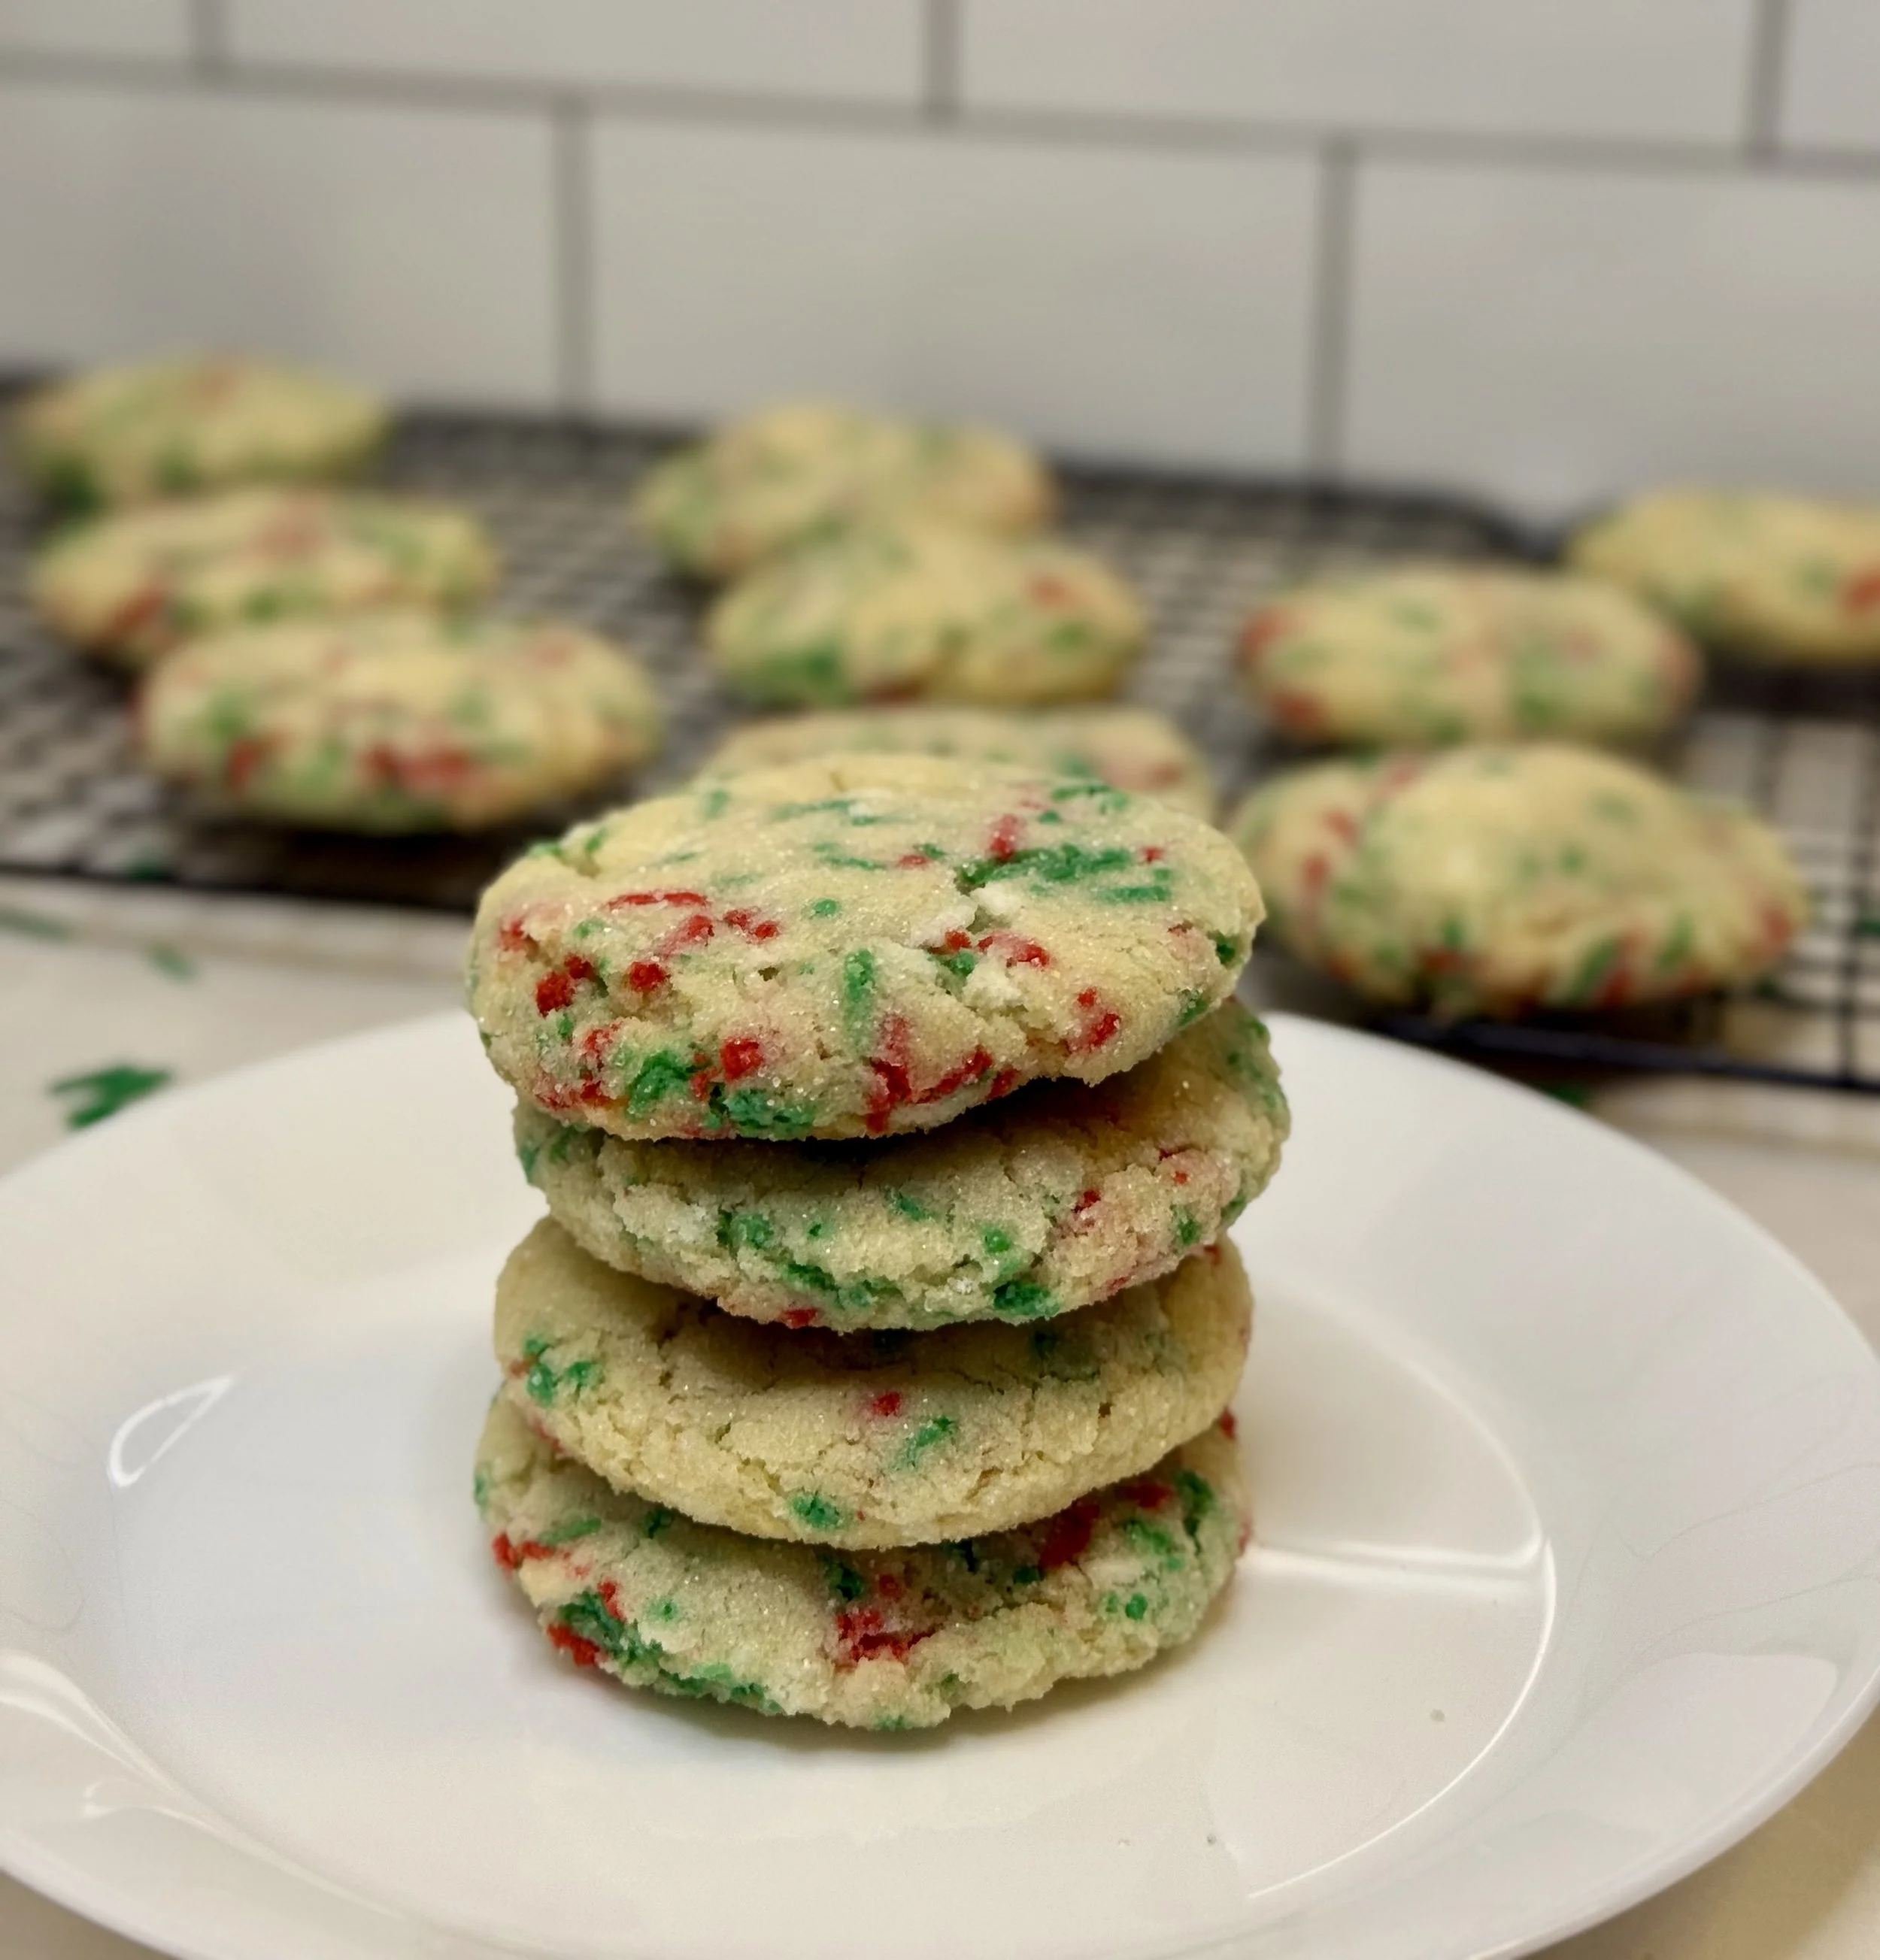
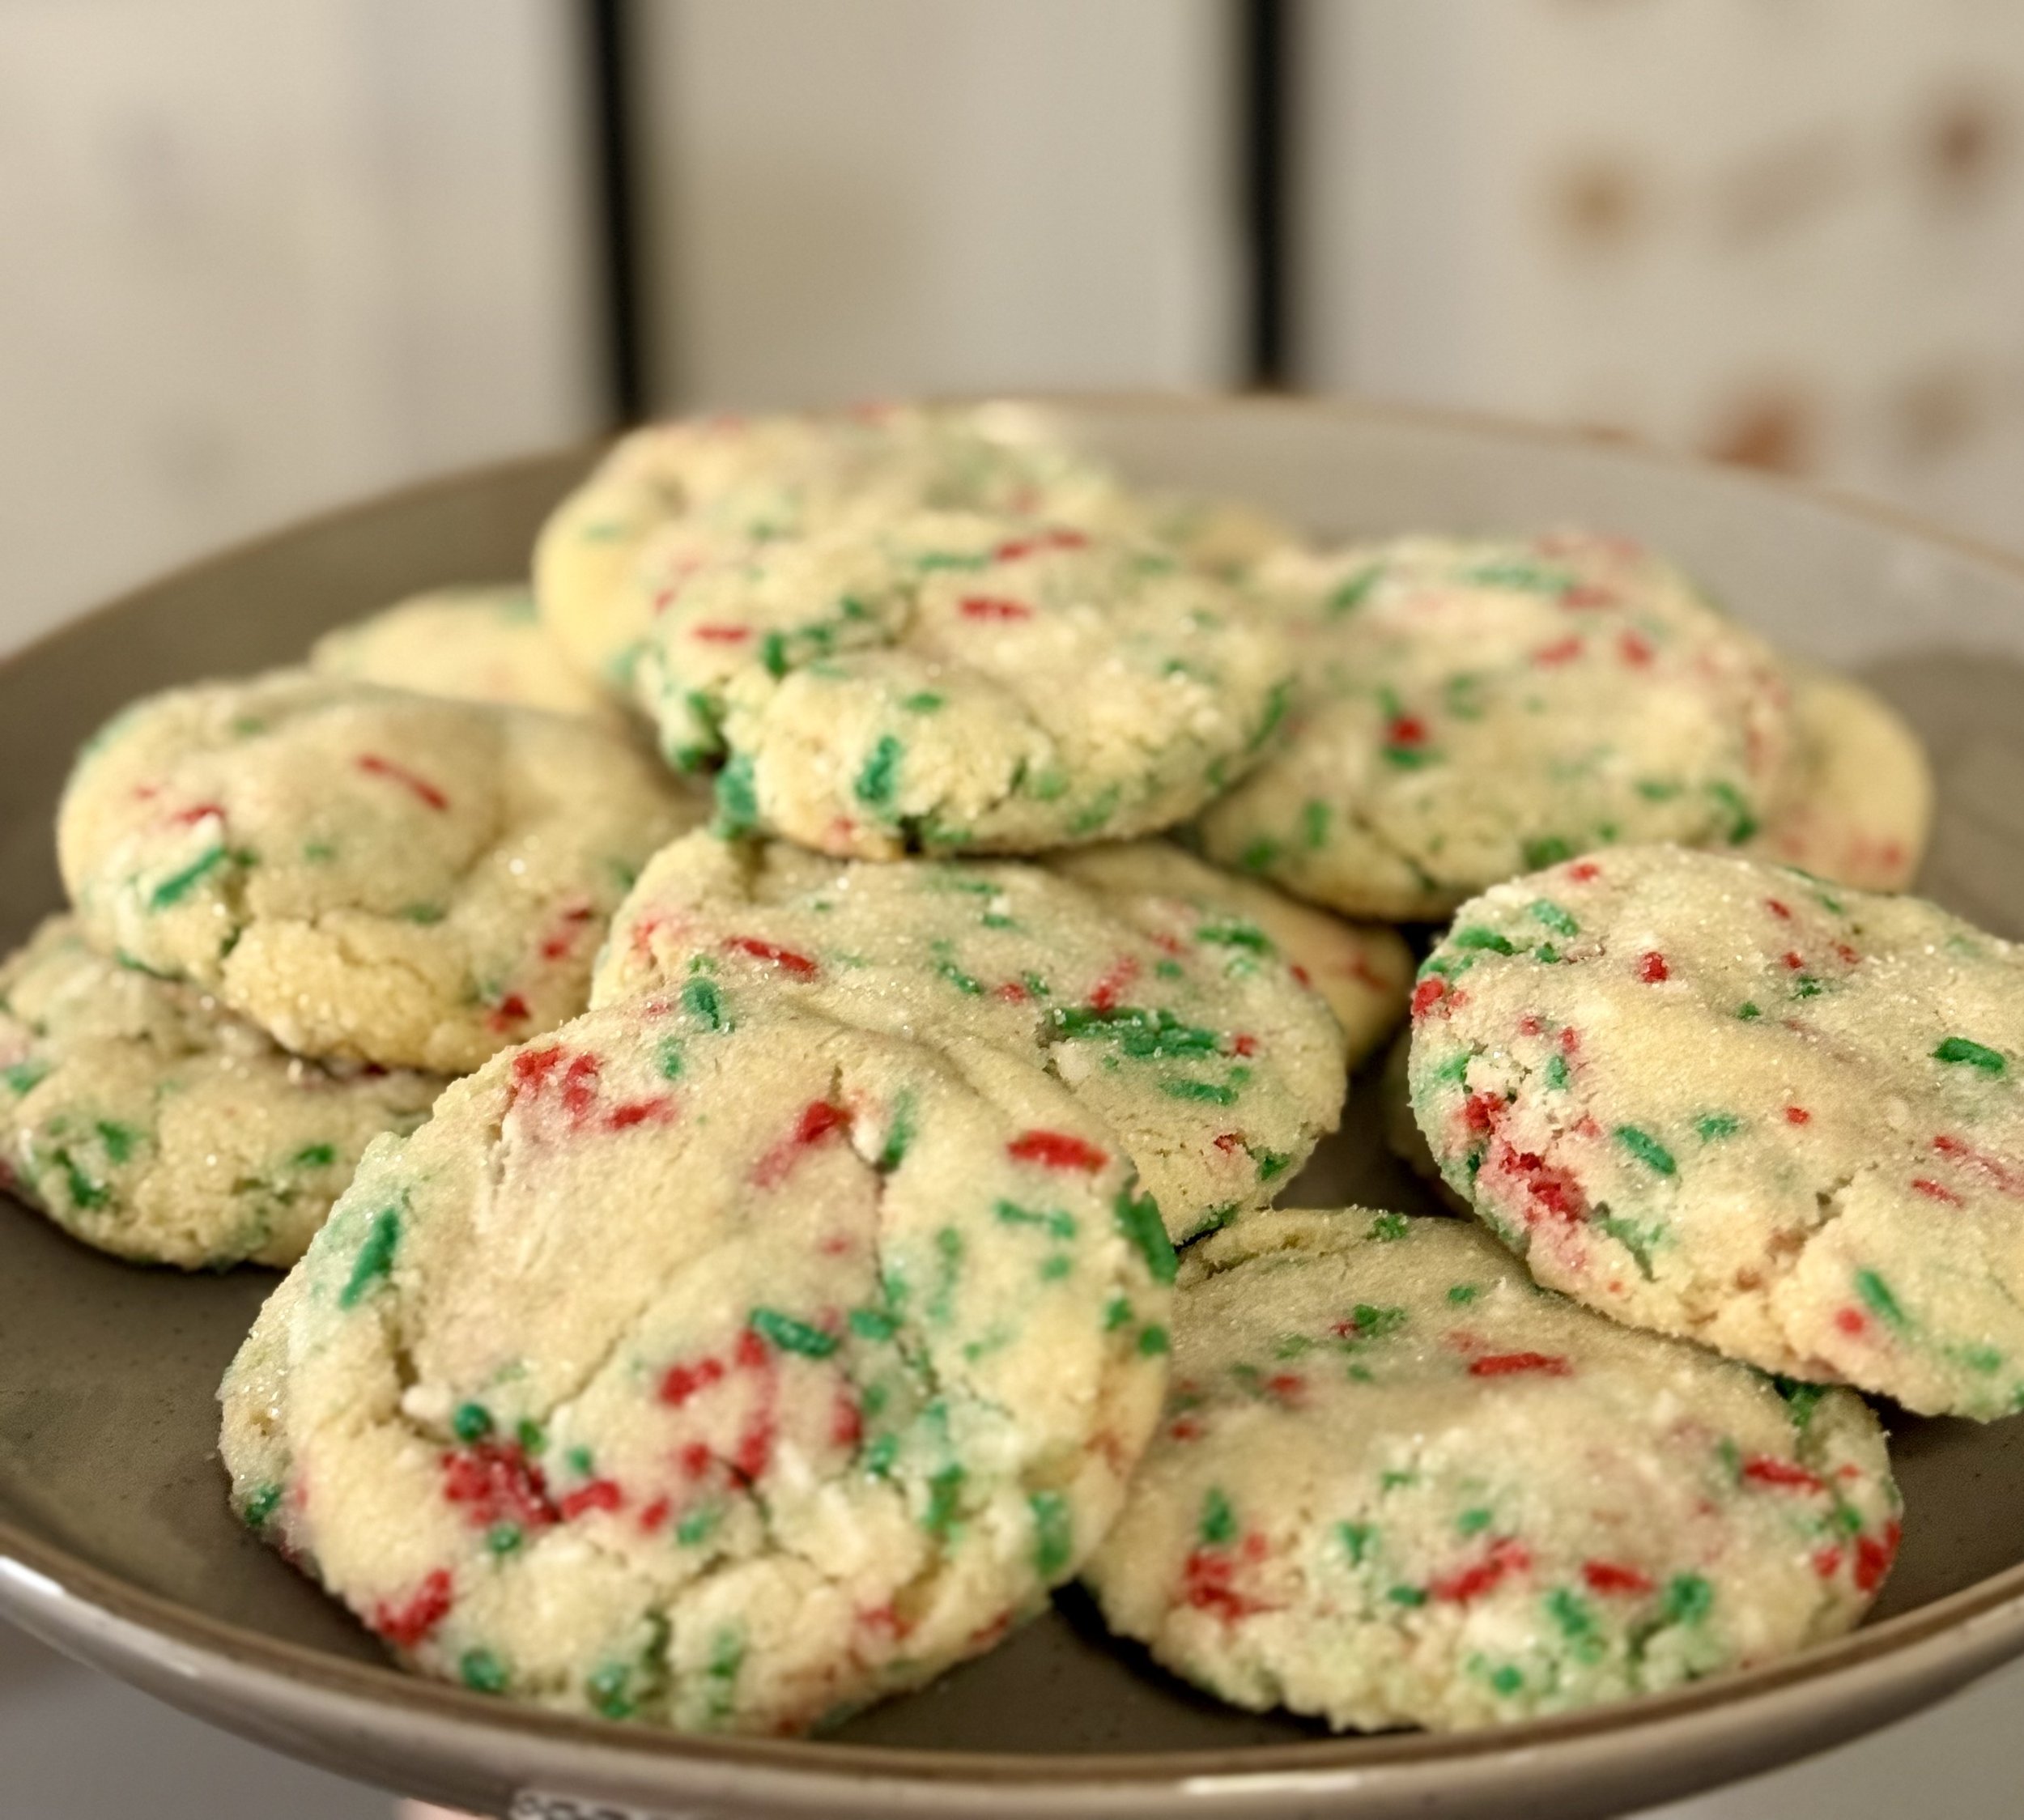
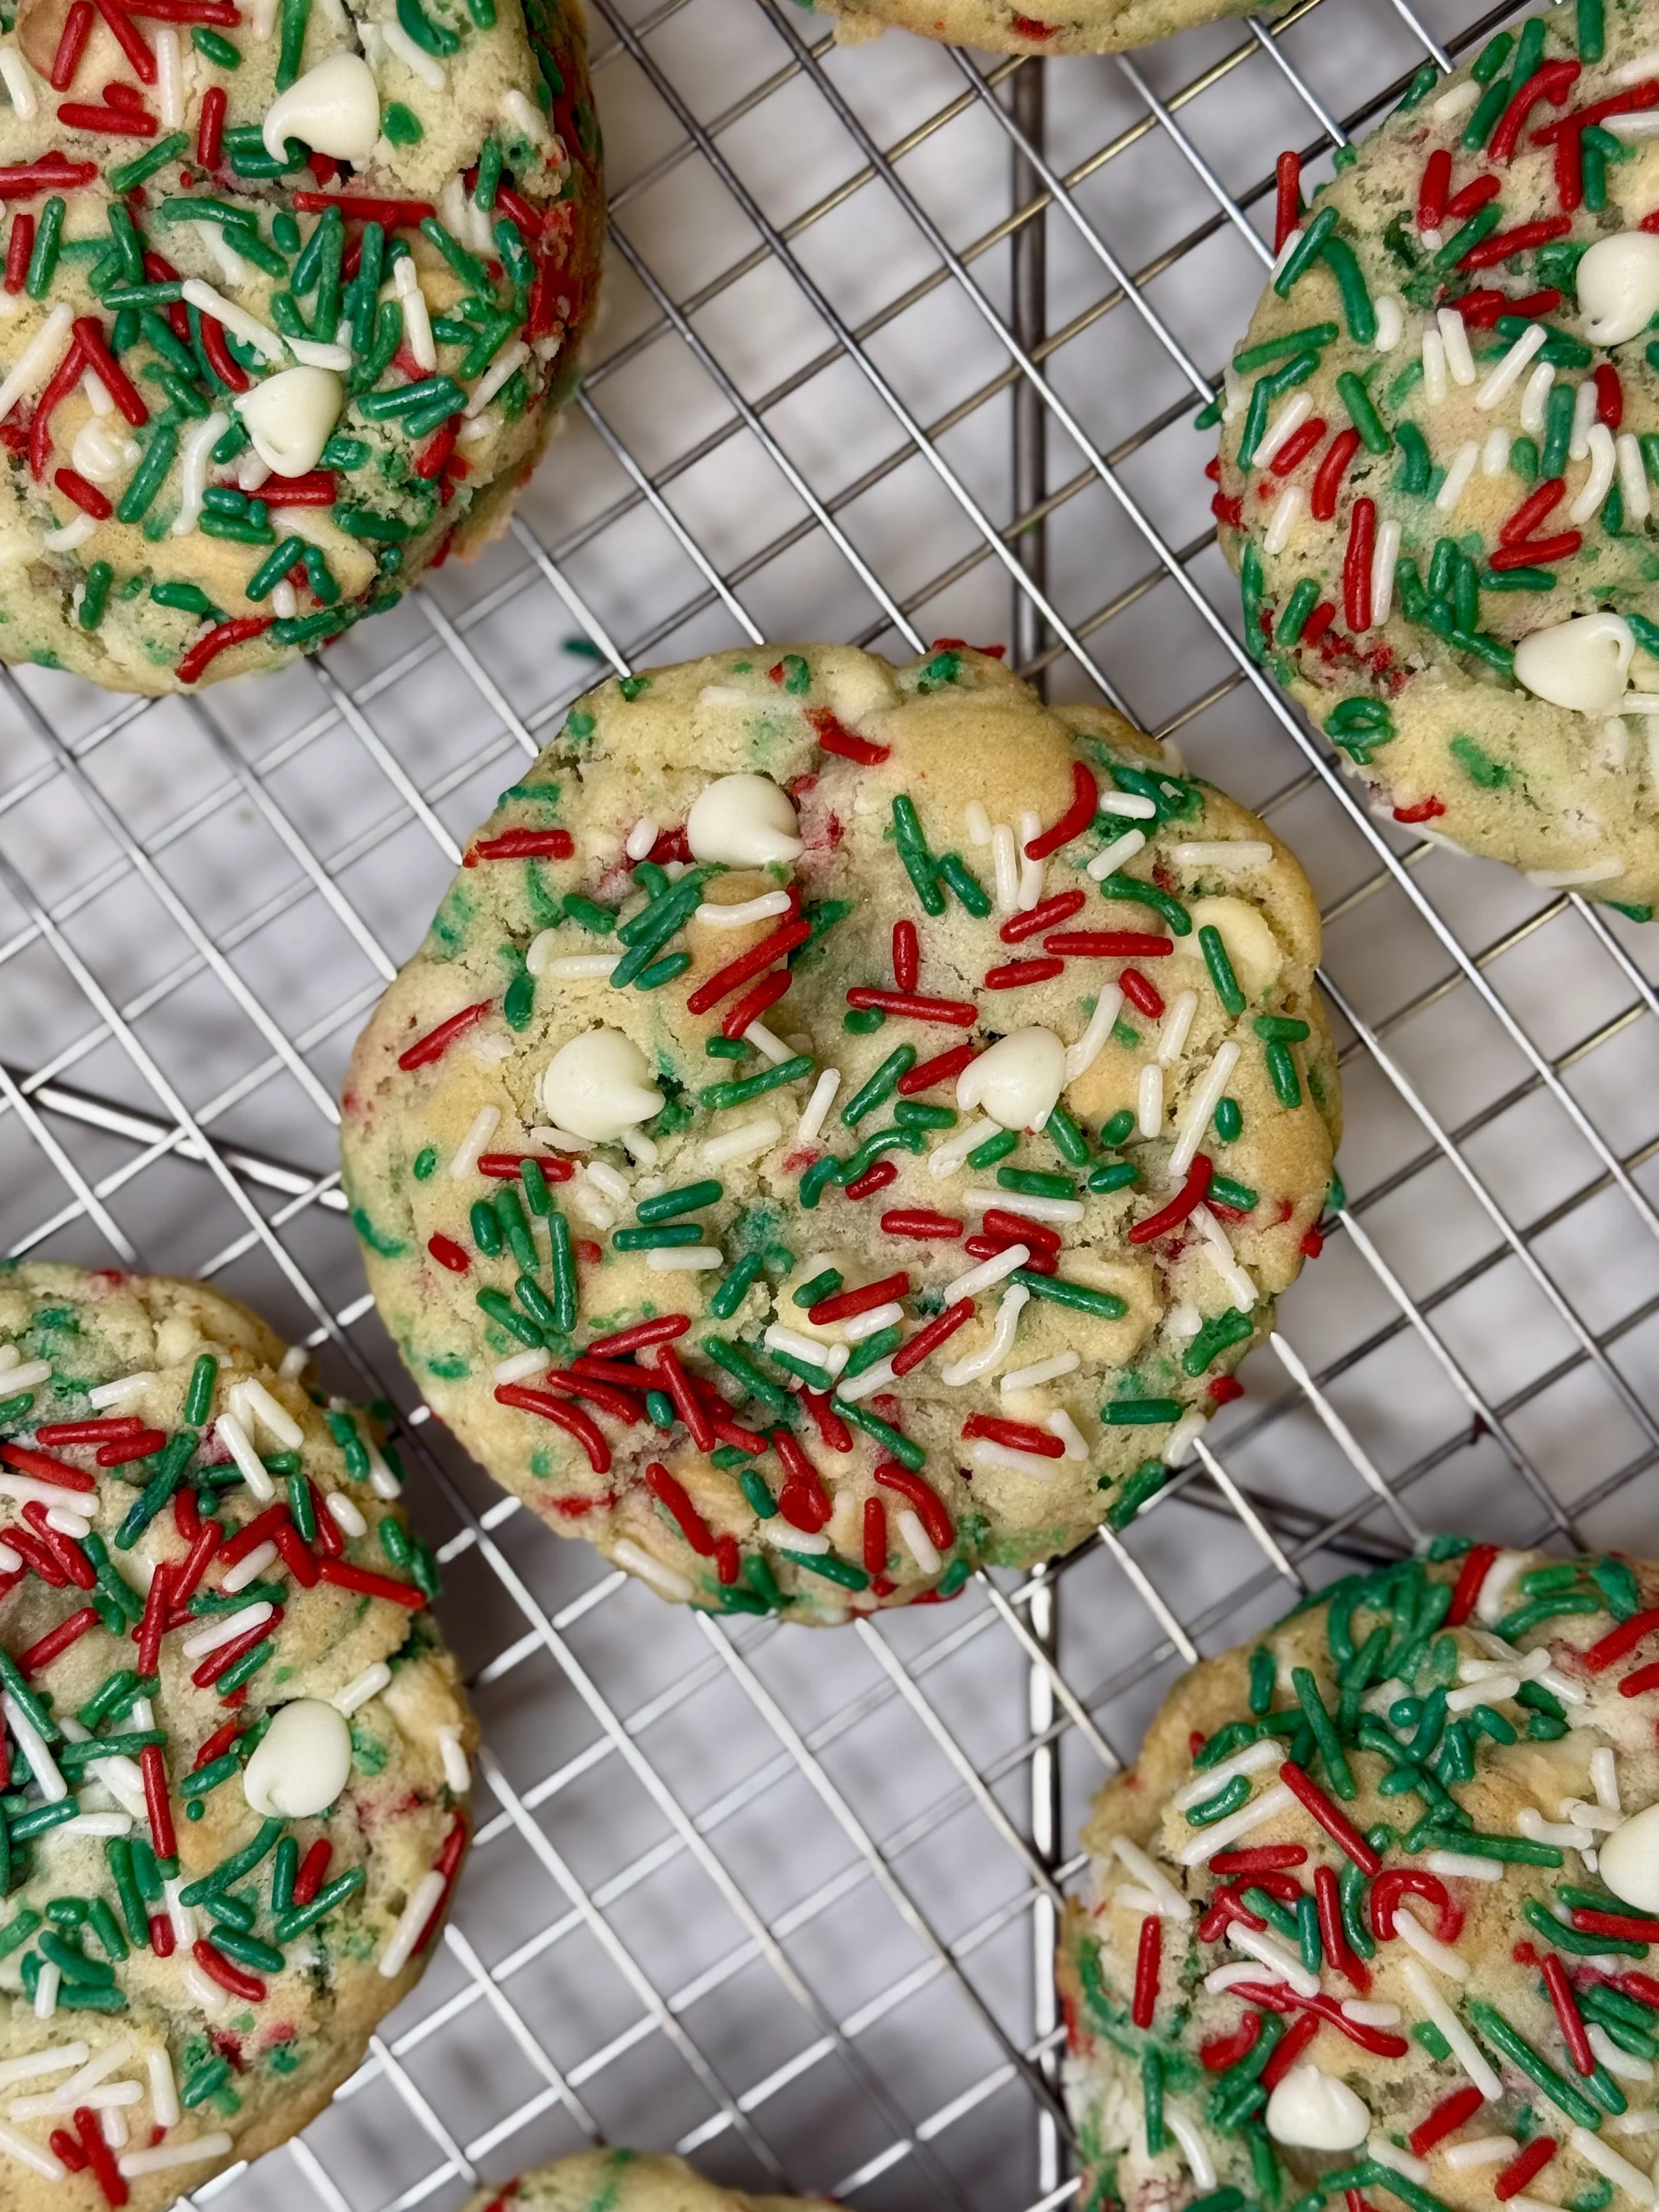
There’s something about Christmas sprinkles that instantly makes everything feel more festive, and these Chunky Christmas Sprinkle Cookies are no exception. Thick, bakery-style, and loaded with white chocolate chips and colorful sprinkles, these cookies are soft and gooey in the center with perfectly golden edges. They’re the kind of cookies that look just as good on a holiday cookie tray as they taste fresh from the oven.
This recipe was created for anyone who loves big, soft cookies with a buttery vanilla flavor and that classic bakery-style height. Chilling the dough and baking at a higher temperature gives these cookies their signature chunky shape while keeping the centers irresistibly soft.
Santa would definitely enjoy these festive cookies with a nice glass of milk left out for him 🎅
Why You’ll Love These Cookies
Thick & chunky bakery-style cookies with soft, gooey centers
Loaded with white chocolate chips and festive Christmas sprinkles
Easy to make with simple ingredients
Perfect for holiday baking, cookie swaps, and gifting
Dough can be made ahead and chilled
Ingredient Highlights
Cold butter: Using cold butter helps create thick cookies with structure instead of flat, spread-out ones.
Cake flour + all-purpose flour: This combination keeps the cookies tender while still sturdy and chunky.
Cornstarch: Adds softness and helps create that melt-in-your-mouth texture.
Almond extract (optional): A small amount enhances the vanilla flavor and adds a subtle bakery-style warmth.
Christmas sprinkles: Use jimmies-style sprinkles for best results, as they hold their color while baking.
Tips for Perfect Chunky Cookies
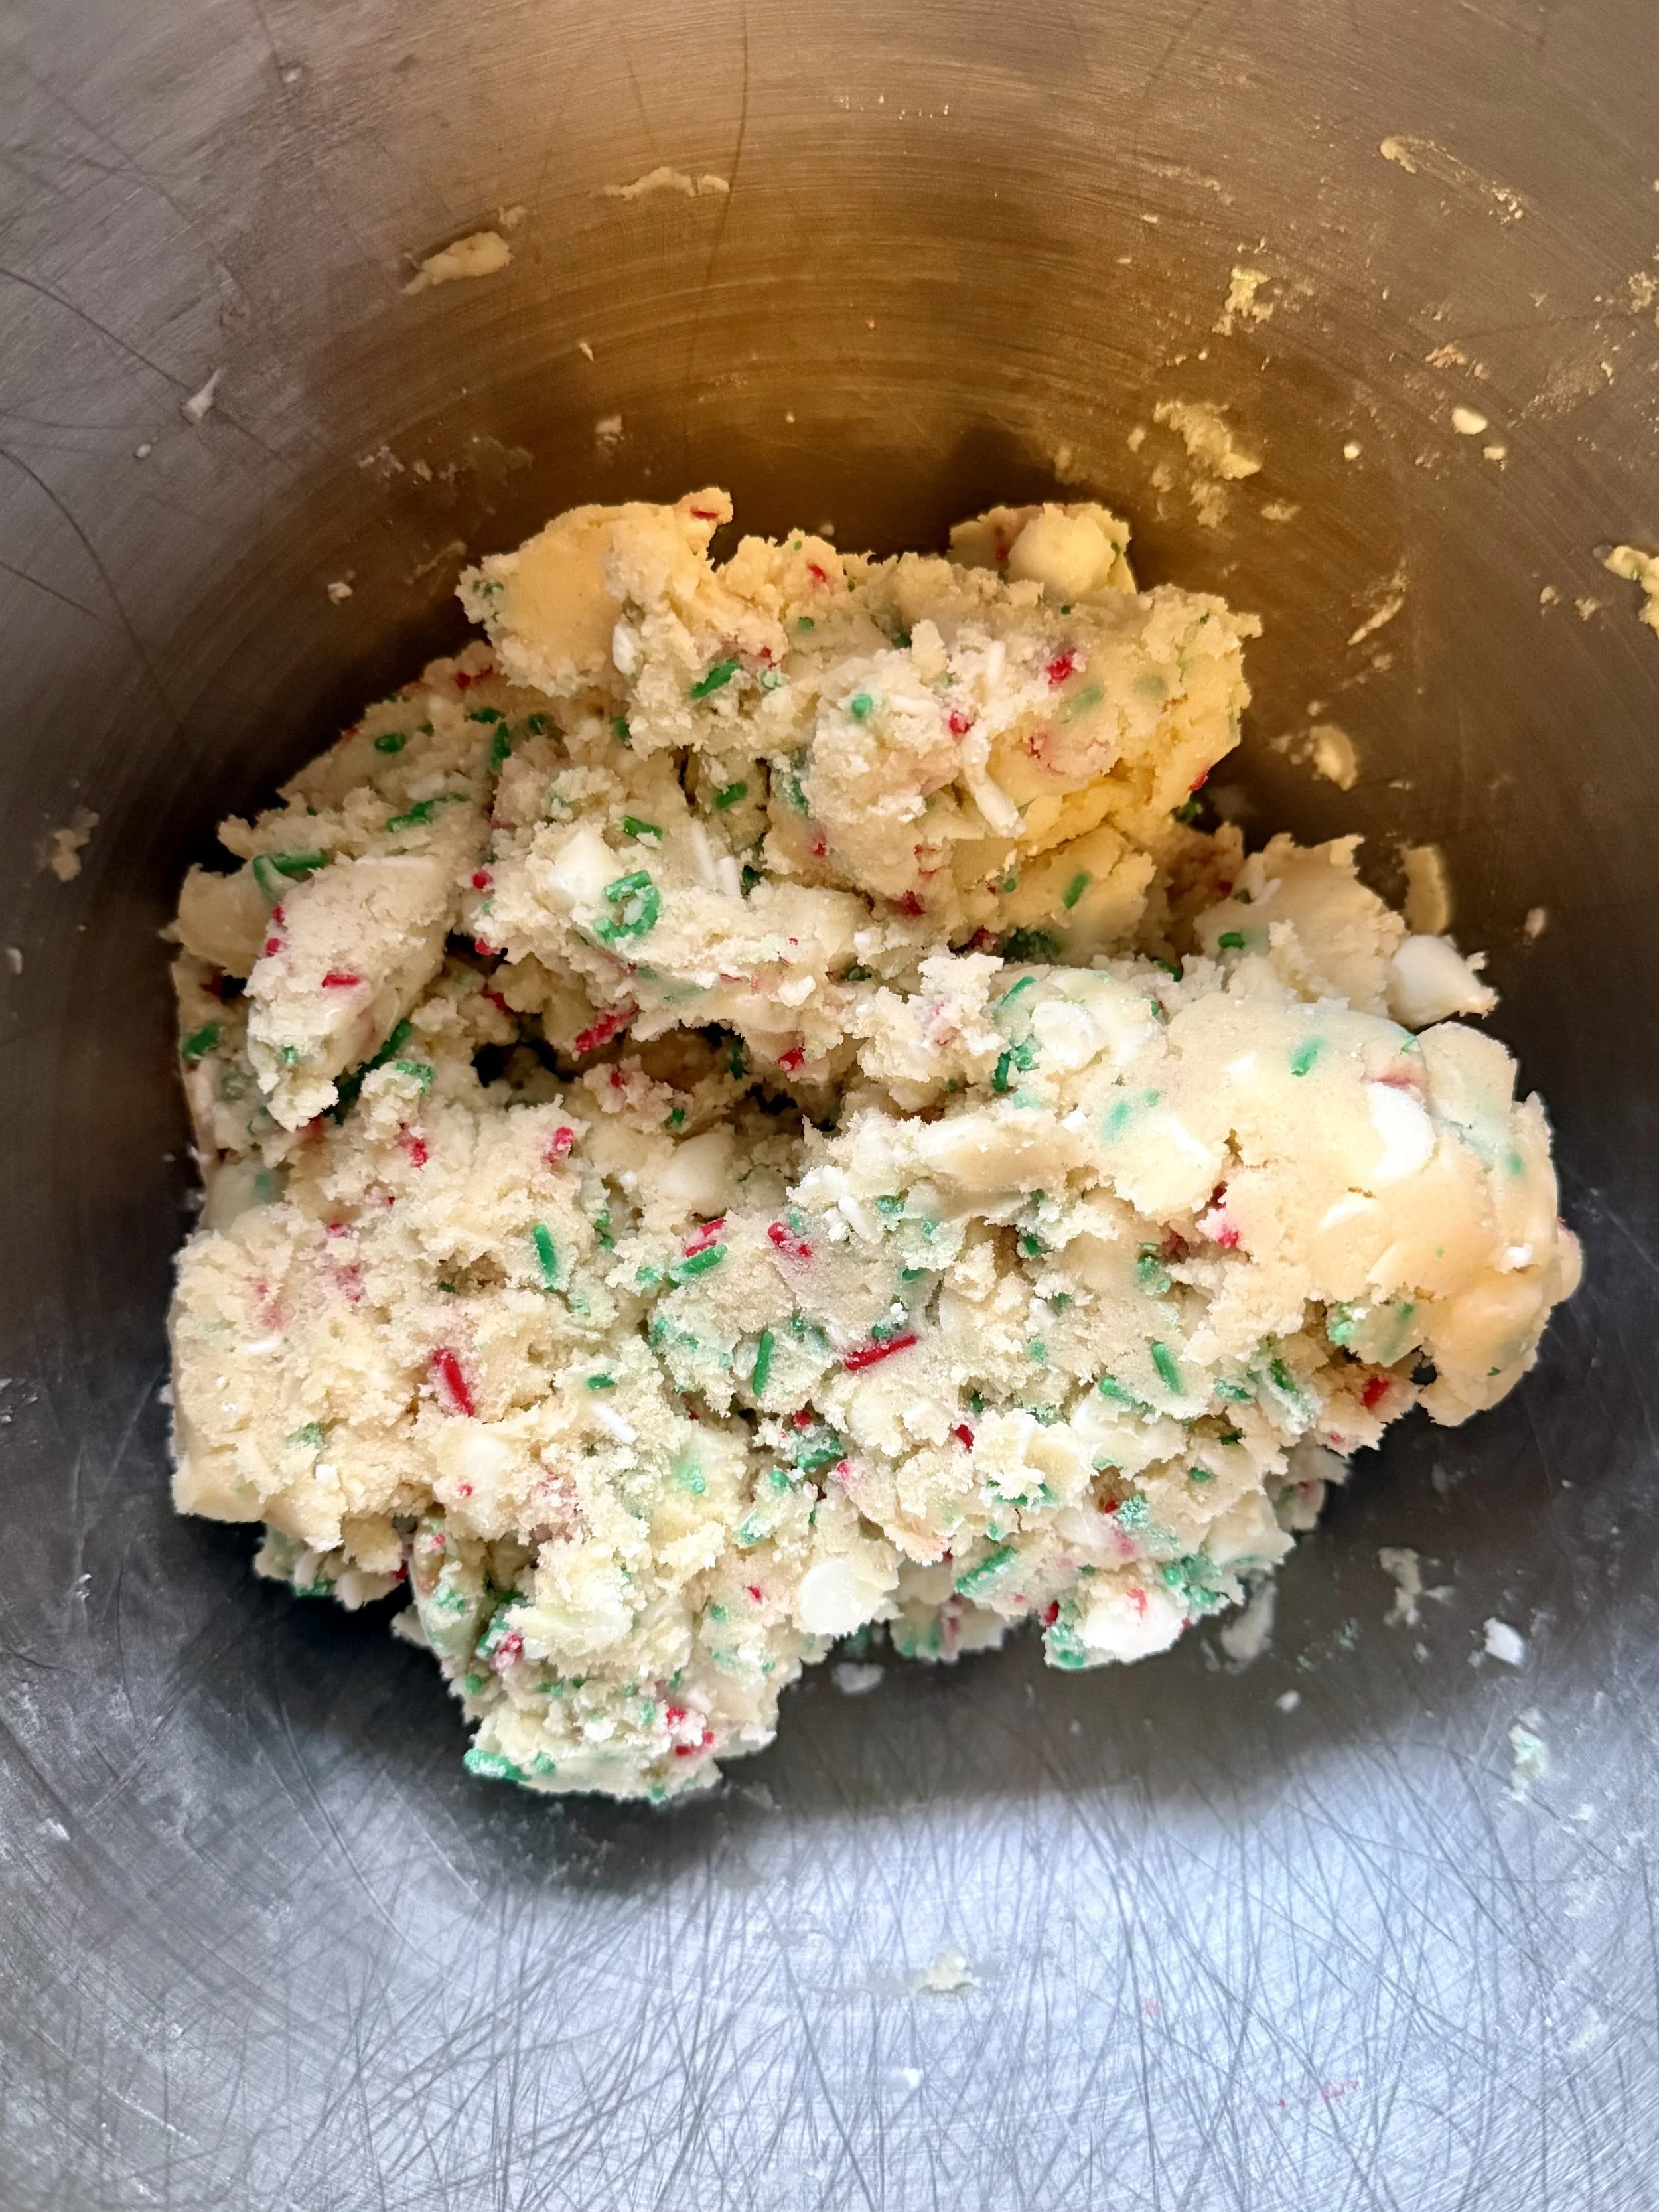
Don’t overmix the dough. Once the flour is added, mix just until combined to keep the cookies tender.
Use a large cookie scoop and don’t level it; extra dough on top helps create height.
Chill the dough. This step is key to thick cookies and prevents excessive spreading.
Bake until the edges are set, but the centers still look slightly underbaked. They’ll continue to firm up as they cool.
For extra festive flair, press a few sprinkles on top right after baking.
Troubleshooting & Helpful Baking Tips
My cookies spread too much.
Make sure the dough is fully chilled before baking. Warm dough or a warm baking sheet can cause excess spreading. Using cold butter and chilling for at least 30 minutes is key for thick cookies.
My cookies didn’t spread enough.
If the dough is very cold, let it sit at room temperature for 5–10 minutes before baking. Also double-check that your baking soda is fresh.
The cookies look underbaked in the center.
That’s intentional! These cookies finish setting as they cool. The centers should look slightly glossy when you pull them from the oven for the best soft, gooey texture.
The cookies browned too quickly.
Every oven is different. If your cookies are browning too fast, reduce the oven temperature to 375°F and bake an extra 1–2 minutes.
My sprinkles bled or melted.
Use jimmies-style sprinkles rather than nonpareils, which tend to bleed. Adding extra sprinkles on top after baking also helps keep the colors vibrant.
Make-Ahead & Storage
Make ahead: Dough balls can be chilled for up to 48 hours before baking.
Freezing: Scoop dough balls and freeze for up to 2 months. Bake straight from frozen, adding 1–2 minutes to the bake time.
Storage: Store baked cookies in an airtight container at room temperature for up to 4 days.
Perfect for the Holidays
These Chunky Christmas Sprinkle Cookies are made for cozy holiday nights, festive gatherings, and filling up cookie tins for friends and family. They’re cheerful, indulgent, and guaranteed to be a hit with kids and adults alike.
If you make these cookies, I’d love to hear how they turned out! Leave a comment, share them on social media, or tag me so I can see your festive creations 🎄🍪
Happy baking!

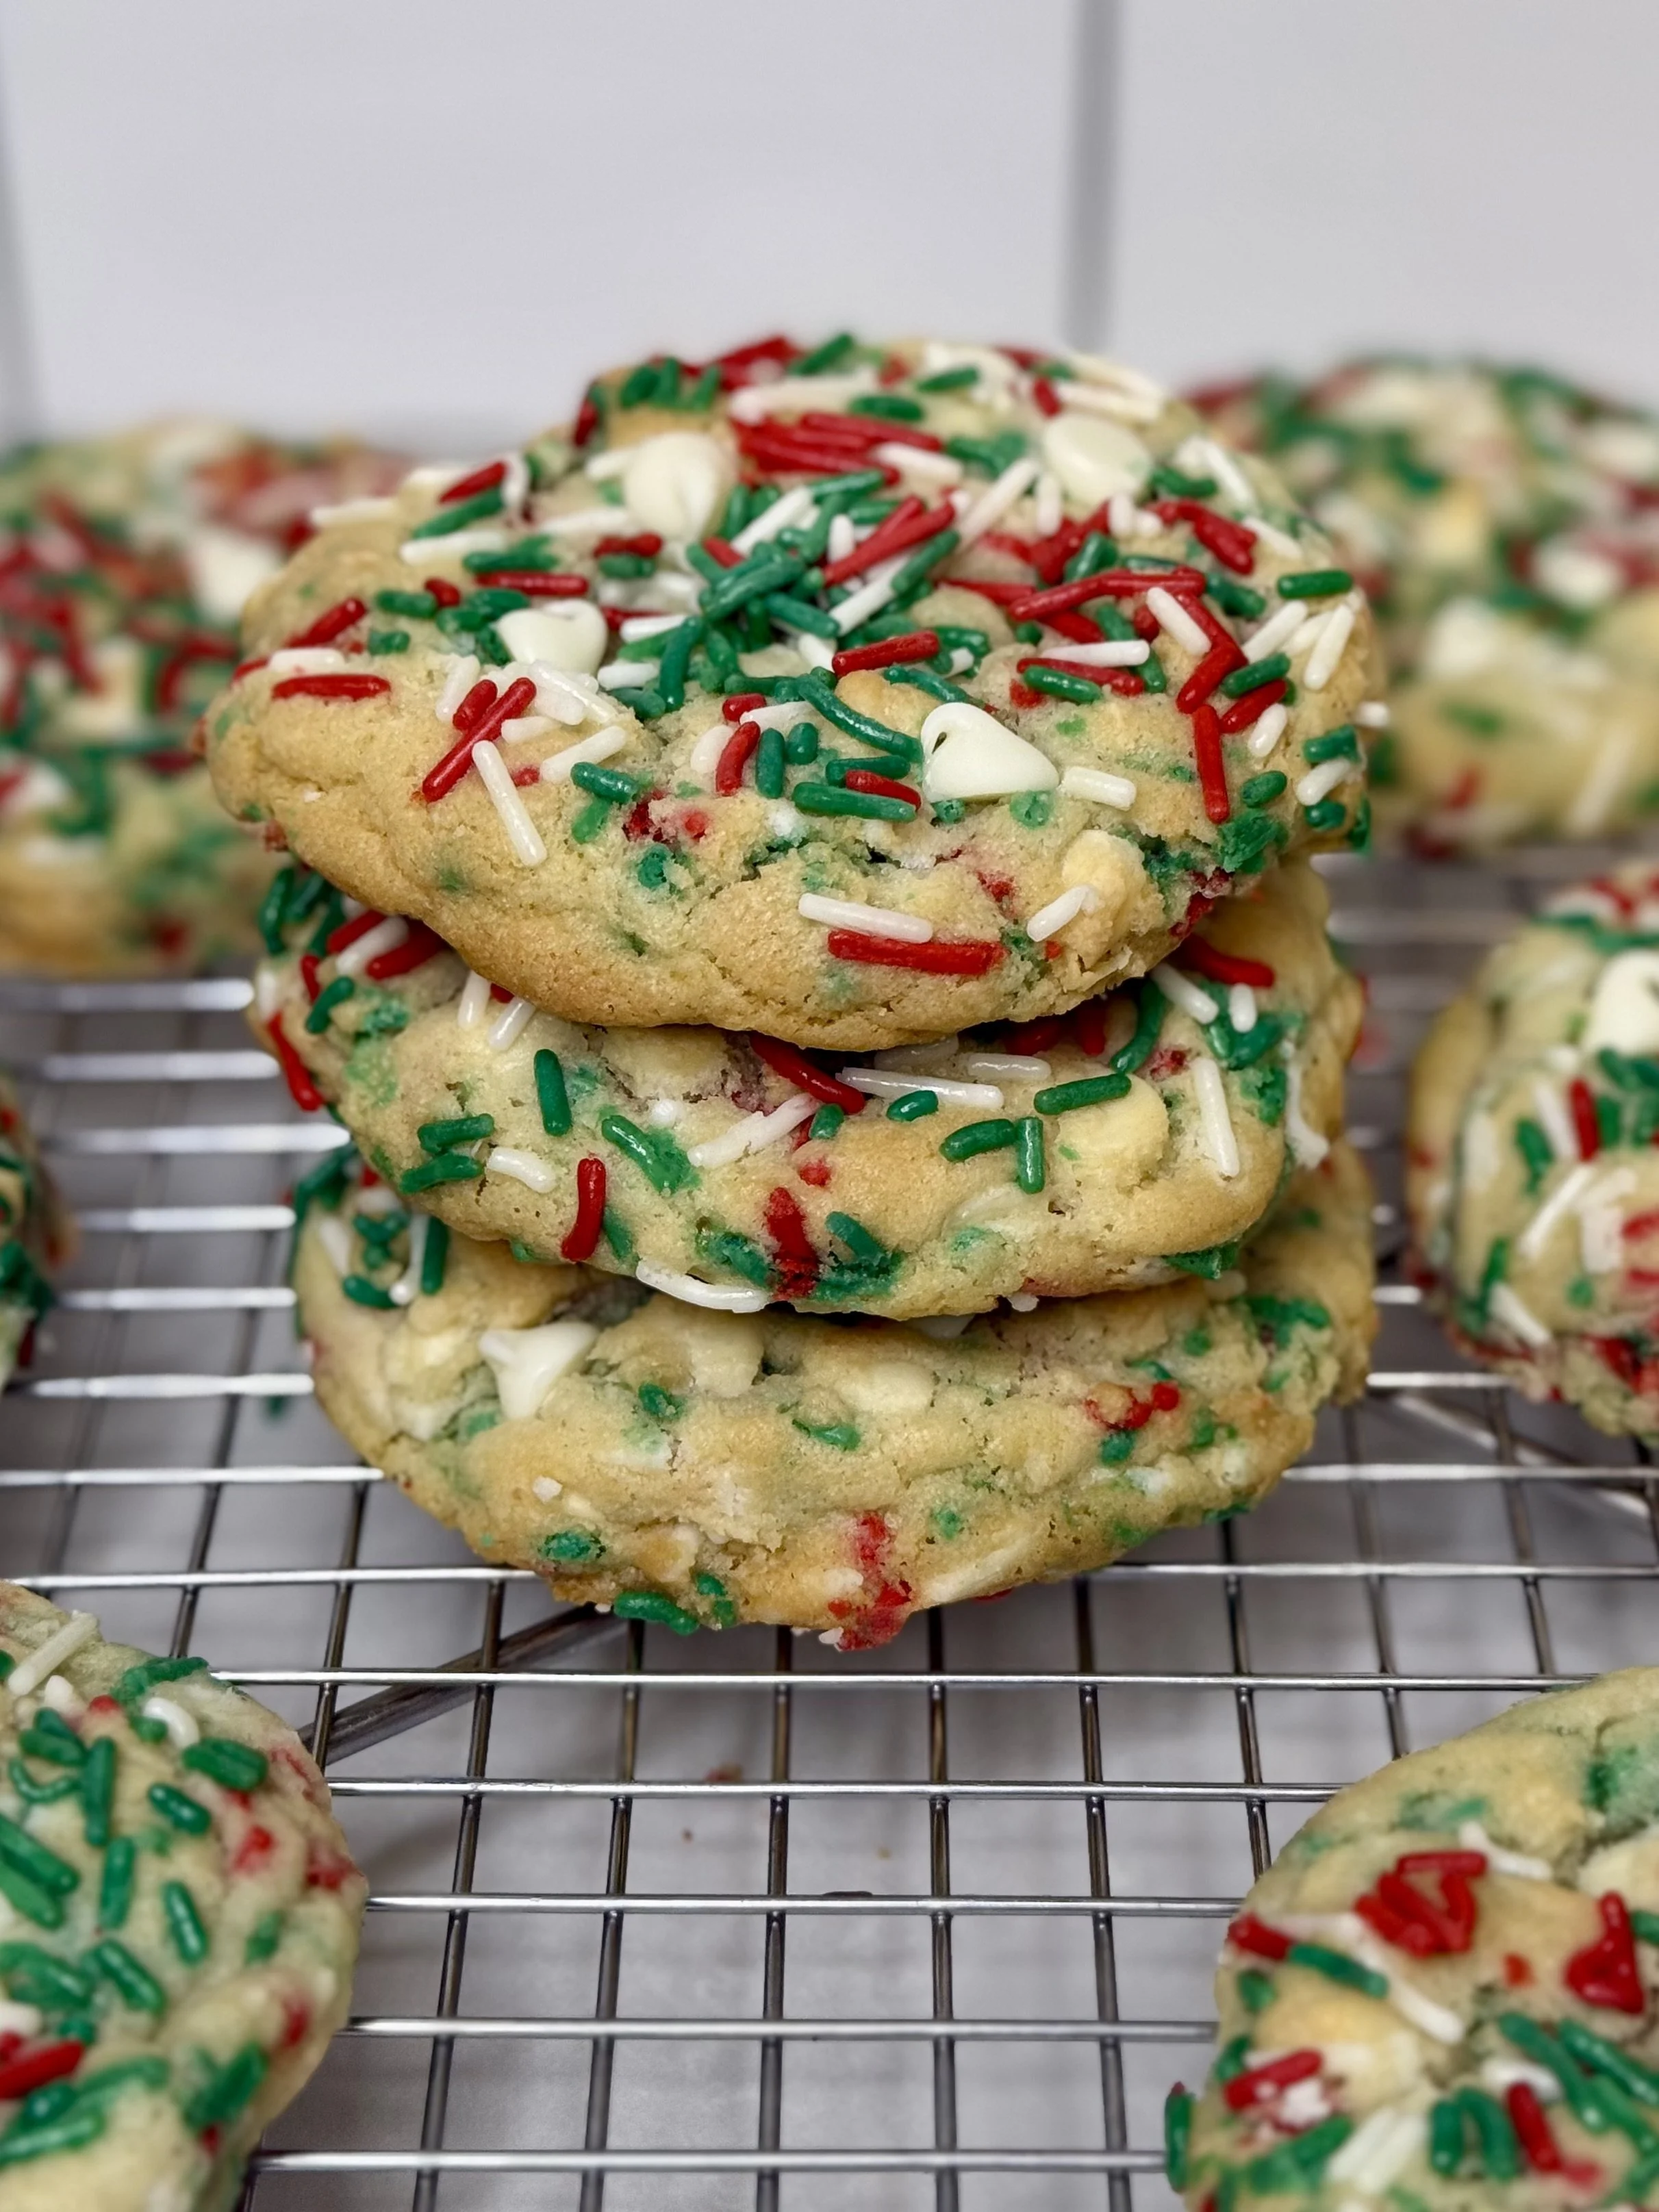
Christmas Sprinkle Cookies
These Chunky Christmas Sprinkle Cookies are soft and chewy with crisp edges, packed with buttery vanilla flavor, and loaded with festive sprinkles in every bite. They’re the perfect thick, bakery-style cookie to brighten up your holiday
Ingredients
- 1 cup cold salted butter (2 sticks), cut into cubes
- 1 1/2 cup sugar
- 2 egg
- 1 tbsp vanilla extract
- 1/4 tsp almond extract (optional, but recomended)
- 1 ½ cup cake flour
- 1 ½ cups all-purpose flour
- 1.5 tsp cornstarch
- ¾ teaspoon baking soda
- ¾ tsp salt
- 2 cups white chocolate chips
- 1 cup Christmas colored sprinkles + 1/2 cup for the topping.
Instructions
Notes
- Right after baking, use the rim of a round glass or cookie cutter to “scoot” the cookies into a more circular shape by gently swirling them while they’re still hot.

Cream Cheese Stuffed Gingerbread Cookies

Cream Cheese Stuffed Gingerbread Cookies
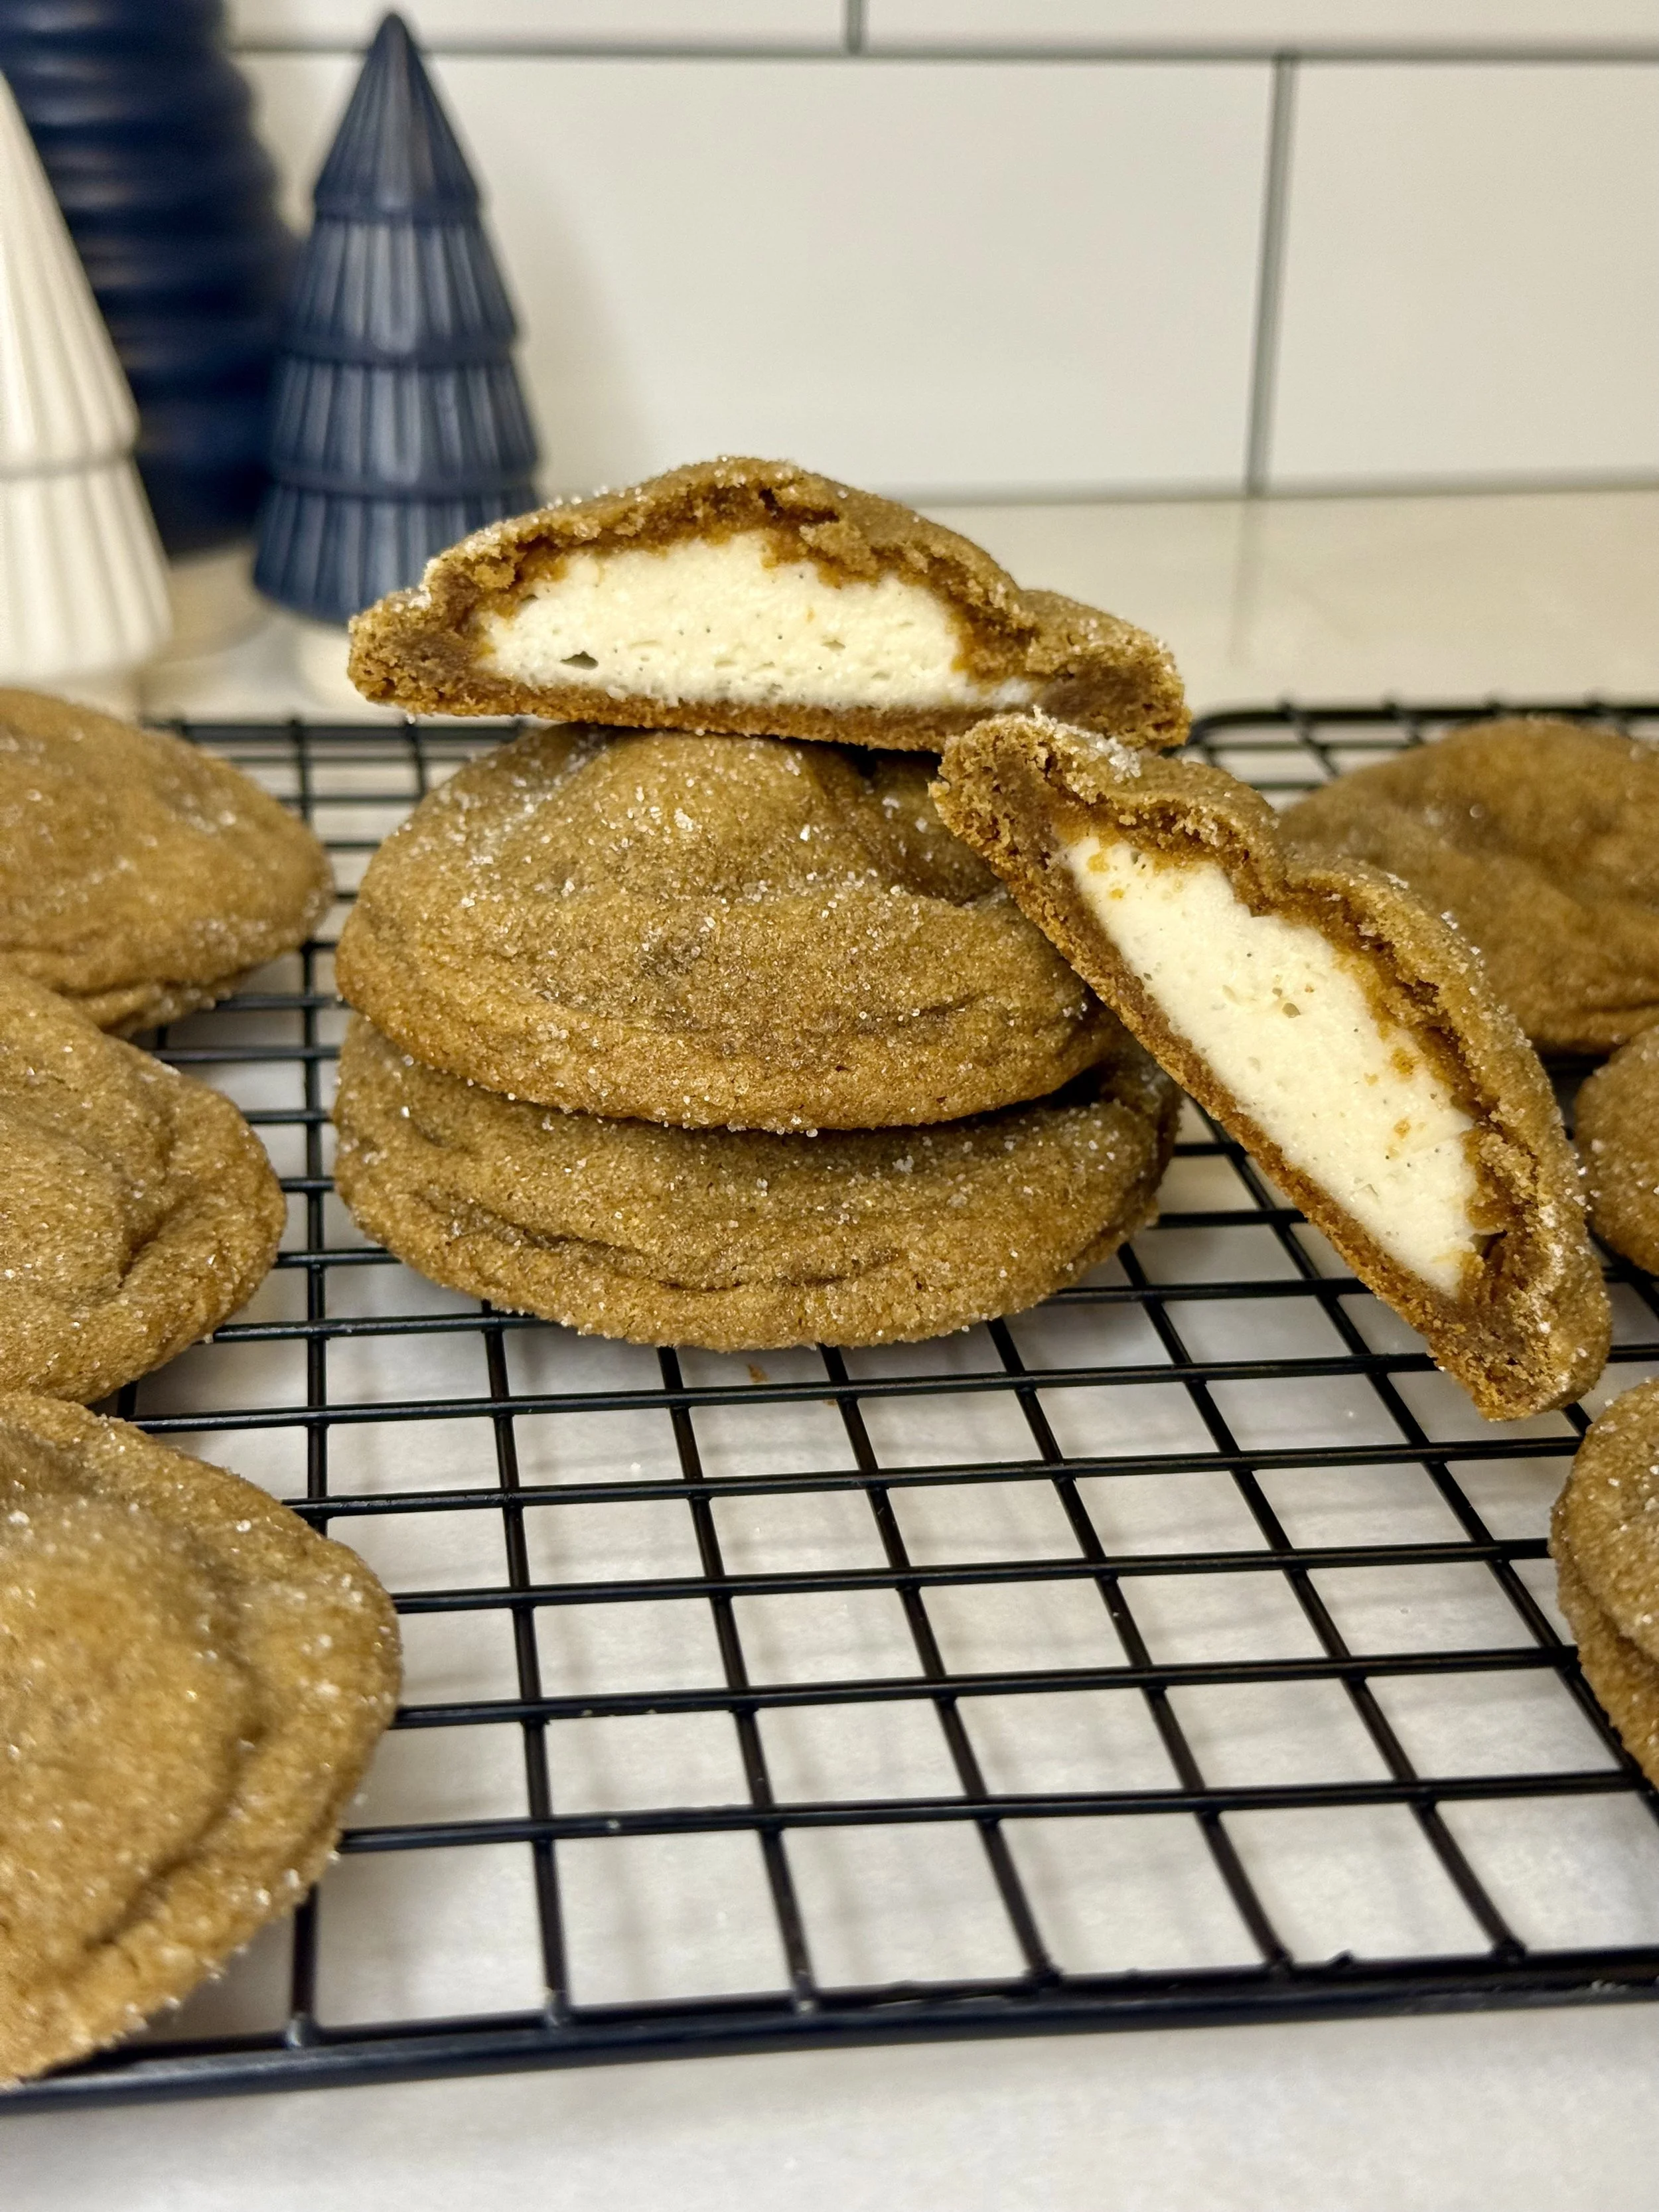
There’s something extra special about gingerbread during the holidays: the warm spices, cozy aromas, and that nostalgic feeling that instantly makes your kitchen feel festive. These Cream Cheese Stuffed Gingerbread Cookies take classic gingerbread and turn it into a show-stopping treat with a creamy, cheesecake-like center hidden inside.
They’re soft, richly spiced, rolled in sugar for a subtle crunch, and filled with a tangy cream cheese surprise that stays melty and luscious after baking. Perfect for holiday cookie boxes, parties, or a cozy night in with a mug of hot cocoa.
Why You’ll Love This Recipe
Soft & cozy texture with perfectly balanced holiday spices
Cream cheese filling adds a rich, slightly tangy contrast
Make-ahead friendly (freeze the filling in advance!)
Looks impressive but is simple to assemble
Ingredients
Gingerbread Cookie Dough
Unsalted butter, softened
Dark brown sugar
Molasses
Honey
Egg (room temperature)
Vanilla extract
All-purpose flour
Baking soda
Cornstarch
Ground cinnamon
Ground ginger
Ground cloves
Ground nutmeg
Salt
Granulated sugar (for rolling)
Cream Cheese Filling
Cream cheese
Granulated sugar
Vanilla bean paste (or vanilla extract)
How to Make Cream Cheese Stuffed Gingerbread Cookies
1. Prepare the Cream Cheese Filling
In a medium bowl, beat the cream cheese, sugar, and vanilla until smooth and creamy. Scoop into small portions using a small cookie scoop and place on a parchment-lined tray or container. Freeze for 2–4 hours, or until completely solid. This step is key to easy stuffing.
2. Make the Cookie Dough
Preheat your oven to 350°F (175°C) and line baking sheets with parchment paper.
Cream the butter and brown sugar together until light and fluffy. Mix in the molasses, honey, and vanilla, then add the egg and beat until smooth.
Add the flour, baking soda, cornstarch, spices, and salt. Mix just until combined; don’t overmix, or the cookies may bake up dense.
3. Stuff the Cookies
Scoop the dough into 2-tablespoon portions with a medium-sized cookie scoop. Flatten each piece, place a frozen cream cheese ball in the center, and gently wrap the dough around it, sealing well. Roll into a smooth ball, then roll in granulated sugar.
4. Bake
Place cookies about 2 inches apart on the baking sheets. Bake for 11–13 minutes, until puffed and the edges are just set. The centers will look soft—this is exactly what you want.
Let cookies cool on the baking sheet for 5 minutes before transferring to a wire rack.
Tips for Success
Freeze the filling completely to prevent leaks during baking
Seal the dough well around the filling to keep it hidden inside
Slightly underbaking keeps the cookies soft and chewy
Vanilla bean paste adds extra flavor, but extract works great too
Storage & Make Ahead
Store cookies in an airtight container in the refrigerator for up to 4 days. Let them come to room temperature before serving for the best texture.
The cream cheese filling can be made and frozen up to 2 days in advance, making holiday baking easier.
Perfect For
Holiday cookie swaps • Christmas dessert tables • Gifting • Cozy winter baking
If you try these cookies, I’d love to hear what you think! Leave a comment below or tag me on social media so I can see your festive creations 🎄🍪
Other Tasty Gingerbread Recipes?

Cream Cheese Stuffed Gingerbread Cookies
Soft, spiced gingerbread cookies wrapped around a creamy cheesecake-style filling, baked until perfectly cozy and indulgent. Each bite delivers warm holiday spices with a rich, tangy surprise at the center.
Ingredients
- ¾ cup of unsalted butter (softened at room temperature)
- ¾ cup dark brown sugar
- ⅓ cup molasses
- 1 tablespoon honey
- 1 egg (room temperature)
- 1/2 tbsp vanilla extract
- 2 ⅓ cups of all-purpose flour
- 3/4 tsp baking soda
- 1 1/2 tsp cornstarch
- 2 tsp ground cinnamon
- 2.5 tsp ground ginger
- ½ tsp ground cloves
- ¼ teaspoon ground nutmeg
- ½ tsp salt
- 1/2 cup granulated sugar for rolling
- 12 ounces cream cheese (1 1/2 bricks), softened
- 4 tablespoons granulated sugar
- 1 tsp vanilla bean paste (recommended) or 1/2 tsp vanilla extract
Instructions

Marble Swirl Cookies
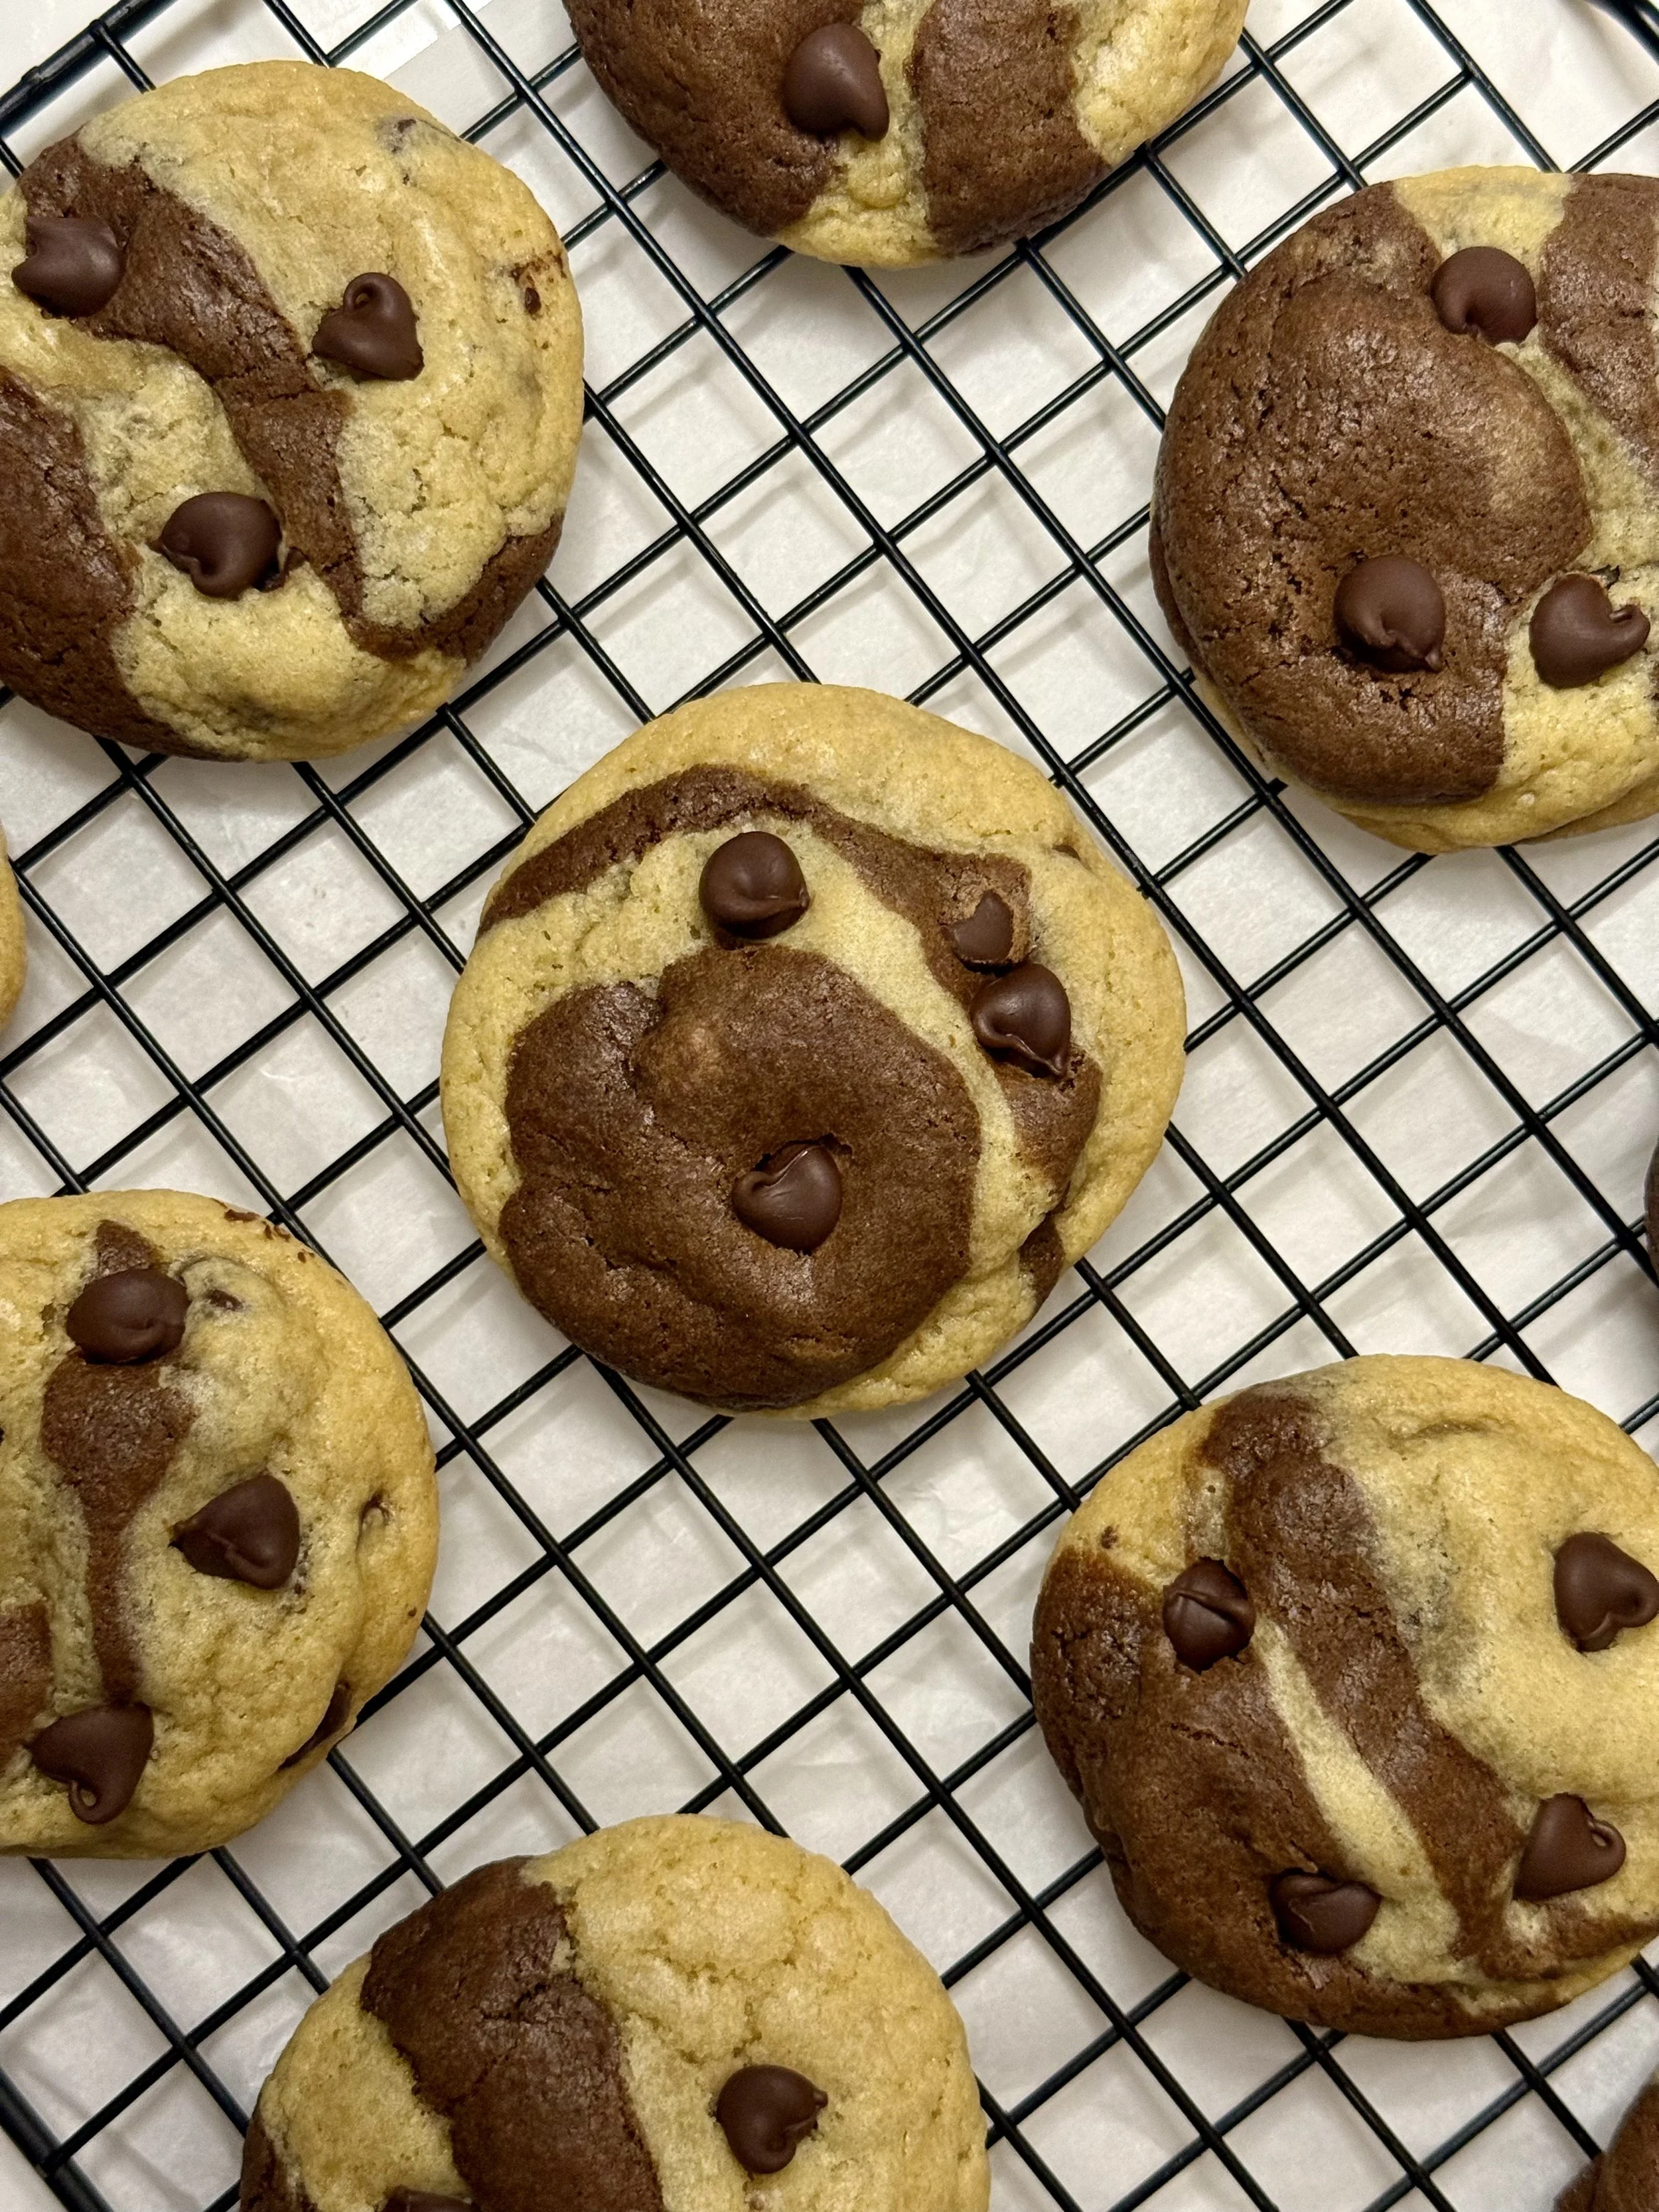
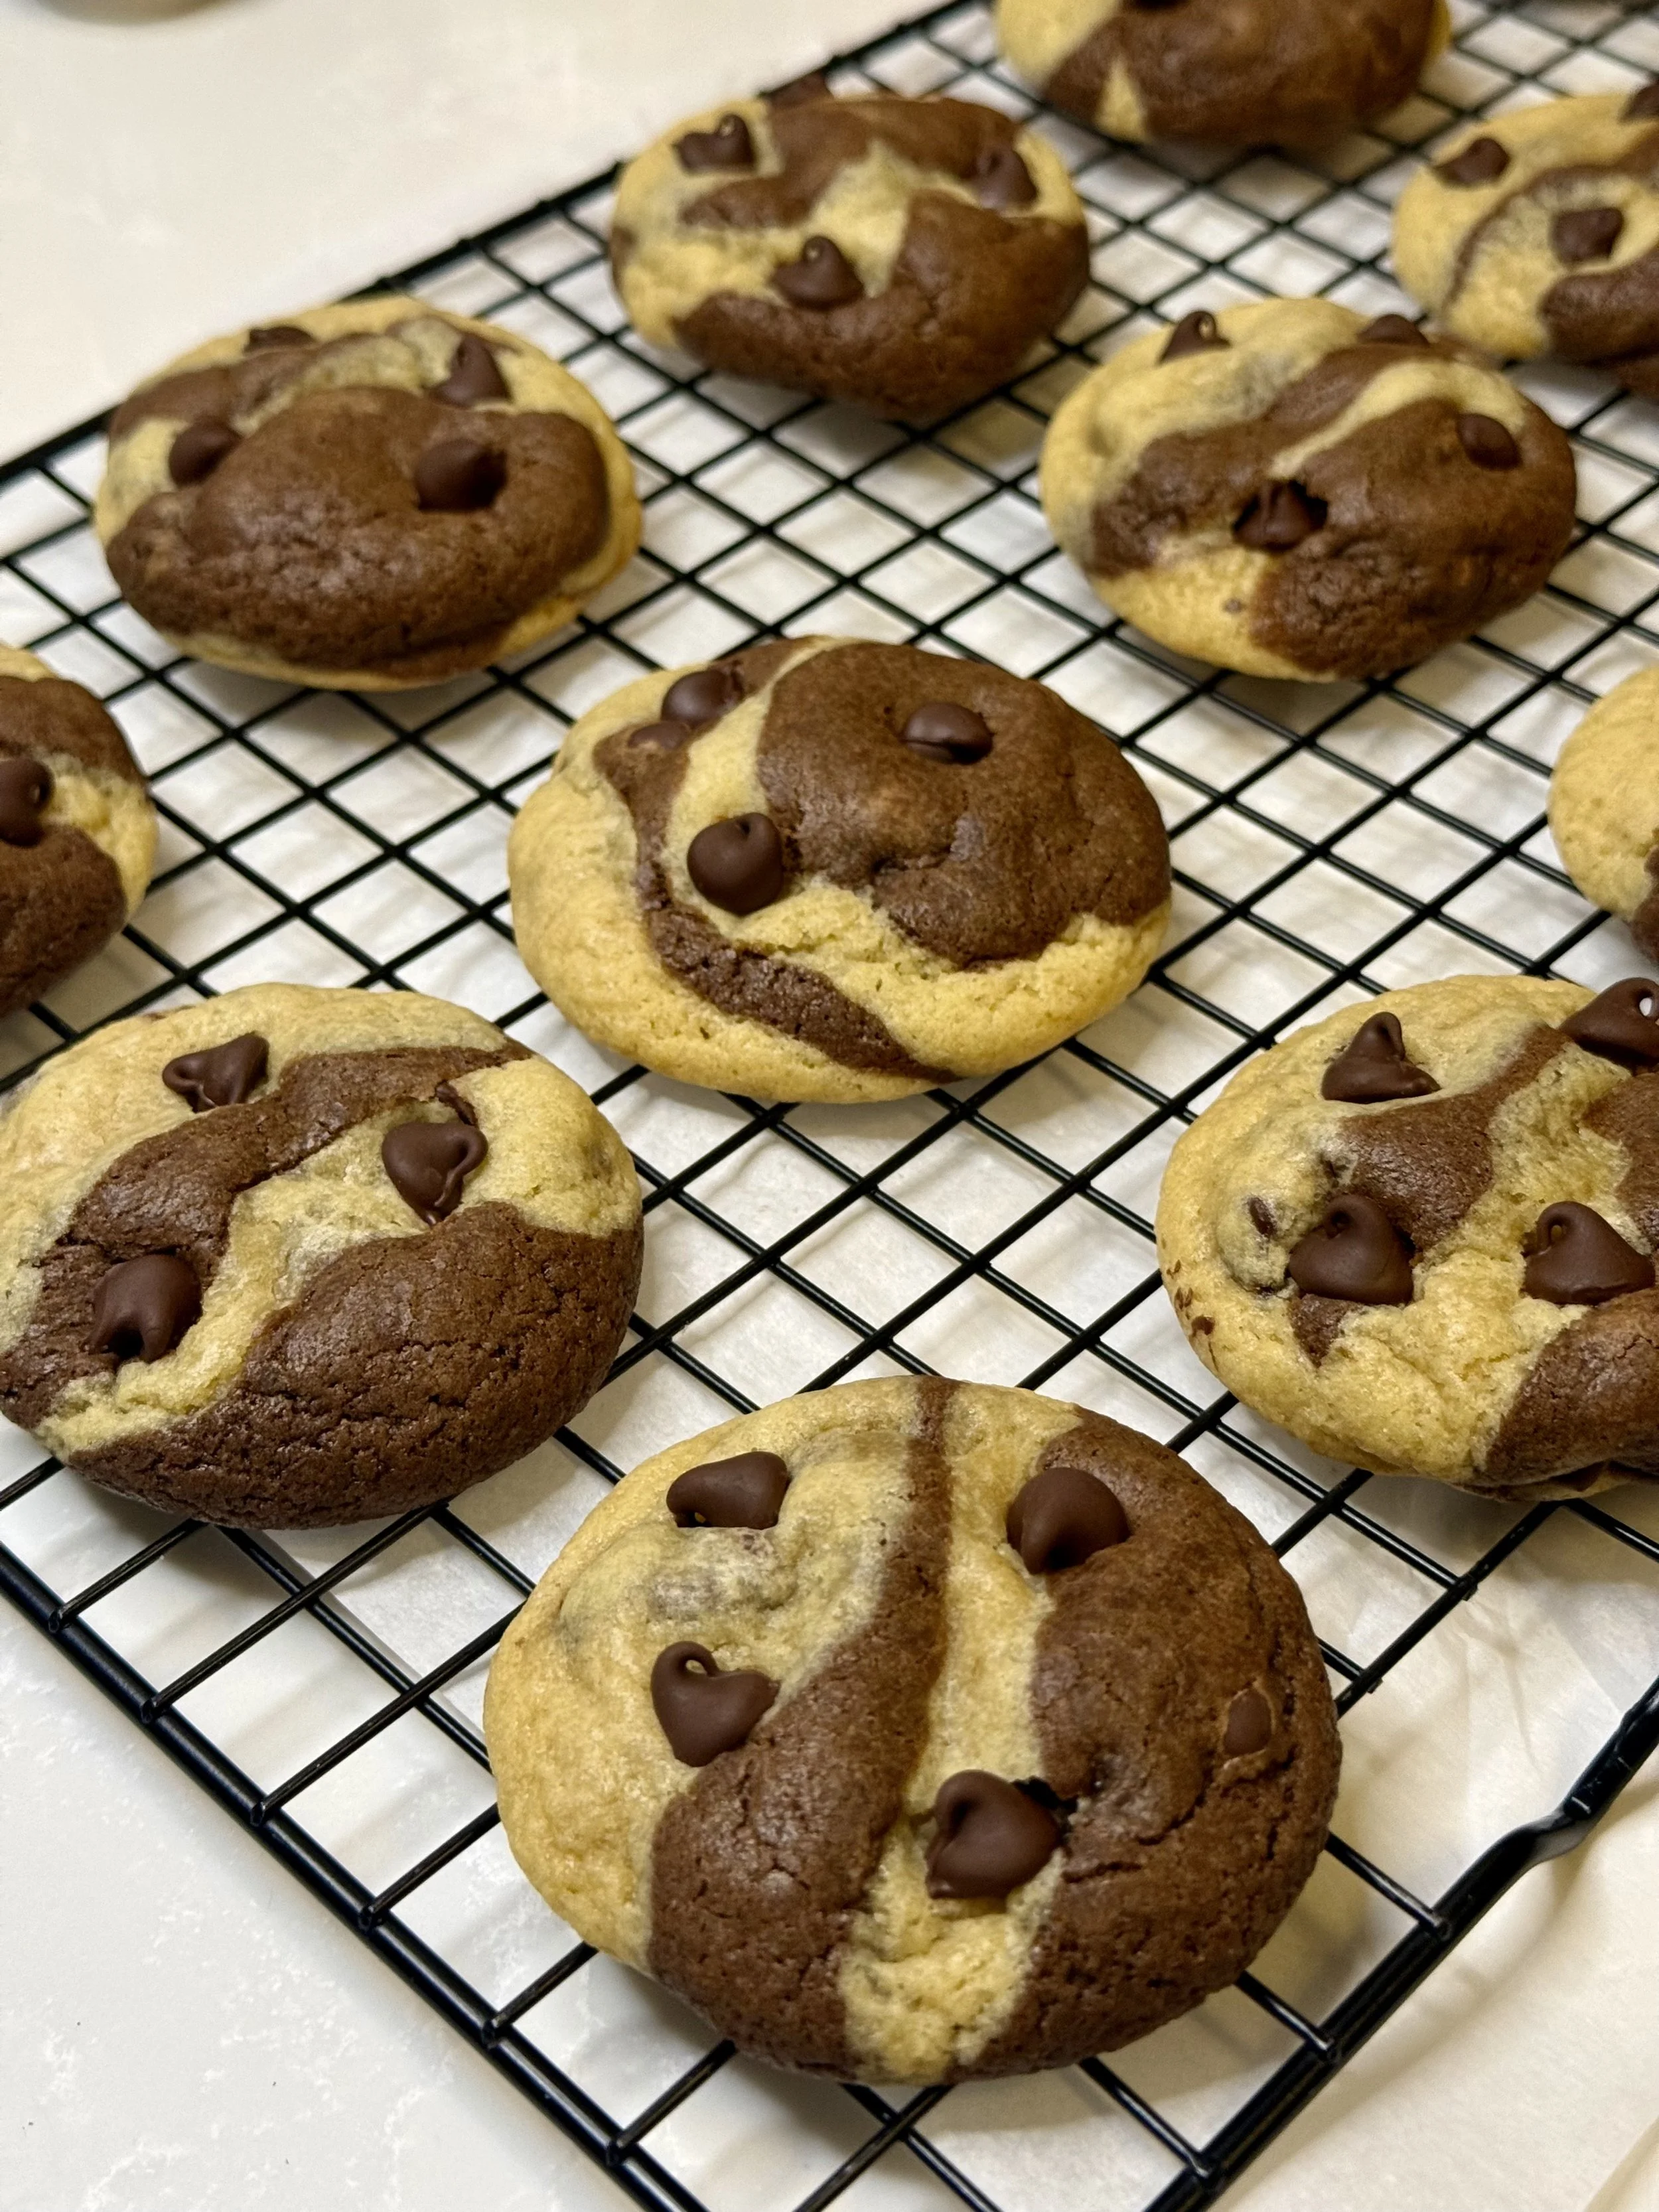
Marble Swirl Cookies
There’s something so fun and nostalgic about these Marble Swirl Cookies. They’re the kind of cookie you make when you can’t decide between chocolate or vanilla… so you just say “why not both?” The two doughs swirl together into the prettiest little cookies, and every bite has that perfect mix of buttery vanilla, rich cocoa, and melty chocolate chips. They’re simple, playful, and honestly just a joy to bake.
Why You’ll Love This Recipe
You get two flavors in one cookie. The best of both worlds, no choosing required.
They look so fancy, without the extra work. The marbled pattern forms naturally as you roll the dough.
The texture is perfect. Soft centers, lightly crisp edges, and creamy pops of chocolate.
Fun, hands-on process. Rolling the little dough balls together feels like edible arts and crafts.
Kid-approved and adult-obsessed. These cookies disappear fast!
Ingredients
Salted butter
Light brown sugar
Granulated sugar
Eggs
Vanilla extract
All-purpose flour
Baking soda
Baking powder
Cornstarch
Salt
Cocoa powder
Chocolate chips
Instructions
1. Preheat the oven
Set your oven to 350°F and line a cookie sheet with parchment paper. This helps the cookies bake evenly and prevents sticking.
2. Cream the butter and sugars
Beat the softened butter, brown sugar, and granulated sugar together until the mixture is light, fluffy, and dreamy, about 2 minutes. This step gives the cookies their soft, tender texture.
3. Add eggs and vanilla
Scrape down the bowl, then add in the eggs and vanilla extract. Mix just until everything comes together.
4. Add dry ingredients (minus the extra 3 tbsp flour)
Add the flour (hold back 3 tablespoons for later), baking soda, baking powder, cornstarch, and salt. Mix until you get a smooth dough without streaks. Stop mixing before it gets tough.
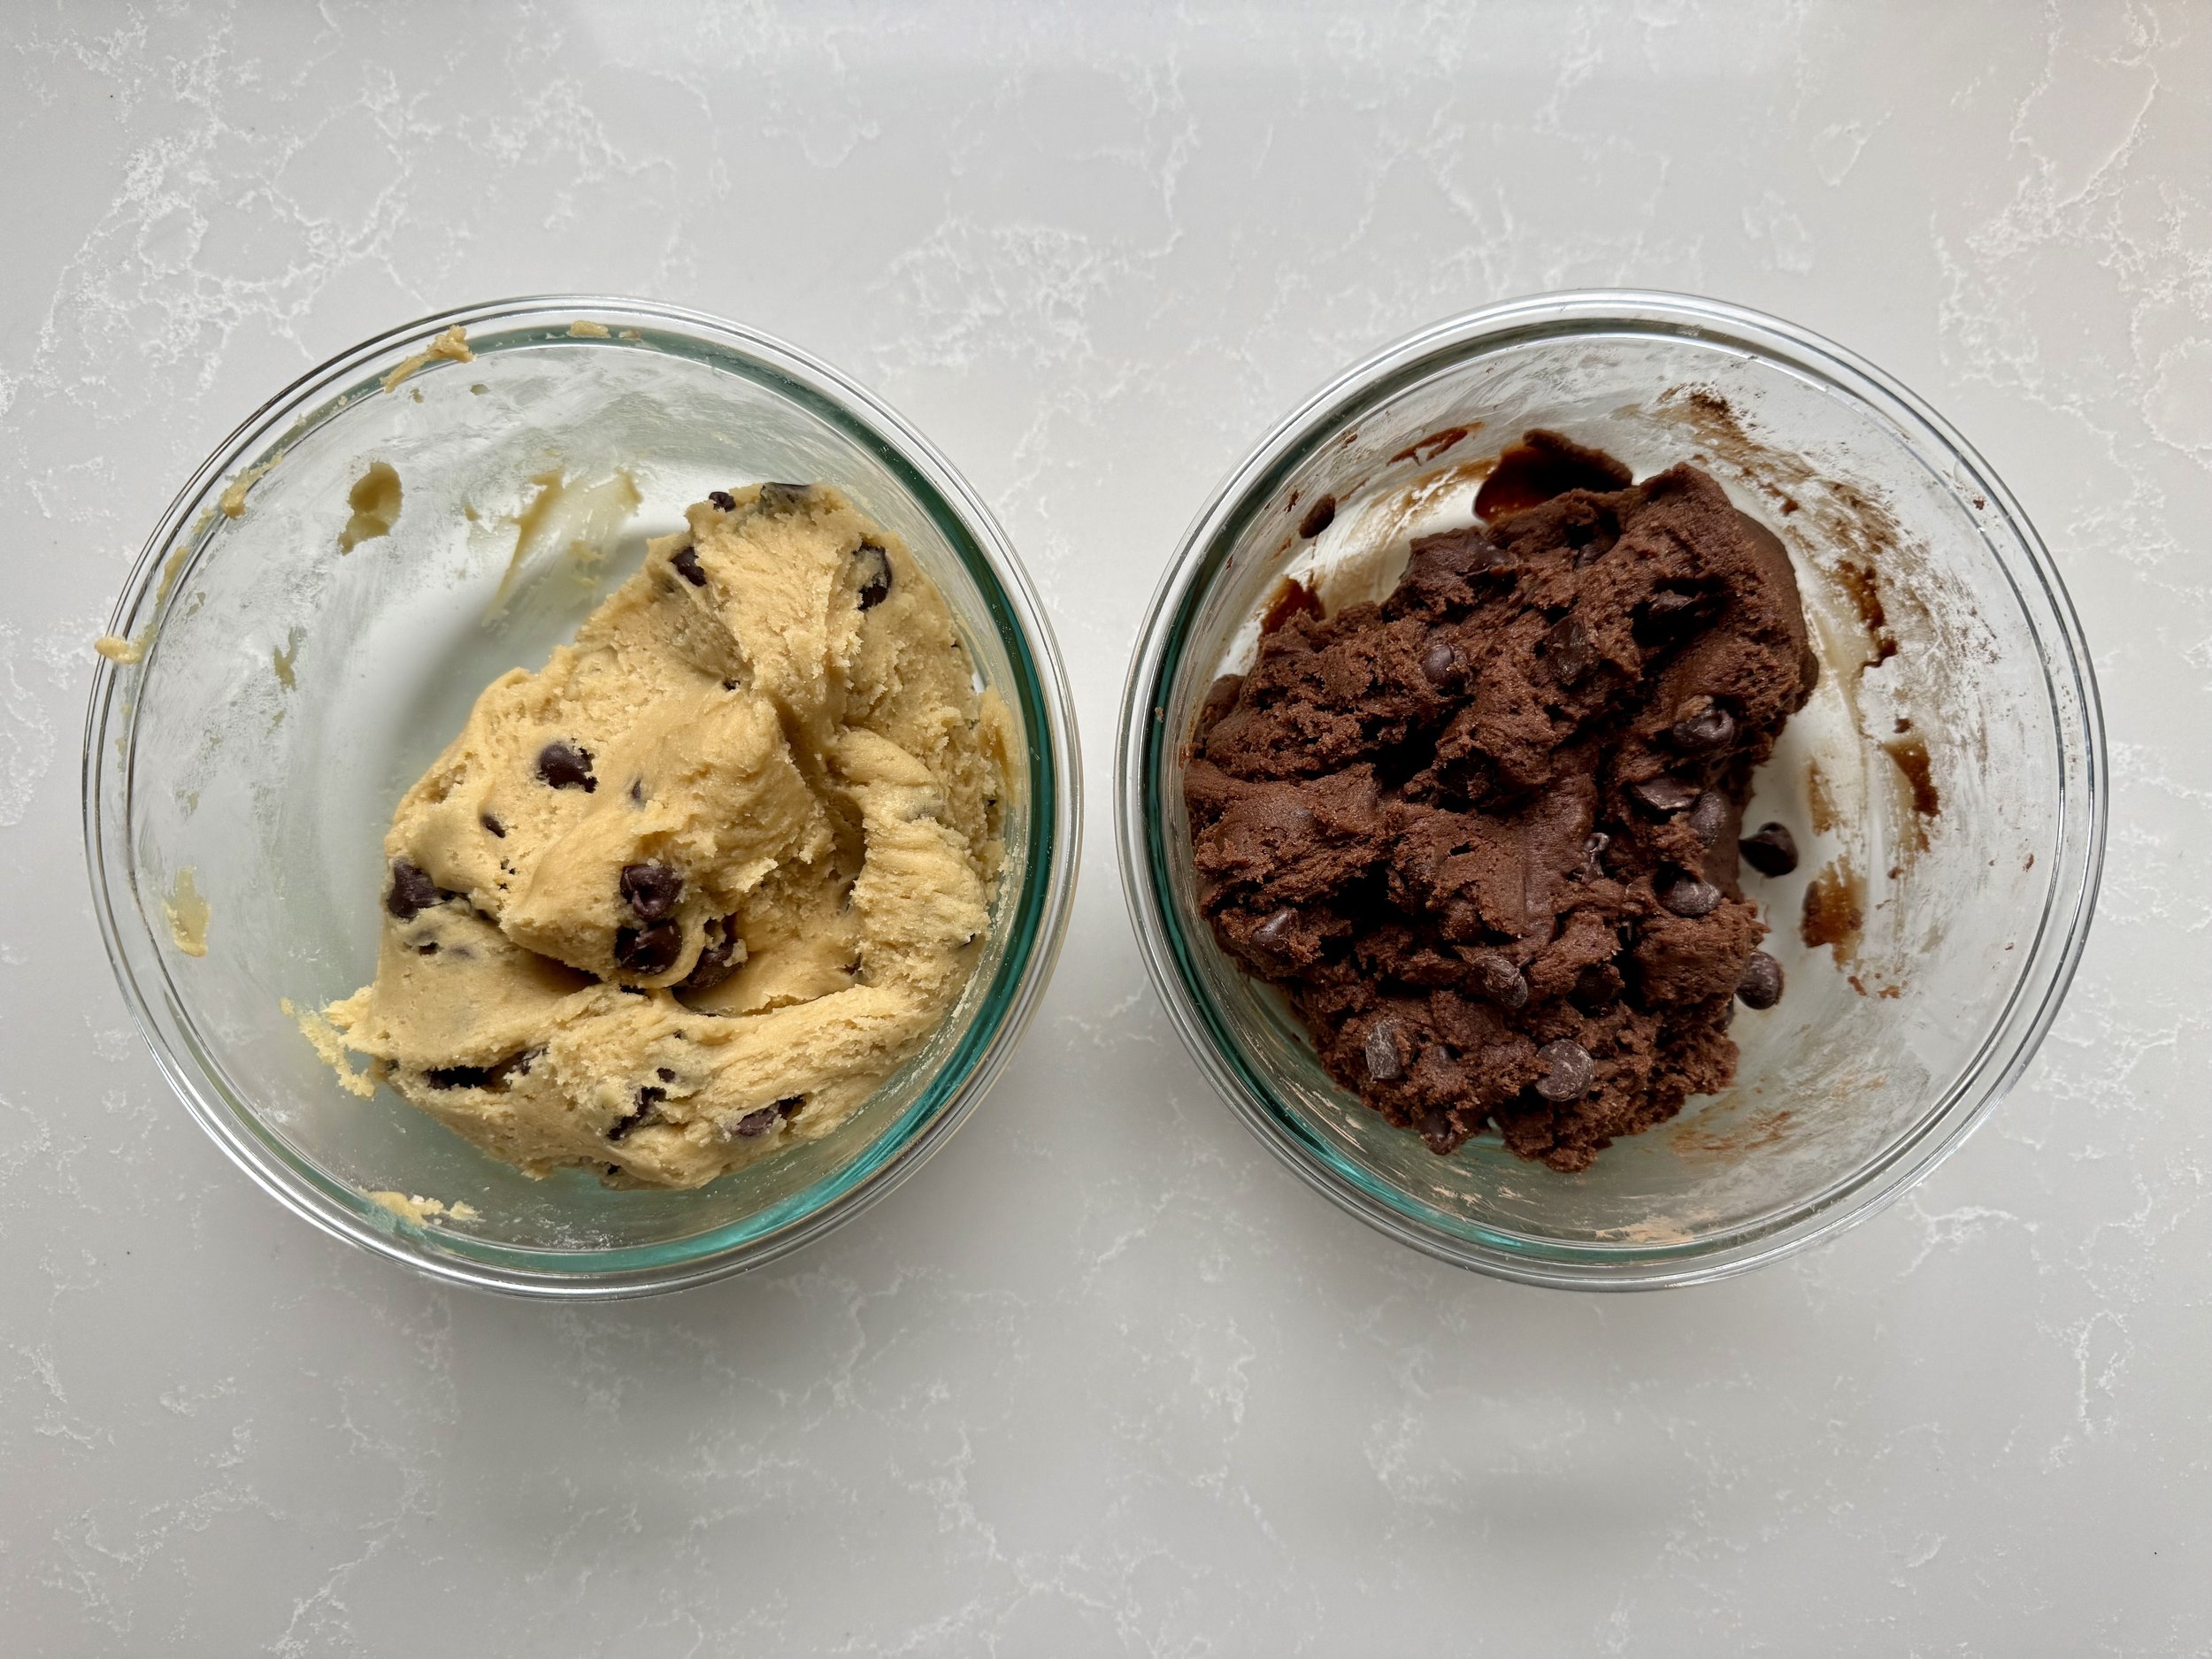
5. Split the dough into two bowls
One bowl gets the reserved 3 tablespoons of flour for the vanilla dough.
The second bowl gets the cocoa powder for the chocolate dough.
Mix each half with a spatula until fully combined.Add 1/2 cup of chocolate chips to each bowl after mixing, for a total of 1 cup.
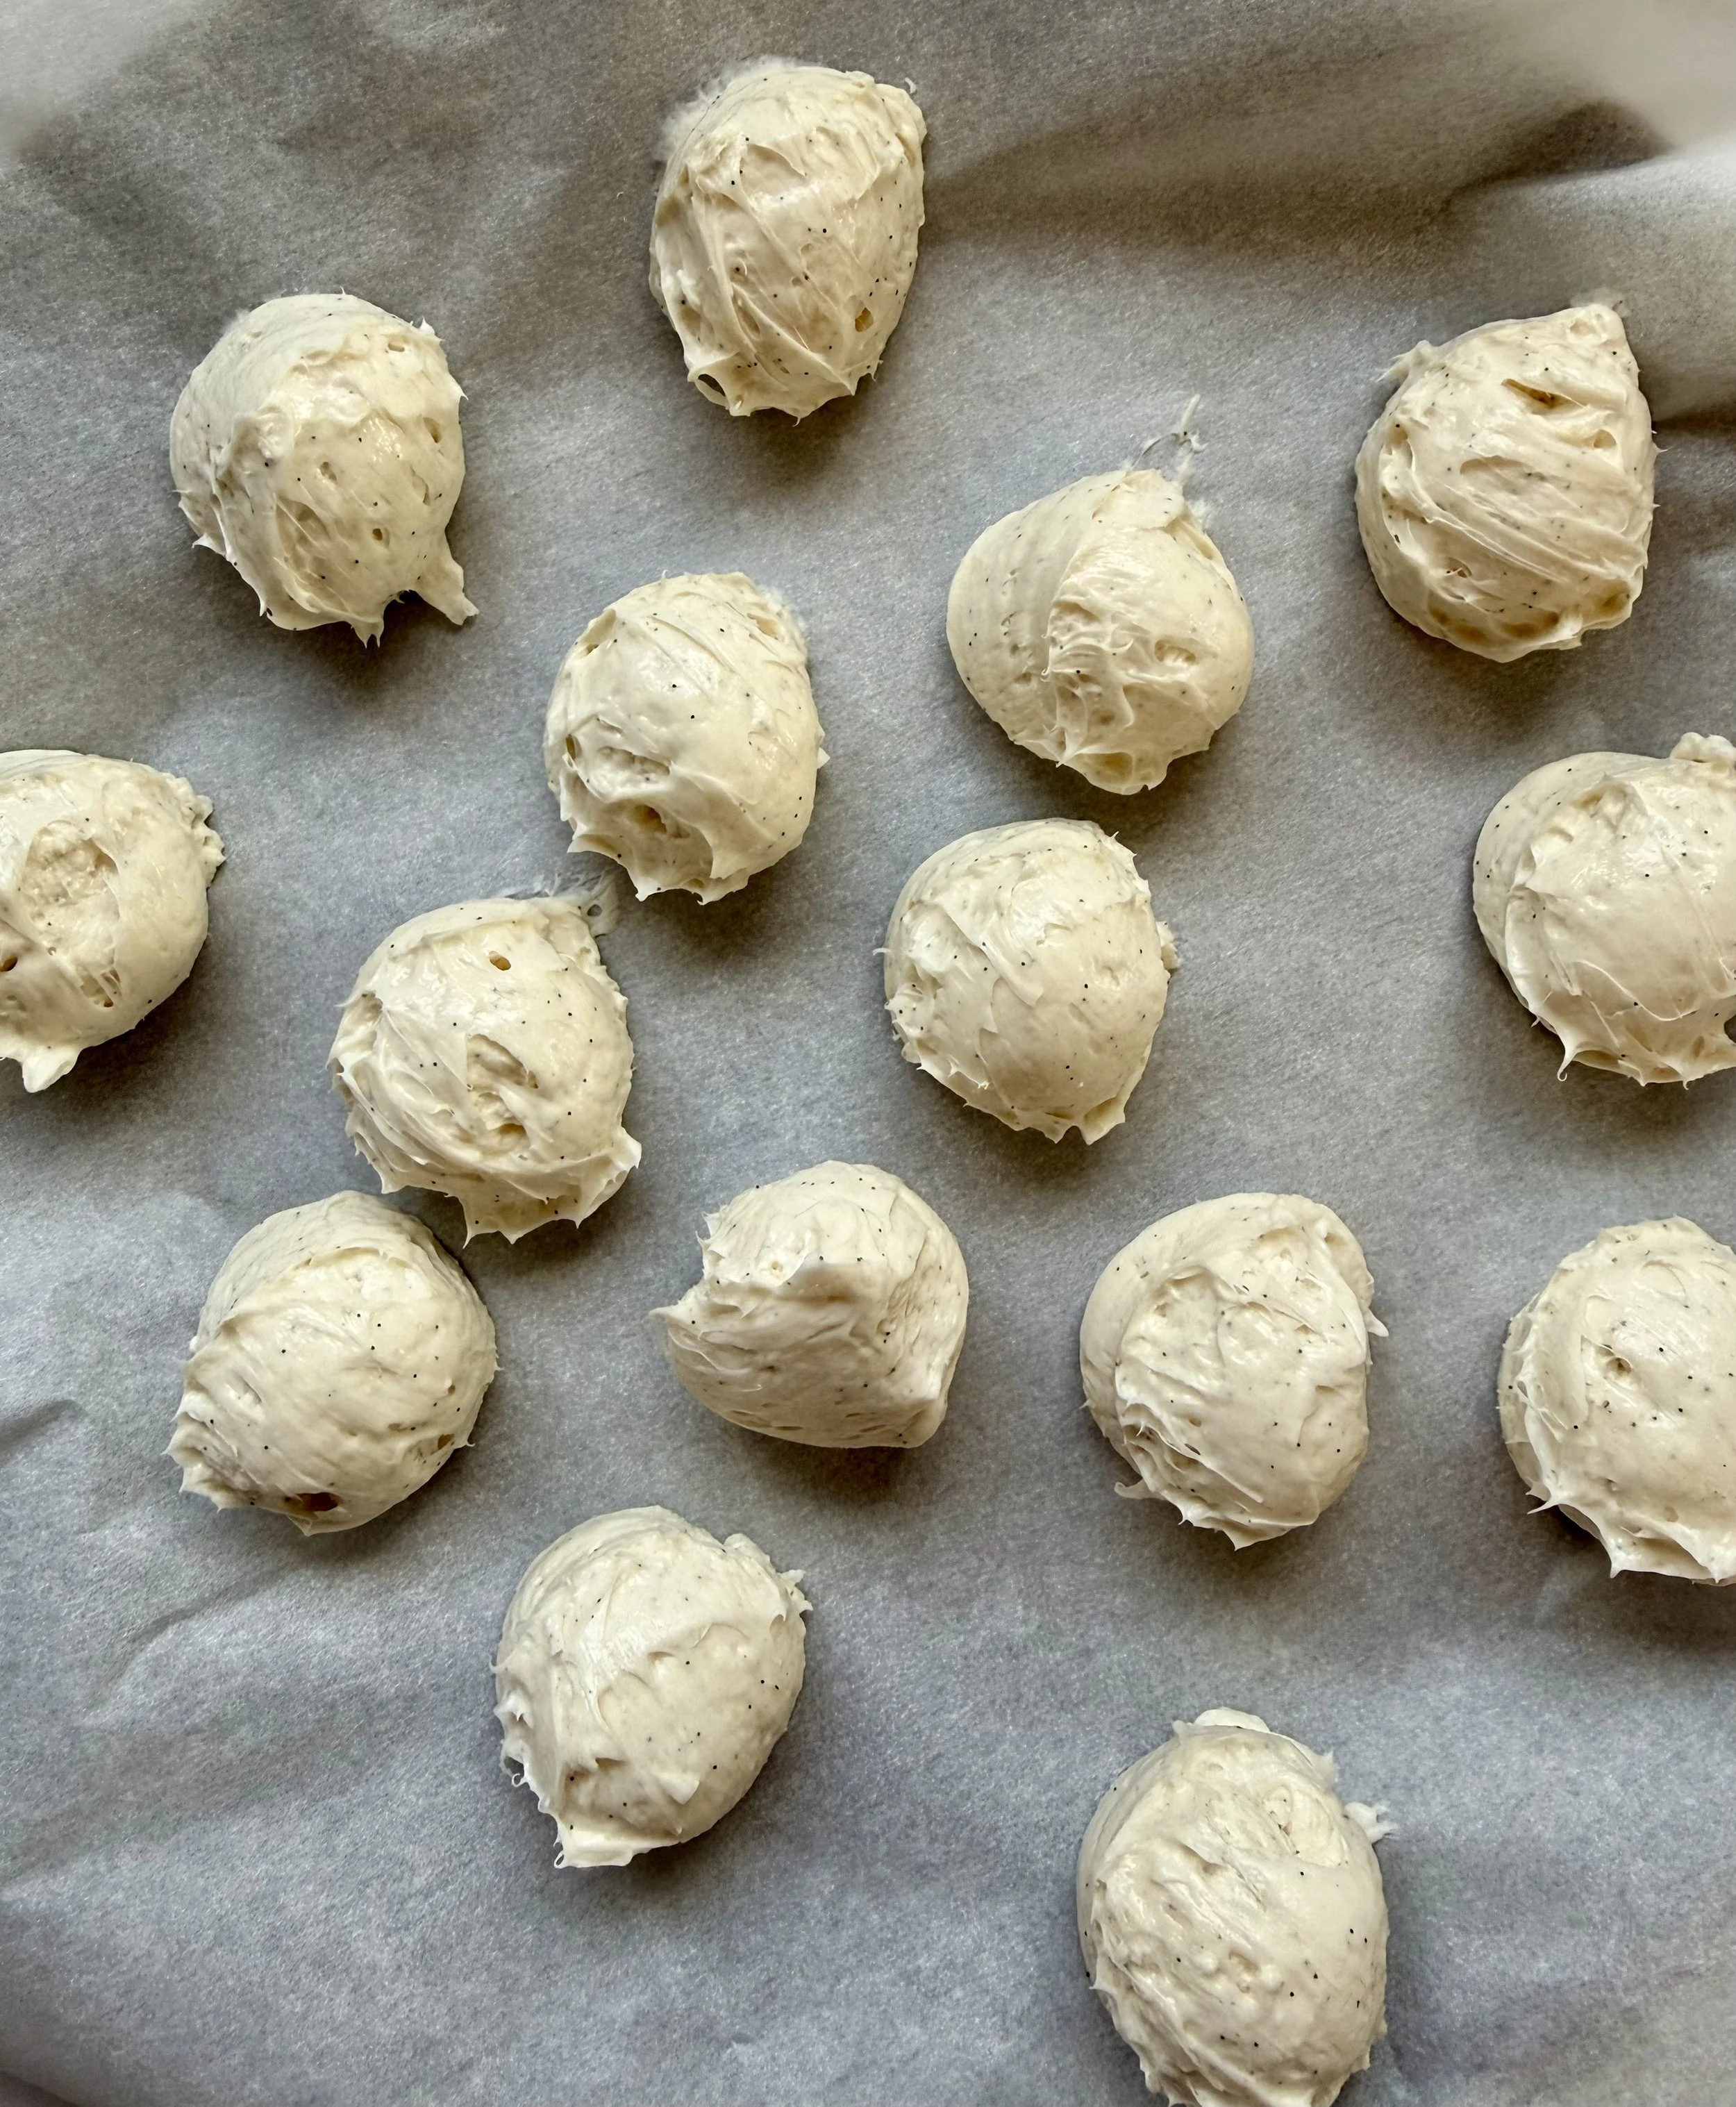
6. Make mini dough balls
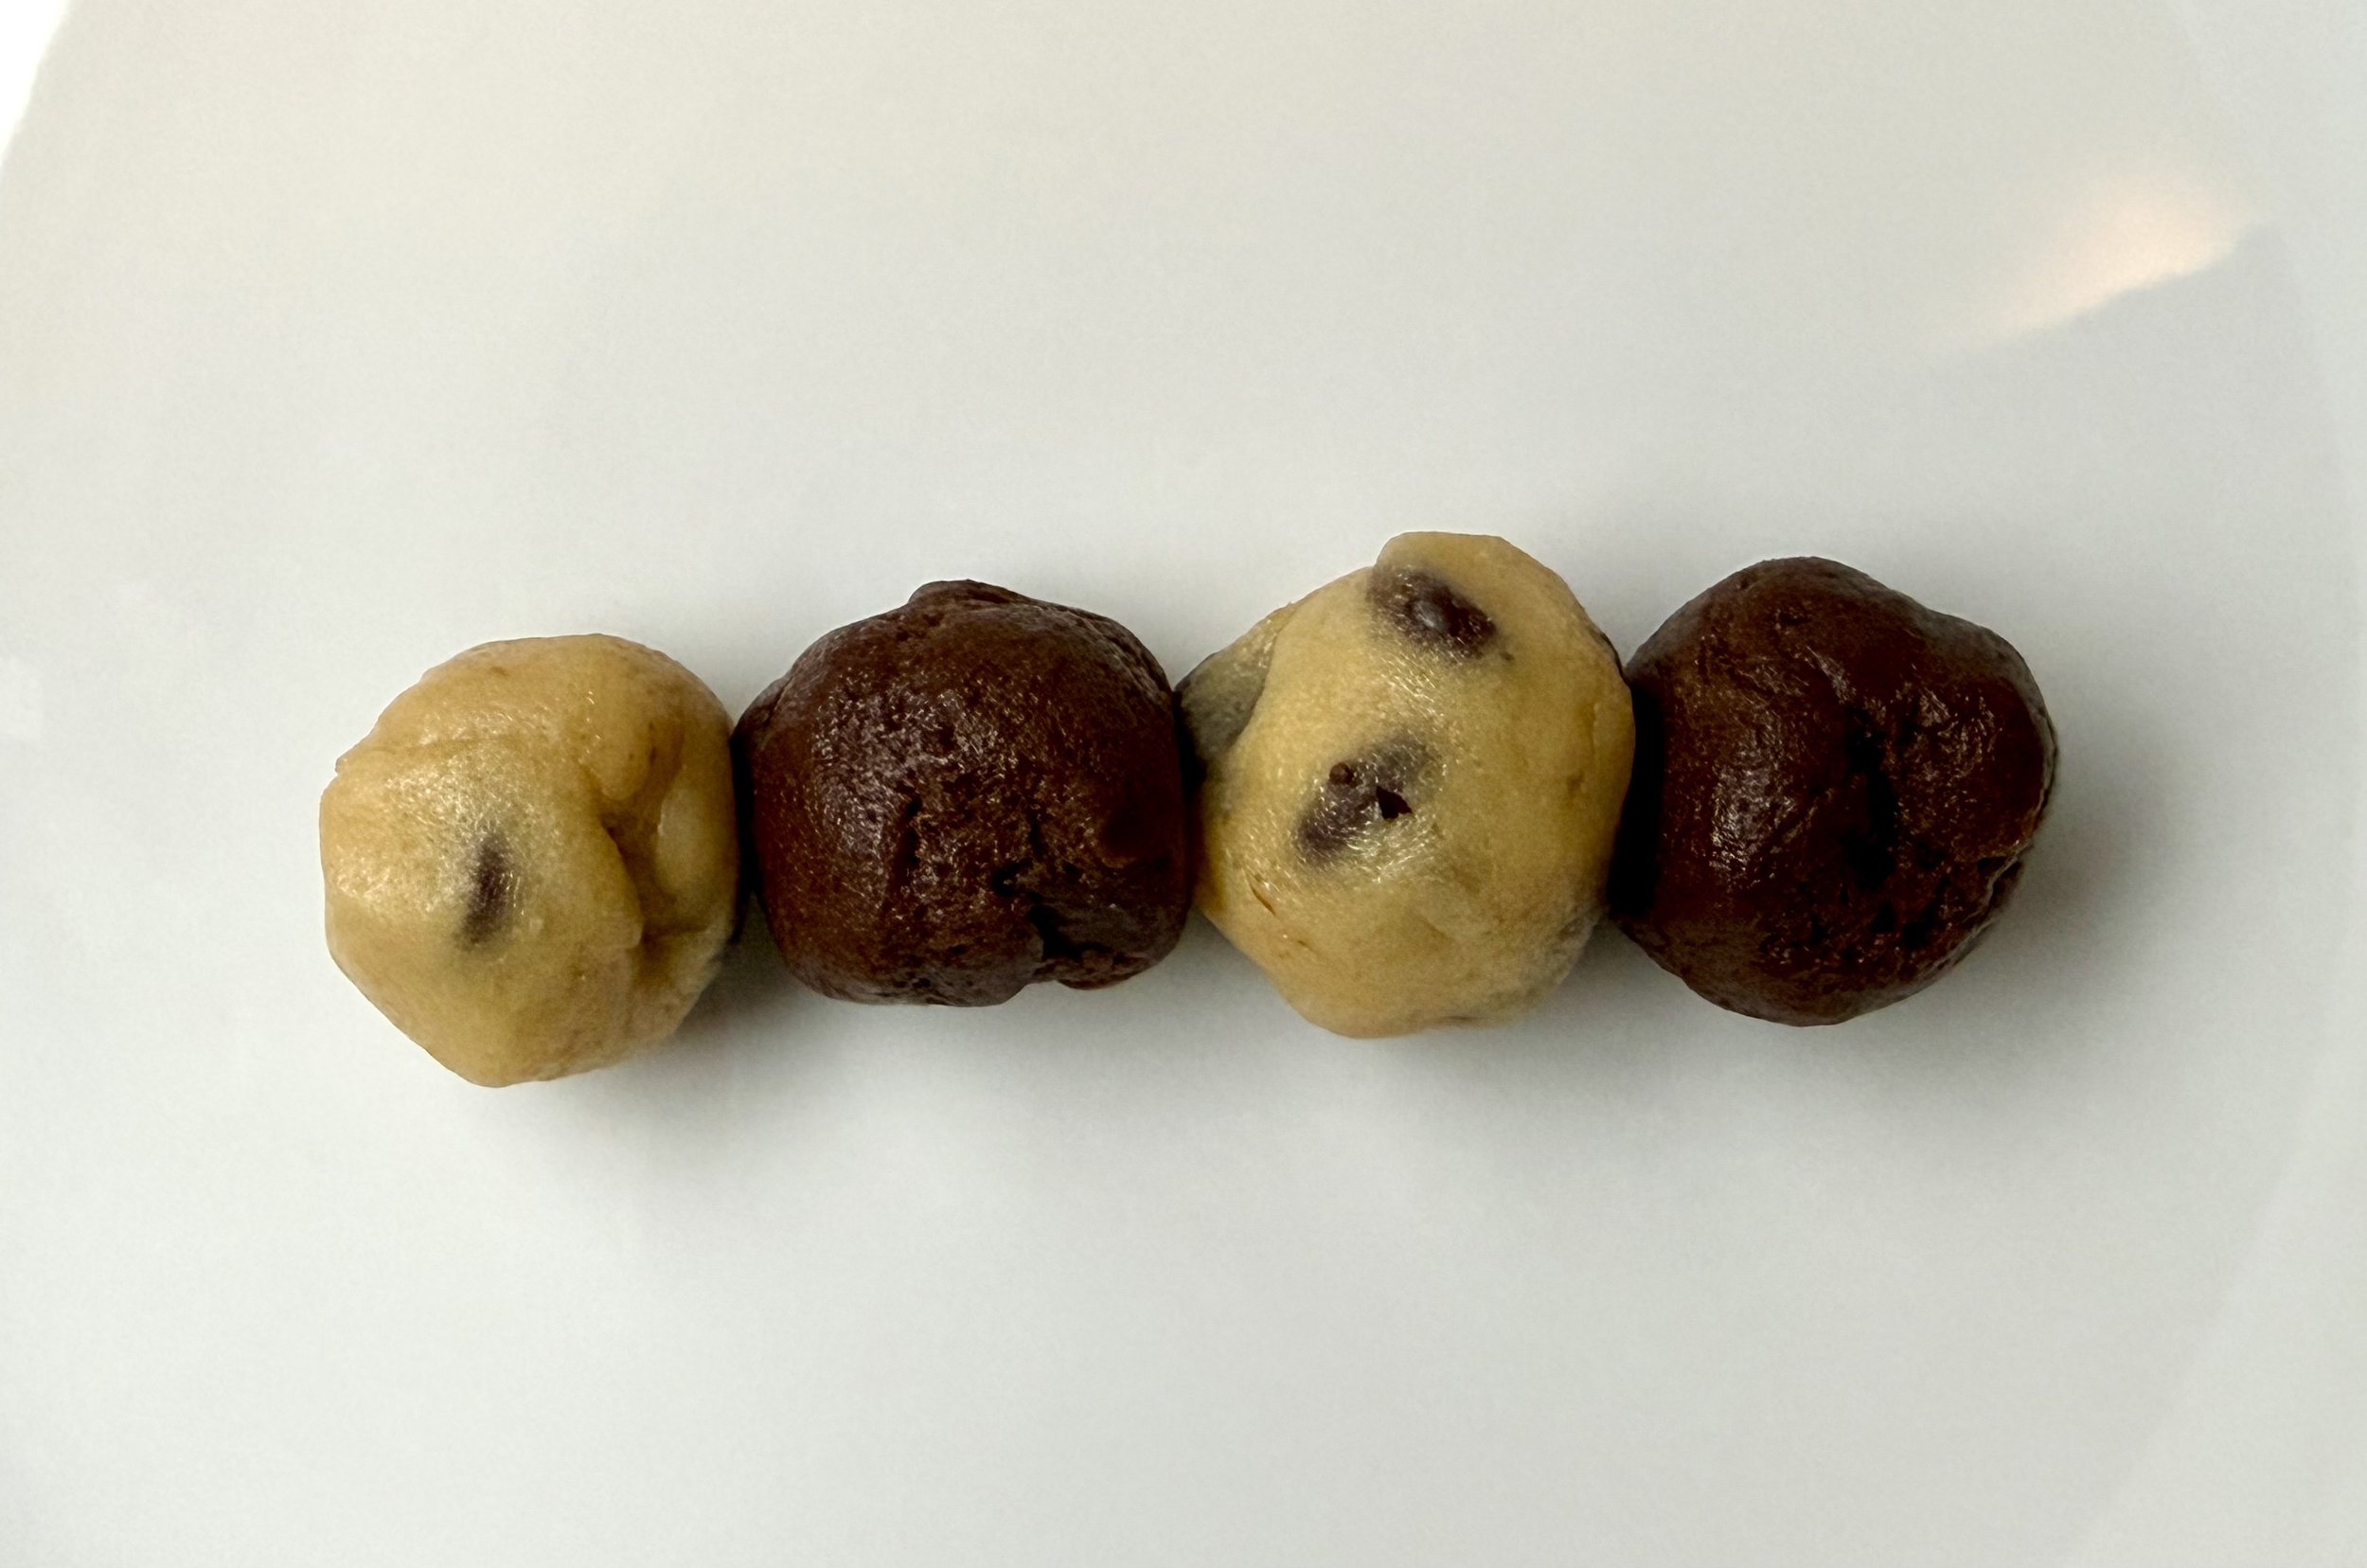
Scoop small portions of each dough, then cut each scoop in half so you end up with lots of tiny vanilla and chocolate dough pieces. This is what gives you beautiful swirls later.
7. Create the marble effect
Take four small dough balls, alternating flavors, think vanilla, chocolate, vanilla, chocolate. Gently squish them together and roll them into one larger cookie dough ball. Repeat until all the dough is used.
8. Bake
Place each dough ball 2 inches apart and bake for 12–14 minutes, or until the edges look lightly golden. The centers may still look soft, that’s perfect!
9. Cool and enjoy
Let them cool on the baking sheet for a few minutes before transferring to a rack. They’ll finish setting as they cool.
Tips for Perfect Marble Cookies
Don’t overmix after adding the flour; it keeps the cookies tender.
Use equal amounts of chocolate and vanilla dough when forming each cookie for the prettiest swirls.
Slightly underbake for super soft centers.
Chocolate chips help highlight the swirl pattern and add the perfect sweetness.
I hope these Marble Swirl Cookies bring as much joy to your kitchen as they do to mine. There’s just something so fun about watching the chocolate and vanilla dough twist together into those pretty, bakery-style swirls. If you make them, tag me or let me know how they turned out, I love seeing your creations. Happy baking, and enjoy every last bite!

Marble Swirl Cookies
These Marble Swirl Cookies blend soft vanilla and rich chocolate dough into one stunning, bakery-style cookie with the perfect bite of chocolate in every swirl.
Ingredients
- ½ cup salted butter (1 stick) softened at room temperature
- 3/4 cup light brown sugar
- 1/4 cup sugar
- 2 eggs at room temperature
- 1/2 tbsp vanilla extract
- 1 ½ cups all-purpose flour + 3 tbsp
- ¼ tsp baking soda
- ½ tsp baking powder
- 1 tsp cornstarch
- ¼ tsp salt
- 3 tbsp cocoa powder
- 1 cup white chocolate chips
Instructions

Hot Chocolate Cookies

If there’s one thing you should know about me, it’s that I never say no to a cozy mug of hot chocolate, especially during the colder months. There’s just something about that creamy, chocolatey warmth that instantly makes everything feel a little calmer, a little brighter, and a lot more nostalgic. So naturally, the moment I perfected my s’mores cookie recipe, my brain immediately thought… “Okay, but what if I turned hot chocolate into a cookie next?”
And honestly? I’m so glad I did.
These Hot Chocolate Cookies are everything I love wrapped into one thick, gooey, chocolate-loaded bite. They start with my same signature thick cookie base, but this time I mixed in actual hot cocoa mix for that true classic flavor. Then, because I always think cookies deserve a little drama, I tucked a melty marshmallow right in the center, just like the marshmallows that float to the top of your cup. And of course, a chocolate drizzle on top because… why not?
They’re warm, nostalgic, a little extra, and exactly the kind of treat that makes you want to curl up under a blanket and watch your comfort show while the oven does its thing.
If you love hot chocolate, if you love marshmallows, or if you just love cookies with personality, you’re going to be obsessed with these.
Why You’ll Love This Recipe
They taste like a mug of hot chocolate, thanks to the cocoa mix baked right into the dough.
A gooey marshmallow center that melts just enough to make every bite a surprise.
Thick, bakery-style texture with a soft, fudgy center and perfectly set edges.
No chilling overnight, just 30–60 minutes to keep them thick and prevent spreading.
Crowd-pleasers for holiday parties, cookie boxes, or any cold-weather craving.
An easy recipe even beginners can follow confidently.

Ingredients
Cold salted butter – Yes, cold! It helps the cookies stay tall and thick.
Brown sugar + granulated sugar – The brown sugar adds moisture and chewiness.
Hot chocolate mix – The secret ingredient that gives these cookies real hot cocoa flavor.
Eggs & vanilla – For structure and warmth.
Cake flour + all-purpose flour – The combo keeps the cookies soft yet sturdy.
Cocoa powder – For a deeper chocolate flavor.
Cornstarch – Creates that soft bakery-style texture.
Baking soda + salt – Balance and lift.
Milk chocolate chips – Because hot chocolate deserves real chocolate, too.
Marshmallows – The gooey center moment.
Milk chocolate + coconut oil – For the smooth, shiny drizzle on top.

Mix the butter and sugars until light and fluffy!
Mixing the cold butter with the sugars until light and fluffy is what builds the structure of these thick, bakery-style cookies. It aerates the dough just enough to keep the centers soft and gooey while still giving the cookies height and stability in the oven.
Pro Tips for the Best Results
Use cold butter- it’s key to the thick, chunky cookie look.
Don’t fully wrap the dough around the marshmallow- letting the top peek through helps prevent bursting.
Cut marshmallows with scissors dipped in water to keep them from sticking.
Watch the cookies near the 11-minute mark - chocolate cookies don’t “brown,” so look for set edges and a golden marshmallow.
Let them cool before drizzling - the chocolate sets beautifully.
How to Store These Cookies
Room temperature:
Store in an airtight container for 3–4 days. The marshmallow stays soft!Freezing baked cookies:
Freeze for up to 2 months. Thaw at room temperature, then warm for 10 seconds in the microwave.Freezing dough balls:
Stuff with marshmallows first, freeze on a tray, then store in a bag for up to 3 months.
Bake from frozen, just add 1–2 minutes.
If you make these cookies I’d love to see your creations or how they turned out! Leave a comment below or tag me on socials. Happy baking! :)

Hot Chocolate Cookies
These Hot Chocolate Cookies are thick, fudgy, and packed with cozy hot cocoa flavor, complete with a gooey marshmallow center and a silky chocolate drizzle. They taste just like a warm mug of hot chocolate in cookie form.
Ingredients
- 1 cup cold salted butter (2 sticks) cut into cubes
- 1 cup brown sugar
- 1/4 cup sugar
- 2 packs of Swiss Miss Hot Chocolate mix (roughly 1/2 cup)
- 2 eggs
- 1 tbsp vanilla extract
- 1 1/4 cup cake flour
- 1 1/2 cups all-purpose flour
- 1/4 cup cocoa powder
- 1.5 tsp cornstarch
- ¾ teaspoon baking soda
- ¾ tsp salt
- 1 cup milk chocolate chips
- 10 medium-sized marshmallows (cut in half to make 20).
- 3/4 cup milk chocolate chips
- 3/4 tsp coconut oil
Instructions
Chewy Chocolate Crinkle Cookies

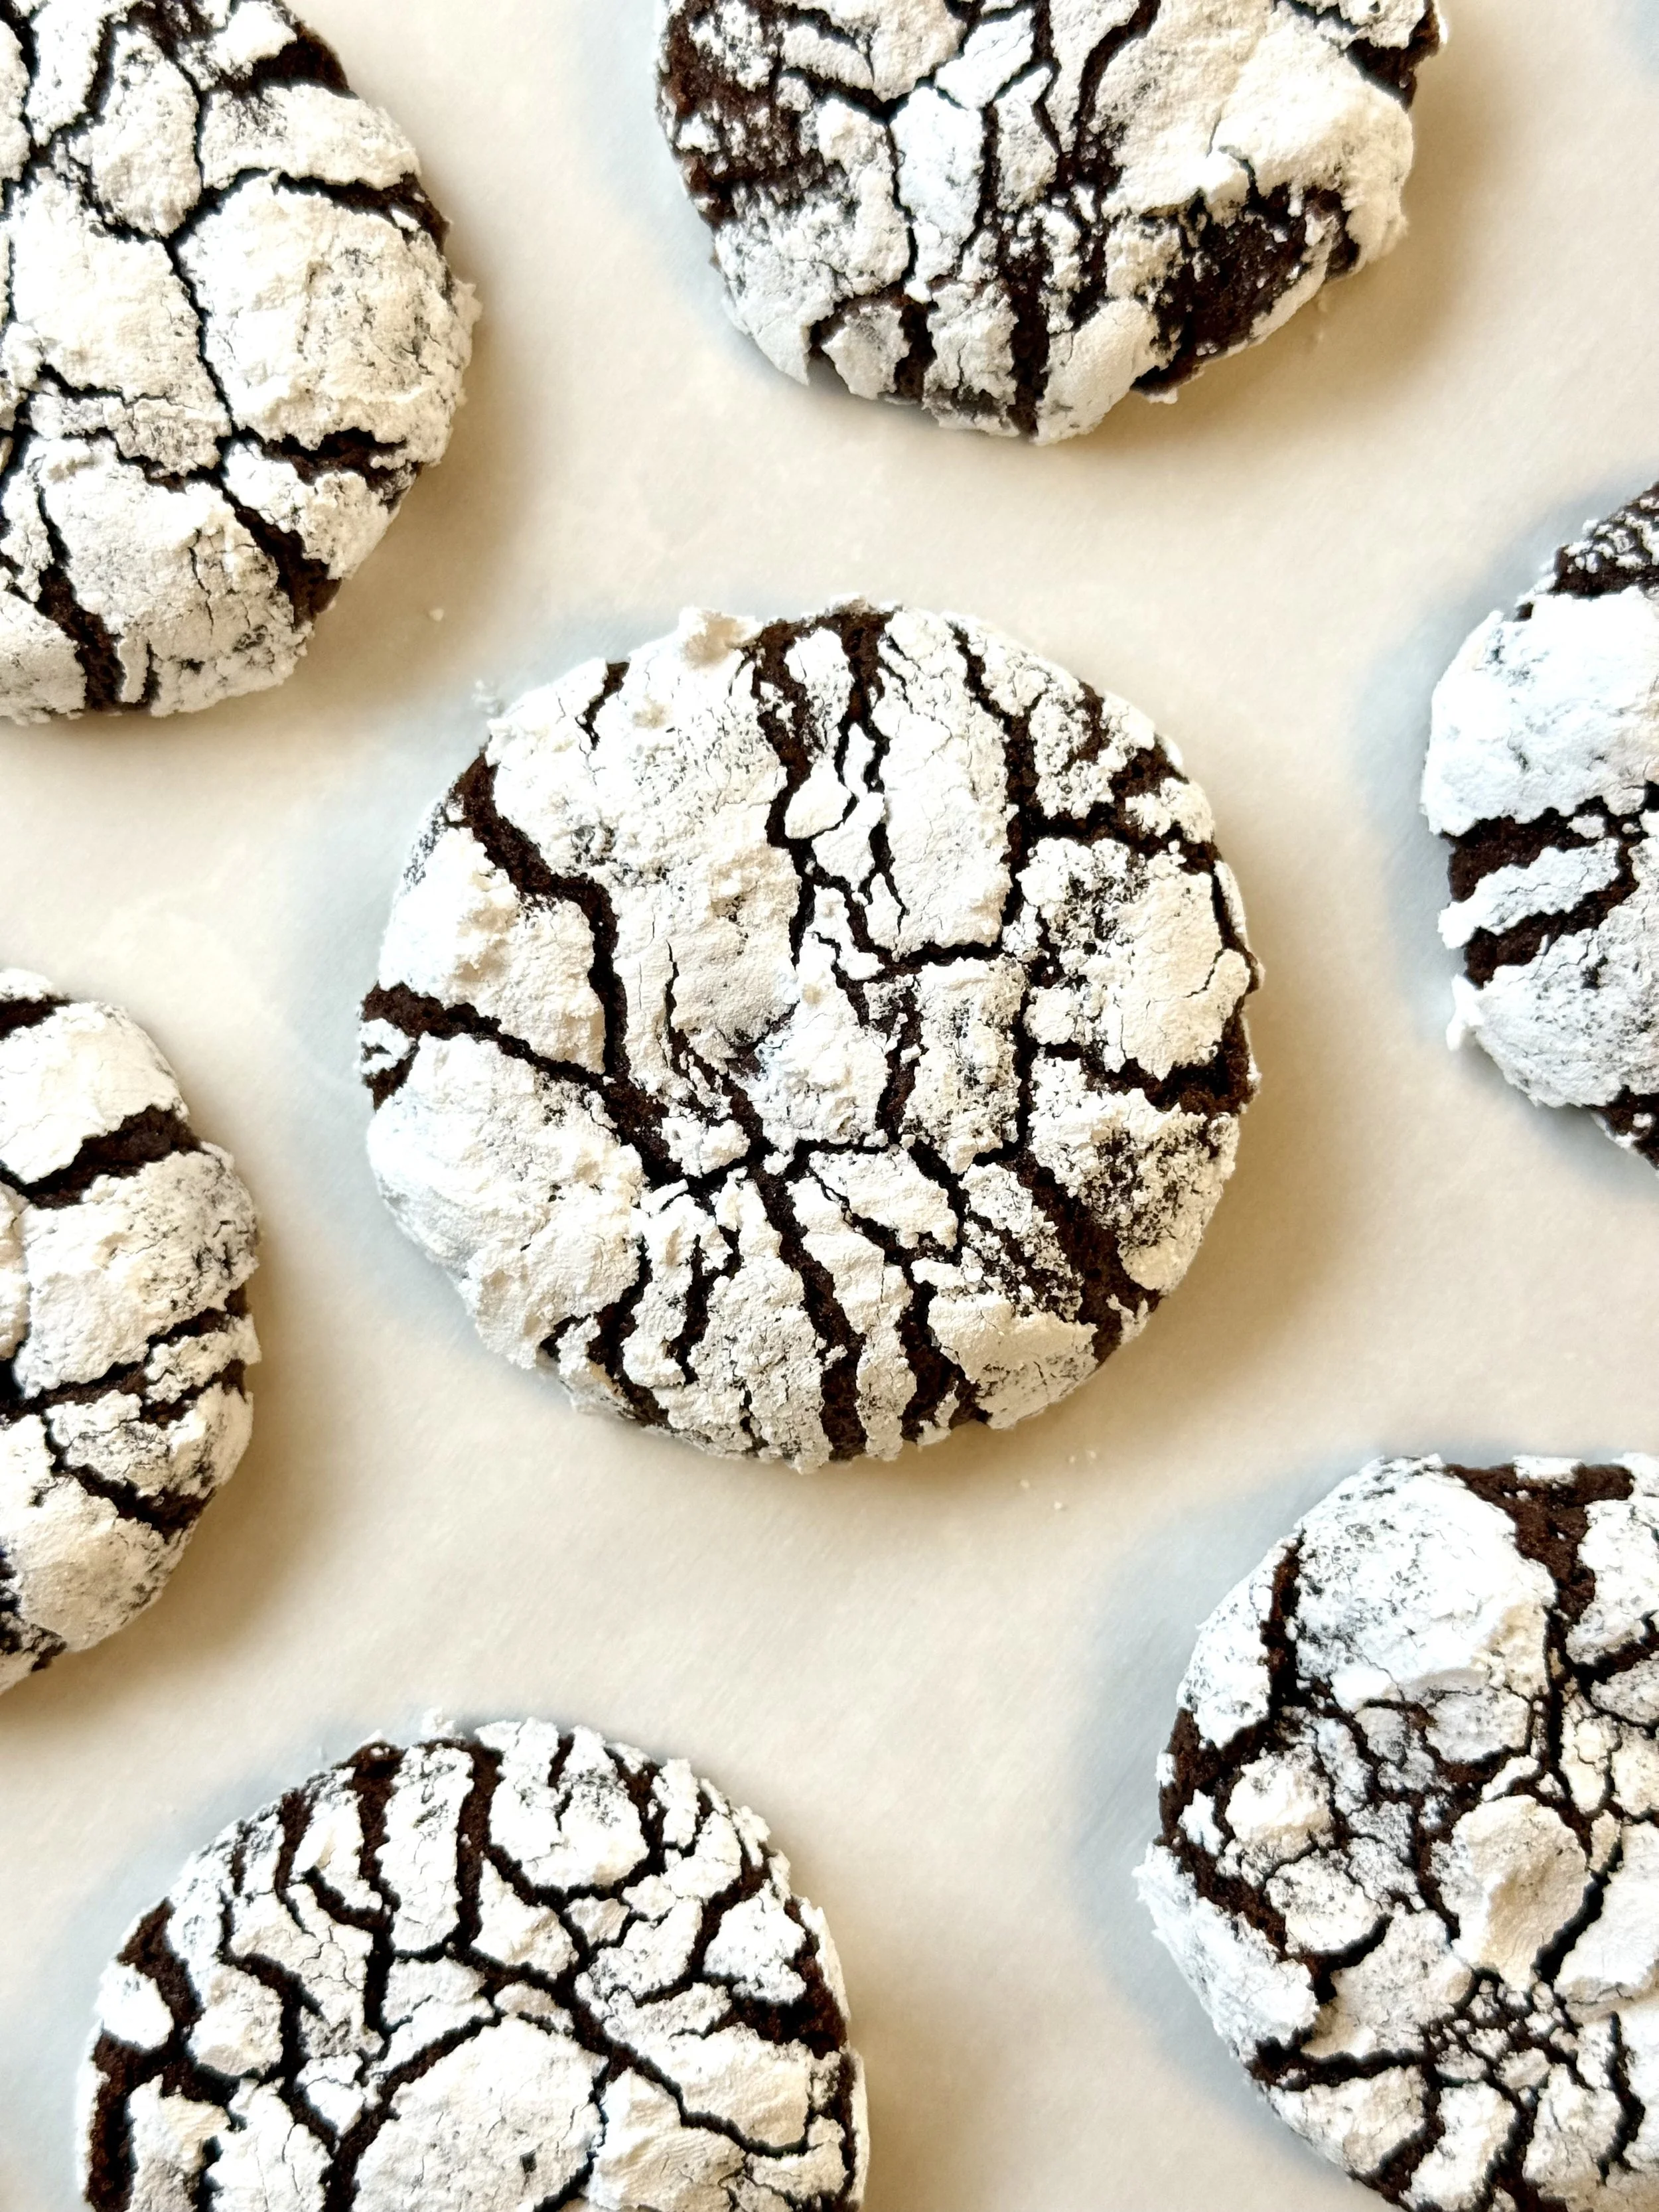
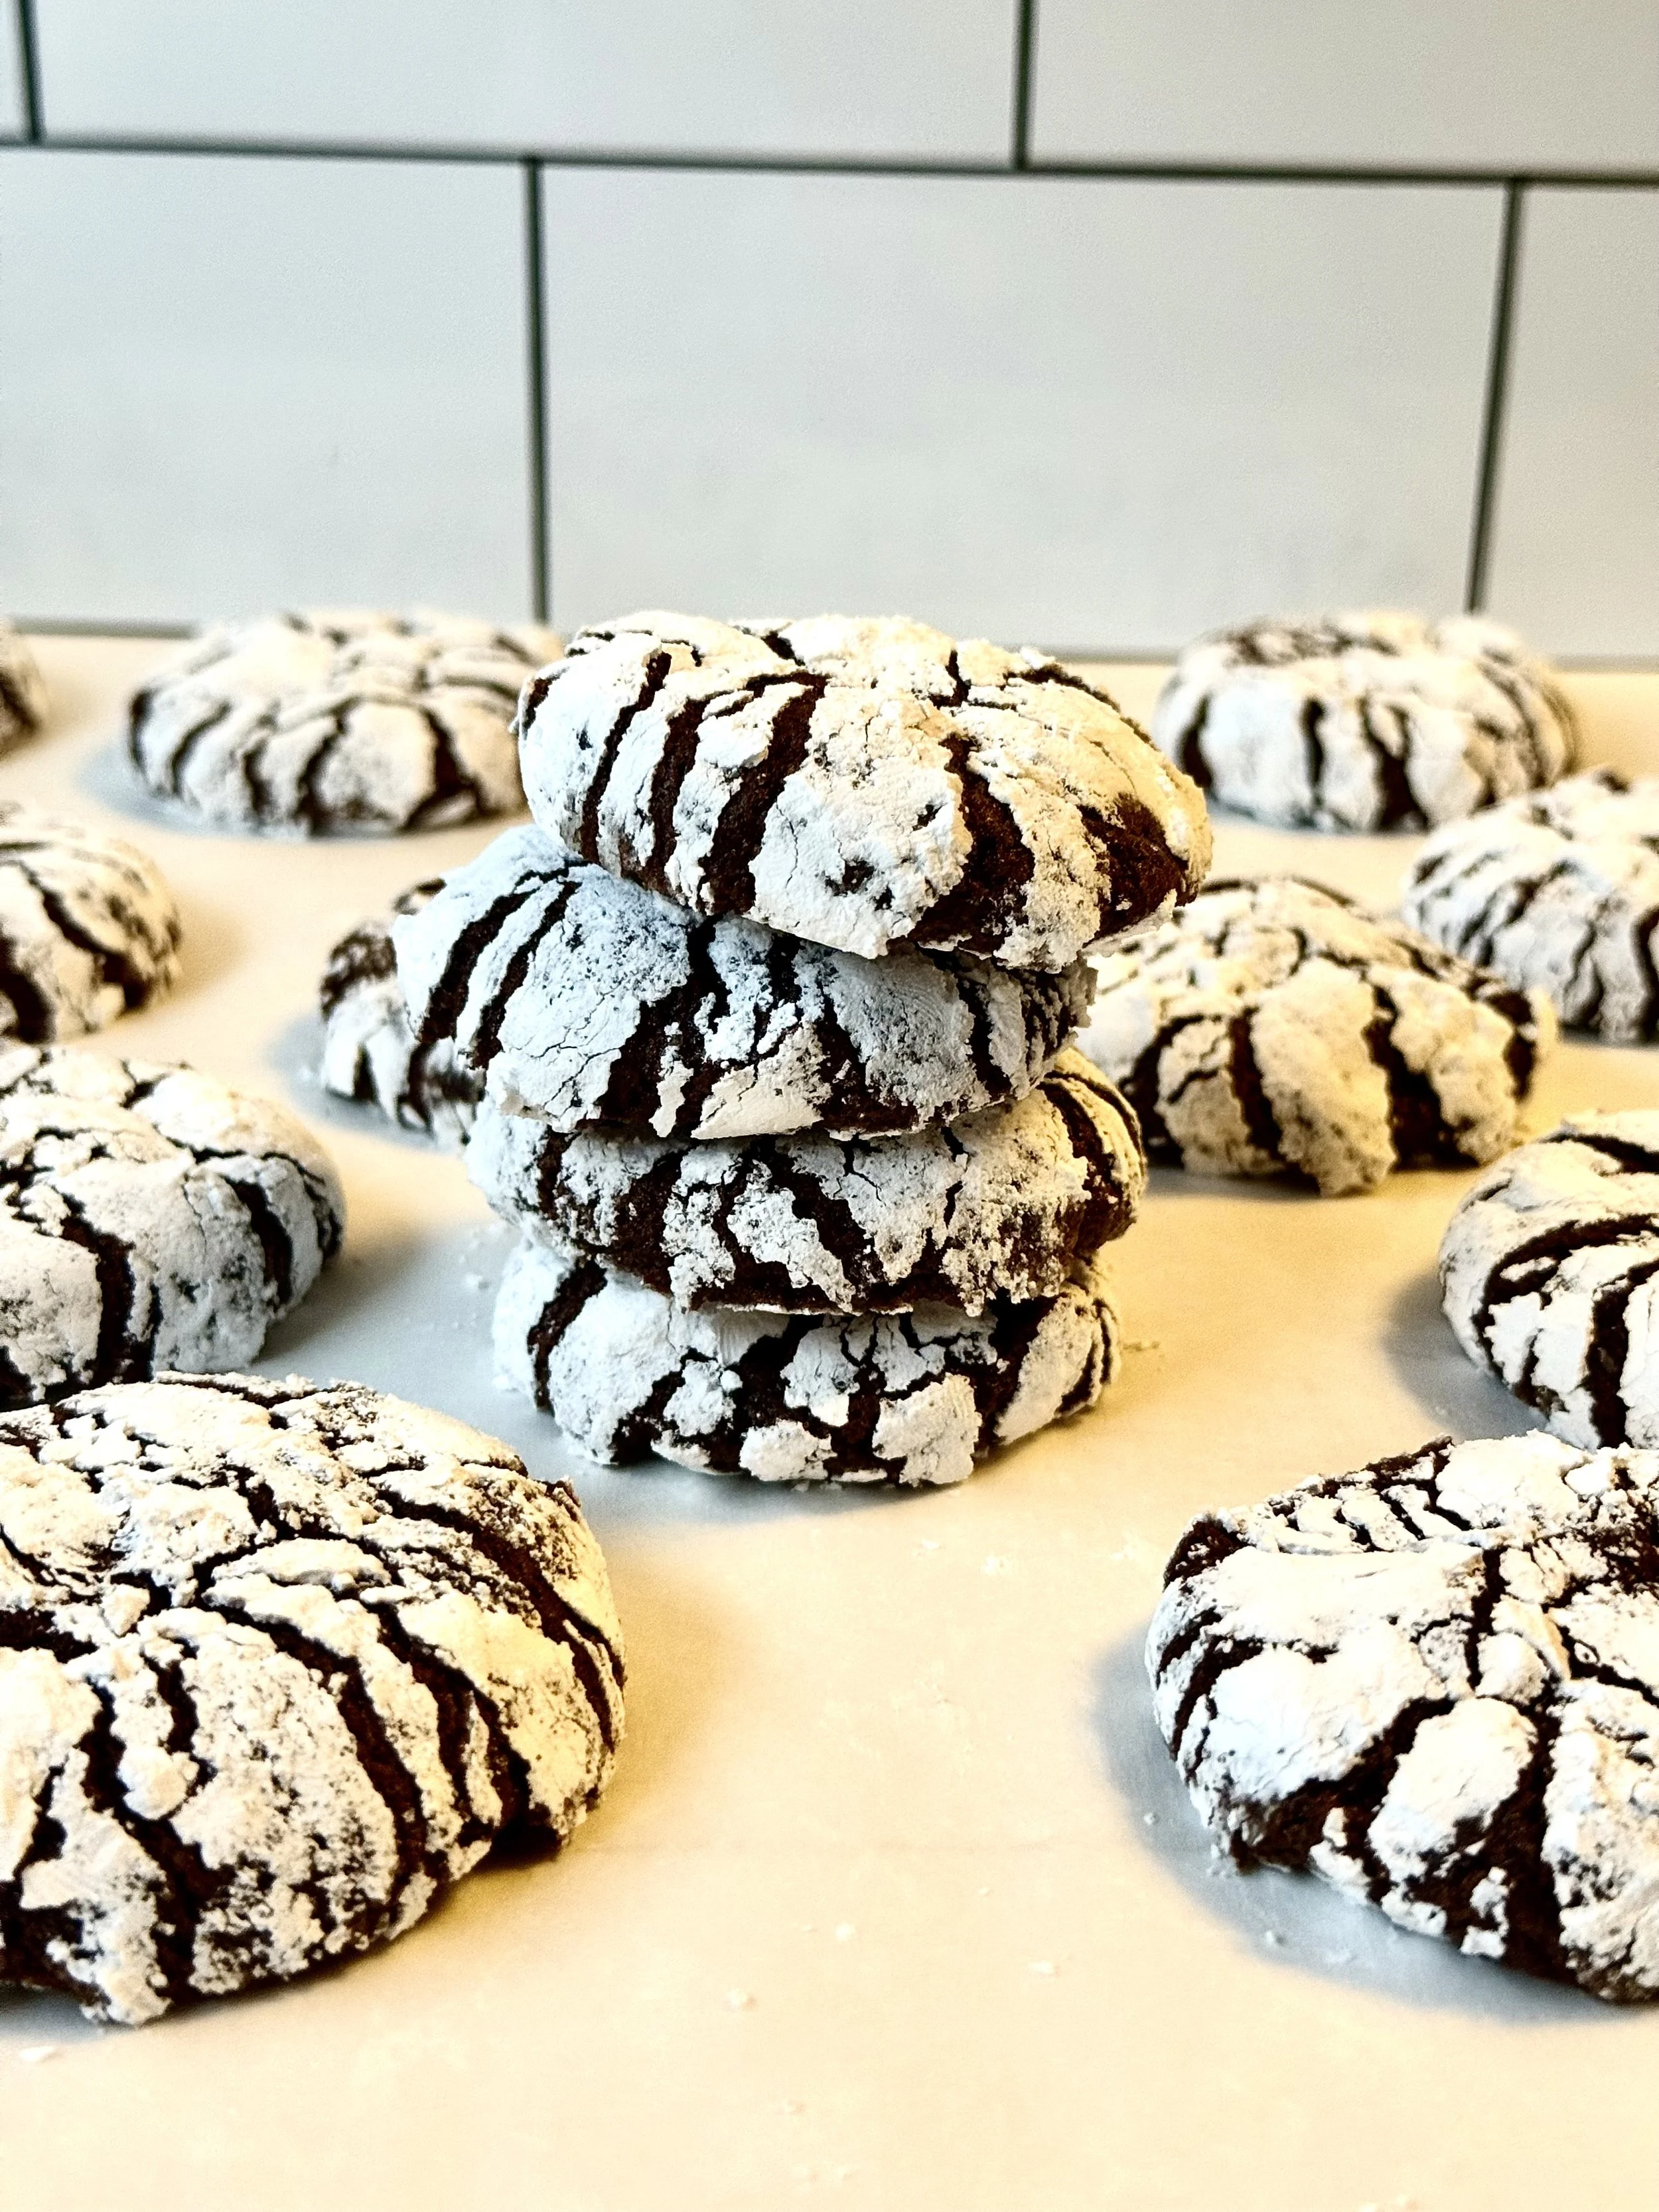
Chewy Chocolate Crinkle Cookies
There’s just something magical about a cookie that looks as good as it tastes, and these Chewy Chocolate Crinkle Cookies deliver on both. With their deep cocoa flavor, soft brownie-like center, and a snowy powdered sugar coating that crackles beautifully as they bake, they’re a cozy, nostalgic treat perfect for holidays, gifting, or whenever you’re craving something chocolatey and comforting.
Why You’ll Love These Cookies
Perfectly chewy: The centers stay soft and fudgy thanks to the oil-based dough and proper chilling time.
Crackly, snow-dusted finish: The double sugar roll gives you bold, dramatic crinkles every time.
Simple ingredients: No specialty items — just pantry staples.
Amazing for holidays: They look impressive but are incredibly easy to make.
Kid & crowd-approved: These always disappear fast!
Ingredients You’ll Need
Vegetable oil
Light brown sugar
Granulated sugar
Eggs
Vanilla extract
All-purpose flour
Cocoa powder
Baking powder
Cornstarch
Salt
Crinkle Coating:
Granulated sugar
Powdered sugar
How to Make Chewy Chocolate Crinkle Cookies
Making crinkle cookies is surprisingly simple:
Mix the wet ingredients: oil, sugars, eggs, and vanilla.
Add your dry ingredients: cocoa, flour, baking powder, salt, and cornstarch.
Chill the dough: this ensures thick cookies with dramatic cracks.
Roll in sugar: first granulated, then powdered.
Bake: just long enough for crackles to form while staying chewy in the center.
The Importance of Chilling the Dough
Chilling the dough for at least 3 hours firms it up, prevents excessive spreading, and guarantees the classic crinkled top. Soft, warm dough won’t hold shape and will bake into flat, cakey cookies, chilling makes all the difference.
Tips for the Best Crinkles
Use both sugars for rolling: granulated helps the powdered stick, and powdered gives the dramatic snowy effect.
Coat generously: don’t be shy with the powdered sugar!
Don’t overbake: take them out once they’ve cracked; the centers will continue setting on the tray.
Use a cookie scoop: it keeps cookies uniform and helps them bake evenly.
Storing & Freezing
Room temperature: Store in an airtight container for up to 5 days.
Freezing dough: Scoop into balls, freeze on a sheet tray, then store in a freezer bag for up to 3 months. Roll in sugar right before baking.
Freezing baked cookies: Freeze up to 2 months; thaw at room temp.

Barriers
Cookies didn’t crack?
The dough wasn’t chilled long enough, or the powdered sugar layer was too light.
Cookies spread too much?
The dough was too warm, chill it longer or scoop smaller balls.
Powdered sugar melted into the cookie?
Ensure you roll the cookie ball in granulated sugar before rolling it in the powdered sugar. Granulated sugar helps absorb a bit of surface moisture from the dough, which keeps the powdered sugar from melting into the cookie while it bakes. Because the granulated sugar forms a slight outer crust, the cookie cracks more dramatically in the oven. The powdered sugar then settles into those cracks for that classic bold crinkle pattern. Without the granulated sugar layer, powdered sugar can dissolve into the dough as it bakes, leaving the cookies patchy instead of snowy and defined.
If you make these chewy chocolate crinkle cookies, let me know how turned out for you in the comments below or on socials. Happy Baking!

Chewy Chocolate Crinkle Cookies
Soft, fudgy, and coated in a sweet crackly shell, these Chocolate Crinkle Cookies are the perfect blend of rich cocoa flavor and melt-in-your-mouth texture.
Ingredients
- 1/4 cup vegetable oil
- 1/2 cup light brown sugar
- 1/2 cup granulated sugar
- 2 eggs
- 1/2 tbsp vanilla extract
- 1 cup all-purpose flour
- 1/2 cup cocoa powder
- 1 tsp baking powder
- 1 tsp cornstarch
- 1/4 tsp salt
- 1/3 cup granulated sugar
- 1/2 cup powdered sugar
Instructions
Chunky Gingerbread Cookies

If you love thick, bakery-style cookies but want something festive for the holidays, these chunky gingerbread chocolate chip toffee cookies are for you. They’re loaded with cozy spices, melty chocolate, and sweet toffee bits, giving you a soft, gooey center with perfect golden edges.
Why You’ll Love These Chunky Gingerbread Cookies
They’re thick, soft, and bakery-style, with a gooey center and golden edges.
The molasses + warm spices give every bite that nostalgic gingerbread flavor.
Chocolate chips and buttery toffee bits take the cookies from festive to irresistible.
Chilling is required to make them extra chunky.
They’re the perfect holiday cookie for gifting, snacking, or making your kitchen smell amazing.
What You’ll Need
Salted butter
Brown sugar
Granulated sugar
Molasses
Eggs
Vanilla extract
Cake flour
All-purpose flour
Cornstarch
Baking soda
Salt
Ground ginger
Ground cinnamon
Nutmeg
Cloves
White Chocolate chips
Toffee bits
Helpful Baking Tips for these chunky cookies
Keep the cookies thick: Use cold butter, avoid overmixing, and scoop the dough with the “chunky top” facing upward so the cookies stay tall and bakery-style.
Boost the thickness even more: Chill the scooped dough for 30–60 minutes before baking. This helps the cookies hold their shape and develop a gooey center.
Control the spread: If the dough feels too soft or sticky, add 2–3 tablespoons of extra all-purpose flour or chill the dough longer.
Help them spread a touch more: If your cookies are baking too round or not spreading at all, let the dough sit at room temperature for 10 minutes before baking.
Adjust the spice level: Increase the ginger for extra warmth, or tone down the cloves for a milder gingerbread flavor.
Avoid dark bottoms: Bake on light-colored pans and use the middle oven rack to keep the bottoms soft and golden instead of overly browned.
Enhance the texture: Toffee bits add buttery crunch, but you can swap in white chocolate, extra chocolate chips, or leave mix-ins out entirely for a smoother texture.
Storage Instructions
Store your cookies in an airtight container at room temperature for 3–4 days.
For longer storage, freeze baked cookies for up to 2 months. Let them thaw at room temperature or warm them in the microwave for 8–10 seconds to restore their soft, gooey texture.If you want to freeze the dough, scoop the cookie dough balls, freeze them solid, and store them in a freezer bag for up to 3 months. Bake straight from the freezer, adding 1–2 minutes to the bake time.
I can’t wait for you to enjoy these soft and chunky gingerbread cookies. If you give them a try, drop a comment below and tell me what you think!

Chunky Gingerbread Cookies
These thick, chunky gingerbread cookies are infused with molasses, warm spices, melty chocolate, and toffee bits, creating the perfect holiday twist on a classic. Soft in the center with golden edges, they’re irresistible in every bite.
Ingredients
- 1 cup cold salted butter, cubed
- 1 cup dark brown sugar
- ¼ cup granulated sugar
- ¼ cup molasses
- 2 eggs
- 1 tbsp vanilla extract
- 1 ½ cups cake flour
- 1 ½ cups all-purpose flour
- 2 tsp ground ginger
- 1 ½ tsp cinnamon
- ¼ tsp nutmeg
- ¼ tsp cloves
- 1 tsp cornstarch
- ¾ tsp baking soda
- ¾ tsp salt
- 1 ½ cups white chocolate chips + ½ cup chopped toffee
Instructions

Chewy Gingerbread Cookies
Chewy Gingerbread Cookies
Nothing says cozy like the smell of warm gingerbread cookies baking in the oven. It’s finally that time of year when baking cookies is so magical. I love putting a Christmas movie on in the background and getting right to baking. These chewy gingerbread cookies are packed with classic holiday spices — ginger, cinnamon, cloves, and nutmeg- and have that soft, melt-in-your-mouth texture that makes them impossible to resist.
I created this recipe for anyone who loves a cookie that’s full of flavor but still soft and chewy in every bite. They’re perfect for holiday cookie exchanges or enjoyed with a cup of hot cocoa by the fireplace. The best part? They’re simple to make and turn out beautiful every time.
Why You’ll Love These Chewy Gingerbread Cookies
Perfectly Chewy Texture: Soft in the center with just enough structure to hold their shape, these cookies stay chewy for days.
Warm, Cozy Spices: The classic gingerbread spice blend fills your kitchen with irresistible holiday aroma.
Easy to Make: From creaming the butter to rolling dough balls, this recipe is beginner-friendly and consistent.
Versatile & Fun: Roll in coarse sugar for sparkle, add extra spices for bold flavor, or freeze dough for later baking.
Ideal for Gifting: These cookies are perfect for packaging in cute tins or sharing at holiday gatherings.
Ingredients
Butter
Dark brown sugar
Molasses
Honey
Egg
Vanilla extract
All-purpose flour
Baking soda
Cornstarch
Cinnamon
Ginger
Cloves
Nutmeg
Salt
Coarse sugar for rolling
Ingredient Breakdown & Baking Tips
Butter: Butter provides richness, flavor, and tenderness to your cookies. Softened butter allows for easy creaming with sugar, which creates a light, airy texture. Tip: Don’t melt the butter—softened at room temperature gives the perfect chewy bite.
Dark Brown Sugar: Adds sweetness, moisture, and a slight molasses flavor. The extra moisture from dark brown sugar helps keep these cookies soft and chewy for days.
Molasses & Honey: Molasses is the star of gingerbread, giving it that deep, rich, spiced flavor and dark color. Honey adds natural sweetness and helps maintain chewiness. Tip: Use unsulfured molasses for the best flavor.
Egg: Binds ingredients and adds structure while keeping cookies soft. Room temperature eggs incorporate more evenly for a smooth dough.
Vanilla Extract: Enhances the spices and adds warmth to the flavor profile.
All-Purpose Flour: Provides structure to the cookies. Using the correct amount ensures they hold their shape while remaining tender.
Baking Soda: Helps the cookies rise slightly and spread evenly, contributing to a soft, puffy texture.
Cornstarch: Adds tenderness and softness, giving cookies that melt-in-your-mouth texture.
Spices – Cinnamon, Ground Ginger, Cloves, Nutmeg: These warm spices create the classic gingerbread flavor. Adjust to taste if you like it more or less spicy. Tip: Toasting your spices lightly before adding can enhance their aroma.
Salt: Balances sweetness and enhances the rich, warm flavors.
Coarse Sugar for Rolling (optional): Adds a slight crunch and sparkle to the finished cookies, making them extra festive.
Tips for the Best Chewy Gingerbread Cookies
Do Not Overmix: Once you add the flour and spices, fold gently. Overmixing develops gluten, which can make cookies tough instead of soft and chewy.
Slightly Underbake: Take the cookies out when edges are set but centers are still soft — they firm up as they cool and remain chewy inside.
Softening Trick: Store in an airtight container with a slice of bread. The cookies absorb moisture from the bread and stay soft for days.
Extra Flavor Boost: Sprinkle a pinch of extra ginger or cinnamon on top before baking to enhance the spicy aroma.
Freeze for Convenience: Dough balls freeze beautifully for quick baking later, or freeze baked cookies for easy treats anytime.
Extra tips!
Make Ahead: The dough can be prepared 1–2 days in advance and stored in the fridge. Scoop and bake when ready for fresh, soft cookies.
Storage: Keep baked cookies in an airtight container at room temperature for up to 5 days. For extra softness, place a slice of bread in the container — it helps maintain that chewy texture.
Freezing: Both dough and baked cookies freeze beautifully. Freeze dough balls for up to 3 months and bake from frozen, adding an extra minute or two to baking time. Baked cookies can be frozen and thawed at room temperature before serving.
Prevent Spreading: Use butter that is softened but not melted, and fold the flour gently into the wet ingredients to avoid overly thin, flat cookies.
Adjusting Spice Levels: Increase ginger or cinnamon for a bolder flavor, or reduce cloves and nutmeg for a milder cookie.
Keep Them Chewy: Slightly underbake cookies — remove from the oven when edges are set but centers are still soft. They’ll firm up as they cool while staying tender and chewy inside.
If you give this recipe a try, I’d love to hear how your cookies turned out! Leave a comment below or tag me on social media — seeing your festive creations always makes my day. 🎄✨

Chewy Gingerbread Cookies
These chewy gingerbread cookies are packed with warm spices like ginger, cinnamon, and cloves, and have the perfect soft, chewy texture in every bite. Perfect for holiday baking or anytime you crave cozy, spiced sweetness!
Ingredients
- ¾ cup of unsalted butter (softened at room temperature)
- ¾ cup dark brown sugar
- ⅓ cup molasses
- 1 tablespoon honey
- 1 egg (room temperature)
- 1/2 tbsp vanilla extract
- 2 ⅓ cups of all-purpose flour
- 3/4 tsp baking soda
- 1 1/2 tsp cornstarch
- 2 tsp ground cinnamon
- 2.5 tsp ground ginger
- ½ tsp ground cloves
- ¼ teaspoon ground nutmeg
- ½ tsp salt
- 1/2 cup coarse sugar for rolling - I use turbinado (optional)
Instructions
Notes
- For extra chewiness, store cookies in an airtight container with a slice of bread — it keeps them soft for days.
- If you love bold spice, sprinkle a pinch of extra ginger on top before baking.
- These freeze beautifully (both baked and unbaked).
Autumn Sugar Cookies

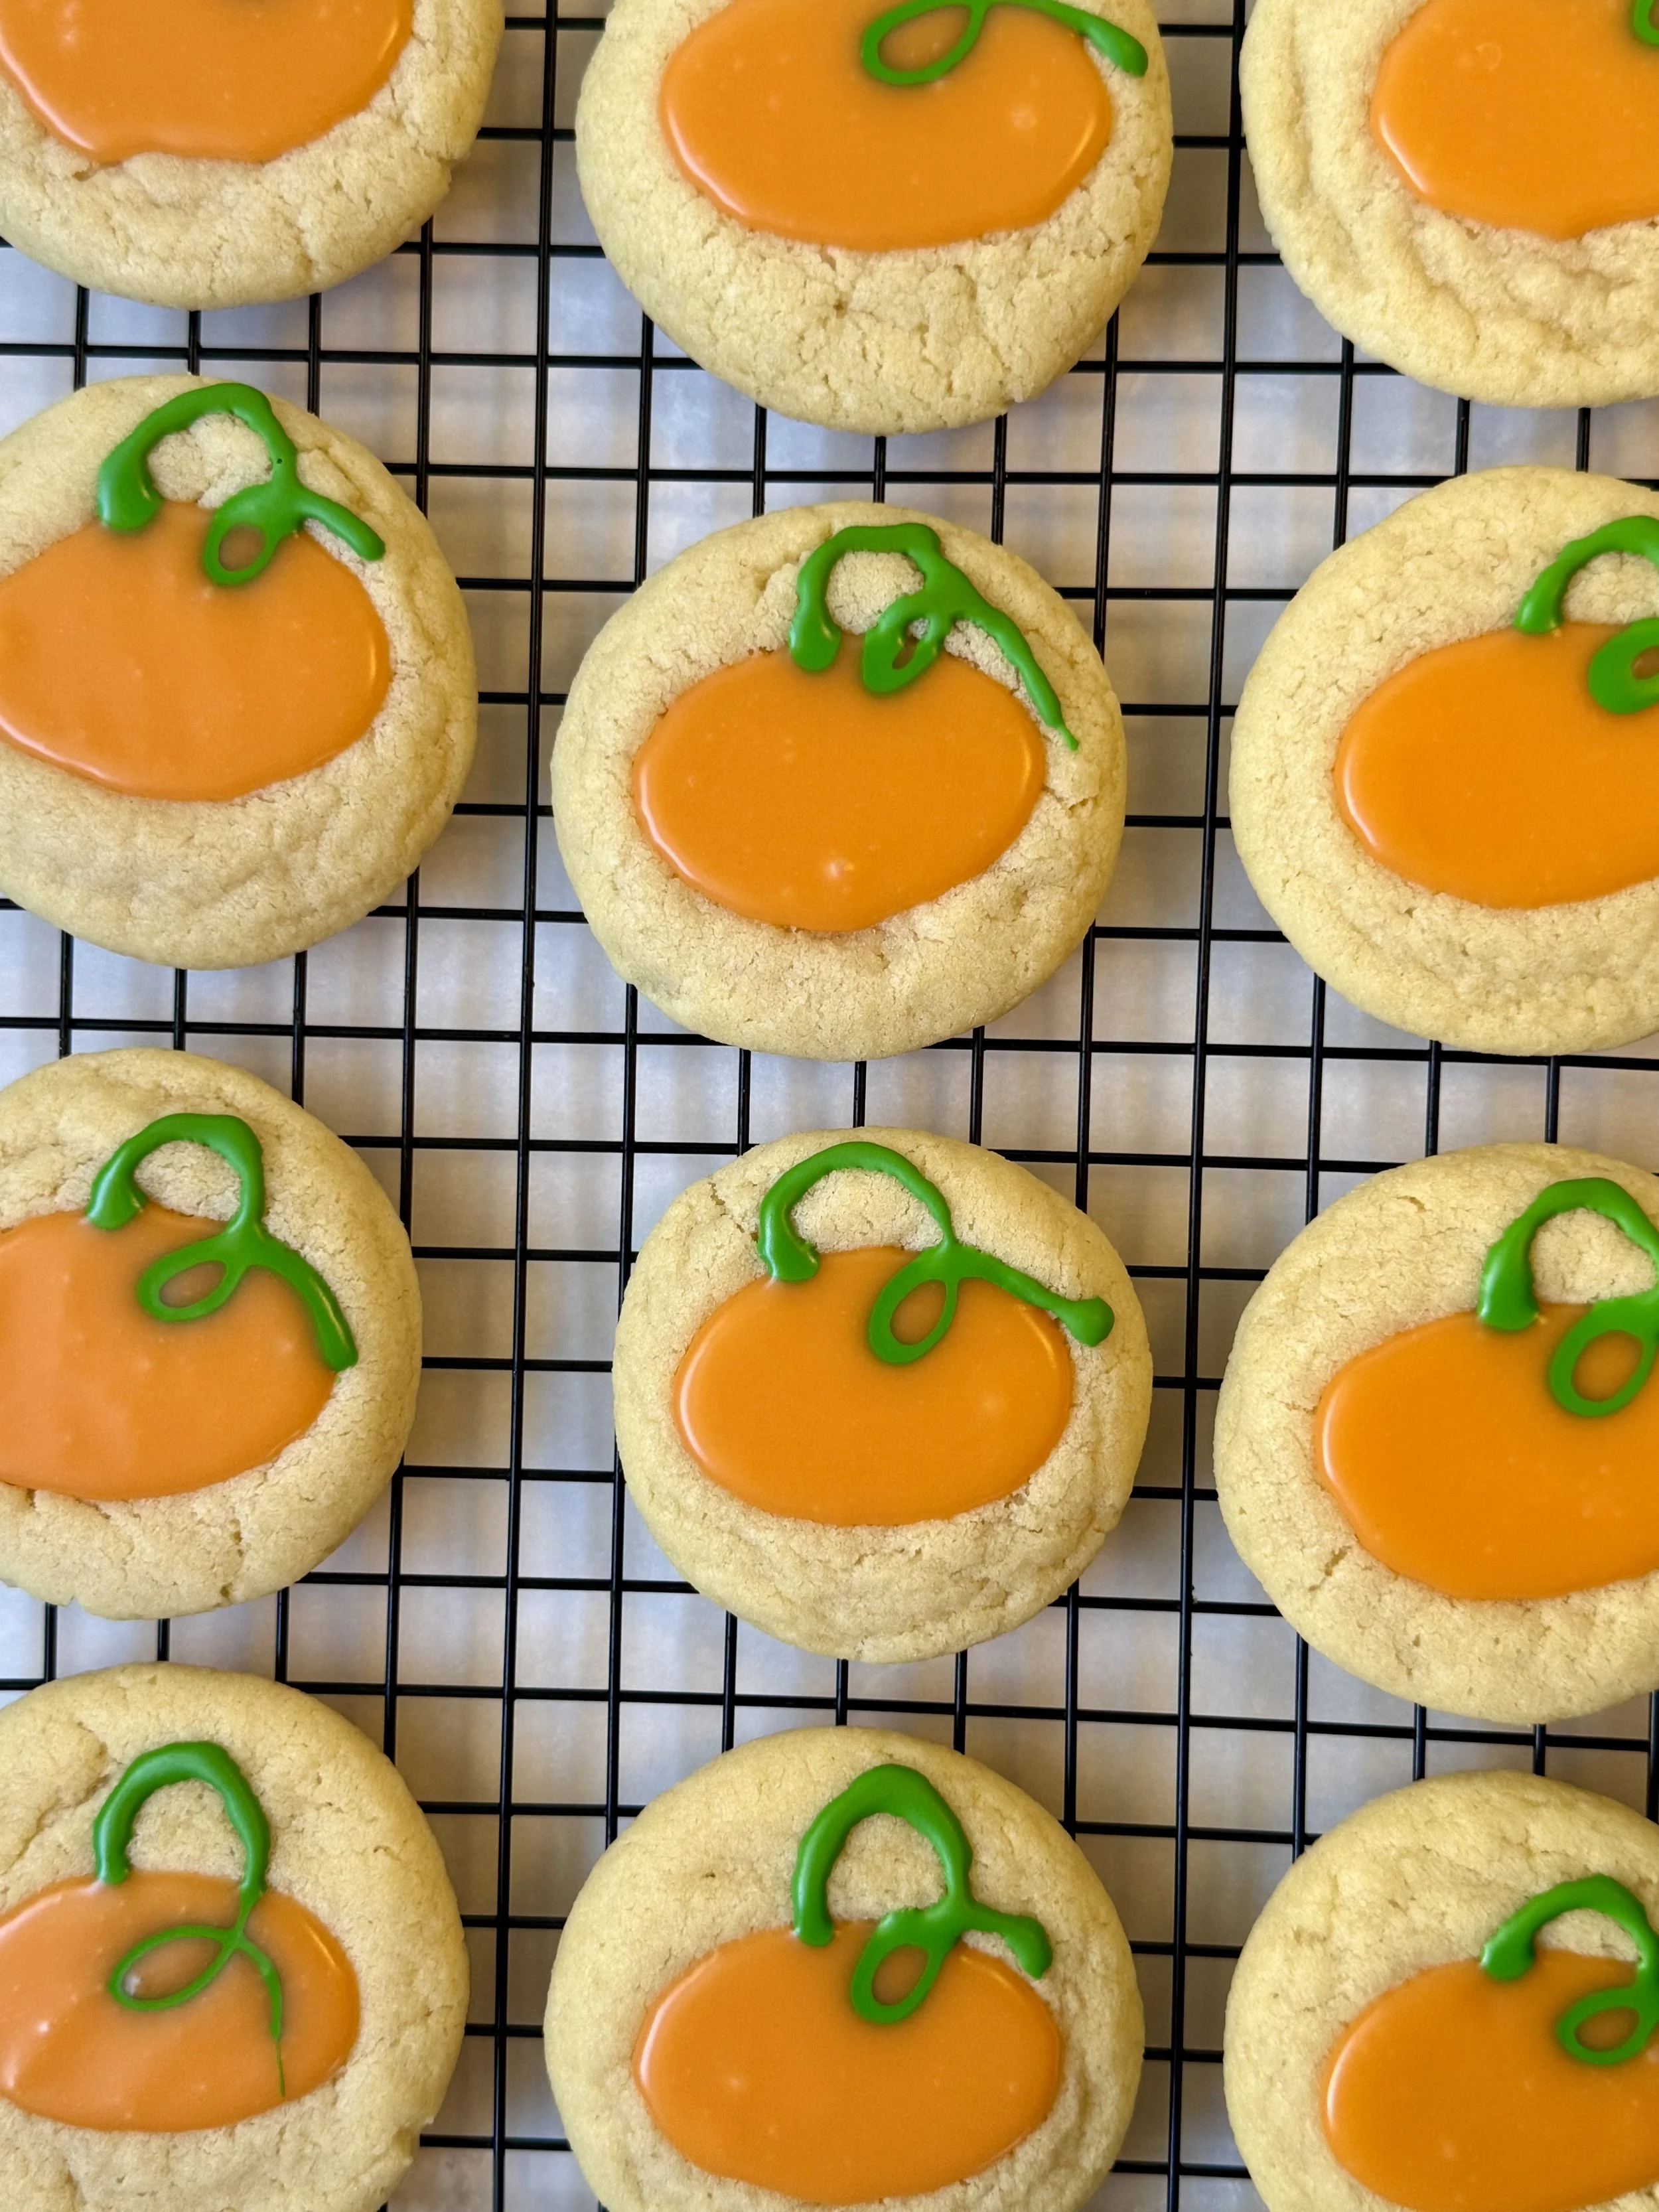
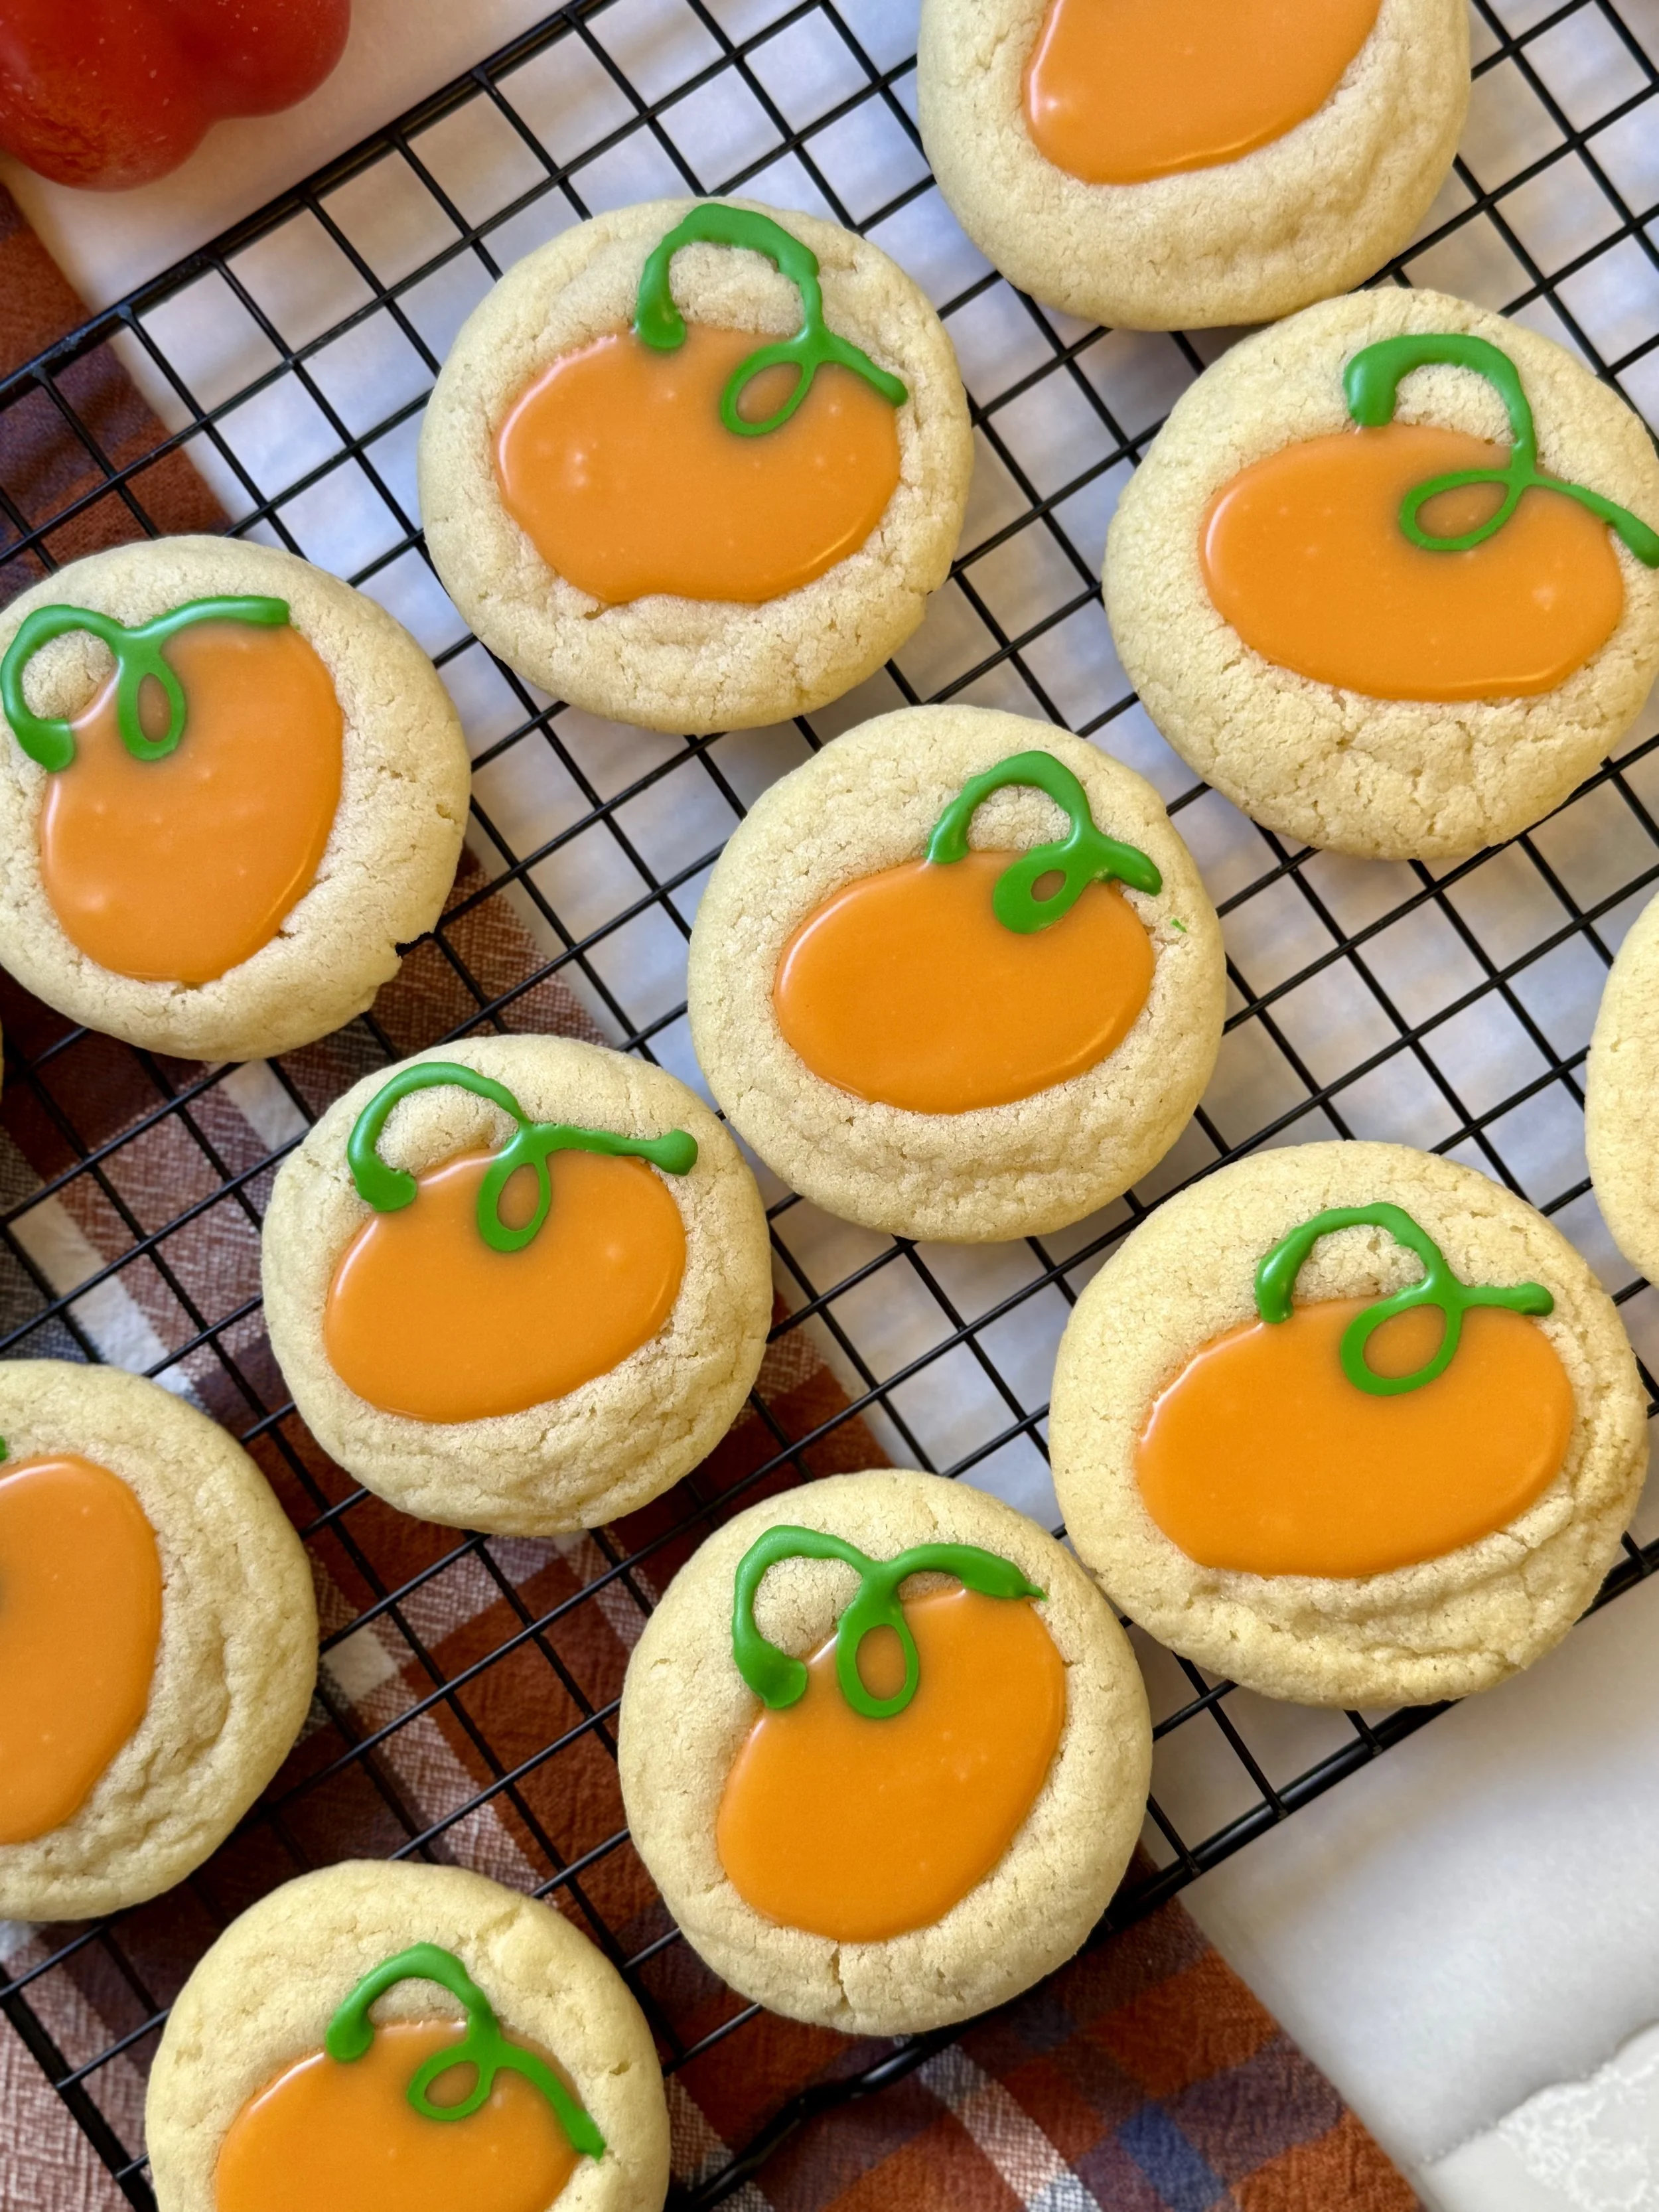
These Autumn Sugar Cookies combine everything you love about a classic sugar cookie with a creamy, seasonal twist. Each cookie is soft and buttery with a rich white chocolate ganache center, lightly tinted orange for a charming pumpkin look. Whether you’re baking for a fall party, a cozy weekend treat, or simply to fill your kitchen with the scent of homemade cookies, this recipe brings all the warmth of the season to your table.
Why You’ll Love These Autumn Sugar Cookies
1. They’re cozy and festive.
Each cookie captures the essence of fall, buttery, sweet, and filled with creamy white chocolate ganache tinted the perfect pumpkin orange.
2. Simple ingredients, big flavor.
You don’t need anything fancy to make these; just pantry staples like butter, sugar, flour, and white chocolate come together for a bakery-quality treat.
3. They’re fun to make and decorate.
Creating the little pumpkin indents and swirling on a green royal icing “stem” makes these cookies as fun to look at as they are to eat.
4. Perfect for any fall occasion.
From cozy weekends at home to Halloween parties or Thanksgiving dessert tables, these cookies fit every autumn moment.
5. Great for all skill levels.
Whether you’re a beginner baker or have been making cookies for years, this recipe walks you through each step with simple instructions and helpful tips for perfect results.

🧈 Ingredients & Their Purpose
| Ingredient | Amount | Purpose / Why It’s Important |
|---|---|---|
| Salted butter (softened) | 1 cup (2 sticks) | Adds richness and moisture; the salt enhances flavor and helps balance sweetness. |
| Sugar | 1 ¼ cup | Sweetens the cookies and helps create a light, tender texture. |
| Egg | 1 large (room temperature) | Binds ingredients together and adds structure and moisture. |
| Vanilla extract | 1 tbsp | Adds warmth and depth to the flavor. |
| All-purpose flour | 2 ½ cups | Provides the base structure of the cookies, giving them body and shape. |
| Baking soda | ½ tsp | Helps the cookies rise slightly and spread evenly. |
| Baking powder | ½ tsp | Works with baking soda to give a soft, puffy texture. |
| Cornstarch | 1 tsp | Creates a softer, more tender crumb in the cookies. |
| Salt | ¼ tsp | Balances sweetness and enhances all the flavors in the cookie. |
| White chocolate chips or bar | 1 ¾ cup (roughly 300 g) | Forms the base of the ganache filling — smooth, creamy, and sweet. |
| Heavy cream | ½ cup | Adds richness and helps create a silky ganache texture. |
| Orange gel food coloring | A few drops | Gives the ganache a festive pumpkin color. |
| Green royal icing (optional) | As needed | Used for decorative “pumpkin stem” details on top. |
How to Make Autumn Sugar Cookies with White Chocolate Ganache
Step 1: Cream the Butter and Sugar
Start by preheating your oven to 350°F (177°C) and lining your cookie sheet with parchment paper.
In your stand mixer fitted with the paddle attachment, beat the softened butter and sugar on medium-high speed for about 2 minutes, until the mixture looks light, pale, and fluffy.
This step is called creaming — it incorporates air into the dough, which helps the cookies bake up soft and tender.
Use a spatula to scrape down the sides of the bowl, making sure everything is evenly mixed.
Step 2: Add the Egg and Vanilla
Add in your room-temperature egg and vanilla extract, then mix again until fully combined.
Using room-temperature ingredients helps everything blend smoothly and prevents the dough from separating.
Once mixed, scrape down the sides one more time to make sure no bits of butter or sugar are hiding at the bottom.
Step 3: Combine the Dry Ingredients
In a separate medium bowl, whisk together the flour, baking soda, baking powder, cornstarch, and salt.
This ensures all your leavening agents are evenly distributed before they hit the wet ingredients.
Slowly add the dry ingredients into your butter mixture, mixing on low speed until just combined.
Stop as soon as the flour disappears — overmixing can make the cookies tough instead of soft.
Your dough should be soft, easy to handle, and not sticky. If it feels sticky, you can chill it for 10–15 minutes before shaping.
Step 4: Scoop and Bake
Use a medium cookie scoop (about 2 tablespoons of dough) to portion the cookies. Roll the dough balls between your hands and slightly flatten the tops so they spread more and give more space to make an indent. Place each scoop about 2 inches apart on the parchment-lined baking sheet.
Bake for 12–13 minutes, or until the cookies have puffed up, the edges are just starting to set, and the centers still look slightly soft and gooey.
They’ll continue to bake a little on the sheet after you remove them from the oven, which helps them stay soft in the center.
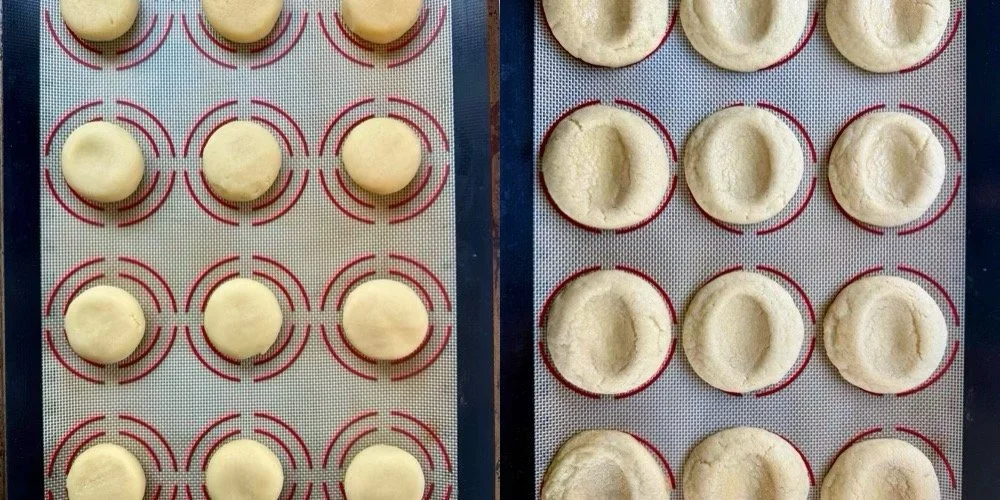
Step 5: Create the Pumpkin Indent
Right after taking the cookies out of the oven, while they’re still warm and soft, use the back of a small spoon to gently press an oval-shaped indent in the center of each cookie.
Be careful not to press too hard, or the cookie might crack. If it does break, that’s your perfect excuse for a taste test! 😉
Indenting while warm makes it easy to shape without breaking the cookie.
Allow the cookies to cool completely on a wire rack before filling them.

Step 6: Make the White Chocolate Ganache
In a heat-safe bowl, add your white chocolate and heavy cream. Microwave the mixture in 30-second intervals, stirring each time with a spatula, until smooth and creamy. This usually takes around 90–120 seconds total.
Once melted, add a few drops of orange gel food coloring and stir until the color is evenly distributed.
White chocolate can be finicky, short heating bursts and frequent stirring prevent it from burning or turning grainy.
Let the ganache sit for about 15–30 minutes, just until it thickens slightly. It should be creamy and pourable but not runny. Cover the top with plastic wrap, with the wrap physically touching/covering the ganache so a film does not form over the ganache.
Step 7: Fill the Cookies
Transfer the cooled ganache to a piping bag fitted with a small round tip (around size 13 works great).
Carefully pipe the ganache into each cookie indent until filled and smooth on top.
If your ganache is too thin and spreading too much, let it cool for a few more minutes. If it’s too thick to pipe, microwave it for just 5–10 seconds to loosen it again.
The goal is a smooth, glossy pool of ganache that settles nicely into the center.
Let the filled cookies sit at room temperature until the ganache sets. You can also speed up the process by chilling them briefly in the fridge.
Step 8: Decorate (Optional)
Once the ganache has set, use green royal icing to pipe a little swirl or stem on top of each cookie to make them look like mini pumpkins.
You can use store-bought royal icing since you’ll only need a small amount, it’s quick, easy, and pipes perfectly for this detail.
Step 9: Enjoy & Store
Once your cookies are set and decorated, snap a photo of your adorable creations, then enjoy!
To store:
Keep cookies in an airtight container at room temperature for up to 4 days.
You can refrigerate them for up to a week (just let them come to room temp before serving).
Unfilled cookies freeze beautifully for up to 2 months. Just thaw and fill when ready to enjoy.
Extra Tips for Perfect Cookies
Use softened, not melted butter — melted butter can make cookies spread too much.
Don’t skip the cornstarch — it keeps the centers soft even days later.
For extra flavor, add a pinch of cinnamon or nutmeg to the dough for a warm autumn touch.
If you want bakery-style cookies, use a cookie scoop for evenly sized rounds.
Always let cookies cool completely before adding the ganache; warm cookies can melt the filling.
Common Barriers & How to Fix Them
Even simple cookie recipes can throw a few curveballs, especially when you’re working with butter, chocolate, and oven temperatures. Here are a few common issues you might run into while baking your Autumn Sugar Cookies, plus quick fixes to help you get perfect results every time:
1. Cookies spread too much
What happened: Your butter may have been too soft, or the dough was a bit too warm going into the oven.
How to fix it: Chill your dough for 15–30 minutes before baking. If your kitchen is warm, even a short chill can help the cookies hold their shape.
2. Cookies cracked or broke when indenting
What happened: You may have waited too long to make the indent or pressed too hard.
How to fix it: Make your indent as soon as the cookies come out of the oven, while they’re still warm and pliable. Press gently with the back of a small spoon to form the pumpkin shape.
3. Ganache turned grainy or separated
What happened: The white chocolate was overheated, or the cream was too hot.
How to fix it: Reheat the ganache in short 5-second bursts and stir gently until smooth. Next time, melt the chocolate and cream slowly in 30-second intervals and stir often to prevent burning.
4. Ganache too thin or runny
What happened: It’s still too warm or has a bit too much cream.
How to fix it: Let the ganache cool for 15–20 minutes before piping. If it’s still loose, stir in a few extra white chocolate chips until it thickens slightly.
5. Ganache too thick to pipe
What happened: It cooled and firmed up too much.
How to fix it: Microwave it for 5–10 seconds, stir, and it should return to a smooth, spreadable consistency.
6. Cookies turned out dry
What happened: They were baked a minute or two too long.
How to fix it: Next time, remove them when the edges look just set and the centers still look soft; they’ll continue to firm up as they cool.
How to Store Autumn Sugar Cookies
To keep your cookies fresh and delicious, store them in an airtight container at room temperature for up to 4 days. If your kitchen is warm, you can also refrigerate them — just bring them to room temperature before serving so the ganache softens again.
For longer storage, place the cookies in a single layer in an airtight container, then freeze for up to 2 months. When ready to enjoy, let them thaw at room temperature for about 30 minutes. Avoid stacking the cookies if possible, as the ganache tops can smudge or lose their shine.
Make-Ahead Tips
If you love getting a head start, this recipe is perfect for it! You can make the cookie dough up to 2 days in advance — just cover it tightly and store it in the refrigerator. When you’re ready to bake, let the dough sit at room temperature for about 10–15 minutes so it’s easier to scoop.
The white chocolate ganache can also be made ahead and stored in the fridge for up to 3 days. When you’re ready to use it, warm it gently in the microwave for 5–10 seconds at a time, stirring until smooth and creamy again.
You can even bake the cookies fully, freeze them plain (without the ganache), and fill them later when you’re ready to serve — perfect for saving time before a holiday party or fall gathering!
Final Thoughts
There’s just something special about baking during the fall: the cozy aromas, the golden colors, and the comfort of something sweet straight from the oven. These Autumn Sugar Cookies bring all of that together in one perfect bite: buttery, soft cookies filled with creamy white chocolate ganache and a touch of pumpkin-inspired charm.
If you make these cookies, I’d love to hear how they turn out! Leave a comment below or share a photo and tag me — nothing makes me happier than seeing your baking creations come to life in your kitchen.

Autumn Sugar Cookies
These Autumn Sugar Cookies feature tender sugar cookie bases with a smooth white chocolate ganache center, creating a festive pumpkin-inspired treat perfect for the season.
Ingredients
- 1 cup salted butter (2 sticks) (softened at room temperature)
- 1 ¼ cup sugar
- 1 egg (room temperature)
- 1 tbsp vanilla extract
- 2 ½ cups all-purpose flour
- 1/2 tsp baking soda
- 1/2 tsp baking powder
- 1 tsp cornstarch
- 1/4 tsp salt
- 1 3/4 cup (roughly 300 grams) of white chocolate chips or bar.
- 1/2 cup heavy cream.
- A couple of drops of orange gel food coloring.
- Green royal icing. (Optional)
Instructions
Notes
- These cookies can easily be made with chocolate ganache if white chocolate is not your favorite!
- These cookies can easily become sugar cookies, too! Just skip the ganache and roll the raw cookies in sugar before baking.

Iced Oatmeal Cookies
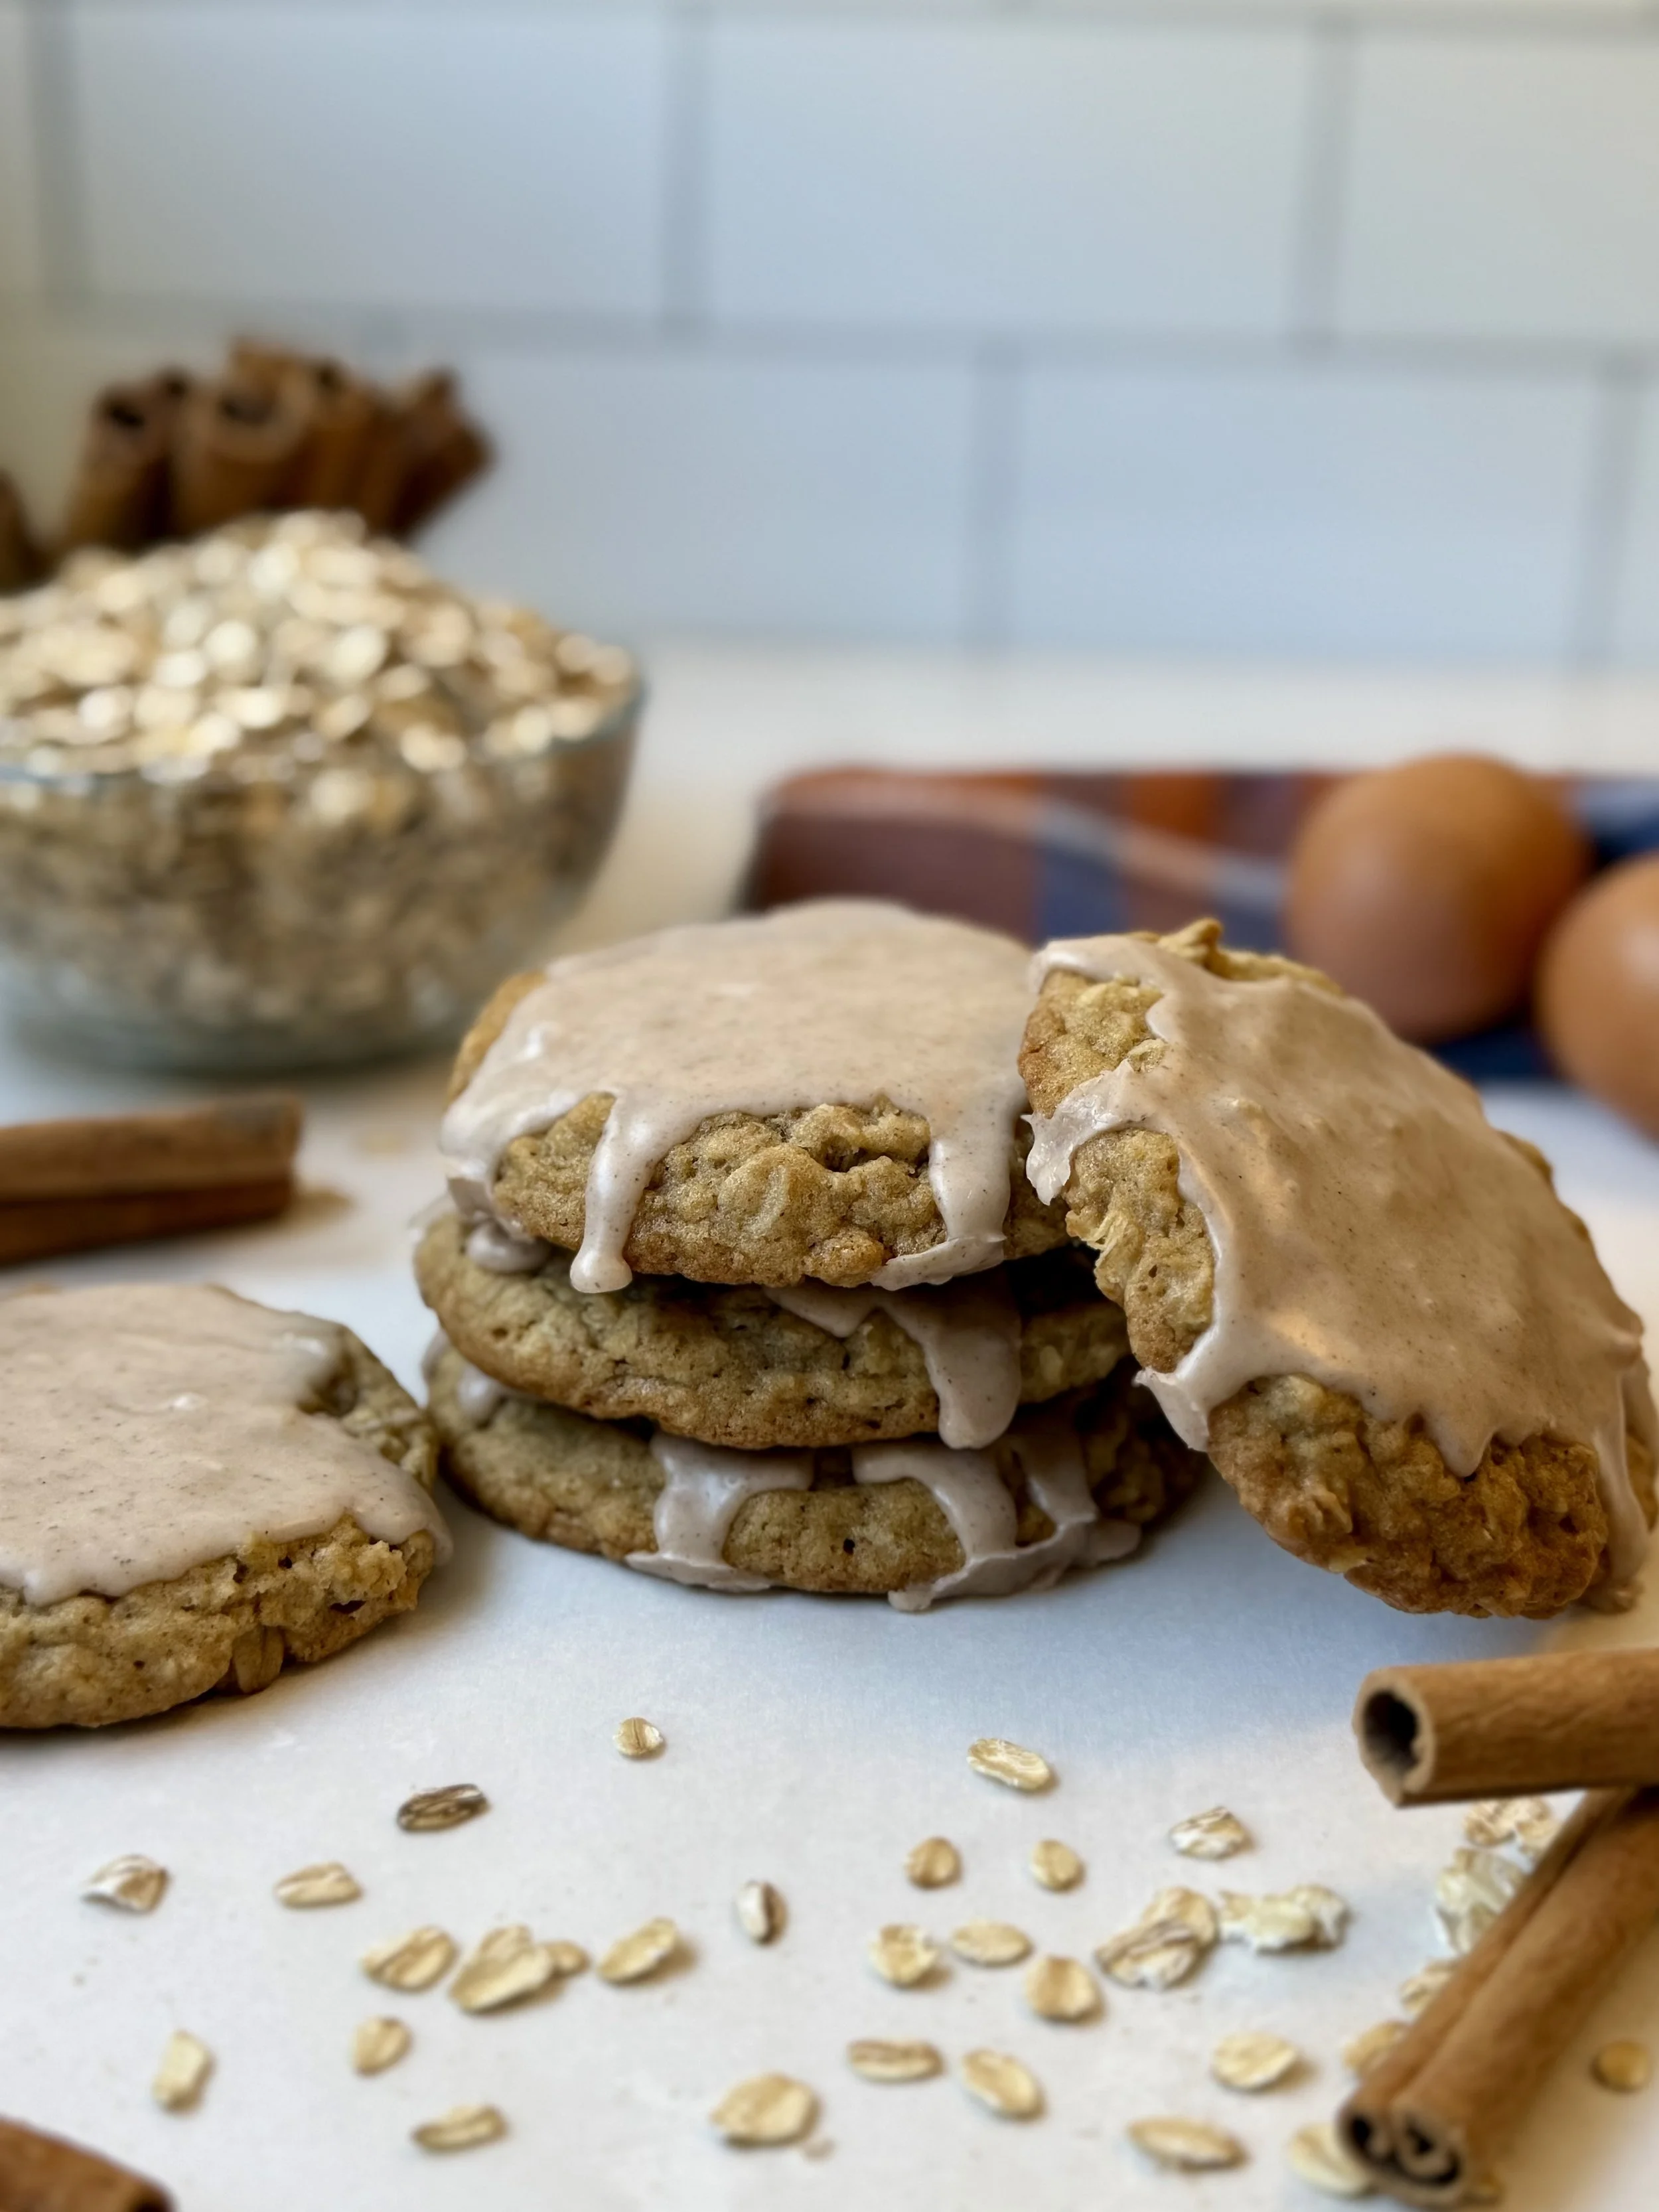
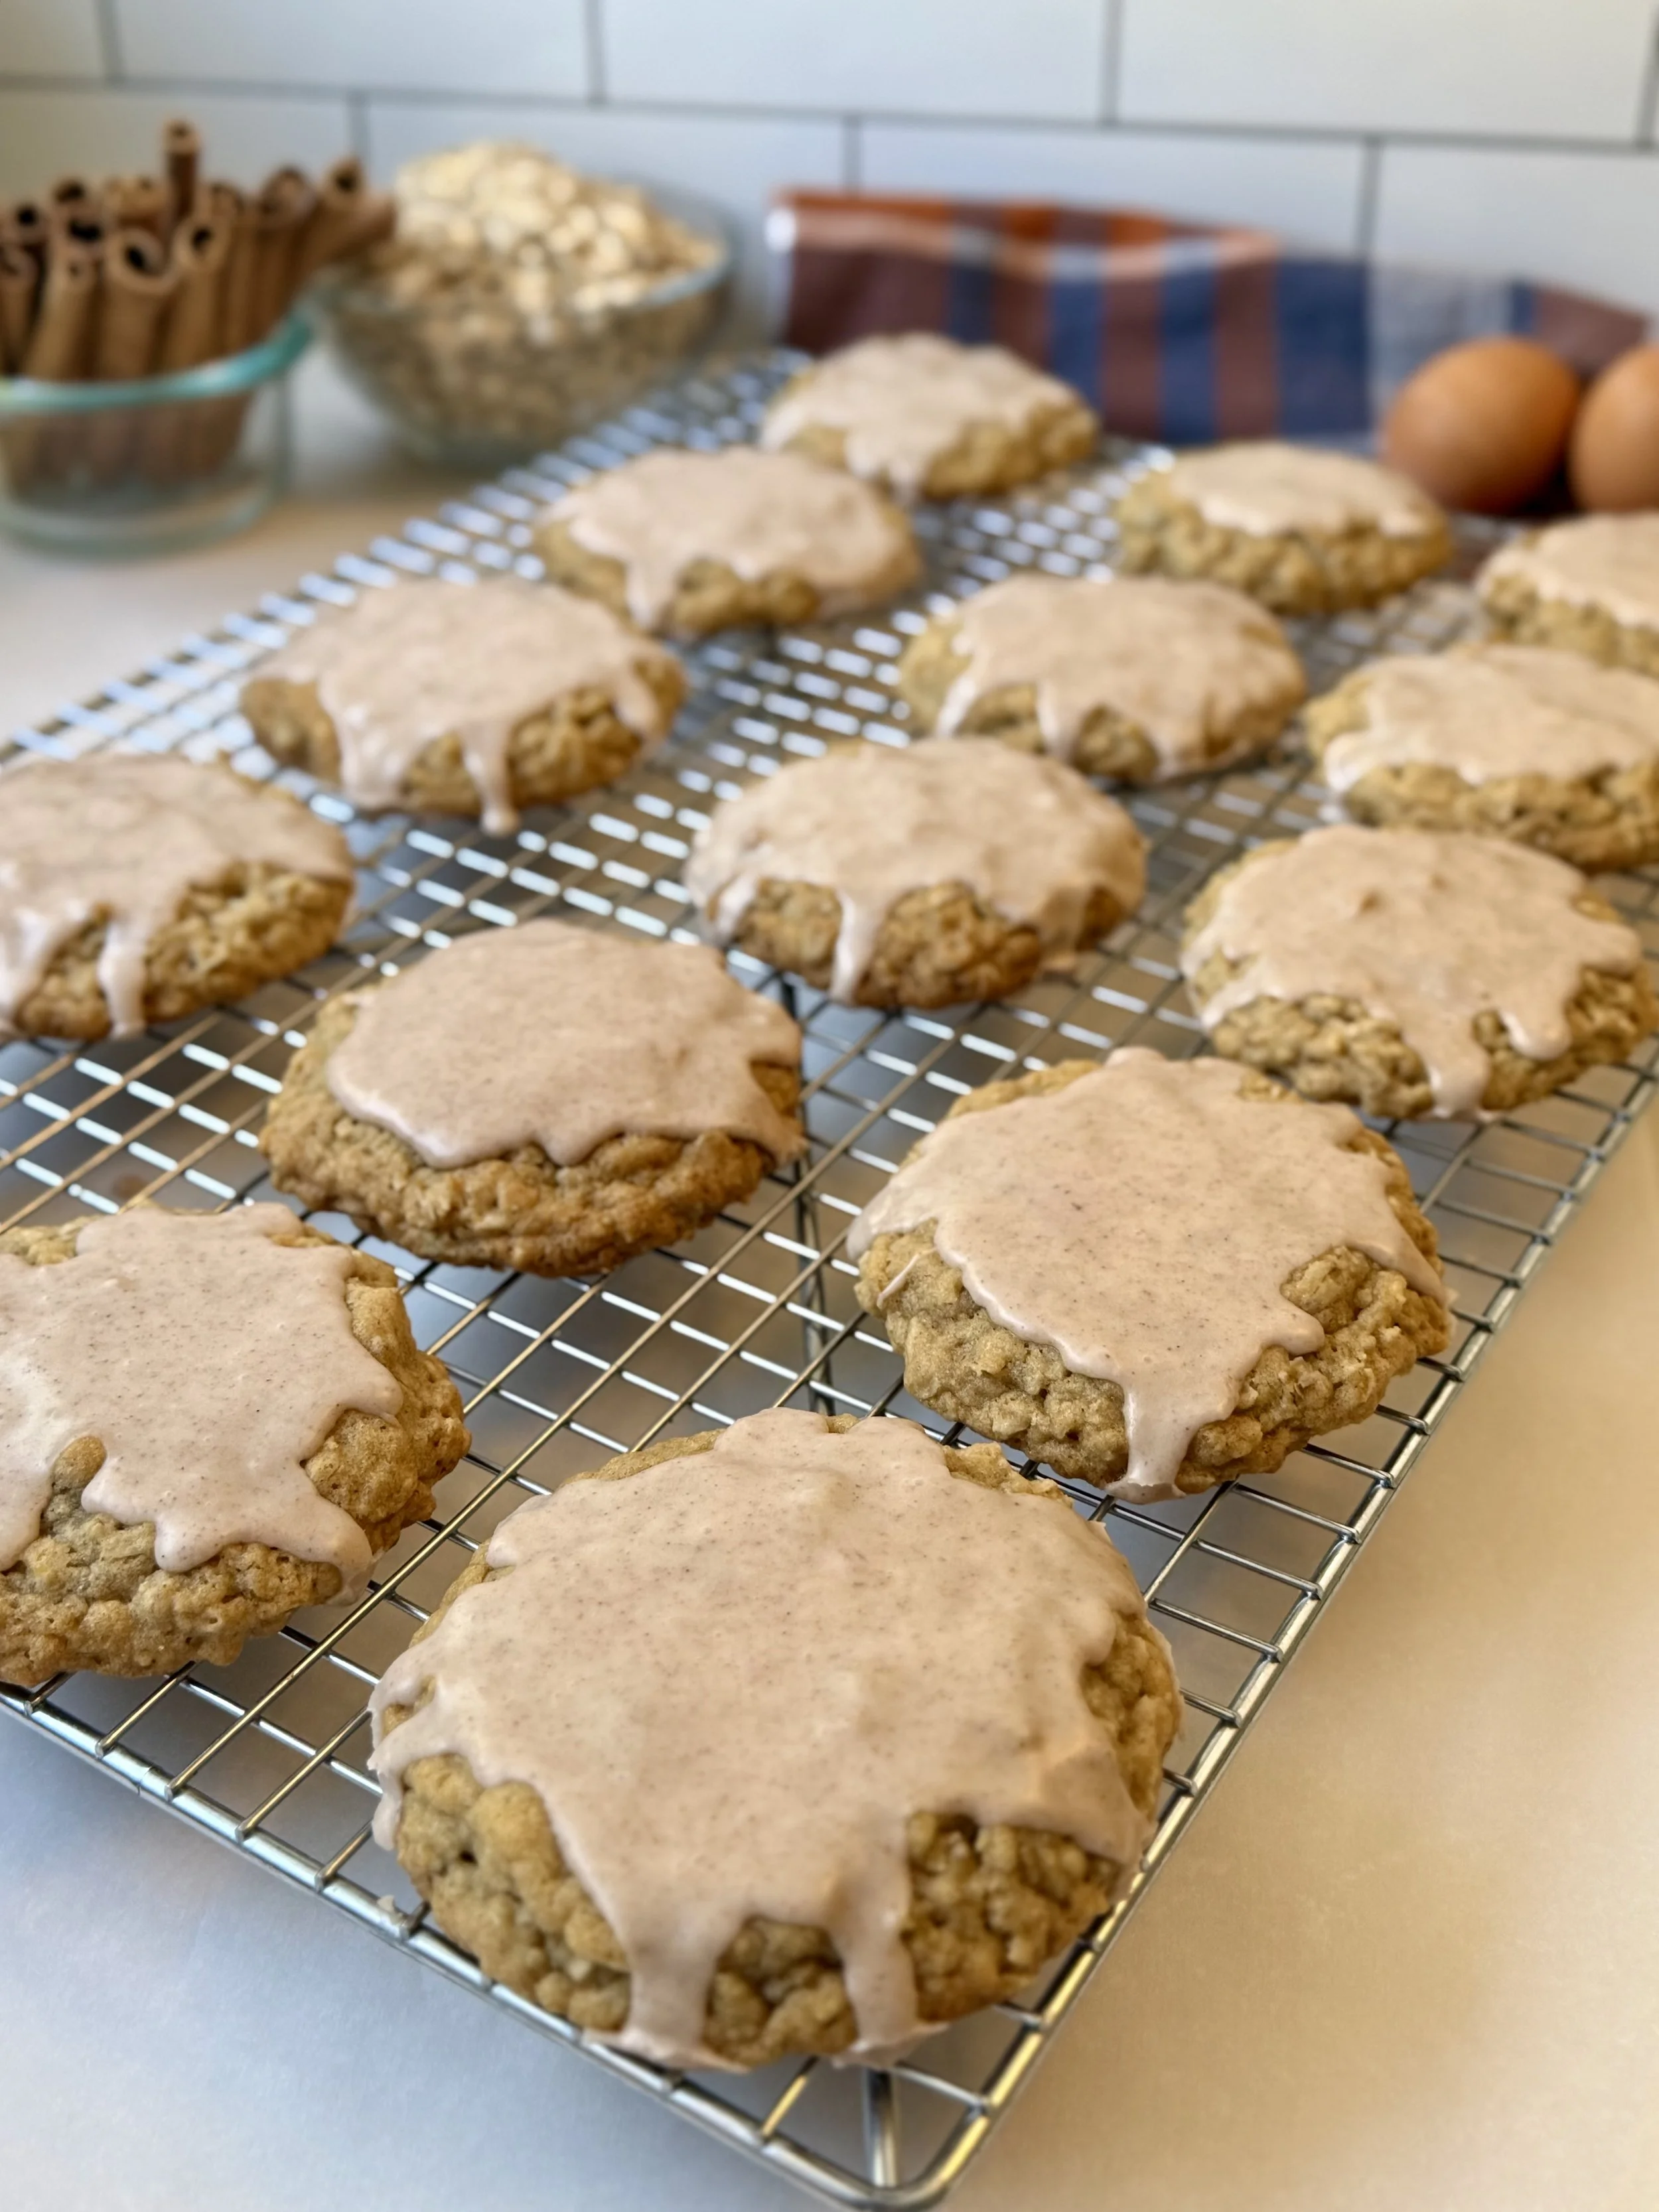
Soft Iced Oatmeal Cookies with Cinnamon Glaze
There’s just something so comforting about oatmeal cookies — they’ve always been one of my all-time favorites. I love the way the kitchen fills with the cozy scent of cinnamon and brown sugar as they bake, wrapping the whole home in warmth. These iced oatmeal cookies are soft, chewy, and perfectly spiced, with a sweet cinnamon glaze that makes them extra special. They’re the kind of treat that feels nostalgic yet elevated. They’re simple to make, beautiful to share, and impossible to resist fresh from the oven.
Whether you’re baking them for a cozy weekend treat, gifting them to friends, or just craving something classic with a twist, these cookies are sure to become a favorite in your kitchen too. Let’s walk through the recipe step-by-step so you can make the perfect batch every time.
Why You’ll Love These Cookies
These iced oatmeal cookies are everything you love about nostalgic bakery-style treats — soft centers, chewy oat texture, golden edges, and a smooth, spiced icing. The blend of brown sugar, warm spices, and a touch of maple extract makes every bite rich and comforting. Perfect for gifting, holiday trays, or pairing with a cup of tea.
If you love other cozy recipes, you may like these too!
Ingredients & Their Purpose
For the Cookies
1 cup salted butter, softened (2 sticks) – Adds richness and moisture; the salt enhances flavor. Softened butter helps create a light, fluffy dough.
1 cup brown sugar – Provides chewiness and deep caramel flavor.
½ cup granulated sugar – Balances sweetness and helps with spreading.
2 eggs – Bind ingredients and add structure and moisture.
½ tbsp vanilla extract – Enhances overall flavor with warm, sweet notes.
¼ tsp maple extract – Adds subtle warmth and depth that complements the oats and spices.
1 cup all-purpose flour – Provides structure for a chewy cookie.
1 cup cake flour – Adds tenderness and a soft crumb due to lower protein content.
1 tsp cinnamon – Brings warm, cozy flavor.
¼ tsp nutmeg – Adds subtle spice and complexity.
¾ tsp baking soda – Leavening agent for gentle lift.
½ tsp cornstarch – Keeps cookies soft and thick.
¾ tsp salt – Balances sweetness and enhances flavor.
2½ cups old-fashioned rolled oats – Provide texture and hearty chew. Avoid instant oats—they’ll make cookies dry and crumbly.
(Optional): ½–¾ cup butterscotch chips – Add sweet caramel notes and texture.
For the Cinnamon Icing
2 cups powdered sugar – Base for a smooth, sweet icing.
1 tsp cinnamon – Warm spice that ties the flavor together.
3 tbsp milk – Thins icing to drizzle consistency.
½ tsp vanilla bean paste – Adds beautiful specks and a rich vanilla flavor. (Vanilla extract works too!)
Step-by-Step Instructions
1. Prepare
Line cookie sheets with parchment paper and set aside.
2. Cream Butter & Sugars
In a stand mixer fitted with the paddle attachment, cream the butter, brown sugar, and granulated sugar on medium-high speed for 3–4 minutes, until light and fluffy.
Tip: Creaming incorporates air for a lighter texture.
3. Add Wet Ingredients
Scrape down the sides. Mix in eggs one at a time, then add vanilla and maple extract until just combined.
4. Combine Dry Ingredients
Add all-purpose flour, cake flour, cinnamon, nutmeg, cornstarch, baking soda, and salt. Mix until no flour streaks remain.
Don’t overmix — this keeps cookies tender!
5. Fold in Oats (and Butterscotch Chips, if using)
Stir until evenly distributed. The dough will be thick.
6. Scoop & Chill
Use a large cookie scoop to portion dough onto prepared sheets. Cover with plastic wrap and refrigerate 30–60 minutes.
Chilling tip: Prevents excess spreading and enhances flavor.
If chilling more than 2 hours, let the dough sit 30 minutes at room temp before baking.
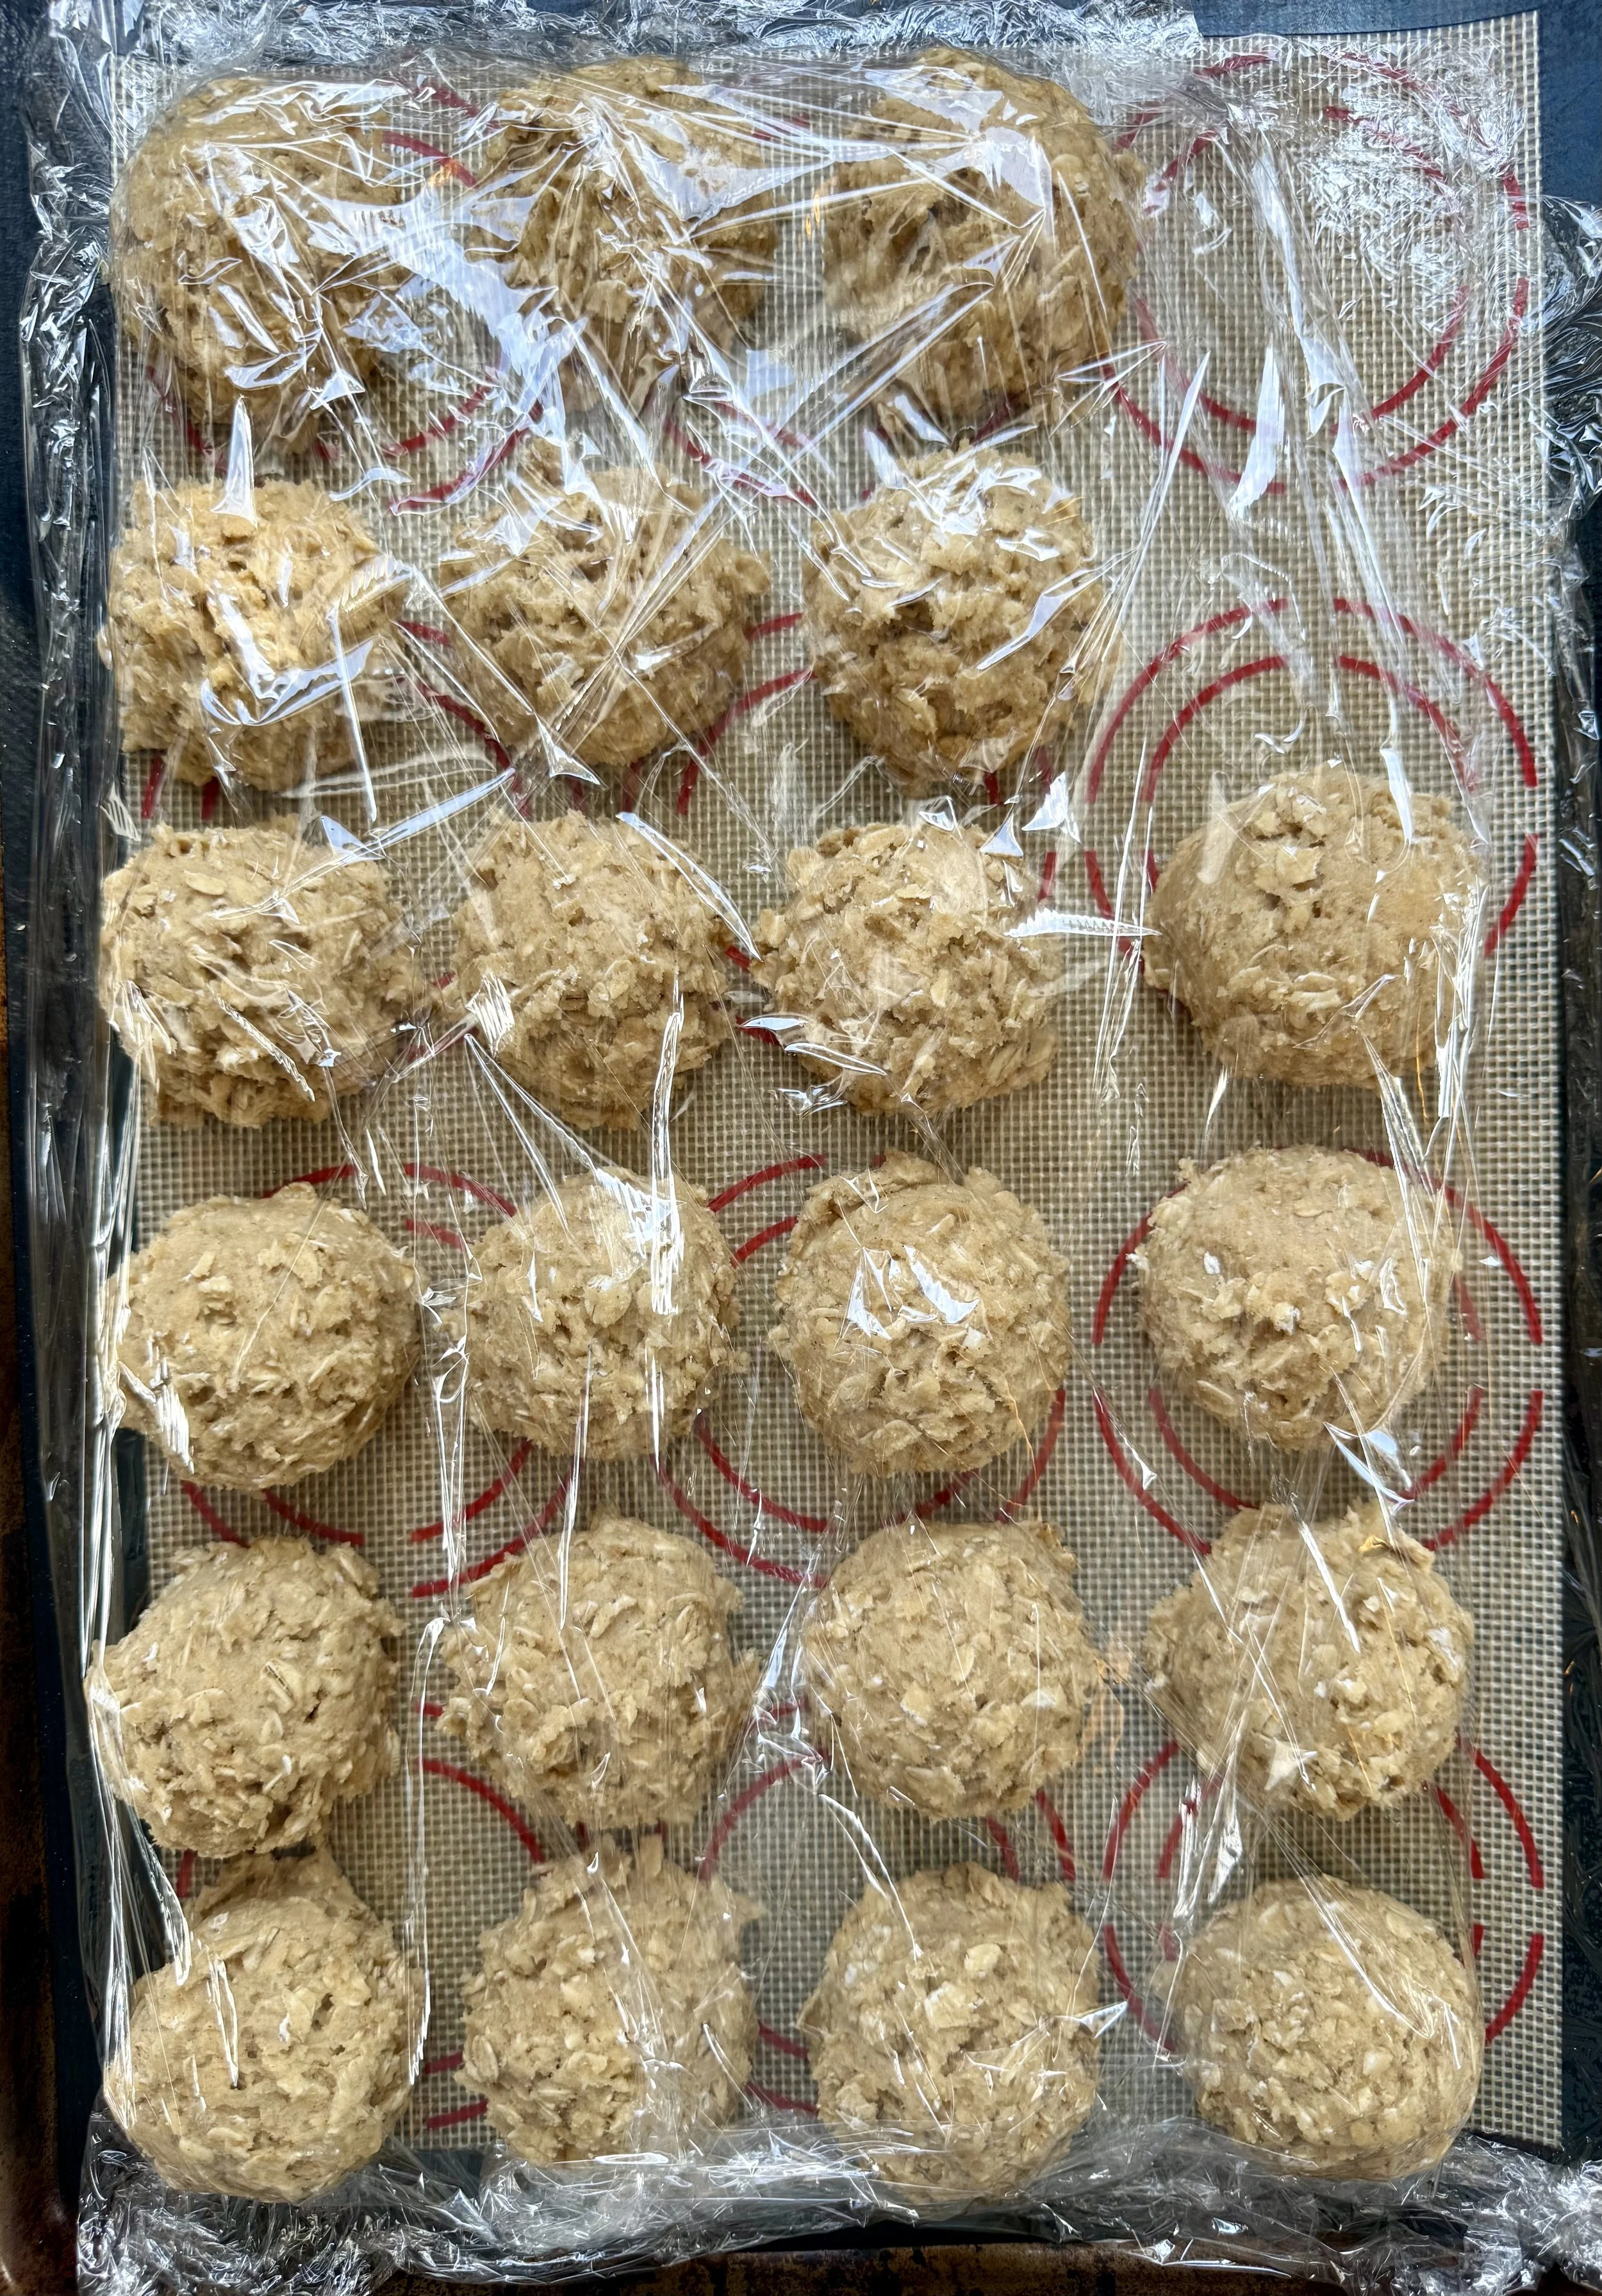
Key step!
Cover with plastic wrap and place in the fridge before baking for best results.
7. Bake
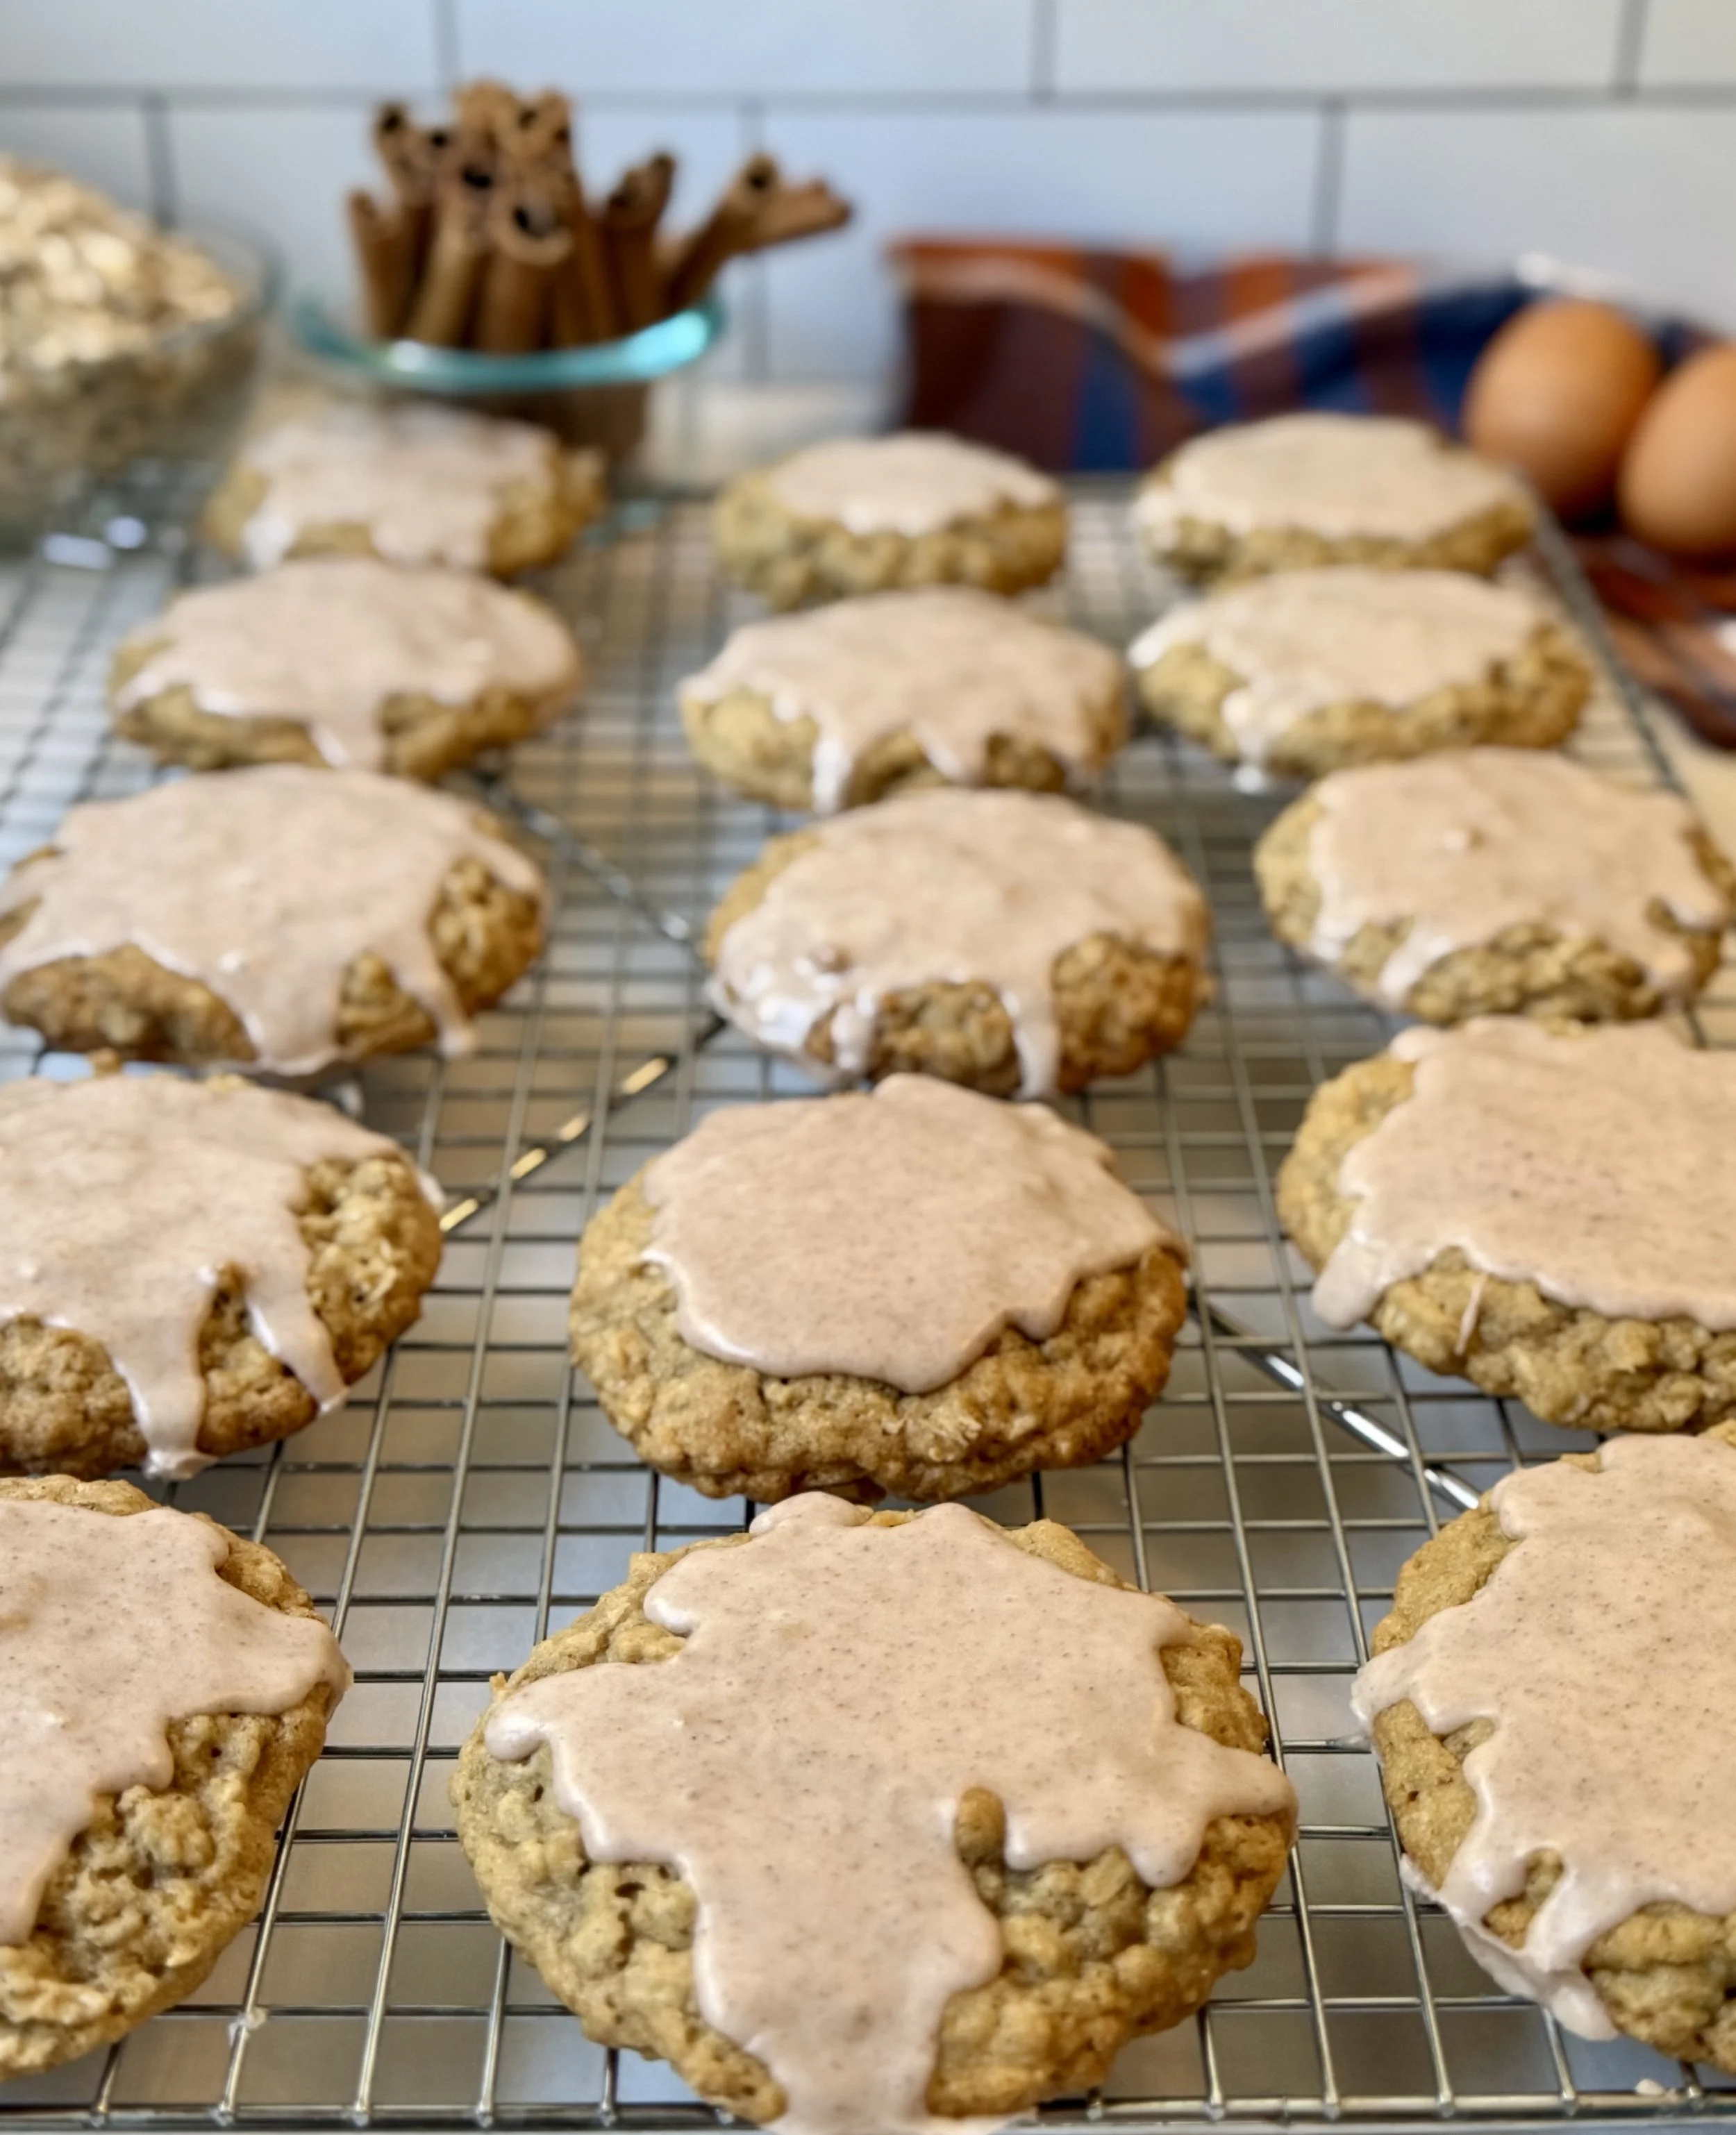
Preheat oven to 350°F (175°C). Bake cookies for 13–14 minutes, until edges are golden and centers look slightly underbaked. They’ll set as they cool.
8. Cool
Let cookies cool completely on a wire rack before icing.
Make the Cinnamon Icing
In a medium bowl, whisk together powdered sugar and cinnamon. Add milk and vanilla bean paste and whisk until smooth and creamy.
If too runny, add more powdered sugar (1 tbsp at a time).
If too thick, add milk (½ tbsp at a time).
Spoon dollops over cooled cookies and let set for 15–20 minutes.
Helpful Tips
Soften butter properly: Room temp means it should press easily with a finger but not be greasy.
Use old-fashioned oats only – instant oats will alter the texture.
Underbake slightly: Cookies continue baking on the sheet after removal.
Chill dough: Cold dough = thicker, chewier cookies.
Don’t skip the icing! It adds sweetness and a bakery finish.
Troubleshooting
Cookies spread too much? The dough may have been too warm. Chill longer or add 2 tbsp extra flour.
Dry cookies? The cookies may have been overbaked, or too much flour was used. Spoon flour into measuring cup (don’t pack) to prevent too much flour.
Icing too thin? Whisk in more powdered sugar to thicken.
Storage & Make-Ahead
Store cookies in an airtight container at room temperature up to 5 days.
To freeze unbaked dough, scoop and freeze on a tray, then store in a bag. Bake from frozen, adding 1–2 minutes.
To freeze baked cookies, layer with parchment in a freezer-safe container up to 2 months. Defrost at room temperature.
Final Thoughts
These iced oatmeal cookies combine nostalgic flavor with a touch of elegance. Perfectly soft, warmly spiced, and finished with a cinnamon glaze. Let me know your thoughts below if you make these!

Iced Oatmeal Cookies
These iced oatmeal cookies are soft, chewy, and perfectly spiced, with a sweet cinnamon glaze that adds the perfect finishing touch.
Ingredients
- 1 cup salted butter, softened (2 sticks)
- 1 cup brown sugar
- 1/2 cup granulated sugar
- 2 eggs
- 1/2 tbsp vanilla extract
- 1/4 tsp maple extract
- 1 cup all-purpose flour
- 1 cup cake flour
- 1 tsp cinnamon
- 1/4 tsp nutmeg
- 3/4 tsp baking soda
- 1/2 tsp cornstarch
- 3/4 tsp salt
- 2 1/2 cups old-fashioned rolled oats (Not instant oats)
- 2 cups of powdered sugar
- 1 tsp cinnamon
- 3 tbsp milk
- 1/2 tsp vanilla bean paste
Instructions
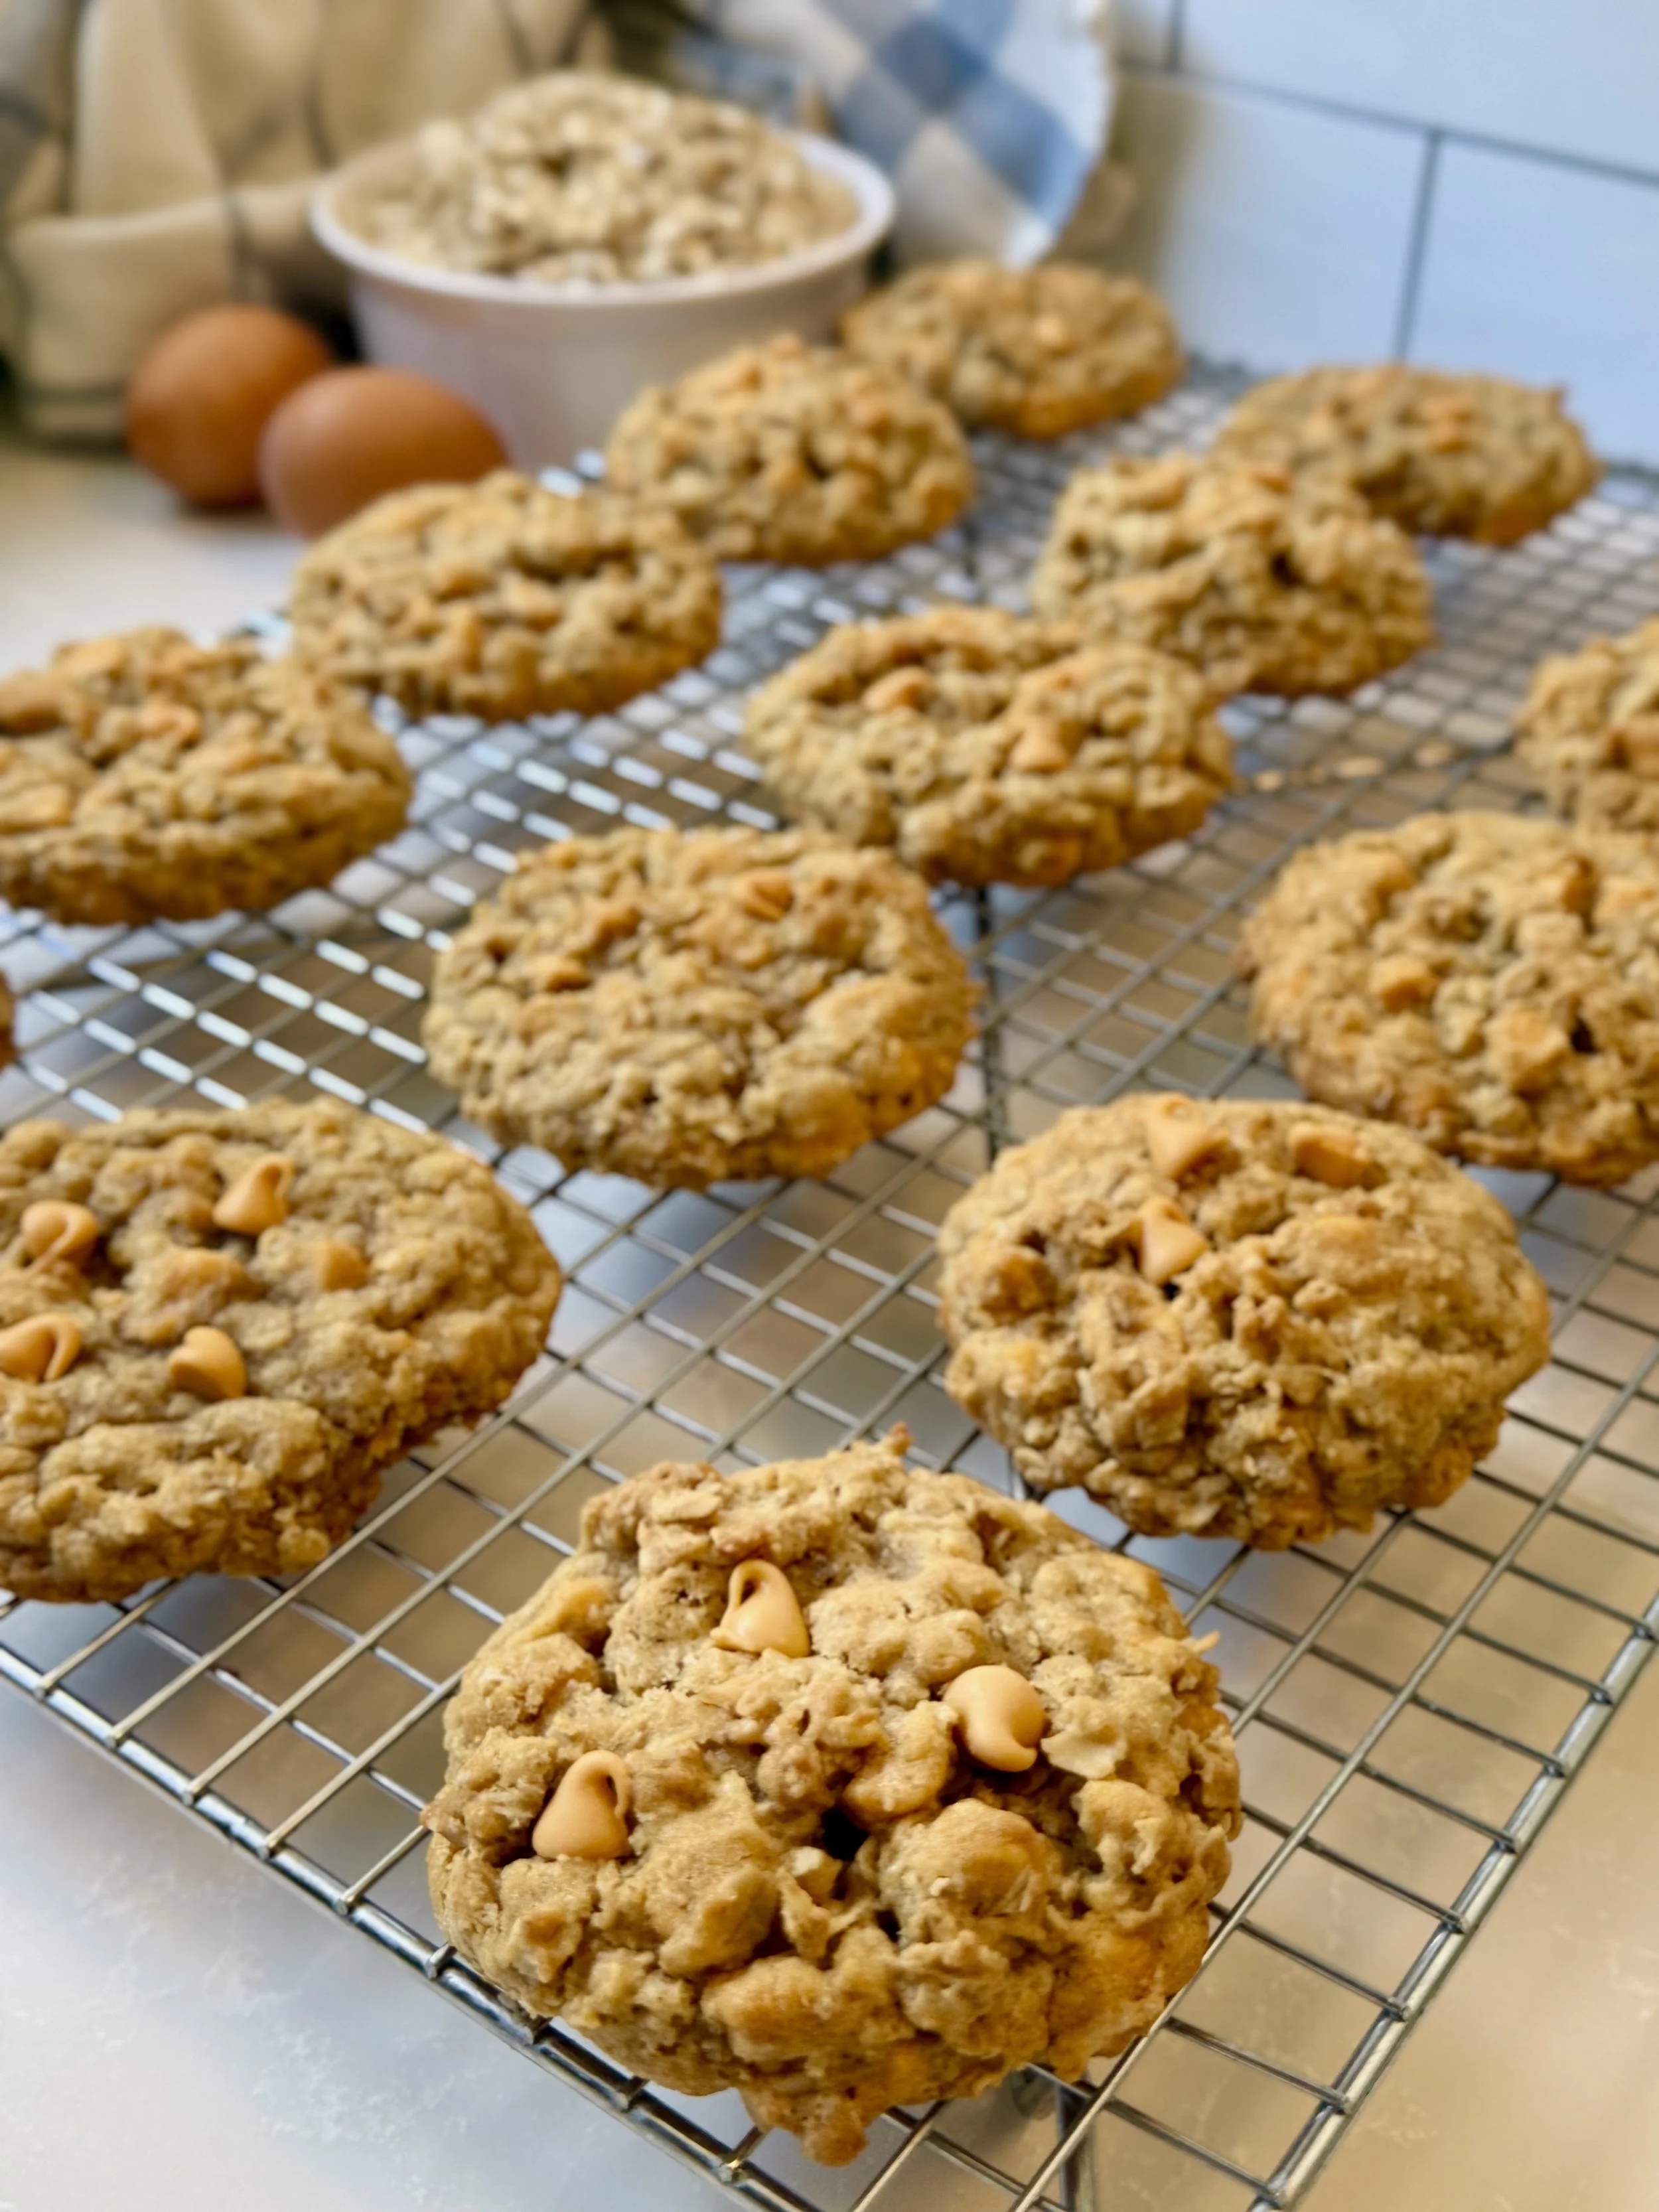
Oatmeal Scotchies

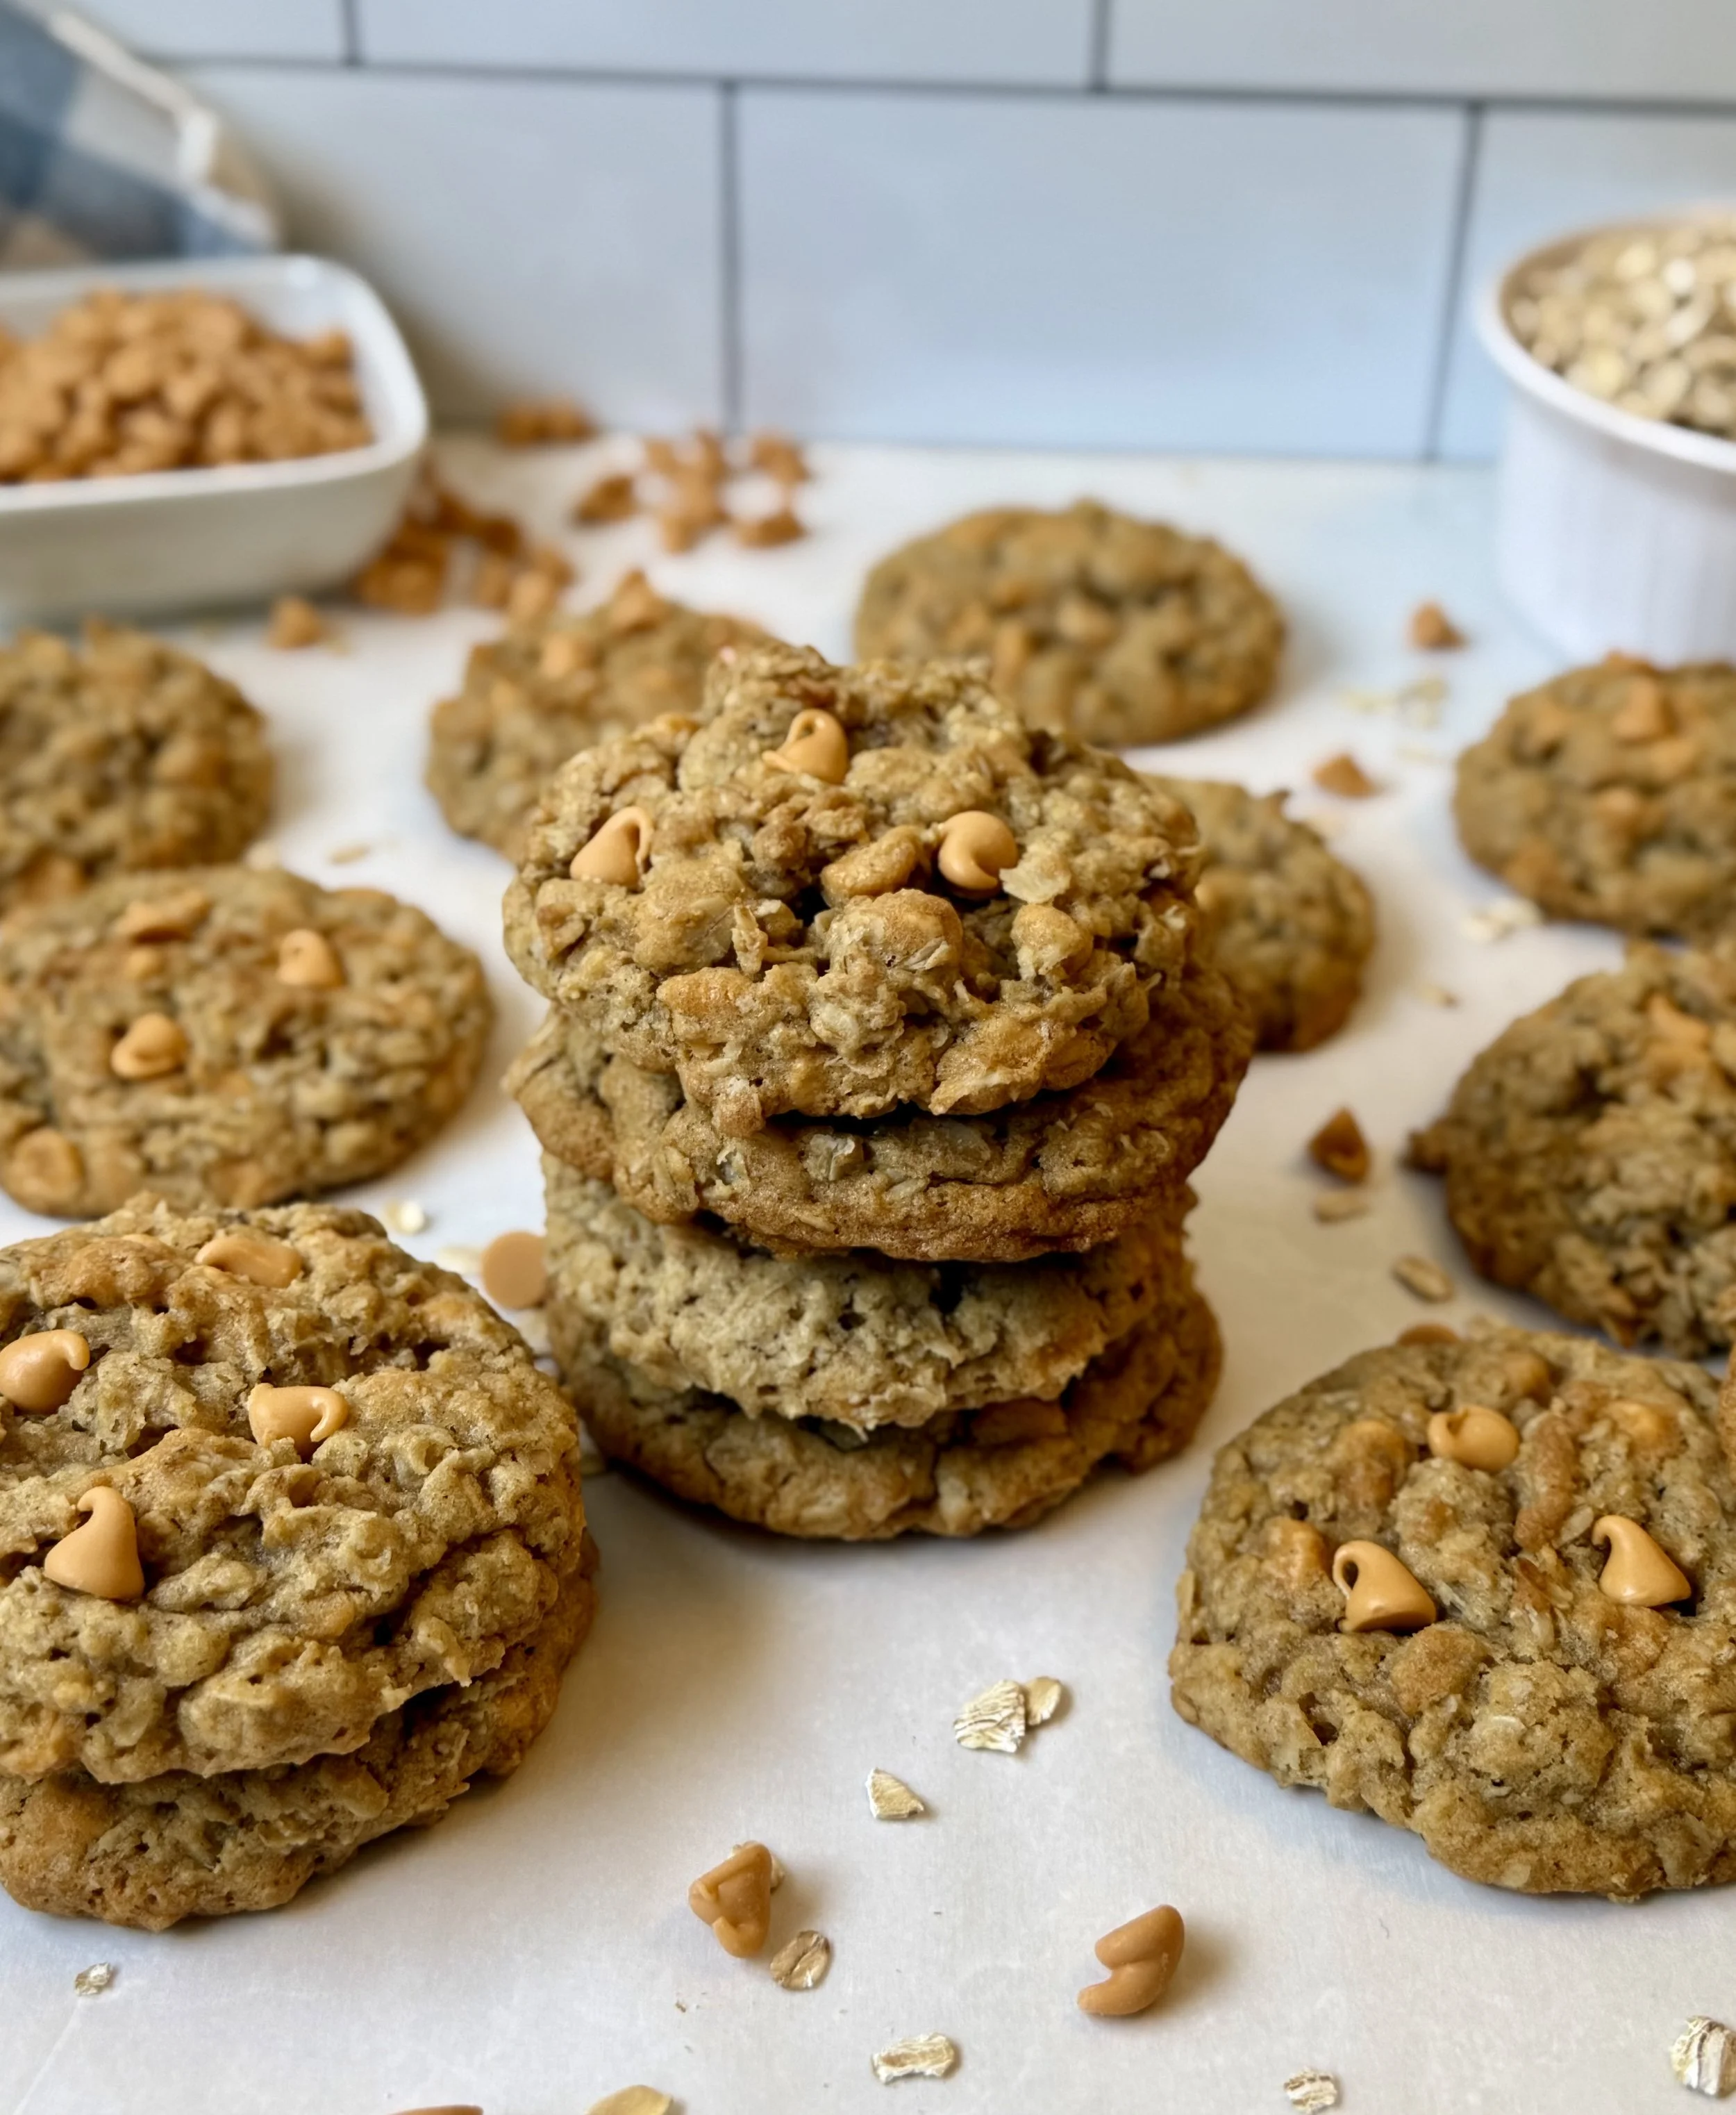
Homemade Oatmeal Scotchies
There’s something special about a cookie that carries a story, and for me, these Oatmeal Scotchies are more than just a recipe. They’re a piece of my childhood, a warm memory baked into every bite.
I remember standing in my grandparents’ kitchen, watching my grandma mix the butter and sugar until it was light and fluffy, the smell of brown sugar and cinnamon filling the air. She’d always let me sneak a spoonful of dough (because who could resist those sweet butterscotch chips?), and I’d wait impatiently by the oven as the cookies baked to golden perfection.
Every time I make these now, I’m reminded of those moments — the laughter, the cozy kitchen, the love that went into every batch. That’s what makes these cookies so special: they’re not just delicious, they’re comforting, nostalgic, and filled with heart.
These Homemade Oatmeal Scotchies are soft in the middle, crisp on the edges, and packed with buttery butterscotch flavor. Whether you’re baking them for a cozy afternoon treat, sharing them with family, or reliving your own childhood memories, this recipe is sure to bring warmth to your kitchen and a smile to your face.
Why You’ll Love These Oatmeal Scotchies
Nostalgic Flavor – Each bite takes you back to simpler times — cozy kitchens and the sweet aroma of freshly baked cookies.
Perfect Texture – Soft and chewy in the middle with lightly crisp edges, thanks to the blend of flours and a touch of cornstarch.
Buttery Butterscotch Bliss – The rich, caramel-like sweetness of butterscotch chips pairs perfectly with warm cinnamon and nutmeg.
Hearty and Comforting – Old-fashioned oats give these cookies a wholesome, satisfying chew that feels like a hug from home.
Make-Ahead Friendly – Chill or freeze the dough for quick, fresh-baked cookies anytime.
Foolproof and Family-Approved – Simple to make, fun to bake with kids, and guaranteed to impress anyone lucky enough to try one.
A Touch of Love – Whether you’re baking them for your family, friends, or just yourself, these cookies carry that homemade warmth in every bite.
Ingredients
| Ingredient | Amount | Purpose |
|---|---|---|
| Salted Butter, softened | 1 cup (2 sticks) | Adds richness and moisture; salt enhances flavor depth. |
| Brown Sugar | 1 cup | Adds chewiness and deep caramel flavor. |
| Granulated Sugar | 1/2 cup | Sweetens and helps create crisp edges. |
| Eggs | 2 large | Bind ingredients and add structure. |
| Vanilla Extract | 1/2 tbsp | Adds warmth and enhances overall flavor. |
| Maple Extract | 1/4 tsp | Brings cozy, sweet depth that complements butterscotch. |
| All-Purpose Flour | 1 cup | Provides structure and chew. |
| Cake Flour | 1 cup | Lightens the texture for a soft, tender crumb. |
| Cinnamon | 1 tsp | Adds warmth and cozy flavor. |
| Nutmeg | 1/4 tsp | Adds subtle spice and aroma. |
| Baking Soda | 3/4 tsp | Helps cookies rise slightly and spread evenly. |
| Cornstarch | 1/2 tsp | Keeps cookies soft and thick. |
| Salt | 3/4 tsp | Balances sweetness and enhances flavor. |
| Old-Fashioned Rolled Oats | 2 1/2 cups | Add hearty texture and nutty flavor (do not use instant oats). |
| Butterscotch Chips | 2 cups | The star ingredient — rich, buttery sweetness in every bite. |
Step-by-Step Instructions
Prepare your pans
Line cookie sheets with parchment paper and set aside.Cream the butter and sugar
In a stand mixer with the paddle attachment, beat the butter, brown sugar, and granulated sugar on medium-high for 3–4 minutes, until light and fluffy. This step incorporates air for a soft texture.Add eggs and extracts
Scrape down the sides of the bowl. Add eggs one at a time, mixing after each until just combined. Then add vanilla and maple extract (my secret ingredient).Combine dry ingredients
Add the cake flour, all-purpose flour, cinnamon, nutmeg, cornstarch, baking soda, and salt. Mix until just combined — do not overmix. The dough will be thick.Fold in oats and butterscotch chips
Mix on low speed until evenly distributed.Portion and chill
Use a large cookie scoop to portion dough onto prepared sheets. Cover with plastic wrap and refrigerate for 30–60 minutes.Bake
Preheat the oven to 350°F. Remove plastic wrap and bake for 13–14 minutes, or until edges are golden brown but centers are still soft and gooey.Tip: If chilled longer than 2 hours, let dough balls rest at room temperature for 30 minutes before baking.
Optional finishing touch
Immediately after baking, carefully press a few extra butterscotch chips onto the tops for a bakery-style look.Cool and enjoy
Let cookies cool on the pan for 5 minutes, then transfer to a wire rack. The hardest part is waiting!

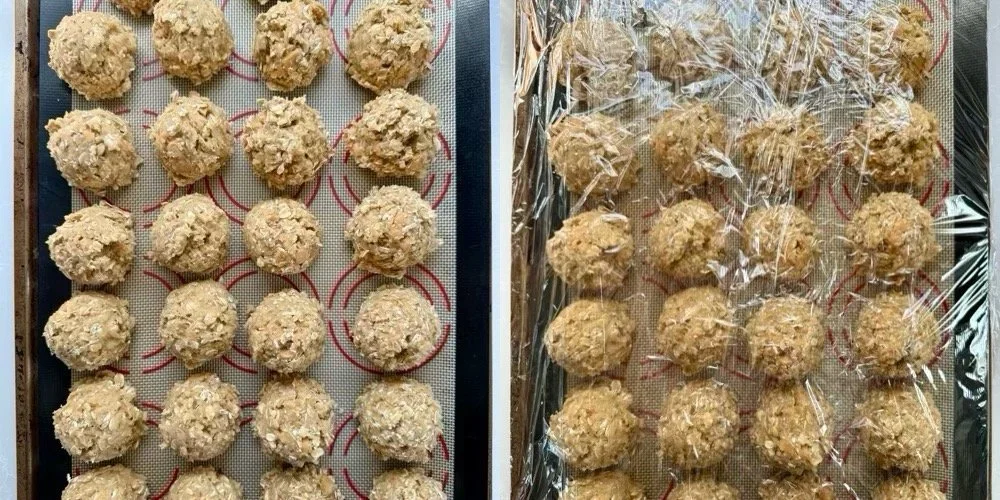
Oatmeal Scotchie Dough
Cover with plastic wrap and place in the fridge before baking for best results!
Why Each Ingredient Matters
Butter: Adds richness and keeps cookies soft and chewy.
Brown Sugar: Creates moisture and a deep caramel flavor.
Cornstarch: Helps cookies hold their shape and stay tender.
Cake + All-Purpose Flour: The combination gives a balanced texture, soft but structured.
Oats: Provide chewiness and heartiness.
Butterscotch Chips: Deliver the signature flavor and pockets of sweetness.
Cinnamon + Nutmeg: Add warmth and depth that elevate the overall flavor.
Helpful Baking Tips
Chill the dough: This prevents cookies from spreading too much and develops flavor.
Measure flour correctly: Spoon into the measuring cup and level off; don’t scoop directly from the bag.
Use room temperature butter and eggs: This ensures even mixing and a consistent dough.
Don’t overmix: Mix just until combined to avoid tough cookies.
Bake one sheet at a time: For the most even results.
Common Barriers & How to Fix Them
| Problem | Cause | Fix |
|---|---|---|
| Cookies spread too much | Dough too warm, too much butter, or overmixed | Chill dough 30–60 minutes; chill longer if your kitchen is warm; mix only until combined. |
| Cookies too dry or crumbly | Overbaked or too much flour | Remove when centers are still soft; measure flour with spoon-and-level; check oven temp with thermometer. |
| Too sweet | Large amount of butterscotch chips or high overall sugar | Reduce chips slightly, add an extra pinch of salt, or balance with a sprinkle of flaky sea salt on top. |
| Centers underbaked while edges are brown | Too hot oven, too much air circulation, or uneven pan placement | Bake at center rack, rotate pan halfway, and verify oven temp; use an insulated baking sheet if edges brown too quickly. |
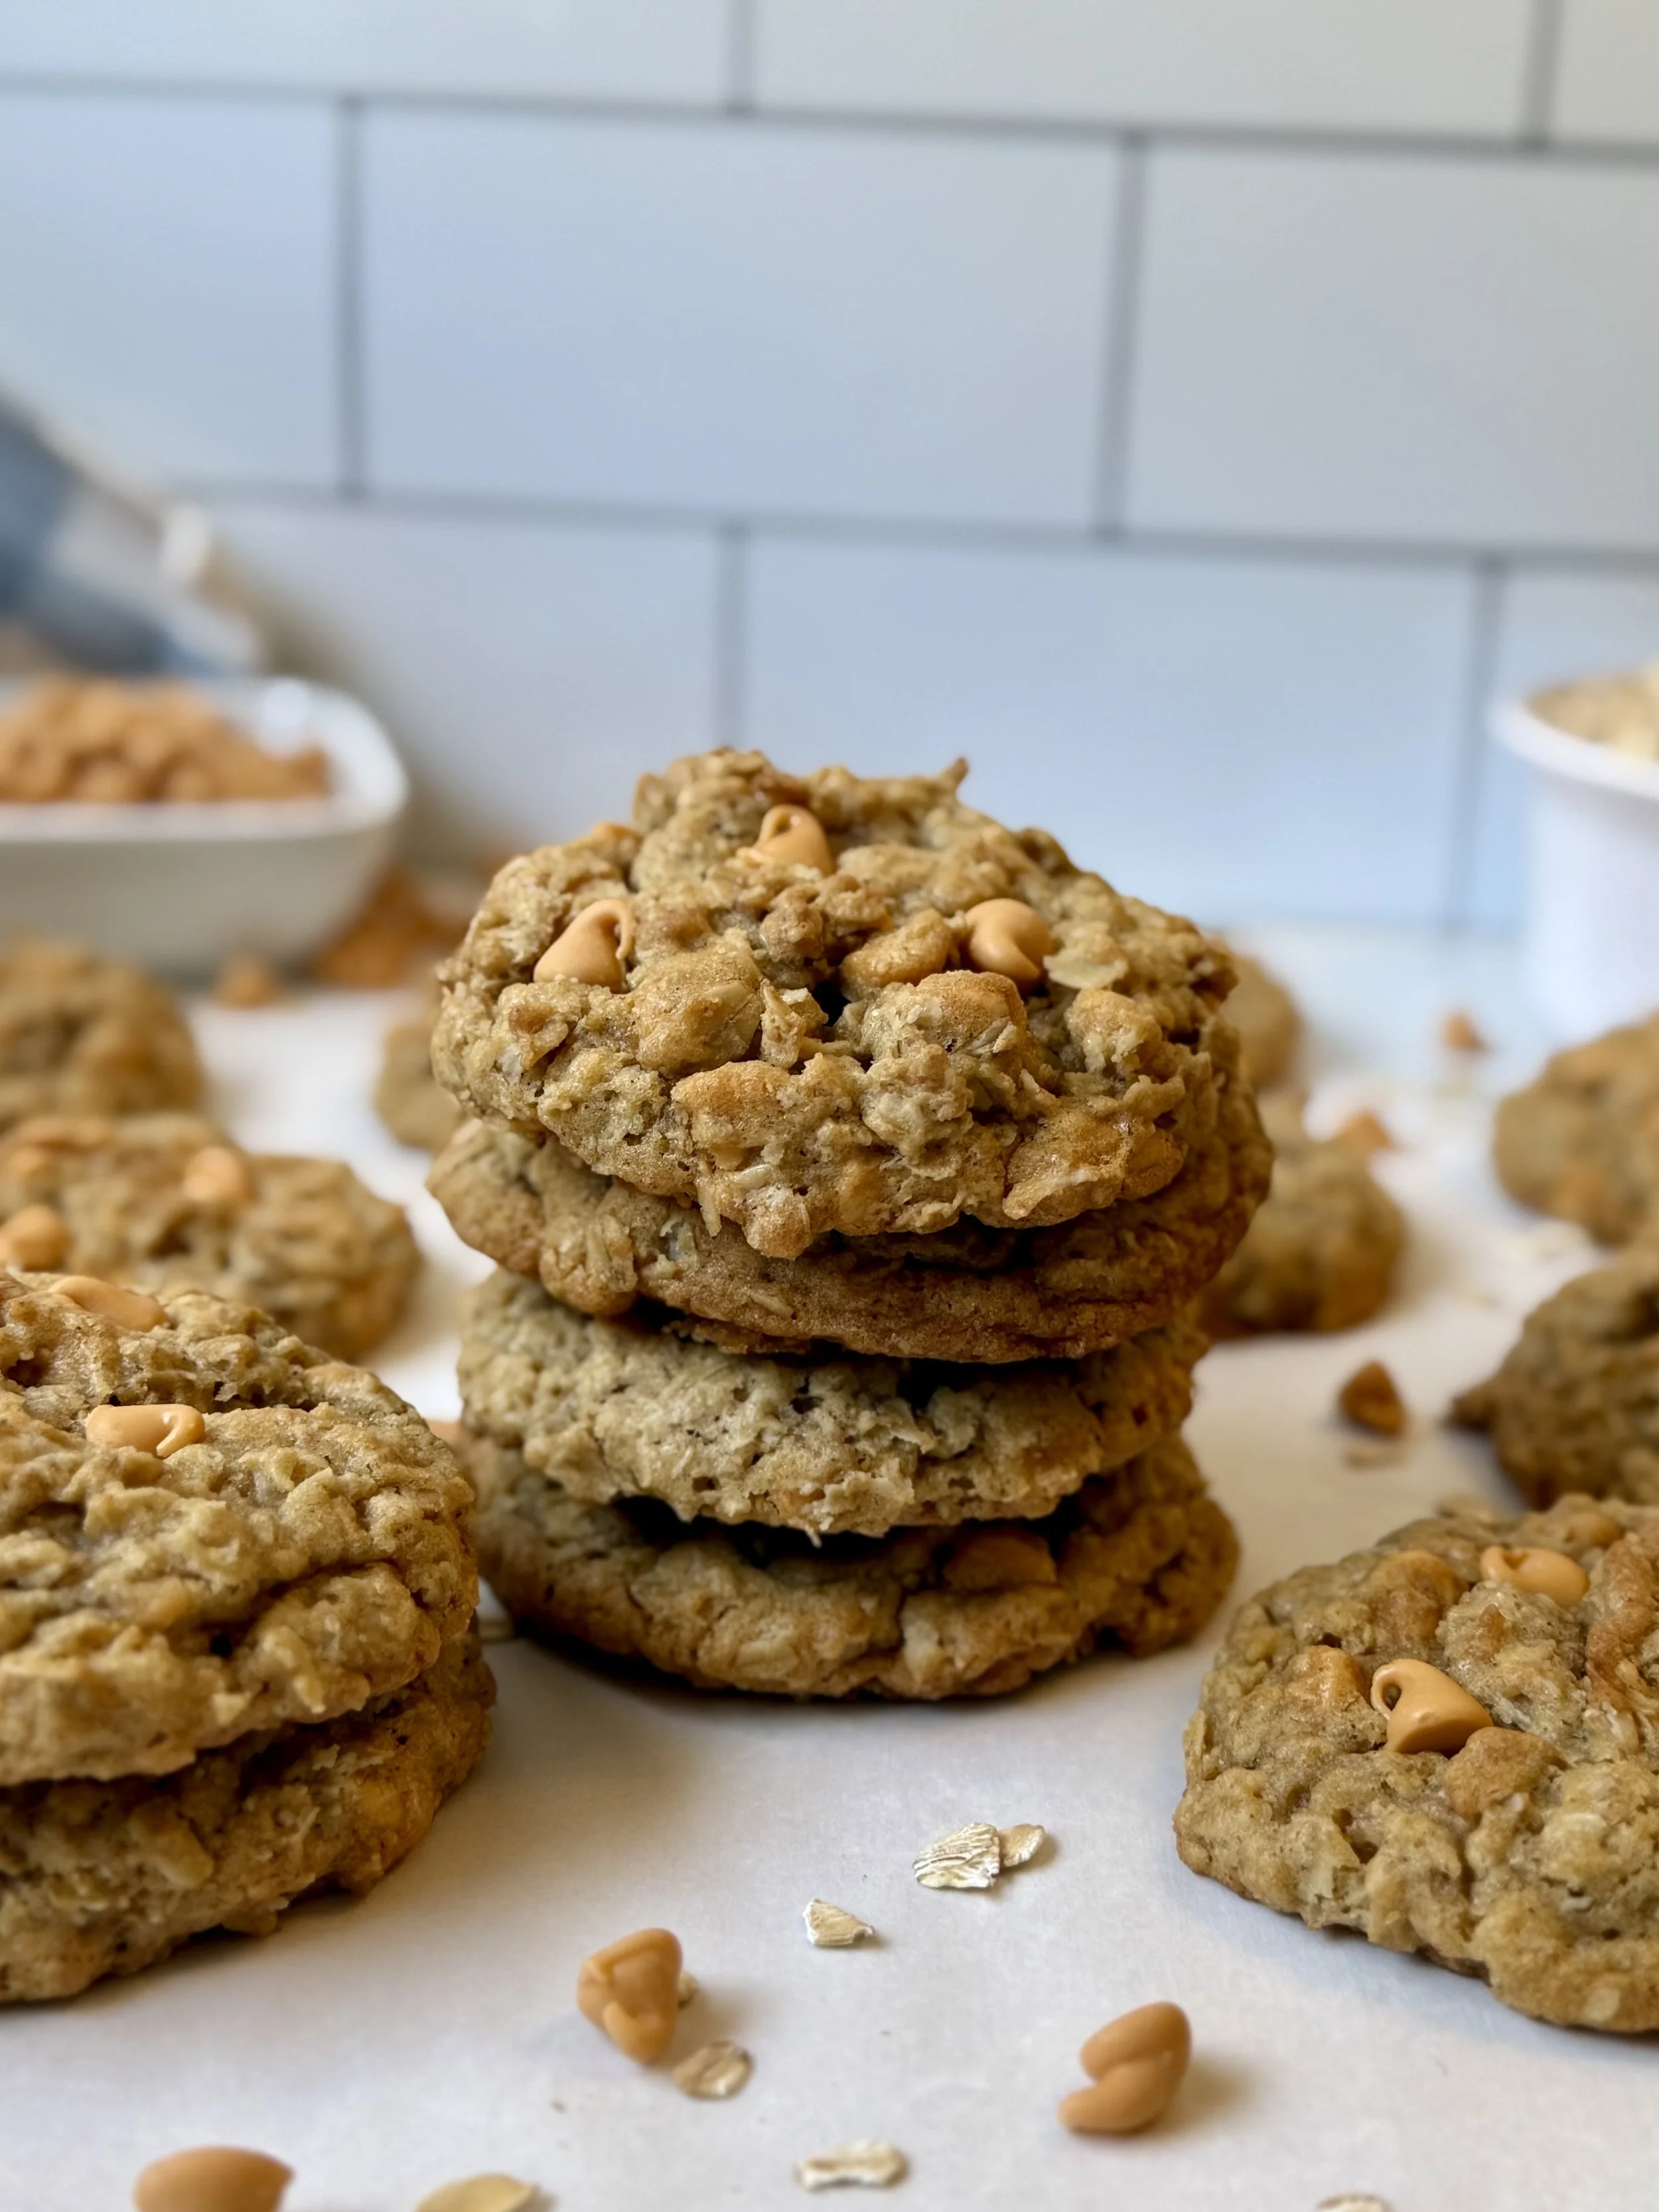
Storage & Freezing Tips
Room Temperature: Store in an airtight container for up to 5 days.
Freezer (Baked Cookies): Store up to 3 months; thaw at room temperature before serving.
Freezer (Cookie Dough): Scoop dough into balls, freeze on a tray, then store in a freezer bag. Bake from frozen, adding 1–2 minutes to the bake time.
Baking these cookies always feels like a warm hug from home.
If you make them, drop a comment below. I’d love to hear what you think and how they turned out!

Oatmeal Scothies
These homemade oatmeal scotchies are soft, chewy cookies packed with hearty oats and sweet butterscotch chips. Perfectly spiced and irresistibly nostalgic, they’re a cozy treat for any occasion.
Ingredients
- 1 cup salted butter, softened (2 sticks)
- 1 cup brown sugar
- 1/2 cup granulated sugar
- 2 eggs
- 1/2 tbsp vanilla extract
- 1/4 tsp maple extract
- 1 cup all-purpose flour
- 1 cup cake flour
- 1 tsp cinnamon
- 1/4 tsp nutmeg
- 3/4 tsp baking soda
- 1/2 tsp cornstarch
- 3/4 tsp salt
- 2 1/2 cups old-fashioned rolled oats (Not instant oats)
- 2 cups butterscotch chips
Instructions
Notes
- When the cookies are out of the oven, top with extra butterscotch chips. (optional)
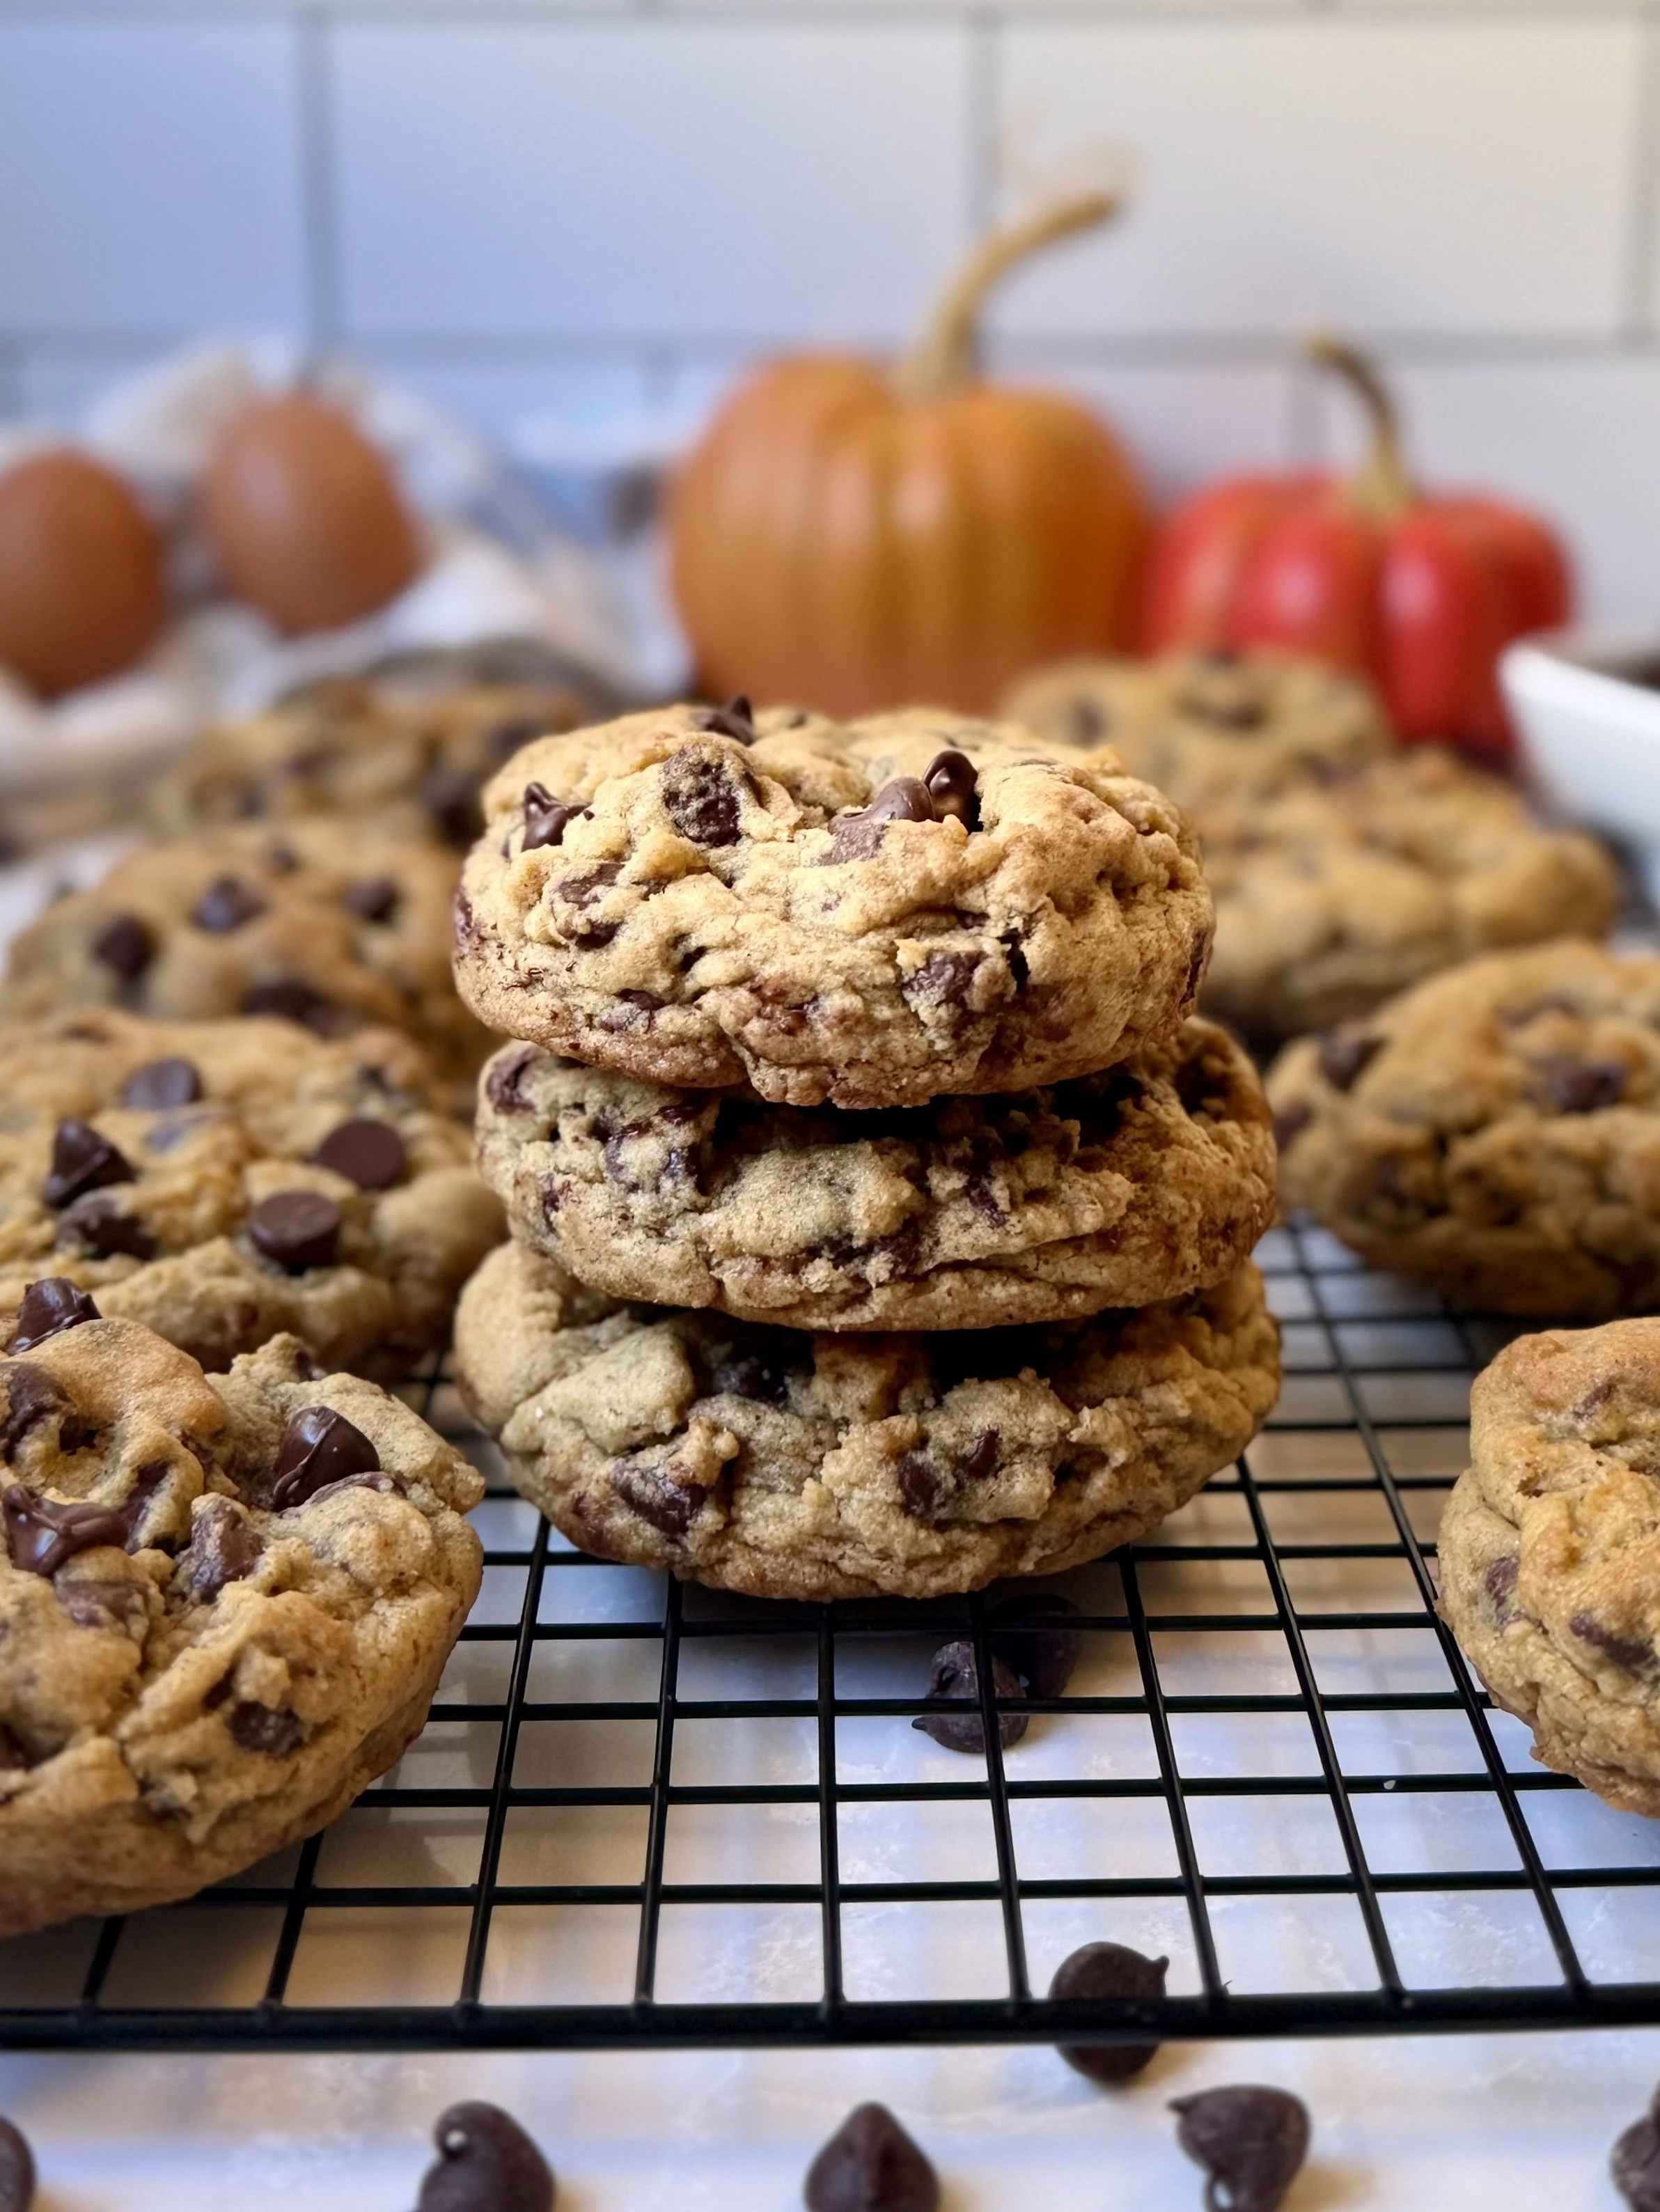
Pumpkin Chocolate Chip Cookies

Pumpkin Chocolate Chip Cookies, Soft, Chunky, and Full of Fall Flavor
These Pumpkin Chocolate Chip Cookies are thick, chewy, and loaded with cozy fall spices and rich chocolate chips. Made with a mix of cake and all-purpose flour for the perfect texture, these cookies are soft in the center, slightly crisp on the edges, and bursting with pumpkin spice flavor. They're ideal for autumn baking, but honestly—they’re too good to only make once a year.
I haven’t always been the biggest fan of pumpkin-flavored desserts, but lately they’re my new favorite. Maybe it’s because people say our taste buds change every so often, but these pumpkin chocolate chip cookies really hit the spot!
🎃 Why You’ll Love These Pumpkin Cookies:
No flattening! The dough stays thick and bakes into perfect bakery-style cookies
Uses real pumpkin puree (not just pumpkin spice!)
A high-temperature bake gives golden edges with gooey centers
Perfect balance of spice, sweetness, and chocolate
Other Pumpkin Desserts
Ingredients
| Ingredient | Quantity | Purpose |
|---|---|---|
| Cold Salted Butter | 1 cup (2 sticks), cubed | Adds flavor, richness, and structure. Cold butter helps prevent spreading. |
| Brown Sugar | 1 cup | Adds moisture, softness, and caramel-like depth. |
| White Sugar | ½ cup | Provides sweetness and helps the edges crisp slightly. |
| Egg | 1 large | Binds the dough and adds richness. |
| Pumpkin Puree | ¼ cup | Adds moisture and subtle pumpkin flavor. |
| Vanilla Extract | 1 tbsp | Enhances the overall flavor profile. |
| Cake Flour | 1½ cups | Makes the cookies tender and soft. |
| All-Purpose Flour | 1½ cups | Gives structure and chew to the cookies. |
| Cornstarch | 1½ tsp | Helps create a soft, bakery-style texture. |
| Pumpkin Pie Spice | 2 tsp | Adds warm, seasonal spice flavor. |
| Ground Cinnamon | ½ tsp | Boosts the spice profile and warmth. |
| Ground Cloves | ¼ tsp | Adds bold, deep fall flavor. |
| Baking Soda | ¾ tsp | Leavening agent that helps the cookies rise. |
| Salt | ¾ tsp | Balances sweetness and enhances flavor. |
| Chocolate Chips | 2 cups | Adds rich, melty chocolate in every bite. |
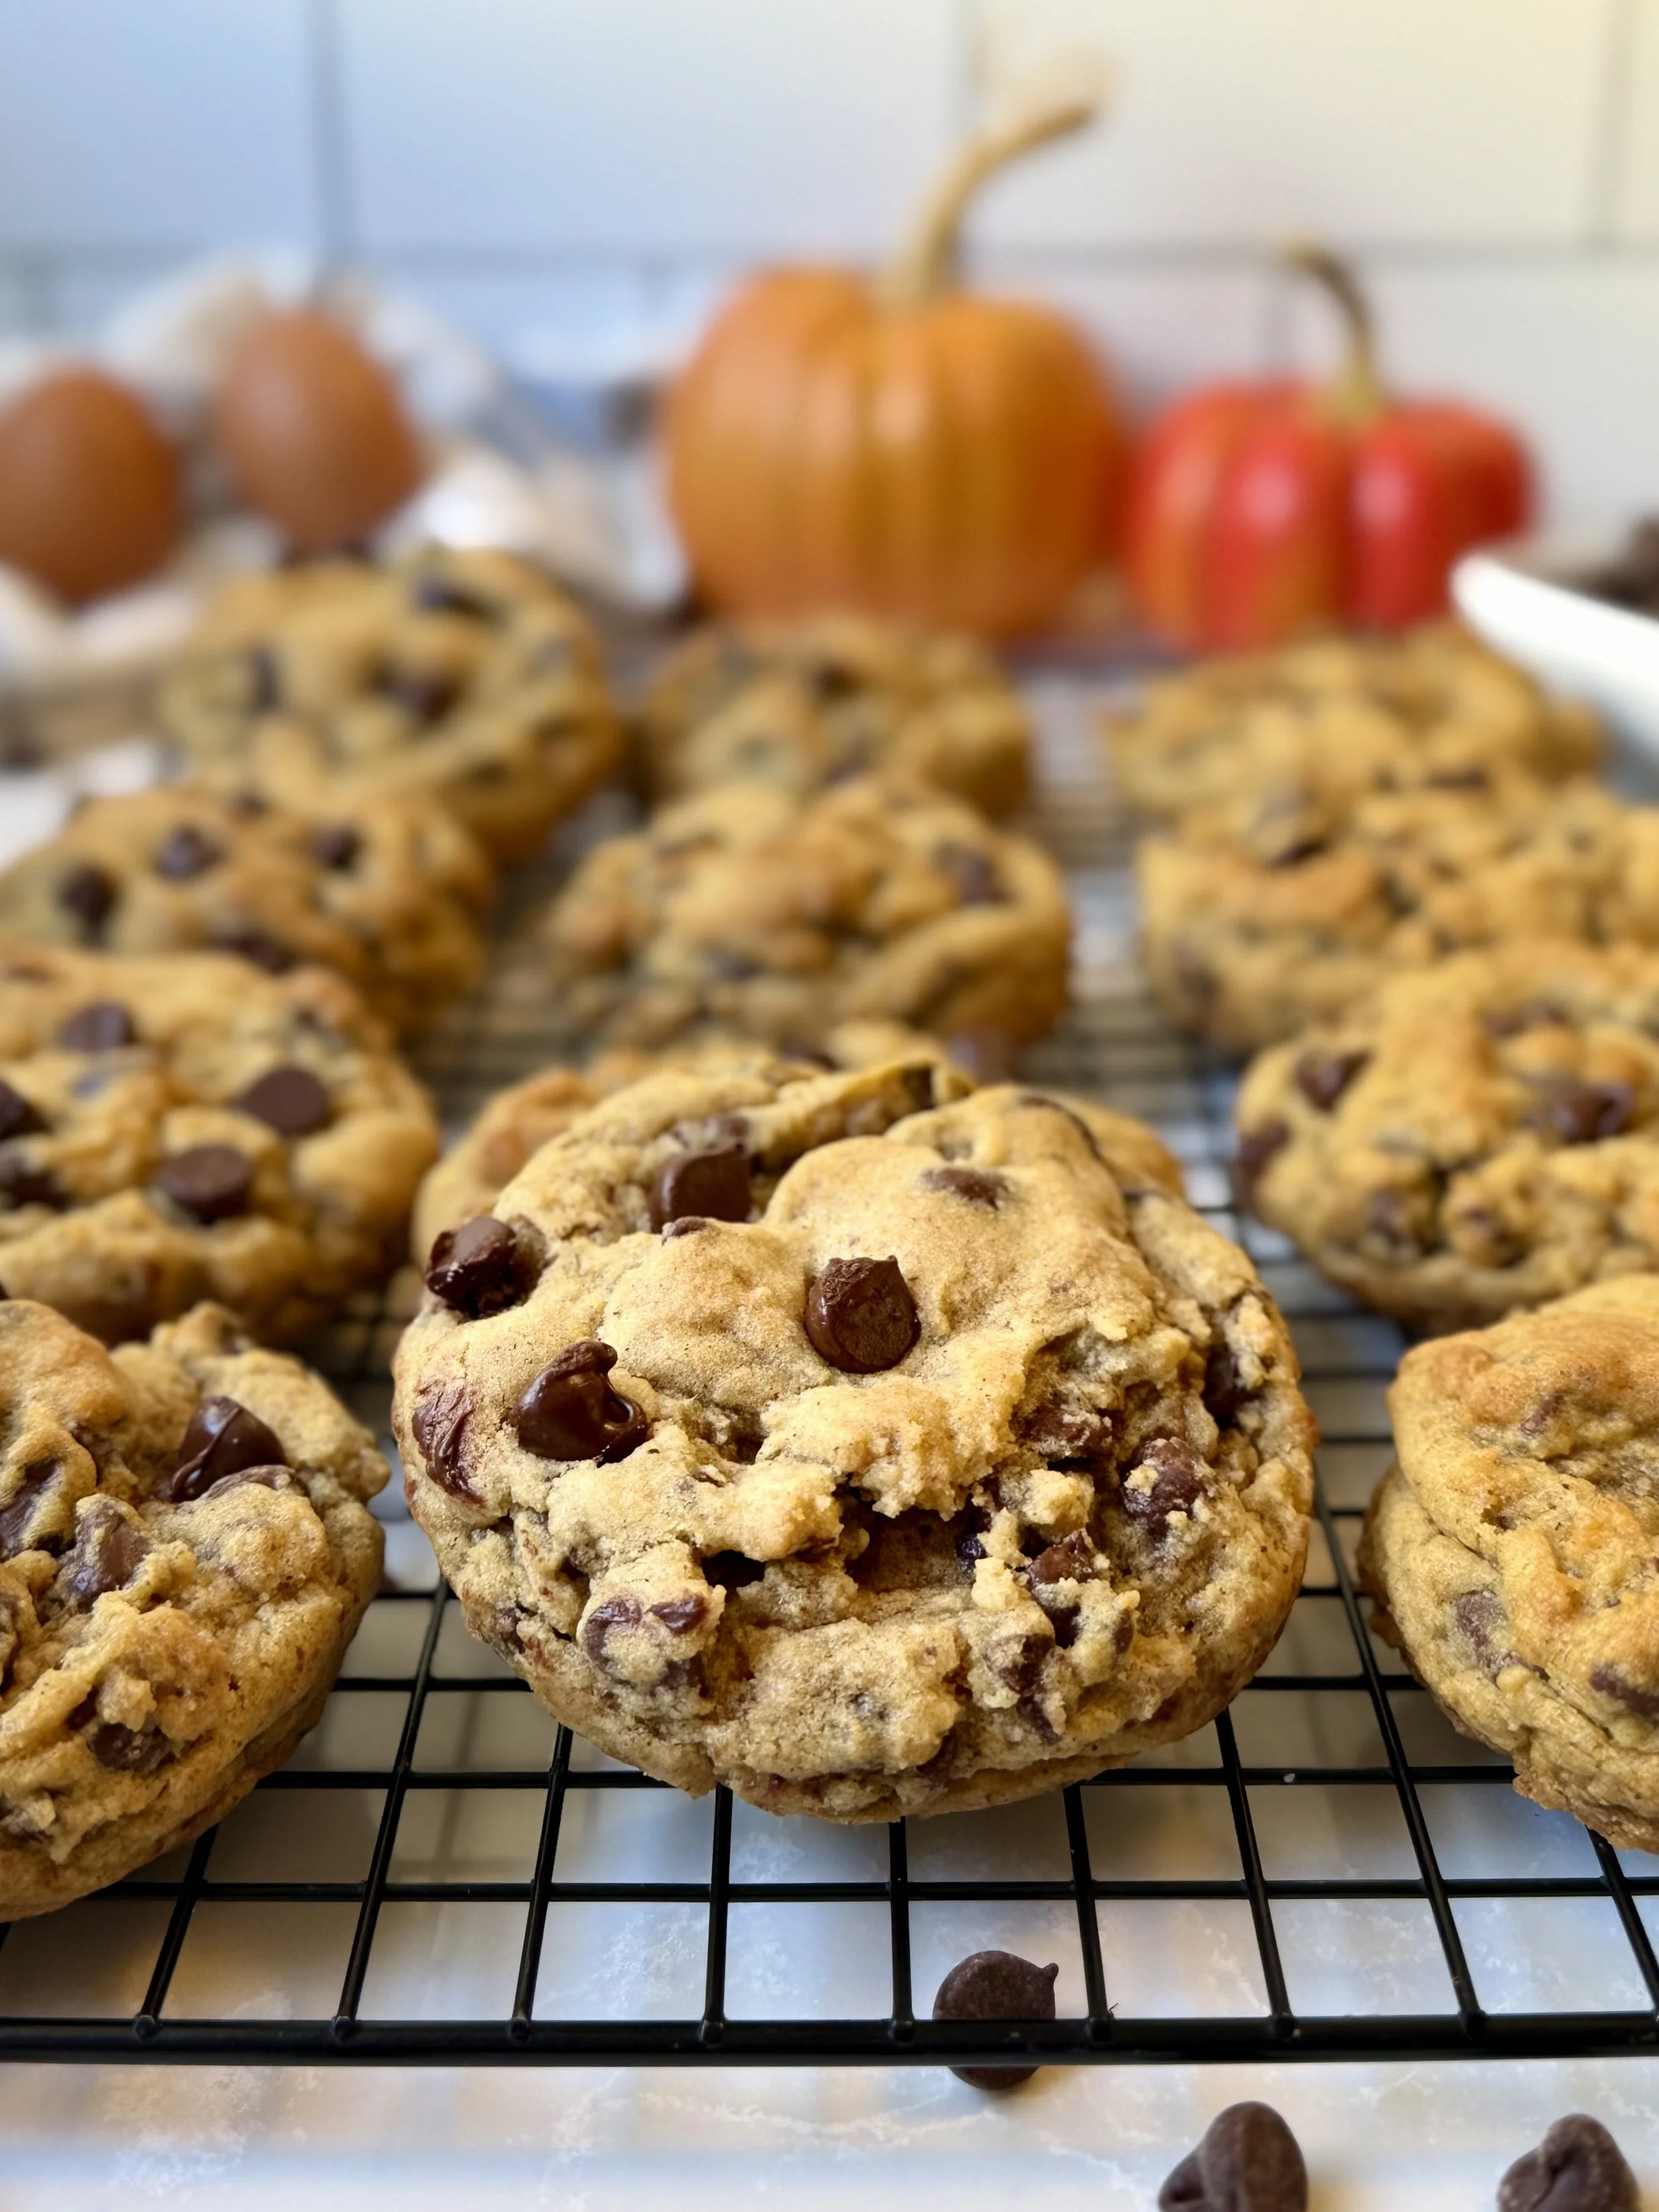
Step-by-Step Instructions
Step 1: Prep your baking sheets
Line cookie sheets with parchment paper and set aside.
Step 2: Cream the butter & sugars
In a stand mixer fitted with a paddle attachment, mix the cold cubed butter, brown sugar, and white sugar on medium-high speed for 3–4 minutes, until light and fluffy.
→ This step is key for texture! Proper creaming traps air, making soft cookies.
Step 3: Add wet ingredients
Scrape down the sides with a spatula. Add the egg and pumpkin puree and mix until just combined. Add the vanilla extract.
Step 4: Mix in the dry ingredients
Add cake flour, all-purpose flour, cornstarch, pumpkin pie spice, cinnamon, cloves, baking soda, and salt to the mixer.
Mix on low until just combined, don’t overmix! The dough will be thick.
Step 5: Add chocolate chips
Mix in the chocolate chips until evenly distributed.

Step 6: Scoop & chill
Using a large cookie scoop, scoop tall, chunky mounds of dough. Don’t flatten them—leave the tops uneven.
Place the rounded sides on the baking sheet with the chunky tops facing up.
Cover loosely with plastic wrap and refrigerate for 30–60 minutes.
→ Chilling helps develop flavor and prevents spreading in the oven.
Step 7: Preheat oven to 400°F
About 20 minutes before baking, preheat the oven to 400°F (204°C).
Step 8: Bake the cookies
Remove plastic wrap. Bake cookies for 11–13 minutes, until the edges are golden but the centers still look gooey.
→ They’ll continue baking slightly on the tray after coming out.
Step 9: Cool & enjoy
Let the cookies cool on the tray for 10 minutes before transferring.
→ This helps them set up perfectly and keeps them soft in the center.
Add-ins & Variations
White chocolate chips or dark chocolate chunks
Toasted pecans or walnuts for crunch
A sprinkle of flaky sea salt before baking
Add extra pumpkin spice for bolder flavor
For vegan version: Use plant-based butter and egg replacer (e.g., flax egg)
Storage Instructions
| Storage Method | Instructions | Shelf Life |
|---|---|---|
| Room Temperature | Store in an airtight container. Add a piece of bread to retain moisture. | 3–4 days |
| Refrigerator | Optional, but helps maintain texture longer. Use an airtight container. | Up to 1 week |
| Freezer (Unbaked Dough) | Freeze scooped dough balls on a tray, then transfer to a bag. Bake from frozen, adding 1–2 minutes. | Up to 2 months |
| Freezer (Baked Cookies) | Cool completely, wrap tightly, and freeze. Thaw at room temperature. | Up to 2 months |
Troubleshooting & Pro Tips
| Issue | Cause | Solution |
|---|---|---|
| Cookies spread too much | Butter was too soft or dough wasn’t chilled | Use cold butter and chill dough for 30–60 minutes before baking |
| Dry or cakey texture | Overbaking or too much flour | Use a kitchen scale or spoon-and-level method; don’t overbake |
| Dough too sticky | Pumpkin adds moisture | Chill longer or lightly flour your scoop |
| Weak pumpkin flavor | Pumpkin is mild naturally | Boost spices slightly (e.g., cinnamon or pumpkin pie spice) |

Frequently Asked Questions (FAQ)
1. Can I use only all-purpose flour instead of both cake and all-purpose flour?
Yes, you can use only all-purpose flour if that’s what you have on hand. However, the combination of cake flour and all-purpose flour gives these cookies their soft and tender texture. If using all-purpose only, the cookies may be slightly chewier and less delicate.
2. Do I need to chill the dough?
Yes, chilling the dough is highly recommended. It helps prevent the cookies from spreading too much, improves texture, and allows the flavors to develop. Even a 30-minute chill makes a noticeable difference.
3. Can I freeze the cookie dough?
Absolutely! Scoop the dough into individual balls, freeze on a tray until solid, then transfer to a freezer-safe bag. Bake directly from frozen—just add 1–2 extra minutes to the bake time.
4. What kind of chocolate chips work best?
Semi-sweet chocolate chips are the best match for the spiced pumpkin flavor. However, you can also use dark chocolate chips, milk chocolate, white chocolate, or even chocolate chunks for variety.
5. Can I make these cookies ahead of time?
Yes! The dough can be made 1–2 days ahead and stored in the fridge. Baked cookies can be stored at room temperature or frozen. See the storage section above for full details.
6. My cookies turned out cakey—what went wrong?
Pumpkin naturally adds moisture, and over-measuring flour or overbaking can make cookies cakey. To avoid this, use a kitchen scale or spoon-and-level your flour, and remove the cookies from the oven when the centers still look slightly gooey.
7. Can I make these cookies vegan or gluten-free?
Yes! For vegan cookies, substitute the butter with plant-based butter and use a flax egg (1 tbsp ground flaxseed + 2.5 tbsp water). For gluten-free, use a good 1:1 gluten-free flour blend and check that all other ingredients are certified gluten-free.
8. Is canned pumpkin the same as pumpkin pie filling?
No. Use 100% pure pumpkin puree, not pumpkin pie filling, which contains added sugar and spices and will throw off the recipe’s flavor and texture.
9. Can I double the recipe?
Definitely! This recipe scales well. Just make sure your mixer can handle the volume, or mix in two batches.
10. How do I get that chunky, bakery-style look?
Use a large cookie scoop and don’t level off the dough. Leave the tops a little jagged and make sure the dough is cold when going into the oven. This helps the cookies hold their tall, chunky shape and creates a rustic, bakery-style texture.
If you make and love this recipe let me know in the comments below! happy baking :)

Pumpkin Chocolate Chip Cookies
These soft and chewy pumpkin chocolate chip cookies are perfectly spiced and loaded with rich chocolate chips, an irresistible fall treat!
Ingredients
- 1 cup cold salted butter (2 sticks) cut into cubes
- 1 cup brown sugar
- ½ cup sugar
- 1 egg
- 1/4 cup pumpkin puree
- 1 tbsp vanilla extract
- 1 1/2 cups cake flour
- 1 ½ cups all-purpose flour
- 1.5 tsp cornstarch
- 2 tsp pumpkin pie spice
- 1/2 tsp ground cinnamon
- 1/4 tsp ground cloves
- 3/4 teaspoon baking soda
- 3/4 tsp salt
- 2 cup chocolate chips
Instructions
Notes
These cookies are great with chopped nuts of your choosing.

Soft Apple Cider Cookies
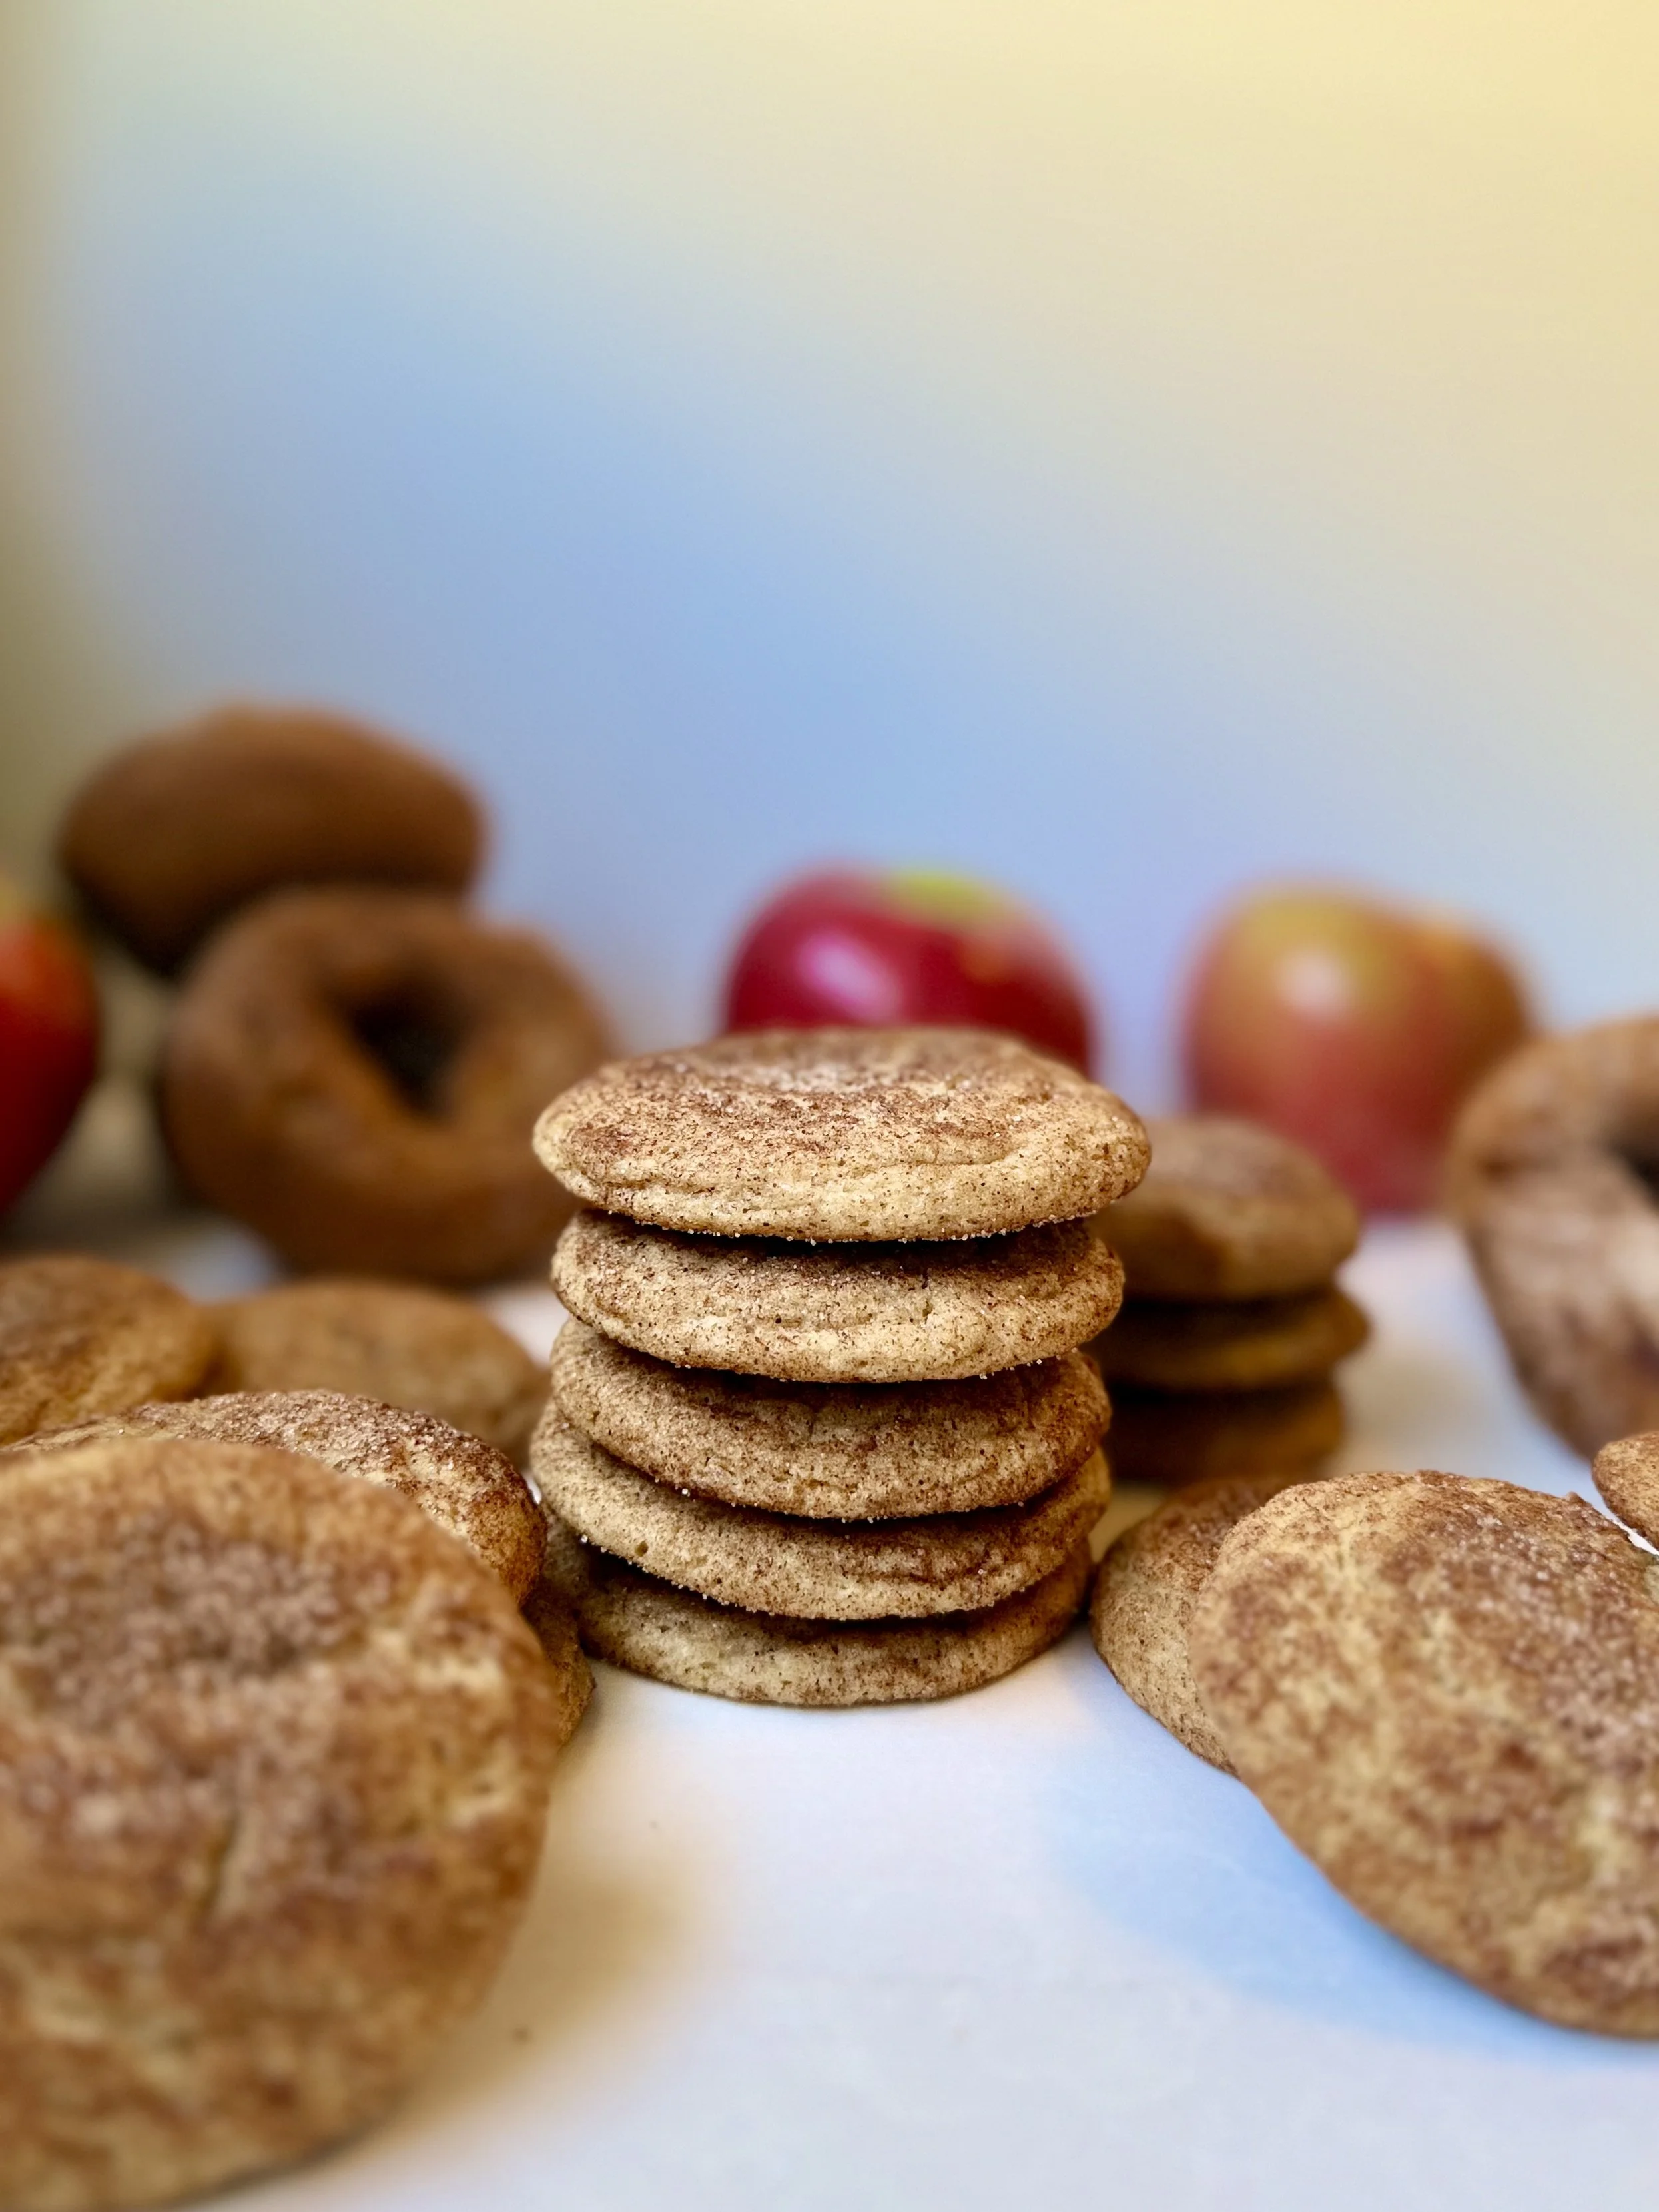
I wanted a cookie that tasted like fall in one bite. Warm, cozy, and just a little nostalgic. A major perk of fall is going to an apple orchard. Walking down the rows of apple trees, picking only the best apples, then finally finishing it all off with some fresh cider donuts and a cup of warm apple cider. I wanted to make something that gave all of those core fall perks in one single cookie.
These soft apple cider cookies capture the flavors of fall in every bite. Reduced apple cider enhances the flavor without overpowering sweetness, while cinnamon sugar brings a comforting crunch. The cinnamon sugar coating adds to the warmth of these cookies, enhancing their flavor. This fall baking recipe will definitely be added to your autumn festivities. Paired with a scoop of vanilla ice cream or a glass of warm apple cider, you will not be disappointed.
Ingredients
Wet Ingredients:
1 cup (2 sticks) salted butter, softened to room temperature
3/4 cup granulated sugar
1/4 cup packed brown sugar (light or dark)
2 large eggs, room temperature
1/4 cup reduced apple cider (see below)
1 tsp vanilla extract
Dry Ingredients:
2 3/4 cups all-purpose flour
1 tsp baking soda
2 tsp cream of tartar
1 tsp ground cinnamon
1/4 tsp ground nutmeg
1/4 tsp ground ginger
1/4 tsp salt
Cinnamon Sugar Coating:
1/4 cup granulated sugar
1 tbsp ground cinnamon
🍎 Step-by-Step Instructions 🍎
1. Reduce the Apple Cider
In a saucepan, pour 1.5 to 2 cups of apple cider and heat over medium. Stir occasionally until it thickens and reduces to 1/4 cup (about 10–15 minutes). It should have a syrup-like consistency.
Tip: Let it cool fully before adding to your dough the warm cider can melt the butter and ruin your cookie texture.
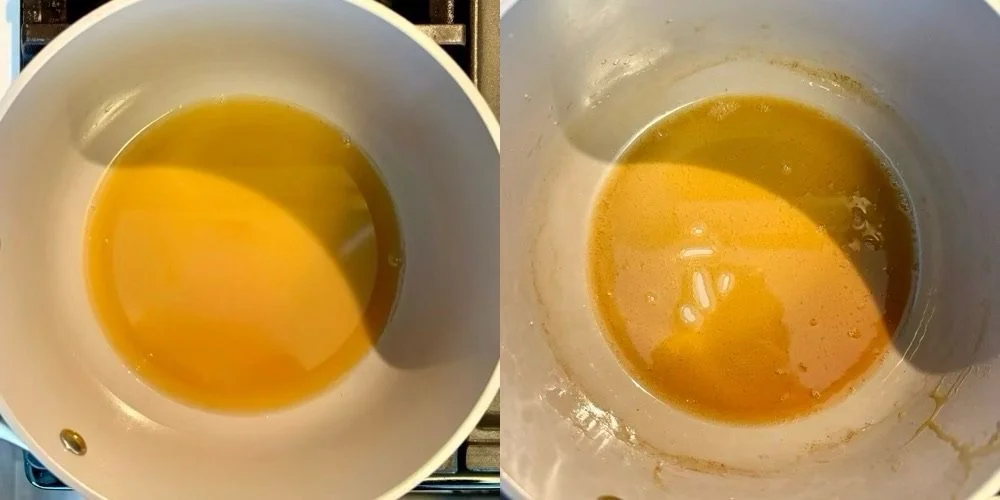
2. Prepare for Baking
Preheat your oven to 350°F (175°C) and line 2 baking sheets with parchment paper or silicone baking mats.
3. Cream the Butter & Sugars
In a stand mixer fitted with the paddle attachment (or using a handheld mixer), beat the softened butter, sugar, and brown sugar on medium-high speed until light and fluffy, about 2 minutes.
4. Add Eggs, Vanilla & Cider
Scrape down the sides of the bowl. Add the eggs, one at a time, mixing until fully combined. Then add the cooled reduced apple cider and vanilla extract. Mix until incorporated.
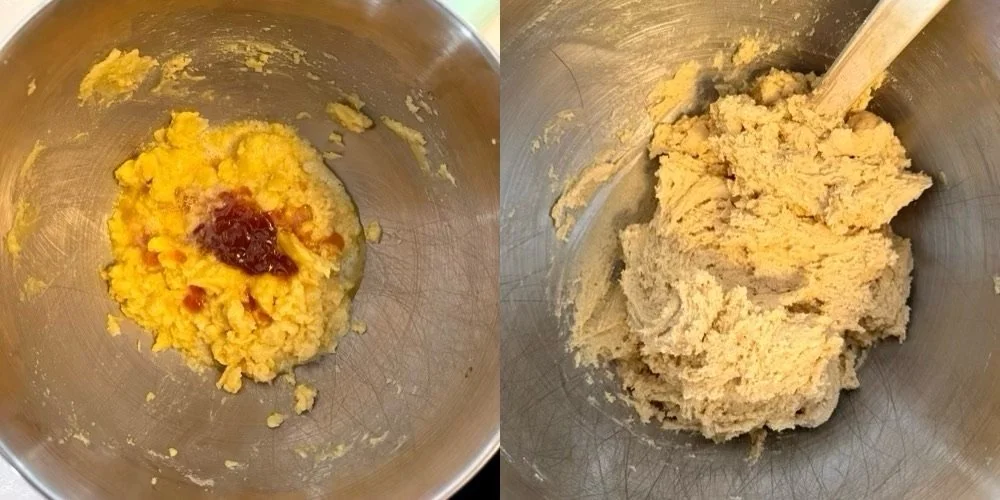
5. Add Dry Ingredients
To the same bowl, add the flour, baking soda, cream of tartar, cinnamon, nutmeg, ginger, and salt. Mix on low speed until the dough just comes together. Don’t overmix.
The dough should be soft and slightly tacky but not sticky.
6. Make Cinnamon Sugar Coating
In a small bowl, stir together 1/4 cup sugar and 1 tbsp cinnamon.
7. Shape & Roll the Dough
Use a medium cookie scoop (about 2 tablespoons of dough) to scoop dough balls. Roll each ball in the cinnamon sugar mixture and place them 2 inches apart on the baking sheet.
Optional: For extra flavor, do a second roll in cinnamon sugar just before baking.
8. Bake
Bake for 10–12 minutes, or until the cookies have puffed up and the edges look set. The centers will still be soft — that’s good! They’ll continue to bake on the tray.
For thicker cookies, chill the dough balls for 30 minutes, then roll in sugar again and bake for 11–13 minutes.
9. Cool & Serve
Let cookies rest on the baking sheet for 5 minutes, then transfer to a wire rack to cool completely.
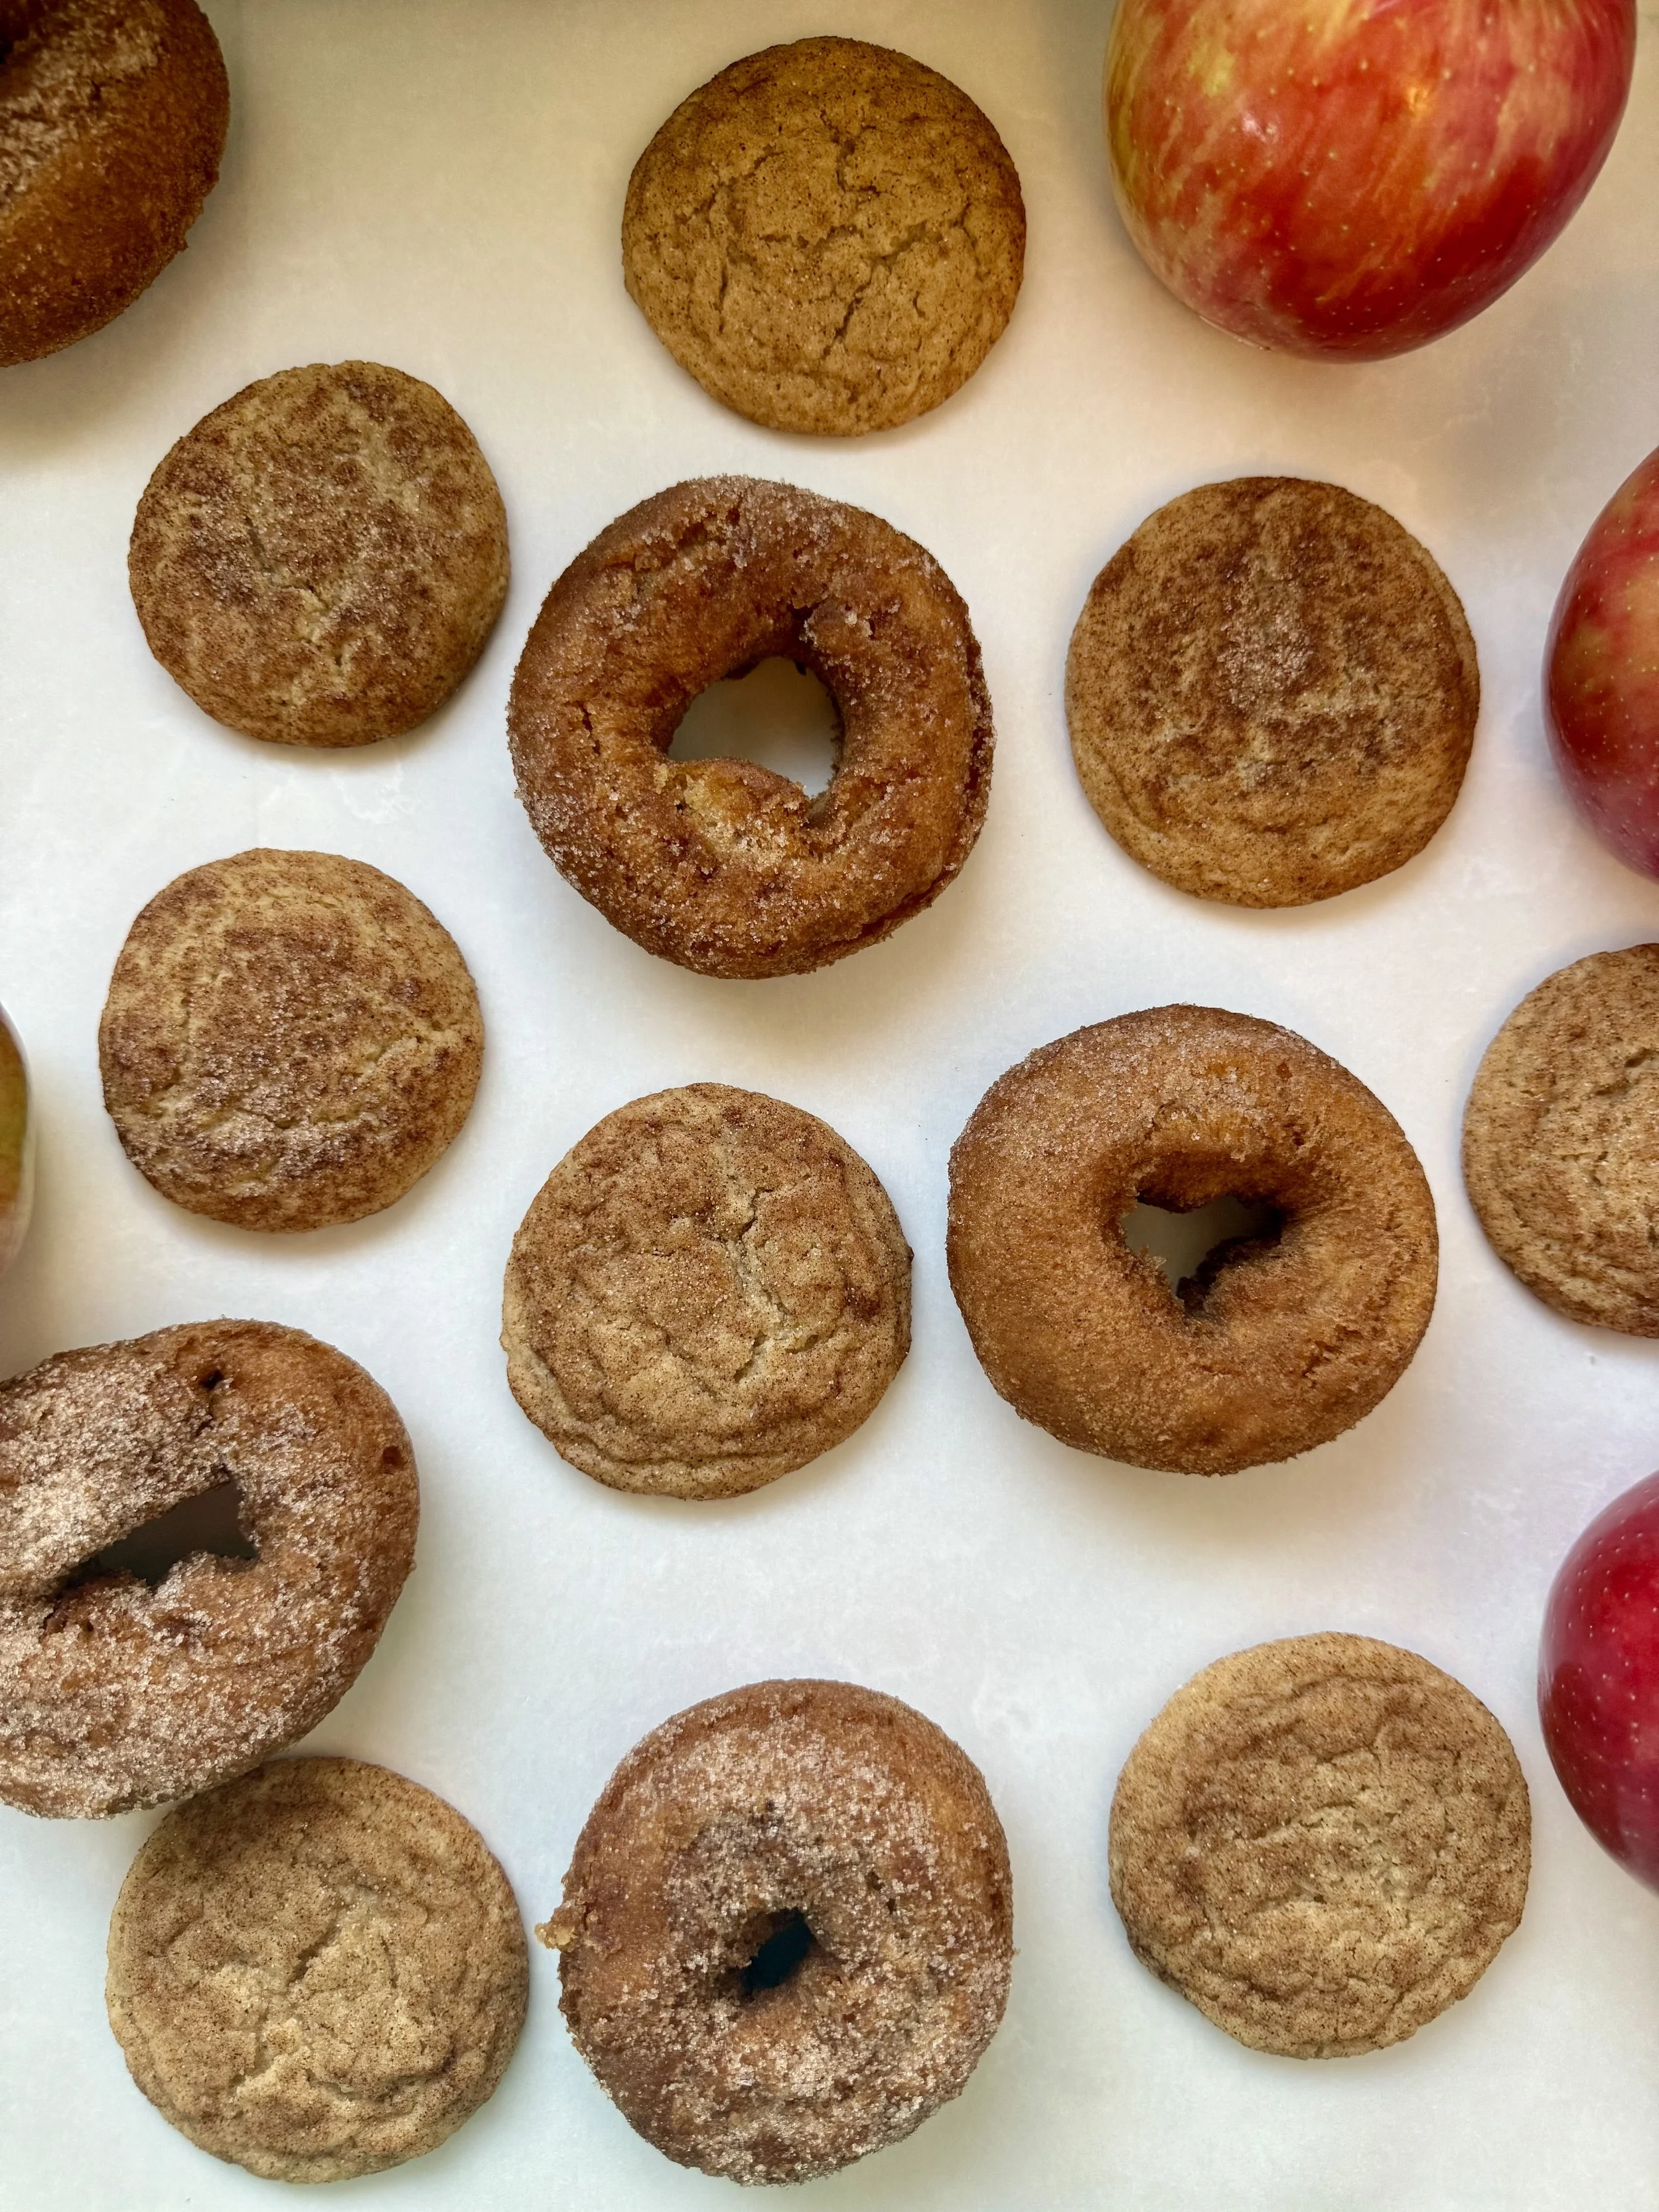
Ingredient Purposes & Tips
| Ingredient | Purpose | Tips or Substitutions |
|---|---|---|
| Salted Butter | Adds richness, moisture, and flavor | Use unsalted butter + 1/2 tsp salt if needed |
| Granulated & Brown Sugar | Sweetness and chewiness | Brown sugar adds moisture and flavor depth |
| Eggs | Bind ingredients and give structure | Room temp eggs mix better into dough |
| Reduced Apple Cider | Concentrates real apple flavor | No sub — reduction is key for flavor impact |
| Vanilla Extract | Adds depth and rounds out flavor | Optional but highly recommended |
| All-Purpose Flour | Provides structure to cookies | Spoon and level — don’t scoop directly |
| Baking Soda | Helps cookies rise and spread | Pairs with cream of tartar for best texture |
| Cream of Tartar | Creates soft, chewy texture with a slight tang | Don’t skip — it's essential to this recipe |
| Cinnamon, Nutmeg, Ginger | Adds warmth and seasonal spice | Use pumpkin pie spice if you’re in a pinch |
| Salt | Balances sweetness and enhances flavor | Essential — even in sweet recipes! |
| Cinnamon Sugar Coating | Adds crunch and flavor to the exterior | Optional second roll for more texture & sweetness |
Substitutions & Add-Ins
Gluten-Free? Try a 1:1 GF baking blend (like Cup4Cup or King Arthur)
Dairy-Free? Use vegan butter sticks and reduce the cider a bit more to counter the added moisture
Want More Apple Flavor? Add finely chopped dried apples or 1/4 tsp apple extract
Add Texture: Mix in 1/2 cup white chocolate chips or chopped pecans
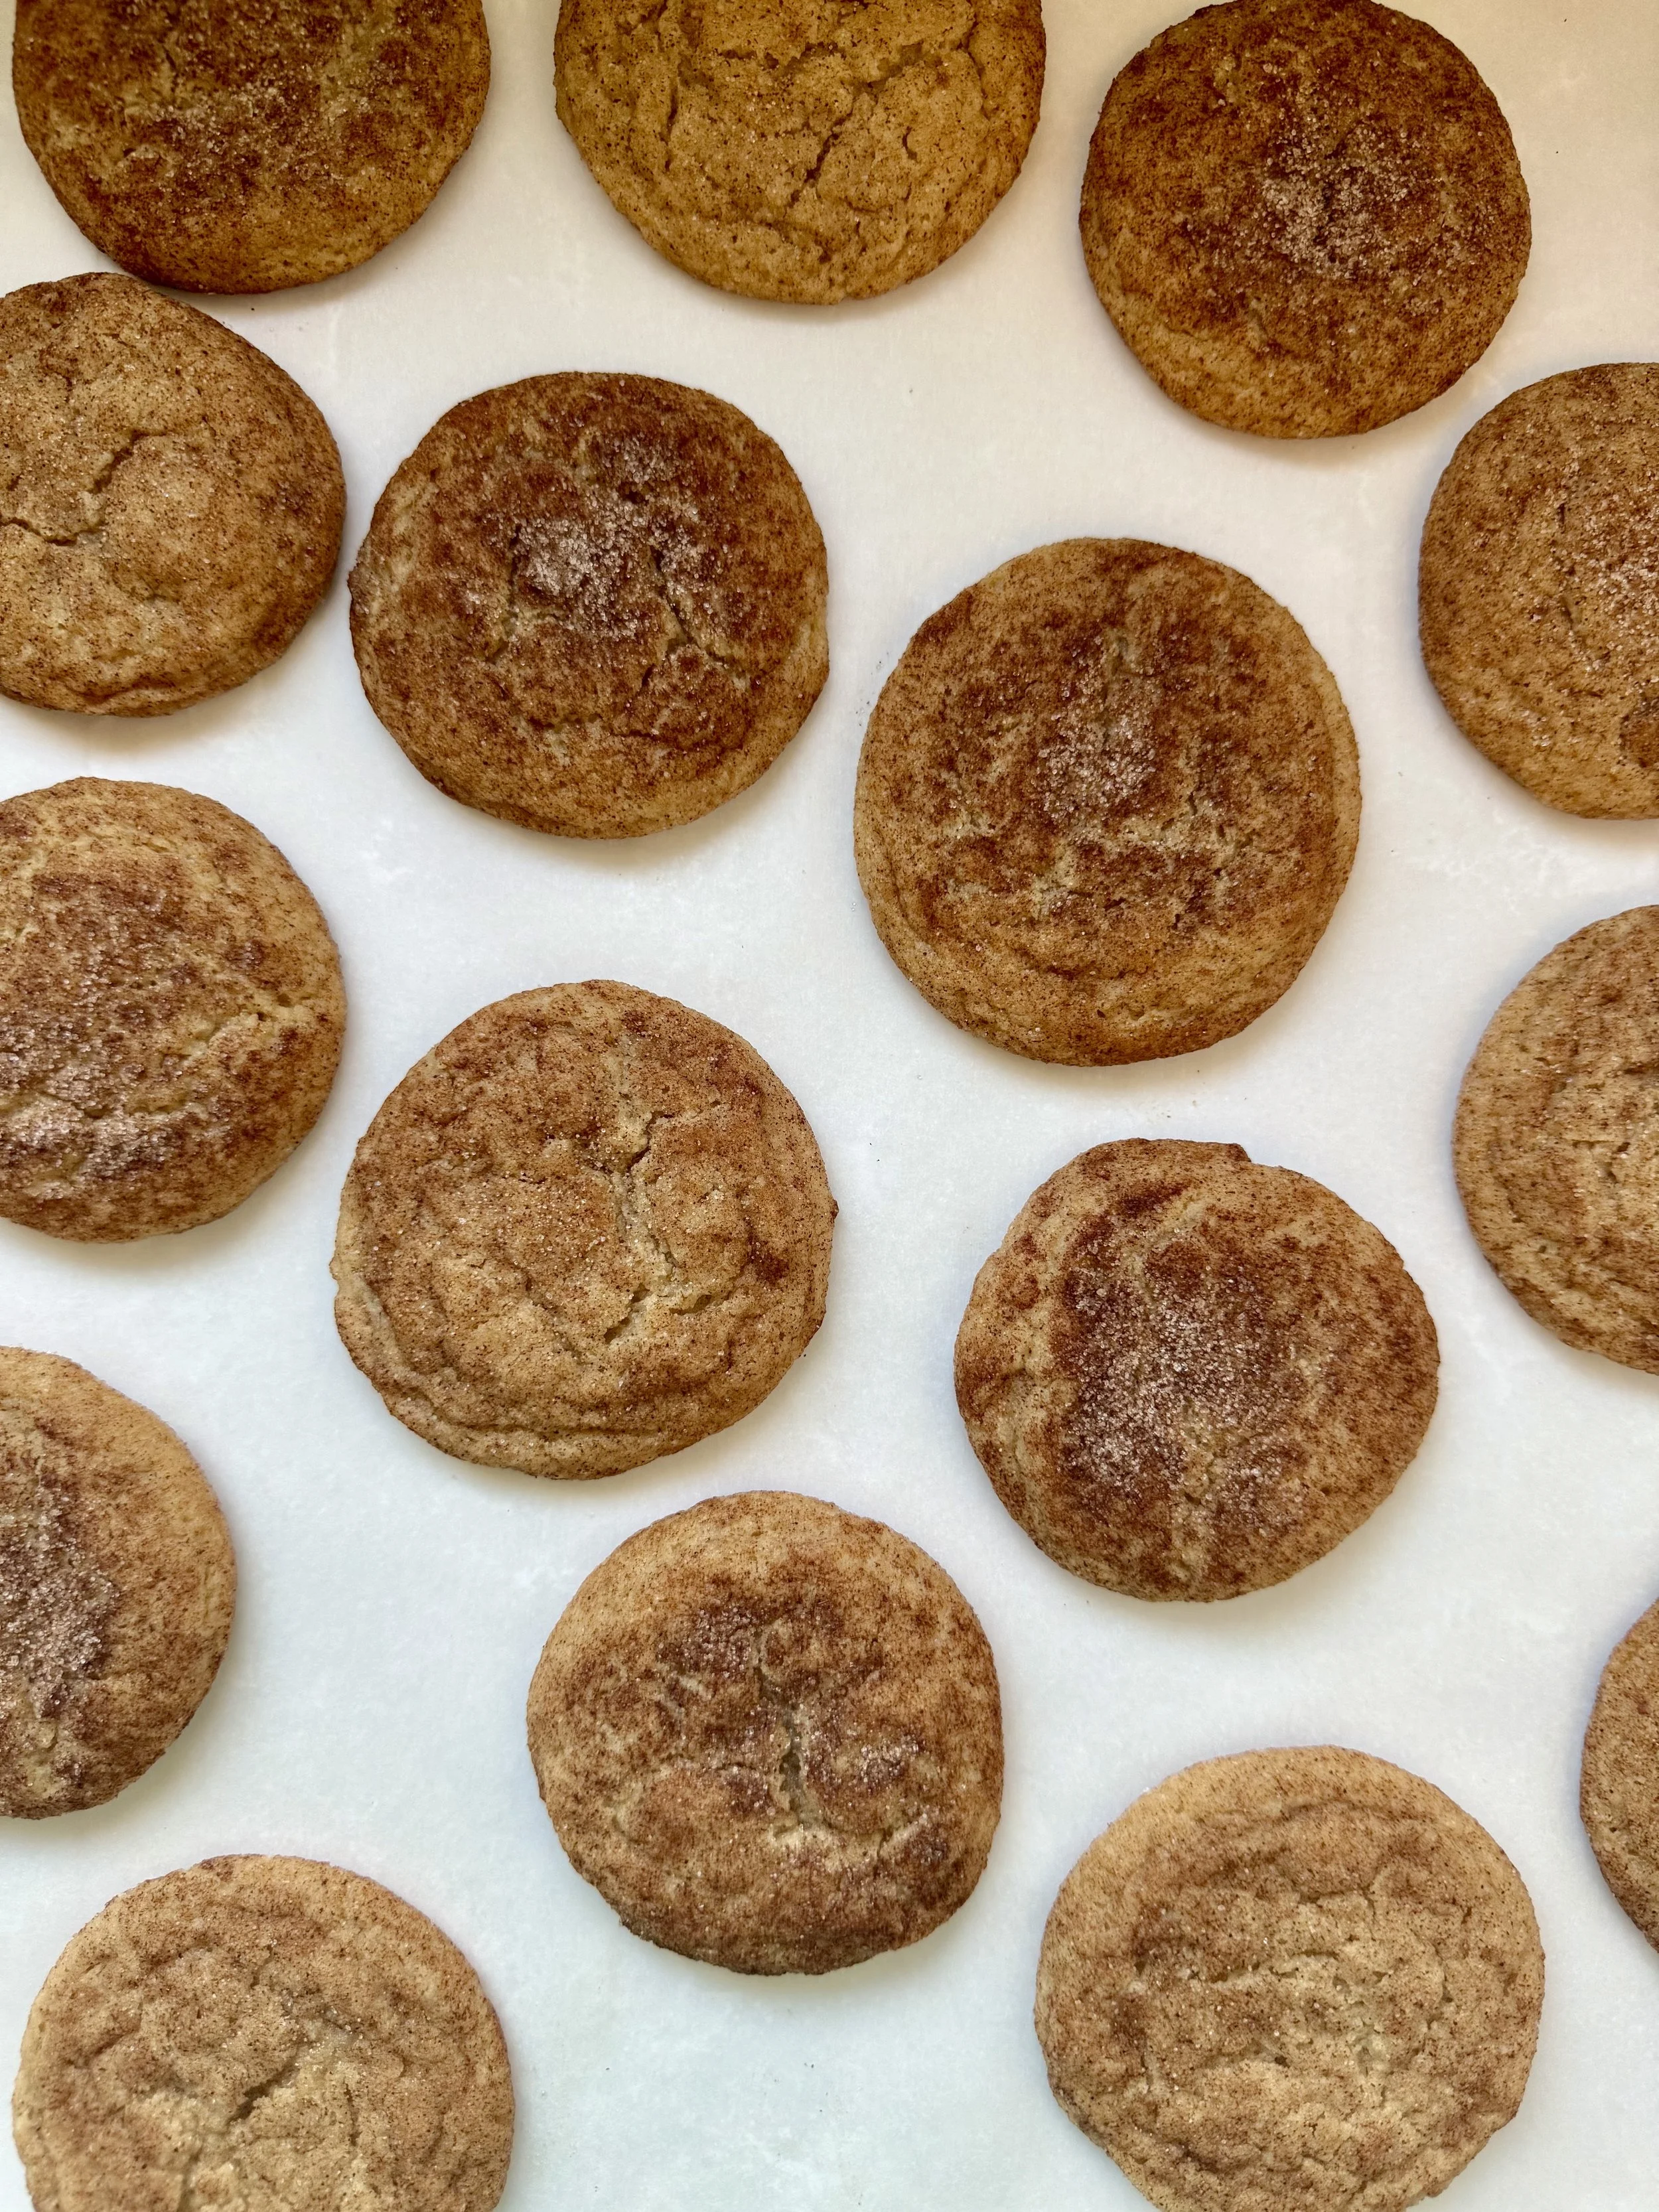
Storage Tips
Room Temp: Store in an airtight container for up to 4 days
Freezing Dough: Scoop and freeze unbaked dough balls up to 3 months, bake from frozen, adding 1–2 minutes
Freezing Baked Cookies: Cool completely, then freeze in a zip-top bag for up to 2 months
If you love these cookies let me know in the comments below! Happy baking.

Apple Cider Cookies
These homemade apple cider cookies are soft, chewy, and bursting with cozy fall flavors. Made with real apple cider and warm spices, they’re the perfect treat for crisp autumn days.
Ingredients
- 1 cup salted butter (2 sticks) (softened at room temperature)
- 3/4 cup sugar
- 1/4 cup packed brown sugar
- 2 eggs (room temperature)
- 1/4 cup of reduced apple cider (see instructions)
- 1 tsp vanilla extract
- 2 3/4 cups all-purpose flour
- 1 tsp baking soda
- 2 tsp cream of tartar
- 1 tsp cinnamon
- 1/4 tsp nutmeg
- 1/4 tsp ginger
- 1/4 tsp salt
- 1/4 cup granulated sugar
- 1 tablespoon ground cinnamon
Instructions
Notes
- If you cookies that hold their shape more and are less flat, roll the dough balls in the sugar mixture once, and place them in the refrigerator for 30 minutes. Then roll the dough balls in the cinnamon mixture for a second time and bake for 11-13 minutes.
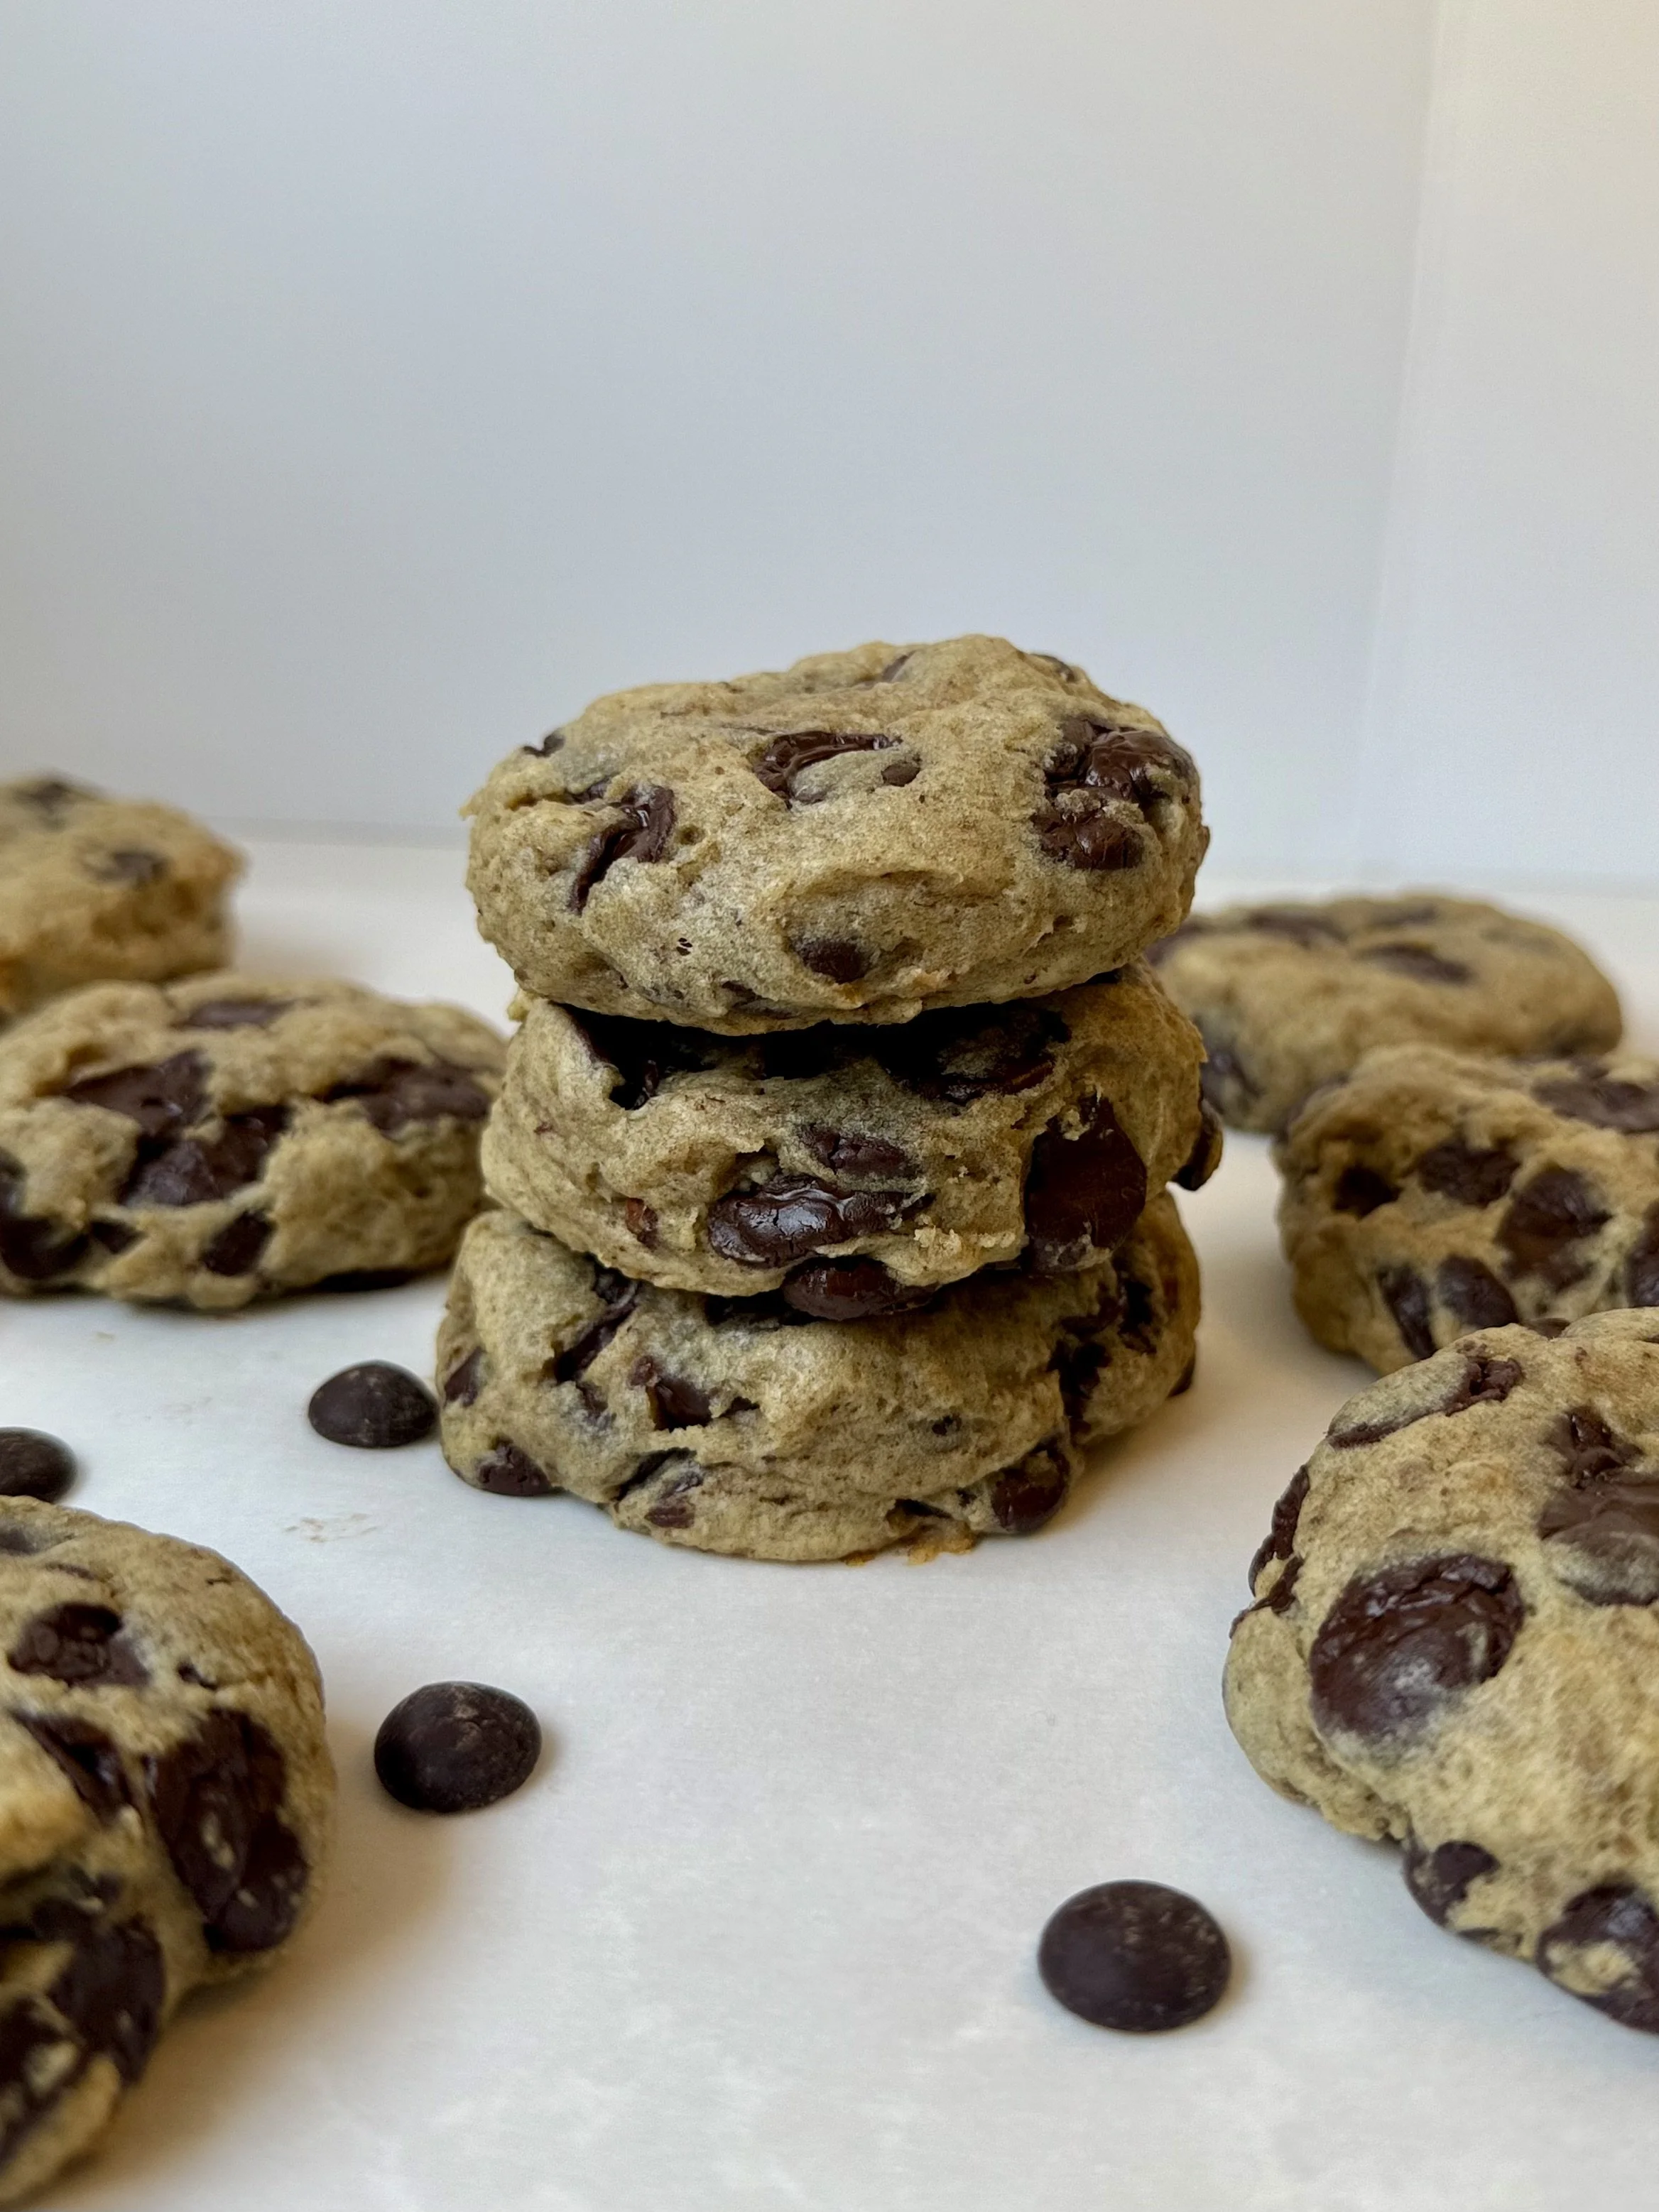
Date Chocolate Chip Cookies (No Refined Sugar)

Soft & Chewy Chocolate Chip Cookies (Naturally Sweetened with Date Paste)
These chocolate chip cookies are proof that you can have it all: soft, chewy centers, golden crisp edges, and rich pools of melted dark chocolate, all without a single grain of refined sugar. Naturally sweetened with homemade date paste, these cookies are a deliciously wholesome twist on a classic favorite. The use of both cake and all-purpose flour creates a tender texture, while dark chocolate chips (like Hu Baking Chips) bring deep, fudgy flavor with no added junk.
Whether you're looking to reduce refined sugar, bake something for the kids, or just explore naturally sweet alternatives, these cookies are a must-try. Bonus: they bake up beautifully golden, thick, and gooey in all the right ways.
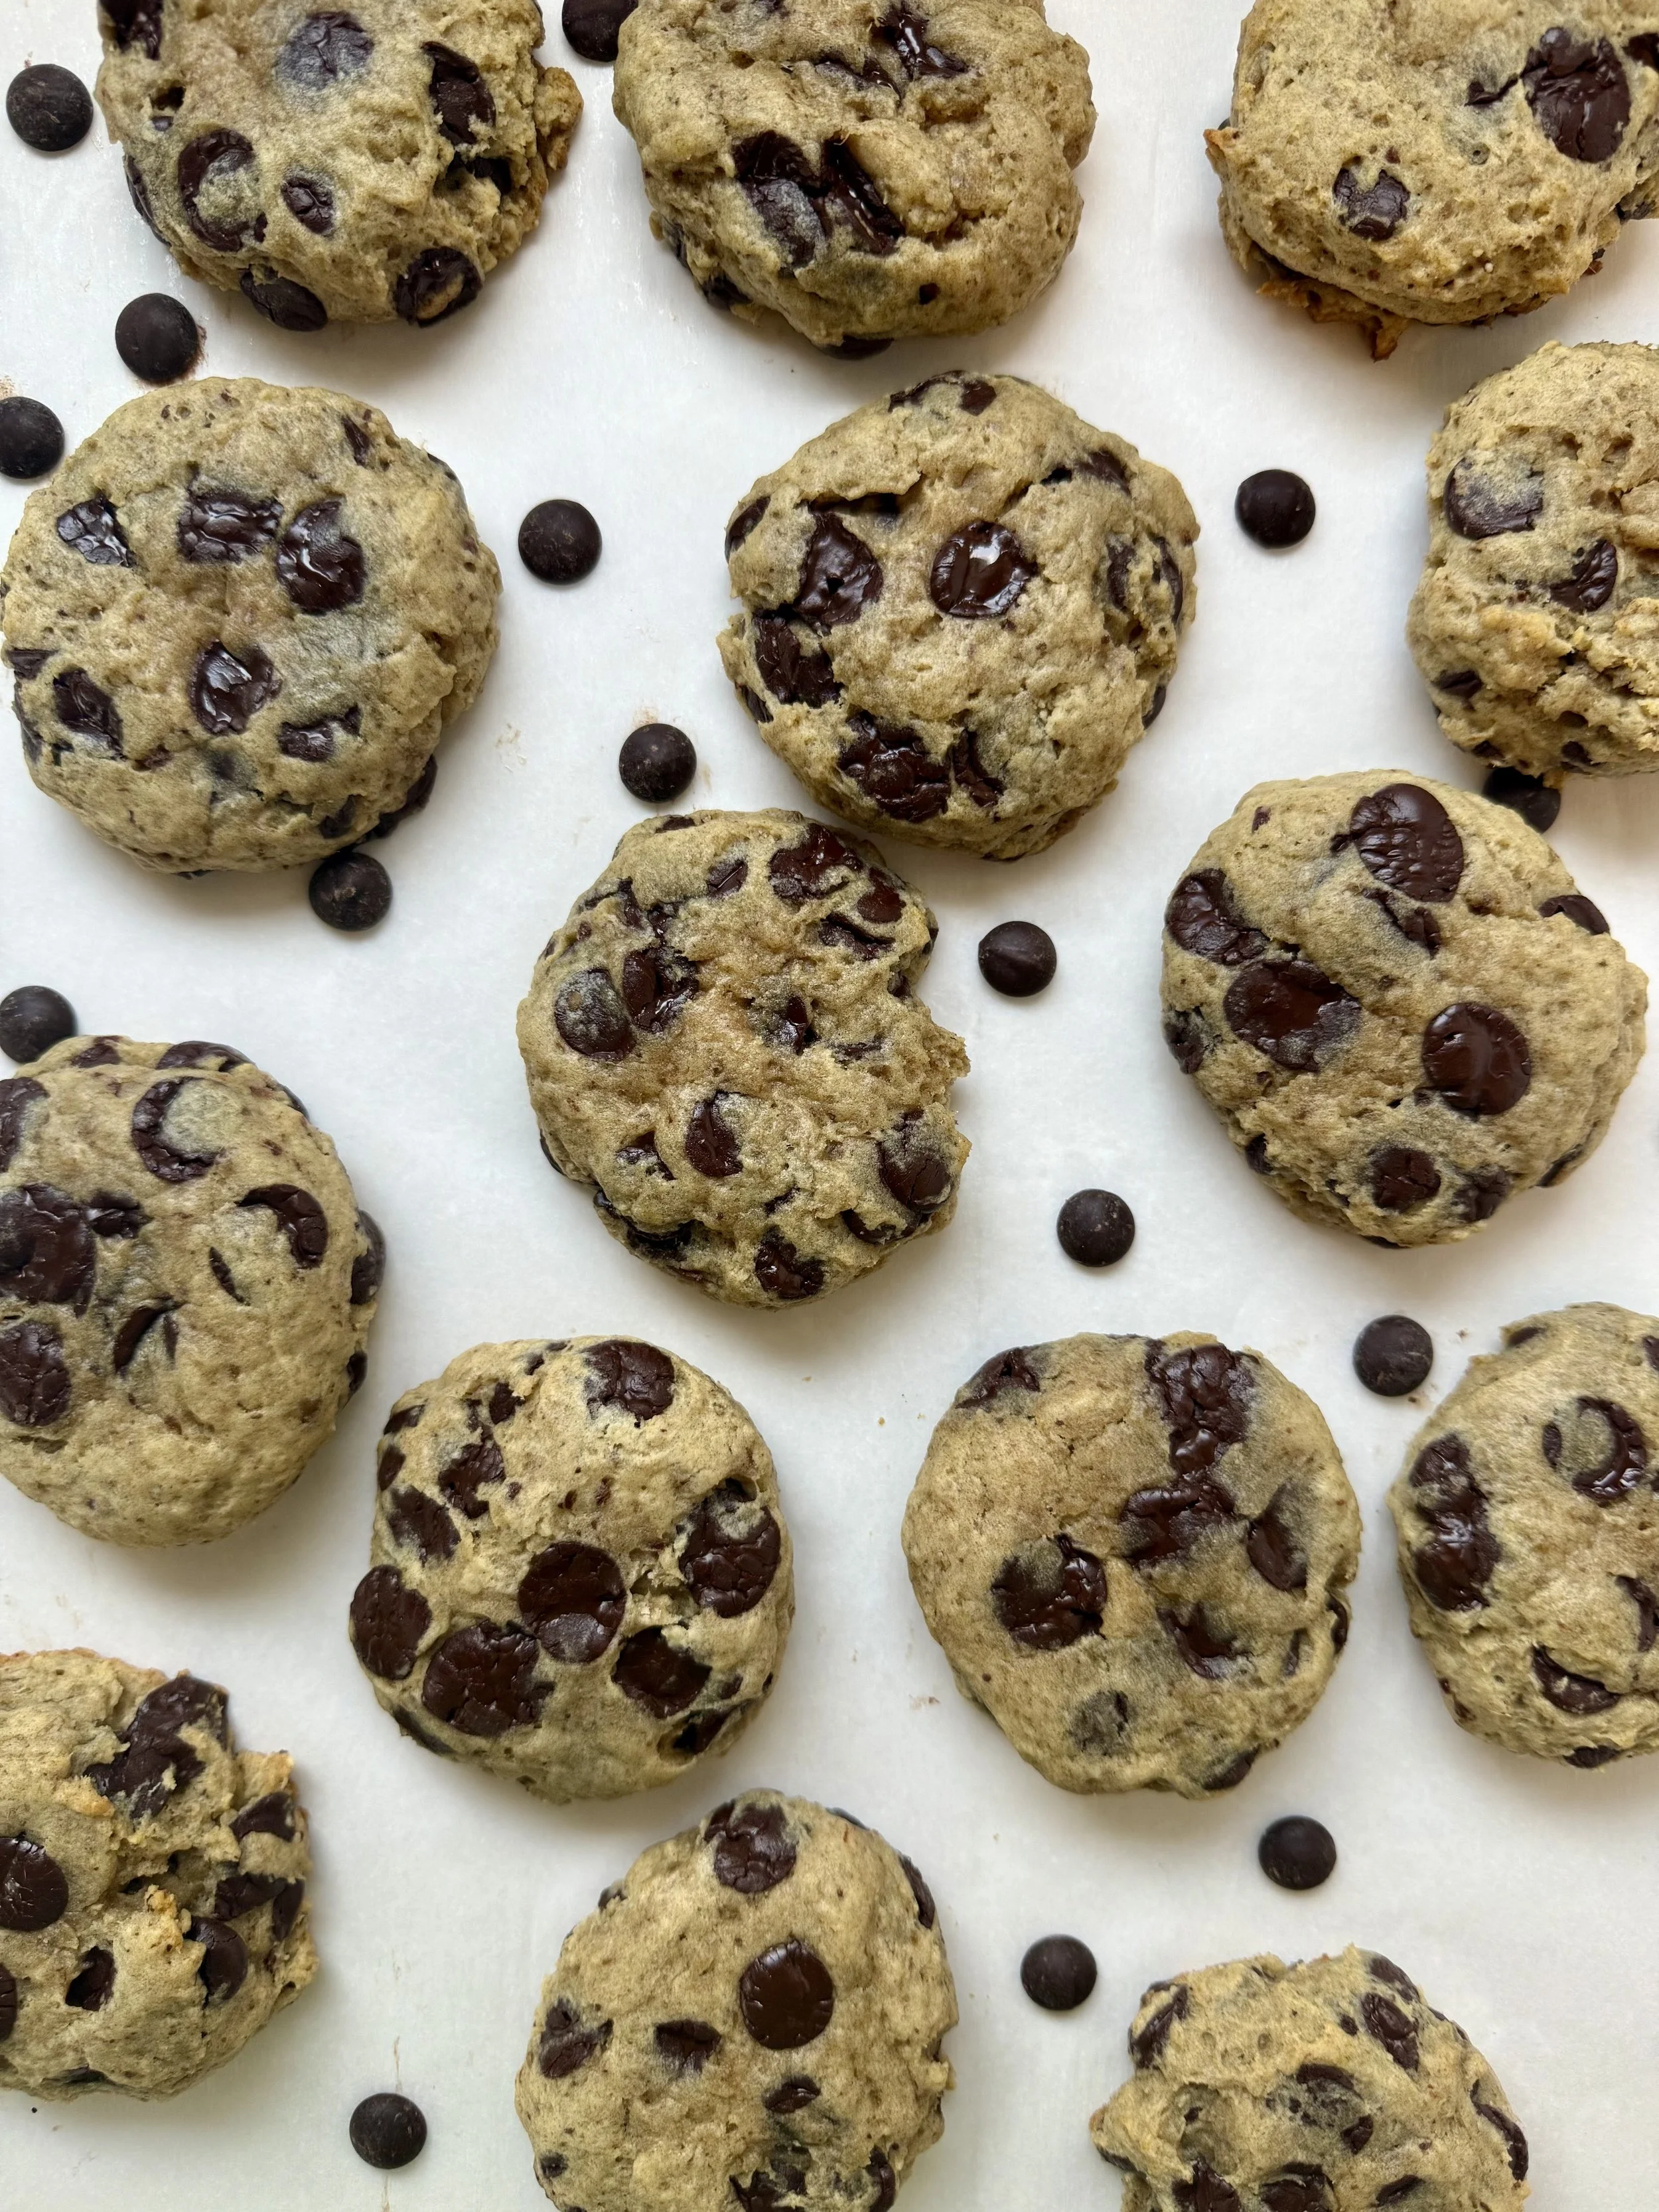
Ingredients
1 cup cold salted butter (2 sticks), cut into cubes
1 ¼ cups date paste: see my recipe on how to make Homemade Date Paste.
2 eggs
1 tbsp vanilla extract
1 ½ cups cake flour
1 ½ cups all-purpose flour
1½ tsp cornstarch
¾ tsp baking soda
¾ tsp salt
2 cups dark chocolate chips (refined sugar–free, such as Hu baking chips)
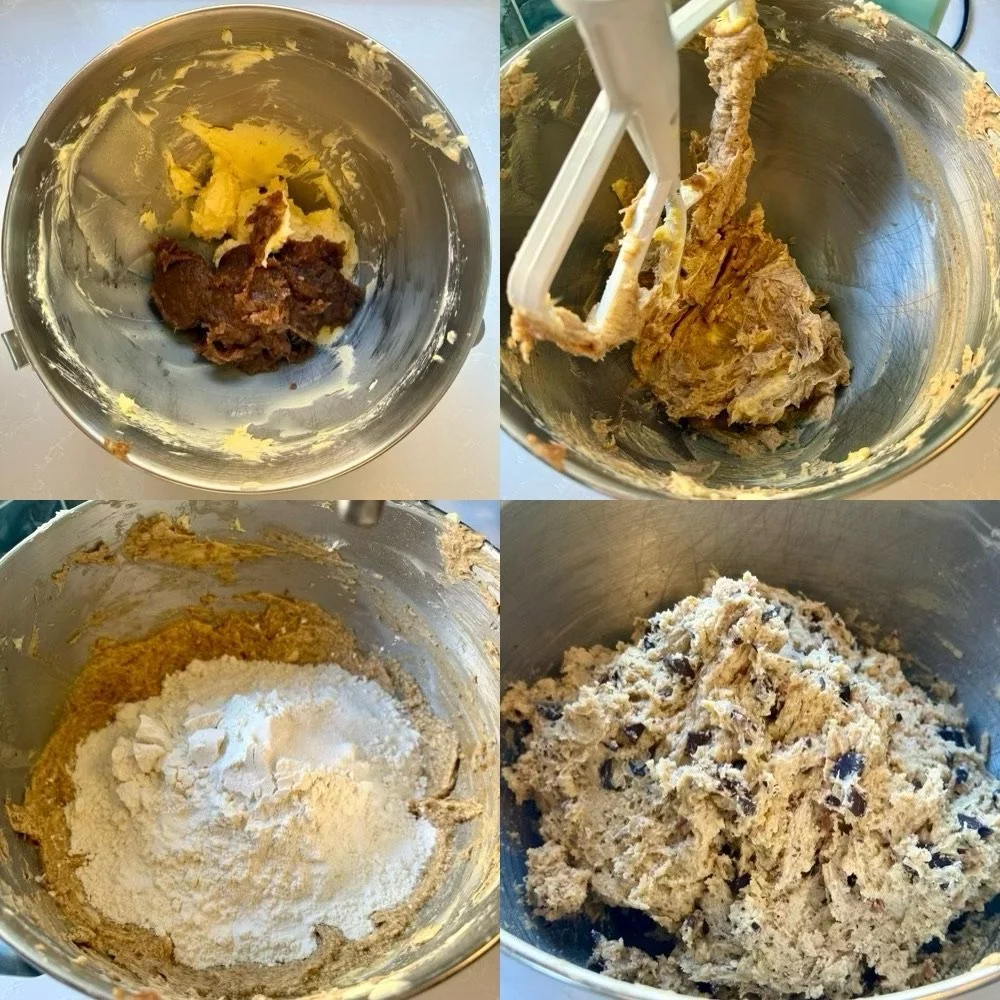
Instructions
Prep Your Baking Sheet:
Line your cookie sheets with parchment paper and set aside.Cream the Butter:
In a stand mixer fitted with the paddle attachment, mix the cold, cubed butter on medium-high for 3–4 minutes until light and fluffy. Scrape down the sides with a spatula as needed.Add the Date Paste:
Add the date paste and continue mixing for another 2 minutes, ensuring everything is well incorporated.Mix in the Eggs and Vanilla:
Add the eggs one at a time, mixing just until each is combined. Add the vanilla extract and give it one final mix.Add the Dry Ingredients:
Add in the cake flour, all-purpose flour, cornstarch, baking soda, and salt. Mix on low speed until no visible flour remains. Be careful not to overmix — this keeps your cookies tender and thick.Fold in the Chocolate Chips:
Add the dark chocolate chips and mix until just combined.Shape the Dough:
Use a large cookie scoop to portion out the dough. You can:Place scooped dough onto the prepared baking sheet, 2 inches apart, and gently flatten the tops with the back of a spoon.
Or, roll each scoop into a ball with your hands, then slightly press down. Don't over-flatten — we’re going for thick, bakery-style cookies.
Chill the Dough:
Cover the trays with plastic wrap and refrigerate the shaped cookies for 30–60 minutes. This helps prevent spreading and deepens the flavor.Preheat the Oven:
About 20 minutes before baking, preheat your oven to 400°F (205°C).Bake:
Remove plastic wrap and bake the cookies for 12–14 minutes, or until the edges are golden brown and the centers are still soft and gooey. Let cool on the baking sheet for 5–10 minutes before transferring to a wire rack.
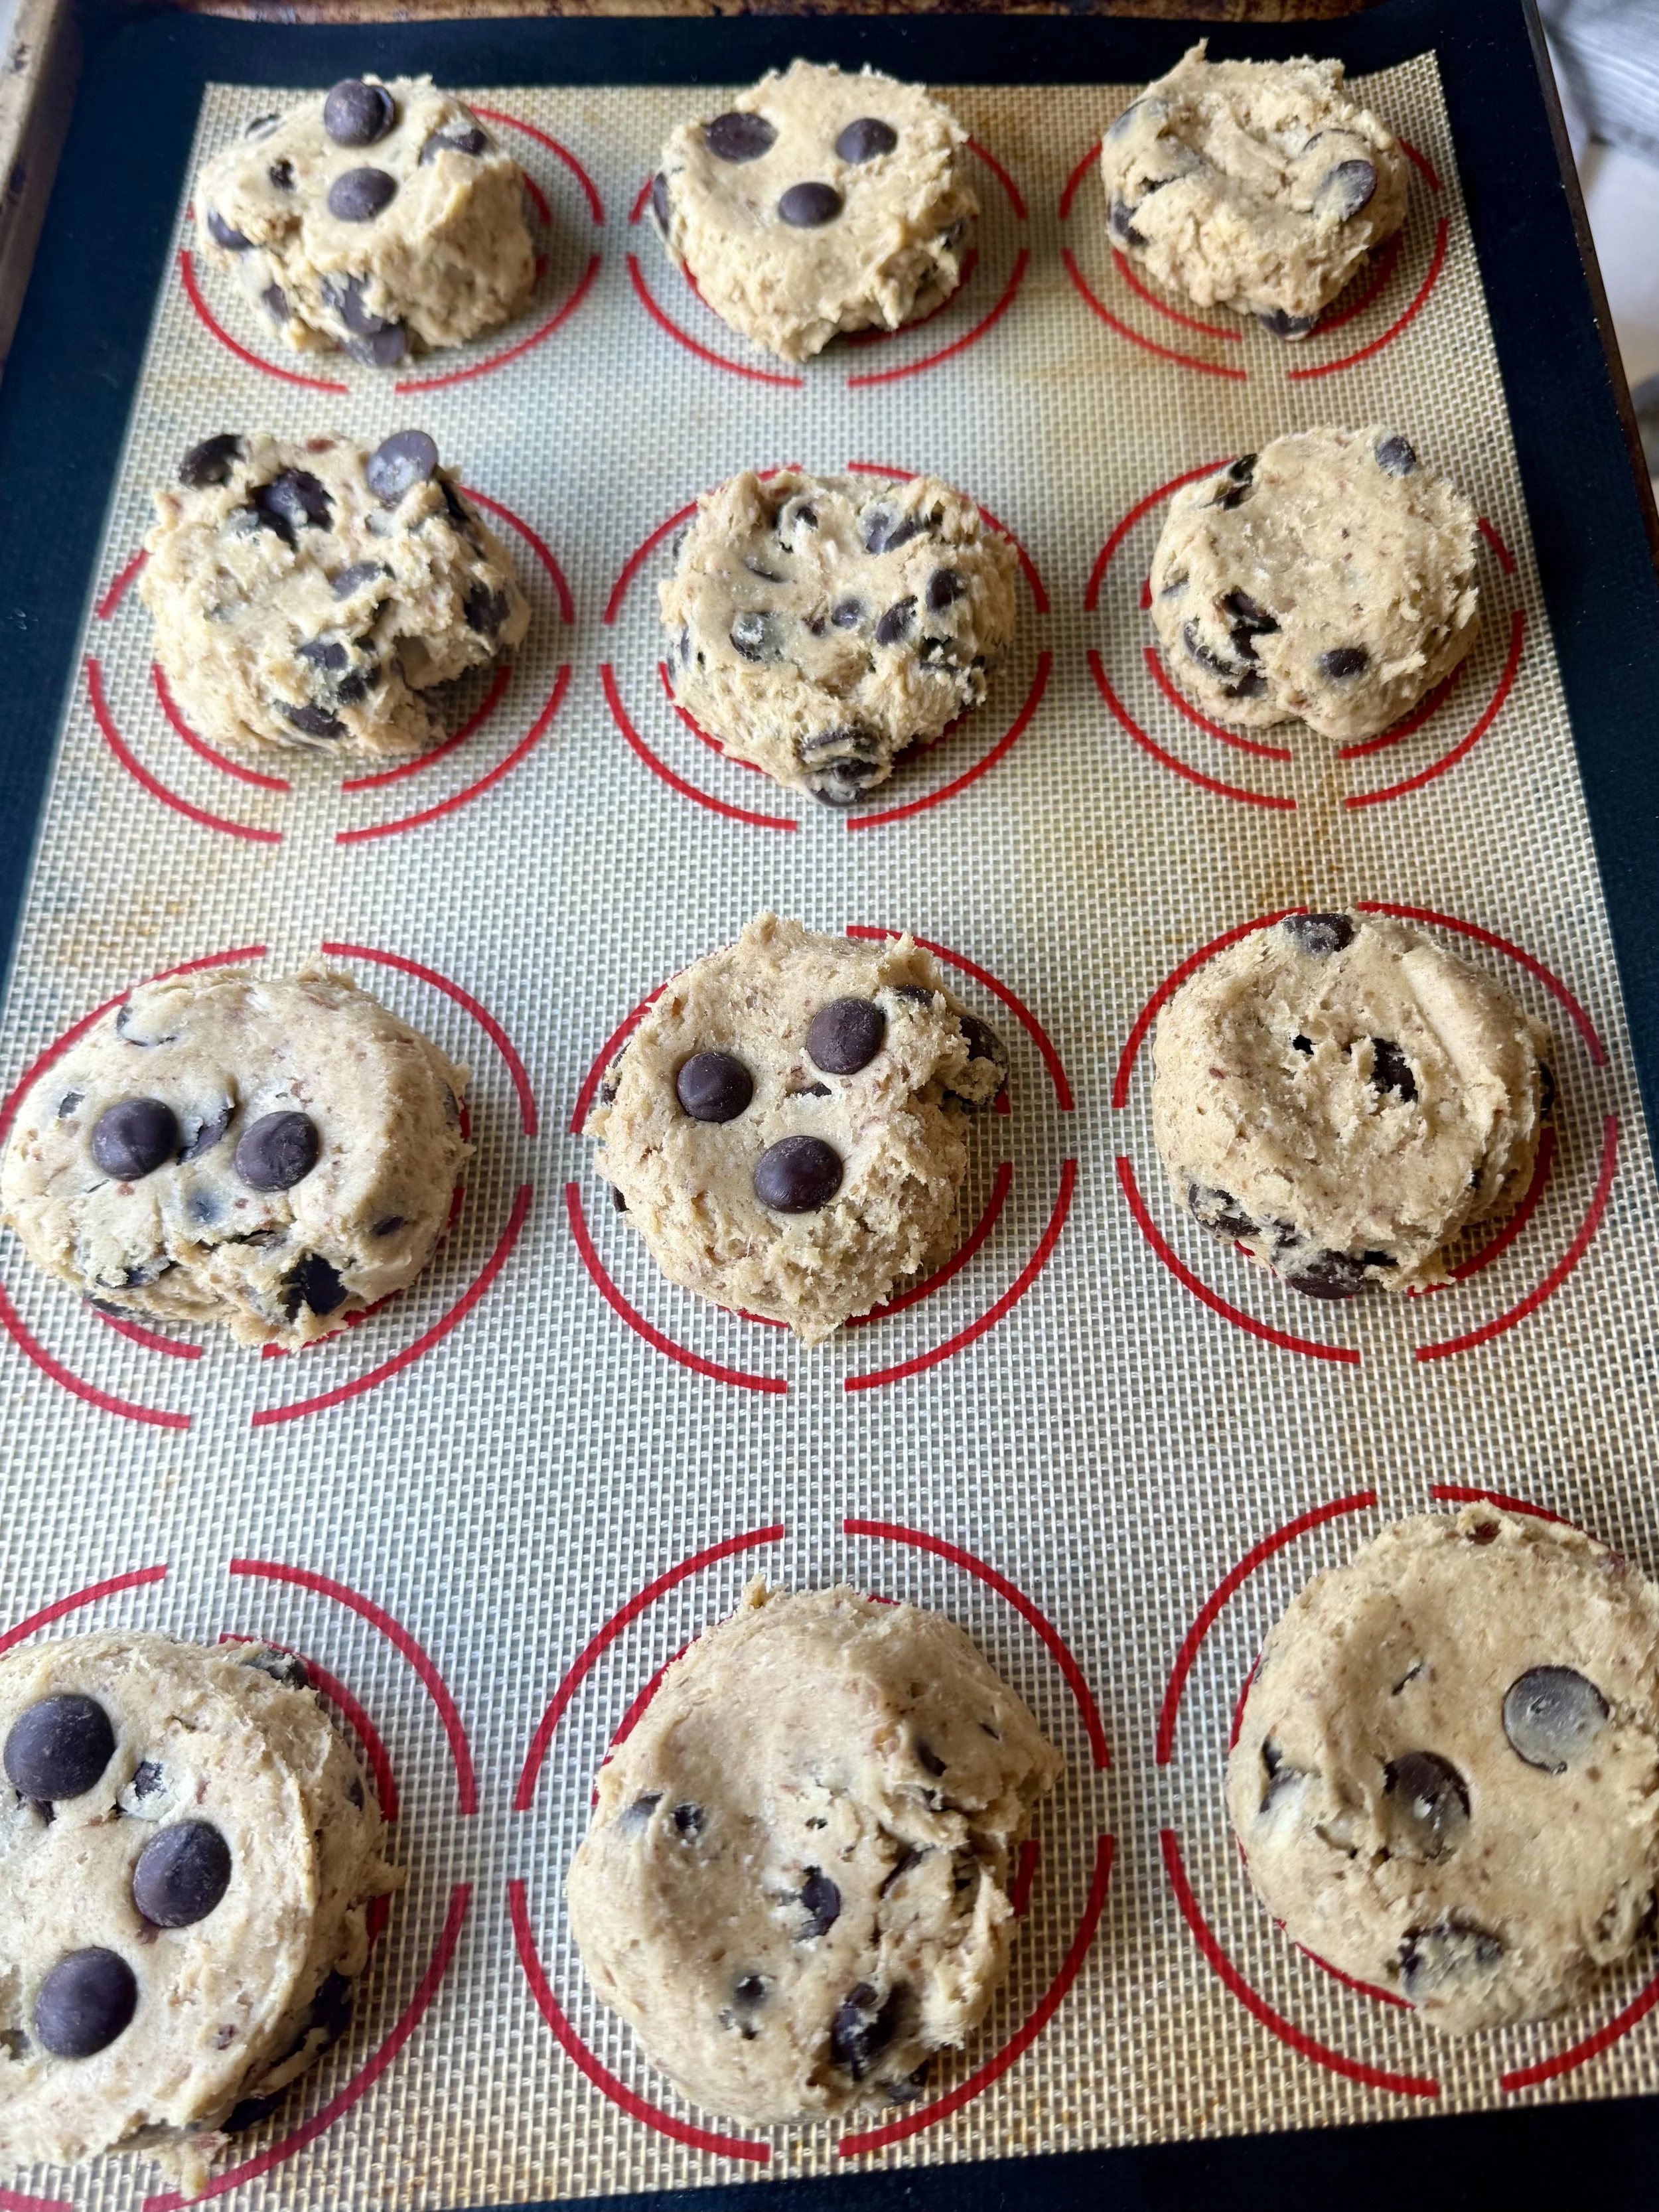
Tips for the Best Cookies
Why Two Flours? Cake flour keeps these cookies extra soft and tender, while all-purpose flour gives them structure and chew.
Don’t skip chilling! Chilling helps control the spread and improves texture and flavor.
Date Paste Texture Matters: Make sure your paste is smooth; chunky paste can affect how well the ingredients mix. I use my homemade date paste recipe.
Swap the Butter (Optional): If you want a dairy-free version, you can try plant-based butter, though it may slightly alter the texture.
Storage Instructions
Room Temperature: Store in an airtight container for up to 4 days.
Refrigerator: Keeps well for up to a week, just let them come to room temperature before serving.
Freezer (Baked Cookies): Freeze baked cookies in a sealed container or zip-top bag for up to 2 months.
Freezer (Cookie Dough): Freeze unbaked dough balls and bake directly from frozen, just add 1–2 minutes to your bake time.
")
Date Chocolate Chip Cookies (No Refined Sugar)
Naturally sweetened with dates, these chocolate chip cookies are a wholesome twist on a classic treat, soft, chewy, and free of refined sugar. Perfect for guilt-free indulgence or a healthy snack option!
Ingredients
- 1 cup cold salted butter (2 sticks), cut into cubes
- 1 1/4 cups of date paste
- 2 eggs
- 1 tbsp vanilla extract
- 1 ½ cup cake flour
- 1 ½ cups all-purpose flour
- 1.5 tsp cornstarch
- ¾ teaspoon baking soda
- ¾ tsp salt
- 2 cups of dark chocolate chips with no refined sugar (I used Hu dark chocolate baking chips)
Instructions

Chocolate Chip Banana Bread Cookies
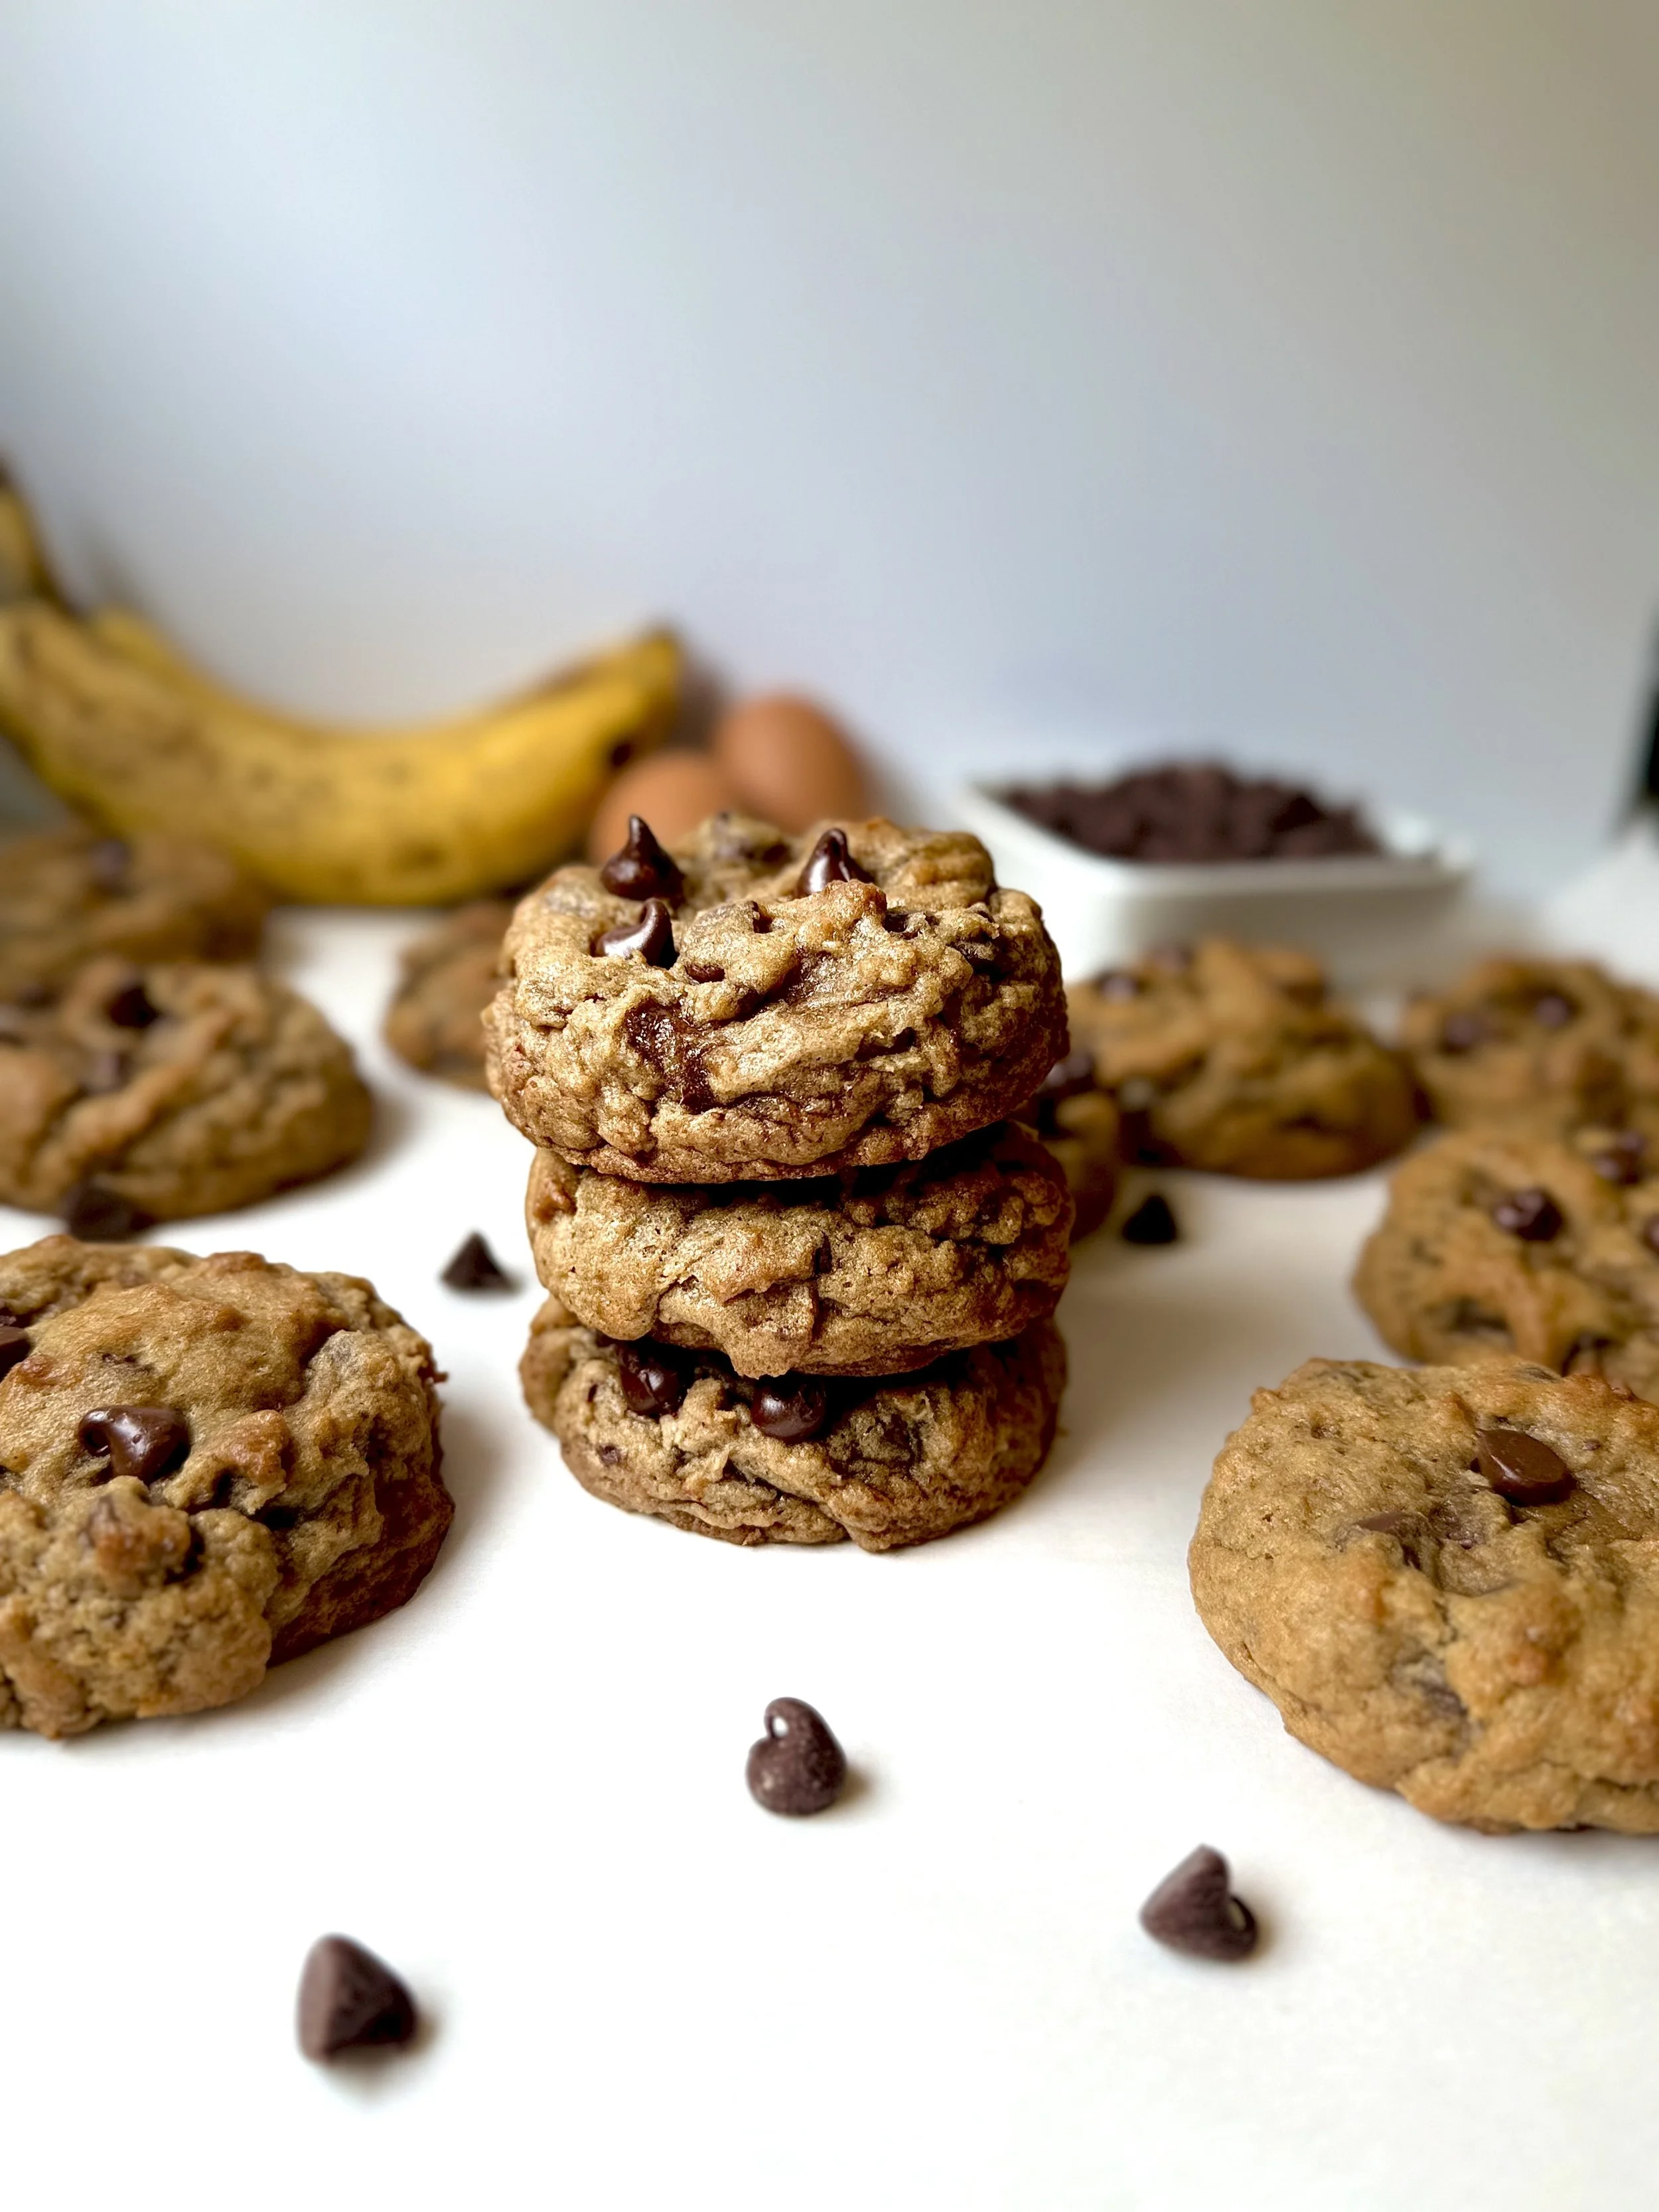
If banana bread and chocolate chip cookies had a love child, this would be it. These Chocolate Chip Banana Bread Cookies are soft, thick, and packed with cozy banana flavor and melty chocolate chips. They’re the perfect way to use up ripe bananas, and honestly, maybe even better than banana bread. I love baking a batch on lazy Sunday afternoons or when I want to impress friends with something a little unexpected (but super comforting). And the best part? You don’t even have to wait for the butter to soften because I use cold, right out of the fridge butter.
This recipe was born when I had one lonely overripe banana and a cookie craving I couldn’t ignore. I tested this recipe with softened butter and without refrigerating the dough, and they turned into the saddest flat cookies ever, so make sure to refrigerate the dough! I brought these cookies to my husband’s work, and every last one was devoured.
The weather is finally starting to cool down, which only intensifies my urge to bake warm baked goods. If you're also looking for a cozy, bakery-style cookie that’s a little different but still classic—this is it
What you’ll need:
Butter
Brown Sugar
One Banana
Egg
Vanilla Extract
Maple Extract
Cake Flour
All-Purpose Flour
Cornstarch
Baking Soda
Cinnamon
Salt
Chocolate Chips
How to Make Chocolate Chip Banana Bread Cookies
Here’s how to make them step-by-step:
Step 1: Cream the Butter and Sugar
In a stand mixer fitted with the paddle attachment, beat 1 cup of cold, cubed salted butter and 1 cup brown sugar on medium-high speed for about 3–4 minutes, until the mixture is light and fluffy.
Tip: Using cold butter helps create thicker, bakery-style cookies!
Step 2: Add the Wet Ingredients
While the butter and sugar are mixing, mash ½ cup of ripe banana (about one large banana) in a small bowl. You might need a little more depending on the size of your banana.
Once the butter mixture is fluffy, scrape down the sides of the bowl. Add:
1 egg
½ cup mashed banana (roughly one banana)
Mix until just combined, then add:
1 tablespoon vanilla extract
½ teaspoon maple extract
Mix again briefly.
Step 3: Add the Dry Ingredients
Add the following dry ingredients directly to the bowl:
1½ cups cake flour
1½ cups all-purpose flour
1½ teaspoons cornstarch
¾ teaspoon baking soda
2 teaspoons cinnamon
¾ teaspoon salt
Mix on low speed just until no streaks of flour remain. Avoid overmixing; the dough should be soft and a bit sticky.
Step 4: Fold in the Chocolate Chips
Add 2 cups of chocolate chips and mix briefly until evenly distributed throughout the dough.
Optional: Save a few chips to press into the tops before or after baking for that perfect bakery look!
Step 5: Scoop and Chill the Dough
Use a large cookie scoop to form dough balls. Don’t level them off; the extra chunk on top gives that rustic, homemade shape.
Place the scoops on a parchment-lined baking sheet, spacing them about 2 inches apart. Cover with plastic wrap and refrigerate for at least 30–60 minutes.
Tip: Chilling helps prevent spreading and enhances flavor.
Step 6: Bake the Cookies
While the dough chills, preheat your oven to 400°F (204°C).
Once ready, bake the cookies for 13–16 minutes, or until the edges are golden and the centers are still slightly soft and gooey.
Step 7: Shape and Cool
Right after baking, use the rim of a round glass or cookie cutter to “scoot” the cookies into a more circular shape by gently swirling them while they’re still hot.
Let the cookies cool slightly on the pan, then transfer to a wire rack to cool completely (if you can wait!).
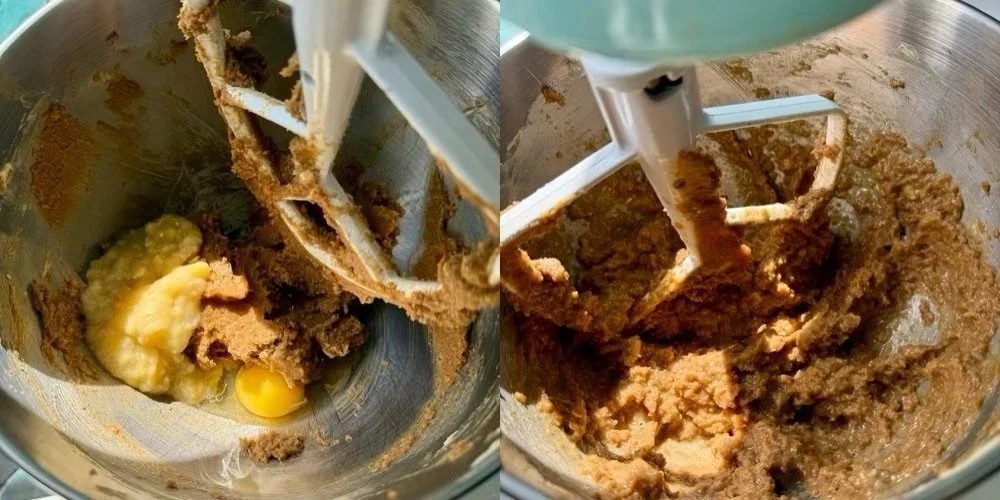
Extra Baking Tips for Success
1. Use ripe bananas with brown spots.
The riper the banana, the sweeter and more flavorful your cookies will be. A banana that’s soft and speckled with brown is perfect.
2. Don’t skip the chilling step.
Chilling the dough solidifies the fat in the butter, which helps prevent the cookies from spreading too much in the oven. It also gives the flavors more time to develop.
3. Use a kitchen scale for accuracy.
Flour measurements can vary a lot when using cups. Weighing your ingredients (especially the flours) ensures consistent results every time.
4. Combine flours for the perfect texture.
The mix of cake flour and all-purpose flour gives these cookies a soft, tender center while still holding structure. Don’t substitute unless necessary.
5. Don’t overmix the dough.
Once you add the dry ingredients, mix only until you no longer see dry flour. Overmixing develops gluten, which can make cookies tough.
6. Bake one tray at a time.
To ensure even baking, bake your cookies one sheet at a time on the center rack. If baking in batches, let your pan cool between rounds or use a second pan.
7. Customize your chocolate.
Mix in a blend of semisweet, dark, or even milk chocolate chips, or chopped chocolate chunks, for variety and melty pockets.
8. Make ahead & freeze.
Freeze scooped cookie dough balls on a tray, then transfer to a zip-top bag. Bake straight from frozen, just add 1–2 minutes to the baking time.
9. Want a bakery-style finish?
Add extra chocolate chips on top before baking for a professional finish. When the cookies are fresh out of the oven, place a drinking glass over the cookies on the pan like a dome and carefully swoosh in a circular motion to create smooth circle edges. - Be careful to not burn youself!
10. Add texture with mix-ins.
For a twist, try adding chopped walnuts, pecans, or a sprinkle of flaky sea salt before baking.
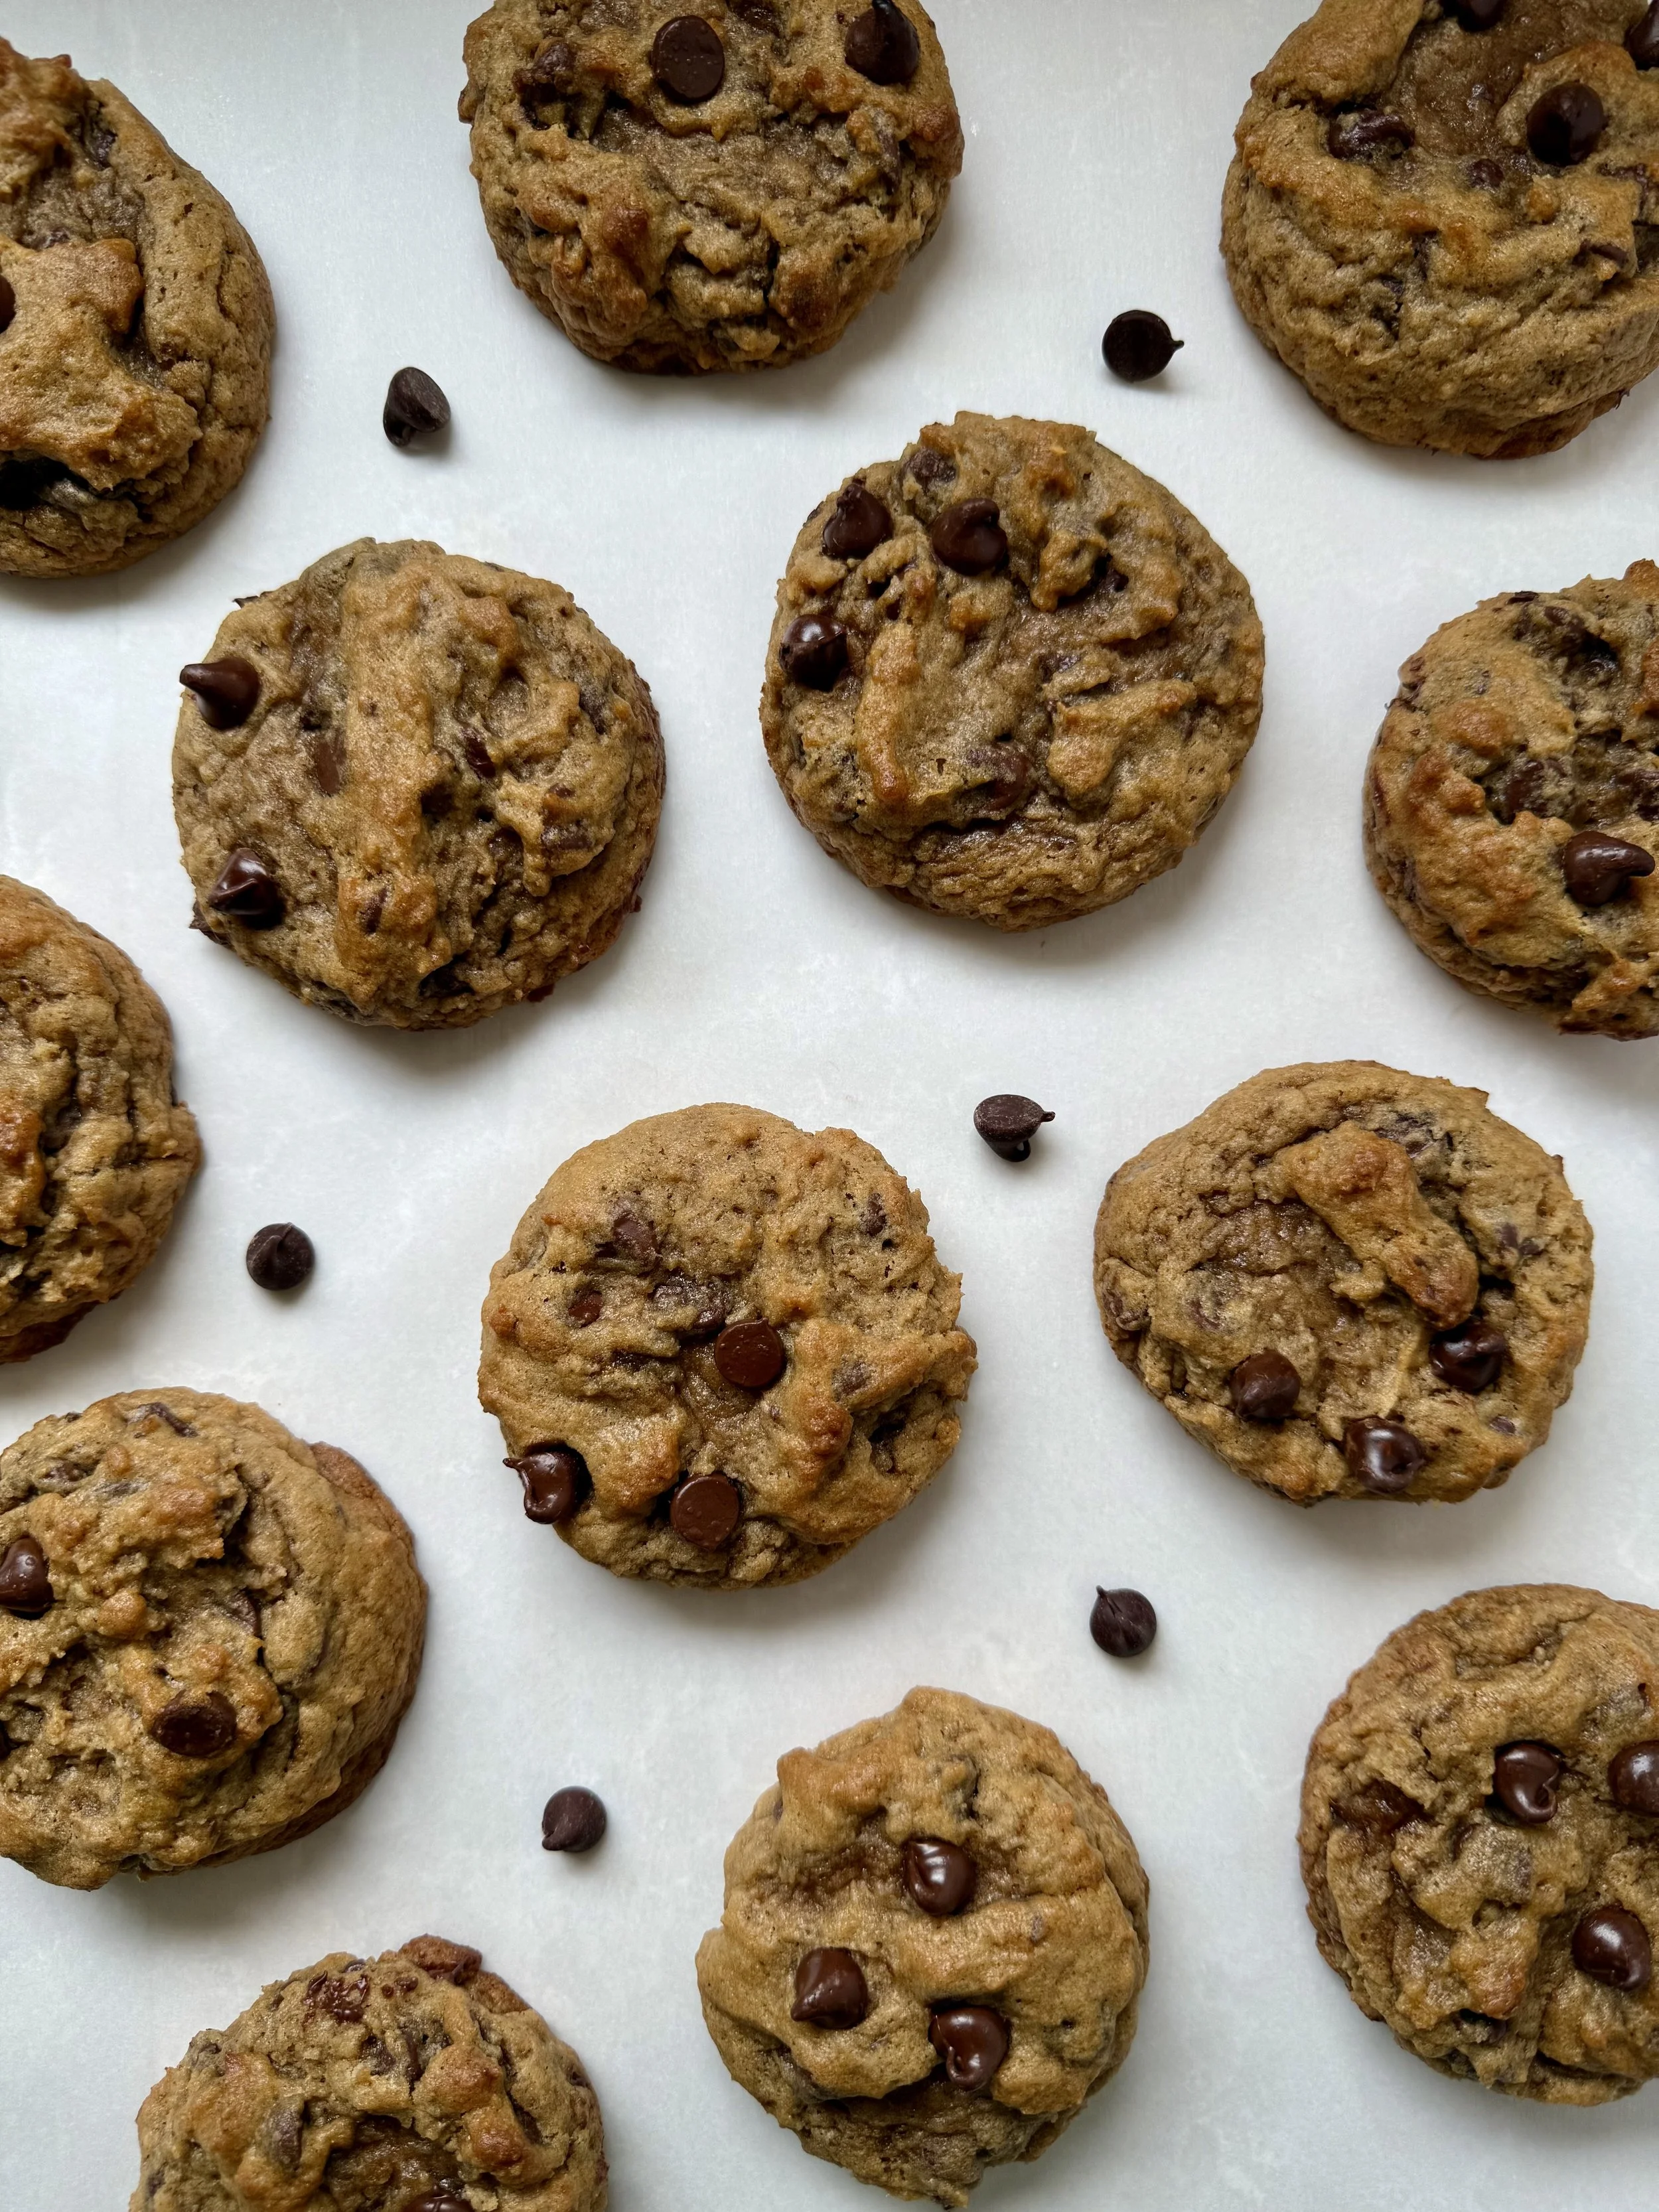
How to Store Your Cookies
To keep your cookies soft, gooey, and full of flavor, here’s how to store them properly:
At Room Temperature:
Store cooled cookies in an airtight container at room temperature for up to 3–4 days. To maintain their soft texture, you can place a slice of bread or a tortilla in the container, and the cookies will absorb moisture from it and stay fresh longer!
Tip: Keep the container out of direct sunlight or heat to prevent melting the chocolate chips.
In the Fridge:
If your kitchen is especially warm or humid, you can store the cookies in the fridge. Just bring them to room temp (or warm them slightly in the microwave for 8–10 seconds) before enjoying—they’ll taste freshly baked!
Freezing Baked Cookies:
Place fully cooled cookies in a single layer in a freezer-safe bag or container. They’ll keep well for up to 2 months. Thaw at room temperature, or warm them in the oven or microwave for that fresh-out-of-the-oven feel.
Freezing Cookie Dough:
You can also freeze the unbaked dough balls:
Scoop dough onto a baking sheet and freeze until solid.
Transfer to a zip-top freezer bag, label with the date, and store for up to 3 months.
Bake directly from frozen, just add 1–2 extra minutes to the baking time.
Final Thoughts
I hope you love these Chocolate Chip Banana Bread Cookies as much as I do. They're the perfect mix of cozy comfort and classic indulgence. Whether you’re baking for friends, family, or just yourself (no judgment here), these cookies are guaranteed to disappear fast.
If you try this recipe, I’d love to hear how it went! Leave a comment below, tag me on Instagram, or share your batch with me and tag me online. Happy baking!

Chocolate Chip Banana Bread Cookies
Soft, chewy, and packed with ripe banana flavor, these chocolate chip banana bread cookies are the perfect mash-up of your favorite quick bread and classic cookie. Easy to make and even easier to love!
Ingredients
- 1 cup cold salted butter (2 sticks), cut into cubes
- 1 cup brown sugar
- 1/2 cup mashed ripe banana (roughly one large banana).
- 1 egg
- 1 tbsp vanilla extract
- 1/2 teaspoon maple extract
- 1 1/2 cup cake flour
- 1 1/2 cups all-purpose flour
- 1 1/2 tsp cornstarch
- 3/4 teaspoon baking soda
- 2 teaspoons cinnamon
- 3/4 tsp salt
- 2 cups chocolate chips
Instructions
Notes
- Top with extra chocolate chips for that bakery looking finish!
c