
Gluten-Free Pumpkin Blondies
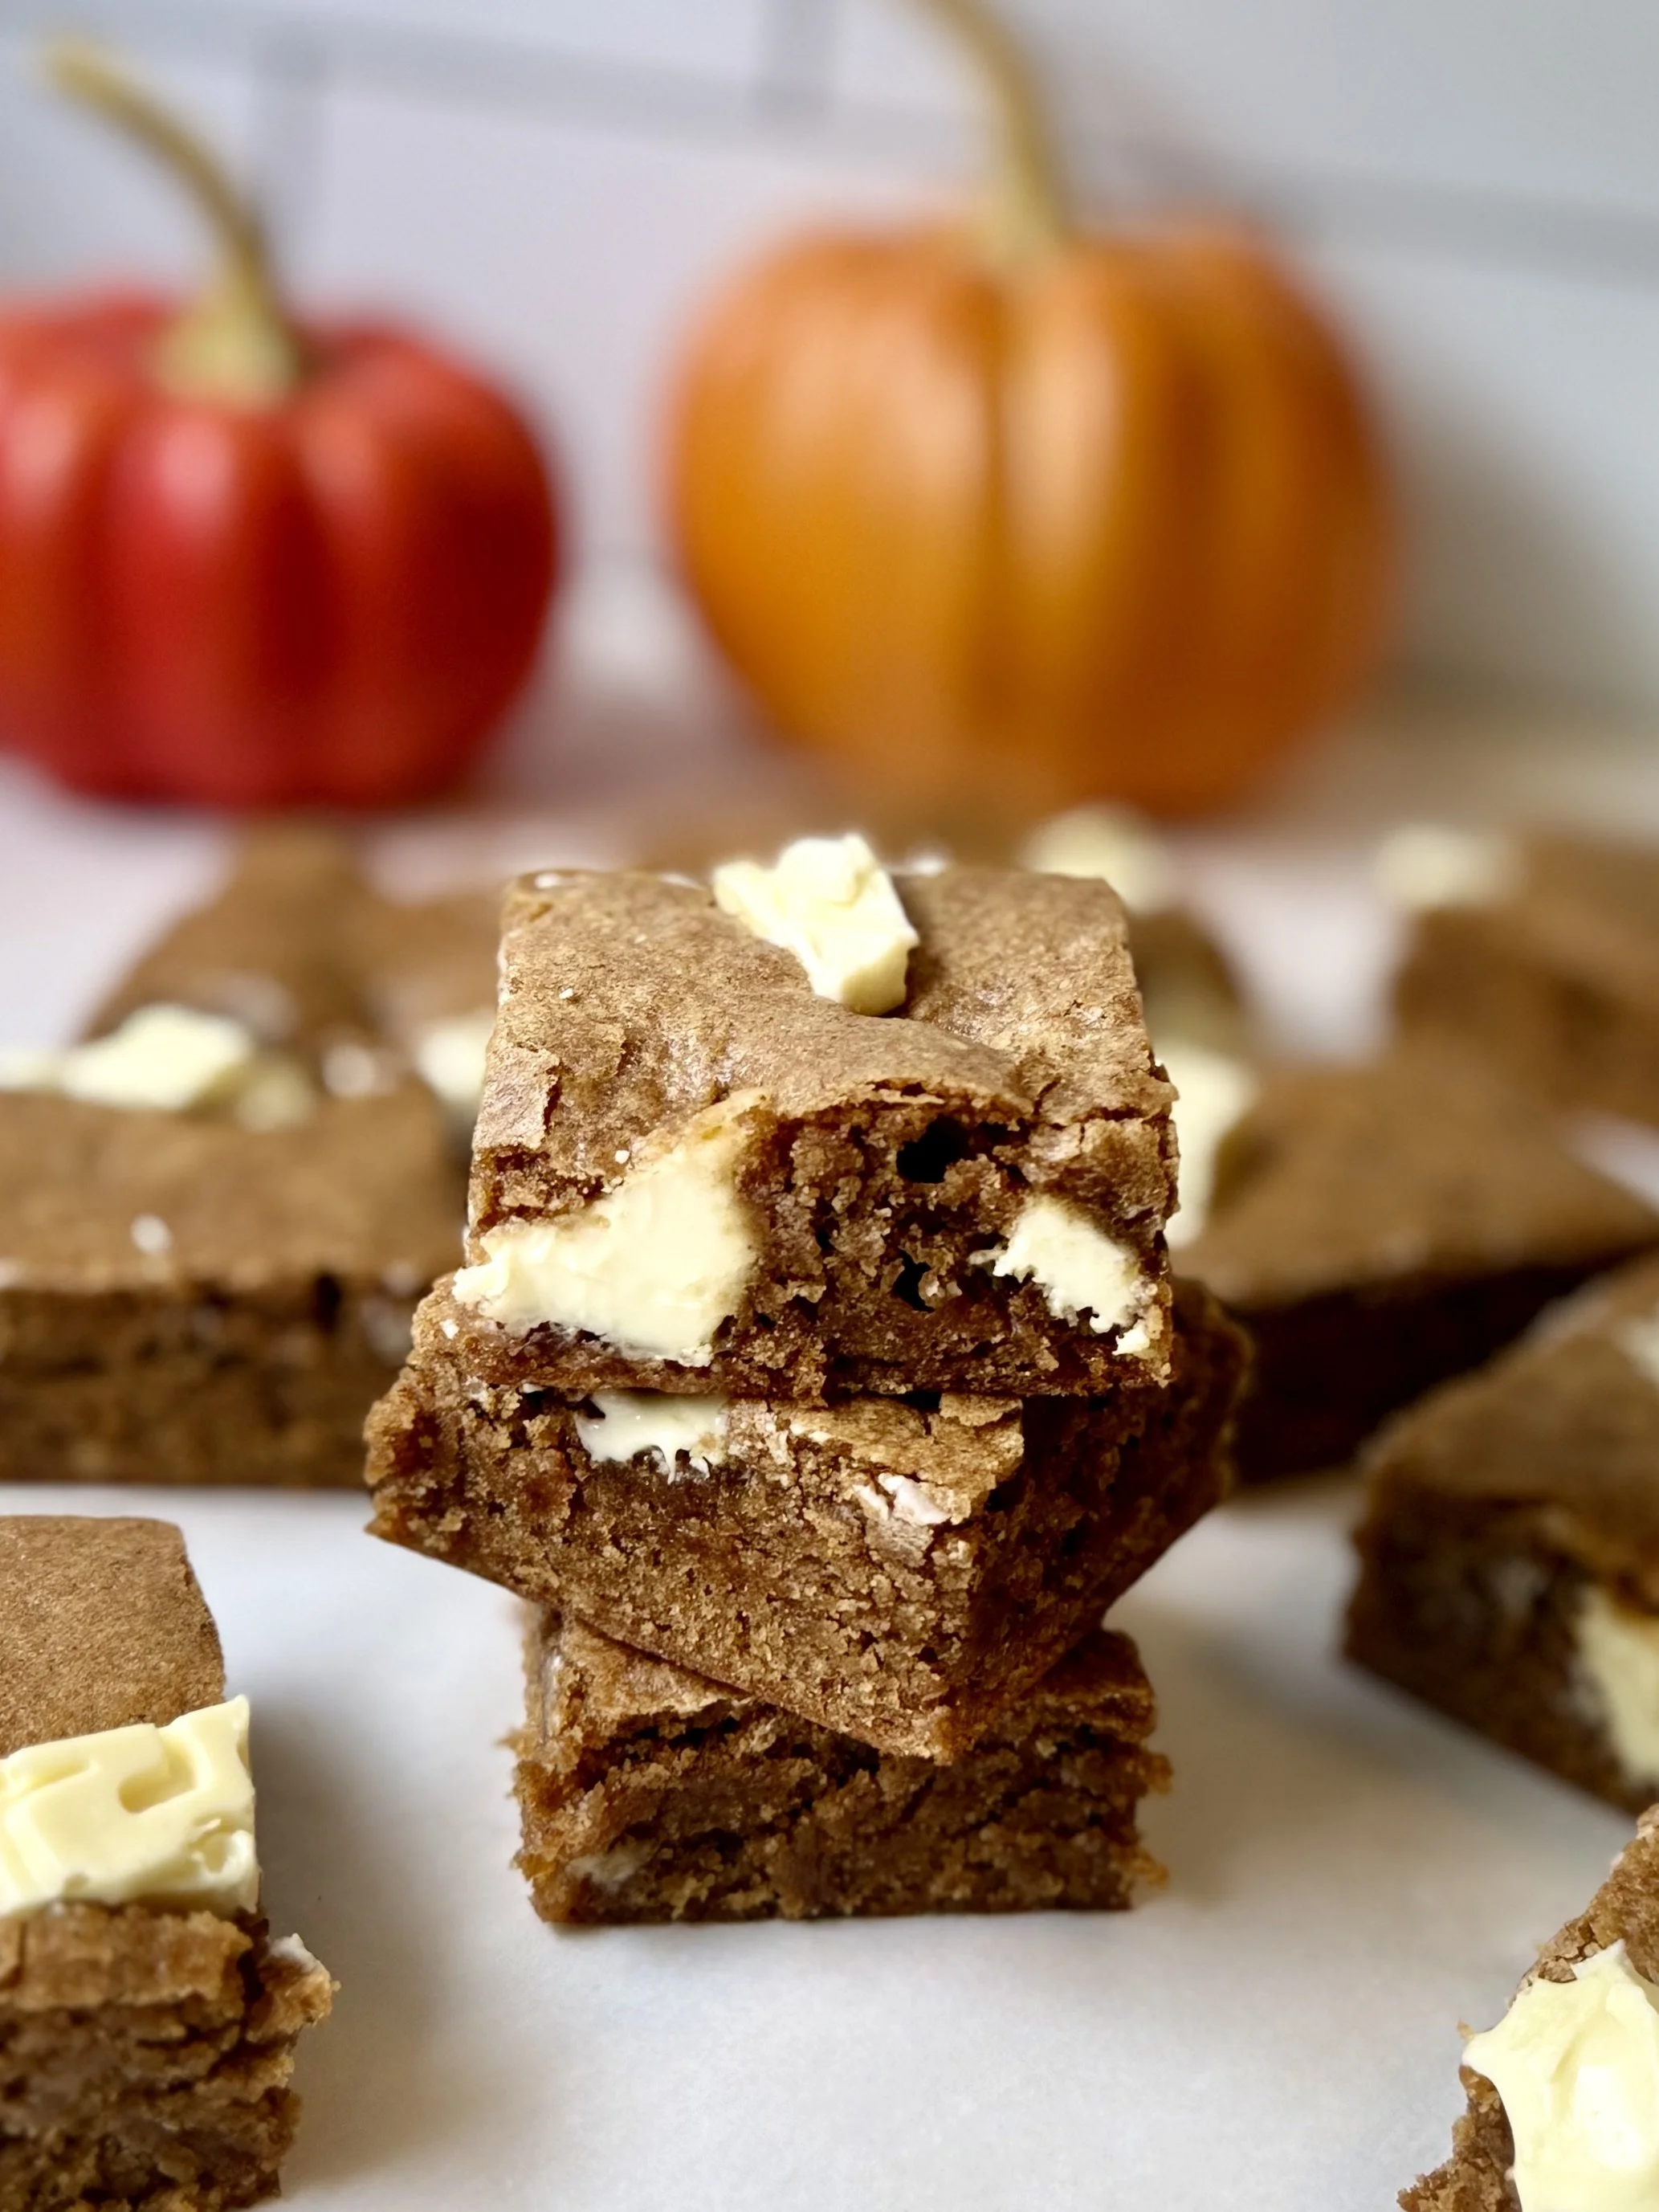
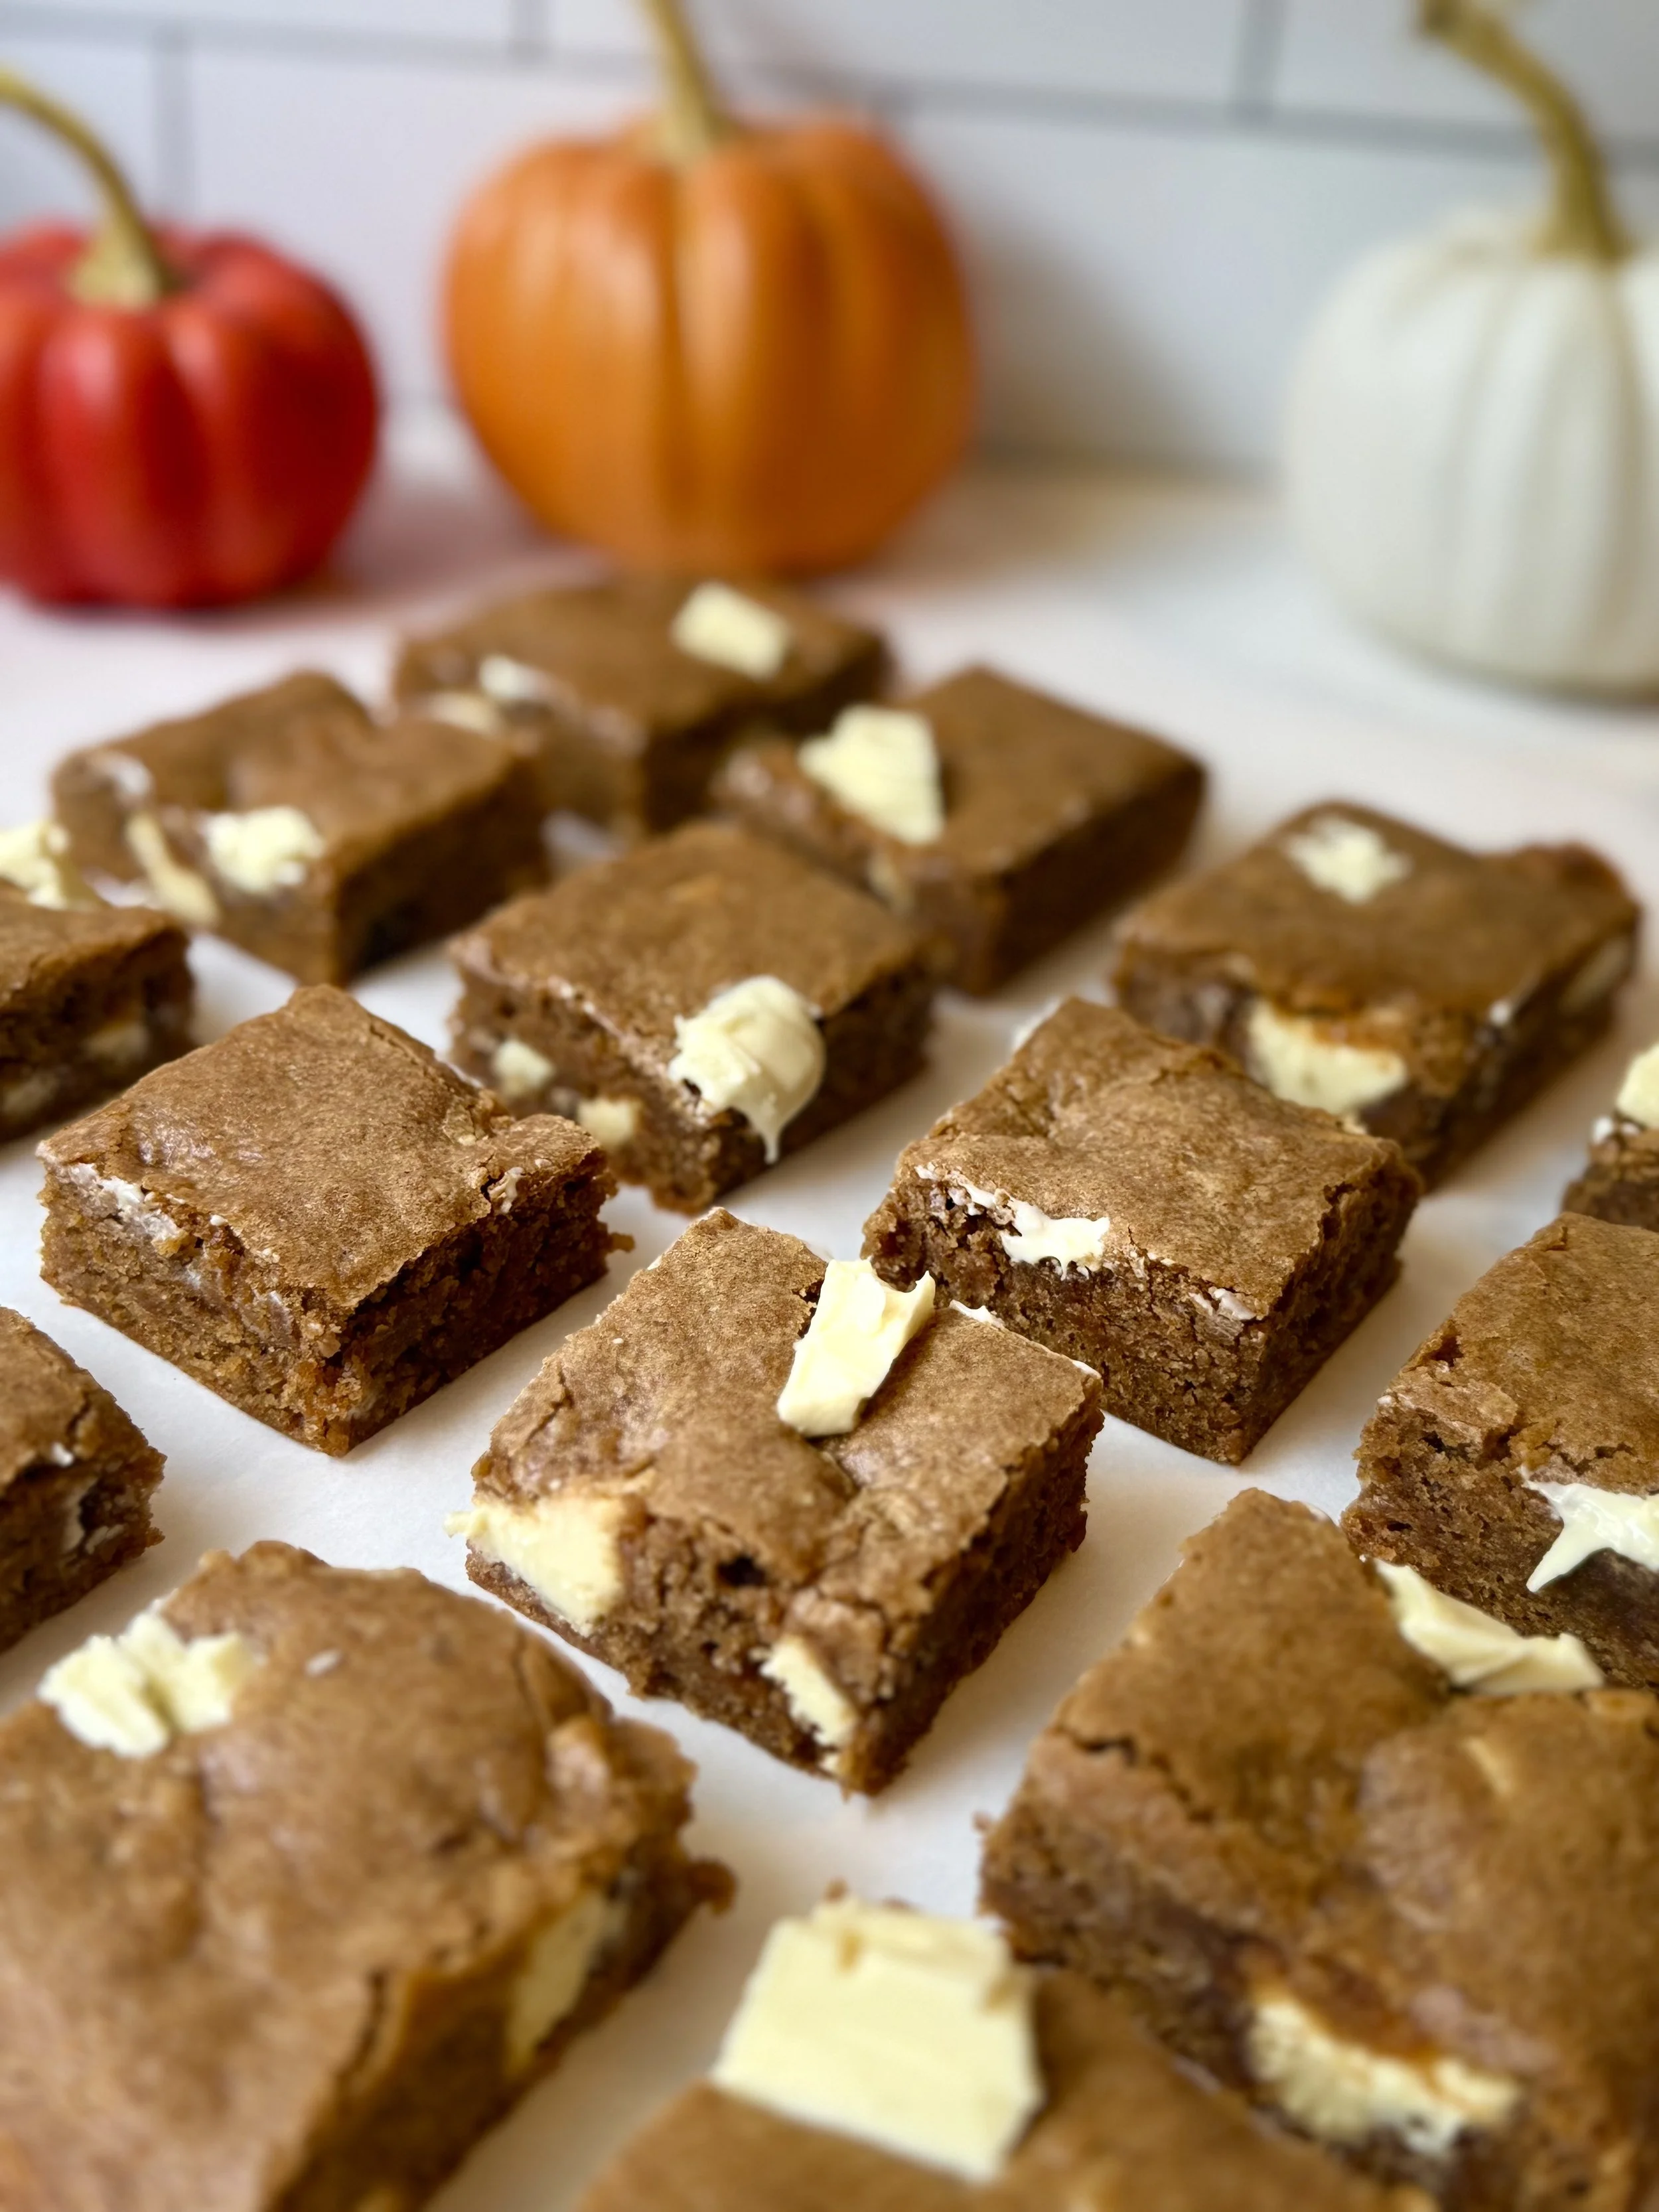
Gluten-Free Pumpkin Blondies with White Chocolate Chunks
These gluten-free pumpkin blondies are soft, chewy, and full of cozy fall flavor. Made with pumpkin puree, warm spices, and rich white chocolate chunks, they're a simple yet irresistible dessert perfect for the season. Whether you're gluten-free or just love a good blondie, this recipe is easy enough for beginners but impressive enough for any fall gathering.
Every year when the leaves start to turn and there’s that crisp bite in the air, I find myself craving something warm, spiced, and comforting, but not too fussy. These gluten-free pumpkin blondies came to life one chilly afternoon when I had just a bit of leftover pumpkin puree in the fridge and a bar of white chocolate calling my name. The result? A cozy, chewy, and sweetly spiced treat that feels like fall in every bite. I love making these to welcome in the season, or honestly, whenever I need a quick dessert that tastes like it took way more effort than it did.
Why You’ll Love This Recipe
One-bowl recipe—no mixer needed
Naturally gluten-free using a 1:1 blend
Filled with warming spices and melty white chocolate
A perfect way to use up leftover pumpkin puree!
| Ingredient | Purpose |
|---|---|
| ½ cup unsalted butter (melted) | Adds moisture and rich flavor; melting gives blondies a dense, fudgy texture |
| 1 cup brown sugar | Sweetens and adds chewiness; brown sugar also adds a subtle molasses flavor |
| 1 egg (room temperature) | Binds the batter and helps it rise |
| ¼ cup pumpkin puree | Adds moisture and seasonal flavor without overpowering |
| 1 tsp vanilla extract | Enhances sweetness and warm flavors |
| 1 cup gluten-free flour (Bob's Red Mill 1:1) | Provides structure; this blend mimics regular flour and includes xanthan gum |
| ¼ tsp baking powder | Gives gentle lift without making them cakey |
| 2 tsp pumpkin pie spice + ¼ tsp ground cloves and cinnamon | Adds warm, aromatic fall flavor |
| ½ tsp salt | Balances sweetness and enhances flavor |
| 1 cup white chocolate chunks (from a chopped bar) | Creates creamy, melty pockets of sweetness throughout |
Step-by-Step Instructions
1. Preheat & Prep
Preheat your oven to 350°F (175°C). Line a 9x9-inch pan with parchment paper for easy removal and clean edges.
2. Melt the Butter
Melt the ½ cup of butter and let it cool slightly—this helps prevent scrambling the egg later.
3. Mix Wet Ingredients
In a mixing bowl, combine the melted butter and 1 cup brown sugar. Mix with a spatula or wooden spoon until smooth and slightly glossy.
Add the egg, ¼ cup pumpkin puree, and 1 tsp vanilla extract. Stir until fully incorporated.
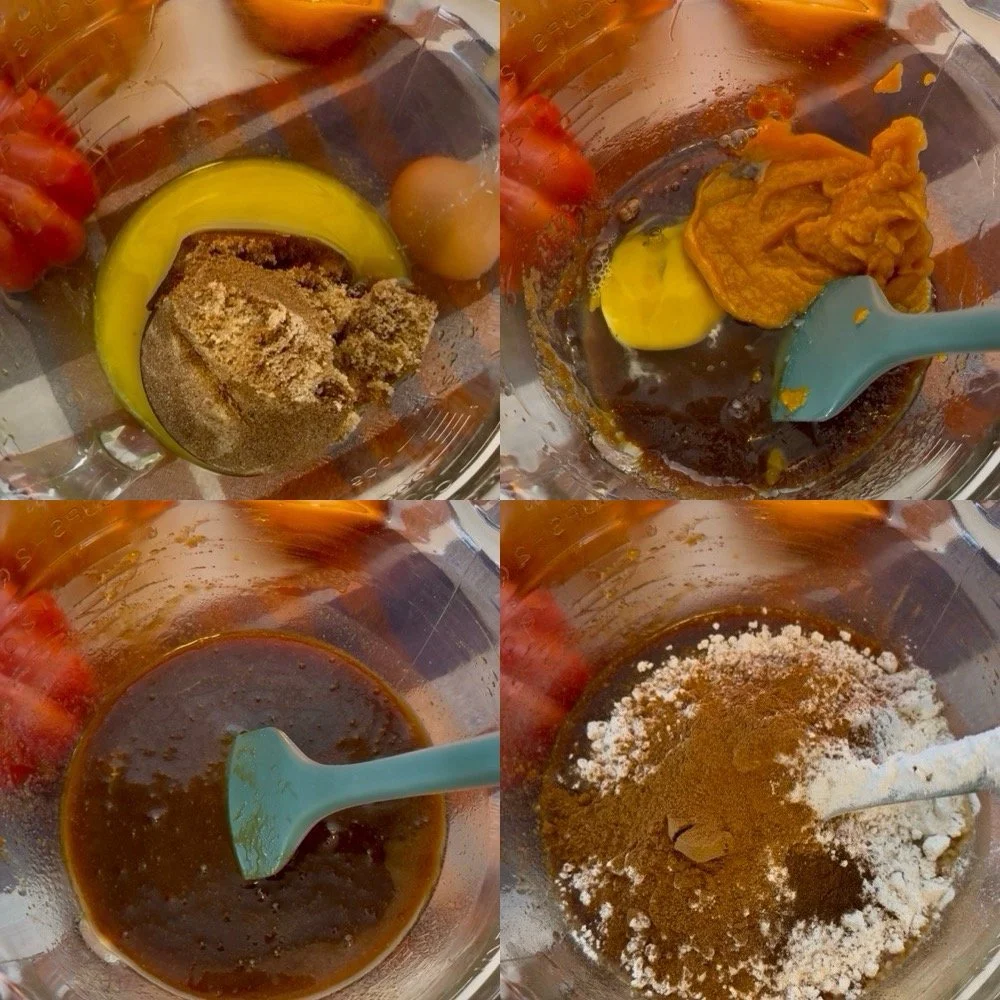
4. Add Dry Ingredients
Sprinkle in the 1 cup gluten-free flour, ¼ tsp baking powder, 2 tsp pumpkin pie spice, ¼ tsp cloves and cinnamon, and ½ tsp salt. Fold everything together with a spatula until no flour streaks remain. Do not overmix—just fold until combined.
5. Add White Chocolate
Add 1 cup of white chocolate chunks and gently fold them into the batter.
💡 Pro Tip: Chop a bar of white chocolate instead of using chips for better melt and texture.

6. Transfer & Bake
Spread the thick batter into your prepared pan and smooth the top. Bake for 30–35 minutes, or until the edges are golden and the center is set but slightly soft.
🔥 Don’t overbake! They’ll firm up as they cool, so pull them once the center doesn’t jiggle.
7. Cool & Serve
Let the blondies cool completely in the pan before cutting—this helps them set and prevents crumbling.
Storage Tips
Room Temp: Store in an airtight container for up to 3 days
Fridge: Keeps for up to 1 week (bring to room temp before serving for best texture)
Freezer: Wrap individually and freeze for up to 2 months. Thaw at room temperature.
Substitutions & Variations
Dairy-Free? Use vegan butter and dairy-free white chocolate.
No pumpkin pie spice? Use a mix of cinnamon, nutmeg, and ginger.
Add-ins: Chopped pecans, walnuts, or dried cranberries are delicious additions!
Troubleshooting & Tips
Blondies too cakey? Be sure to measure flour correctly (spoon and level), don’t overmix, and avoid overbaking.
Too gooey in the center? Let them cool fully; if underbaked, return to the oven for 5 more minutes.
Crumbly edges? It could be from cutting too soon. Let them set completely before slicing.
Final Thoughts
These pumpkin blondies are the ultimate fall treat—easy to make, full of cozy flavor, and naturally gluten-free without sacrificing texture. Whether you're baking for a party or a quiet weekend at home, this is a recipe you’ll want to come back to again and again. Let me know how like this recipe in the comments below!

Gluten-Free Pumpkin Blondies
These gluten-free pumpkin blondies are soft, chewy, and full of warm fall spices. Studded with creamy white chocolate chunks, they’re the perfect cozy treat for any autumn occasion.
Ingredients
- 1/2 cup unsalted butter (melted)
- 1 cup brown sugar
- 1 egg (room temperature)
- 1/4 pumpkin puree
- 1 tsp vanilla extract
- 1 cup of gluten-free flour, I used Bob's Red Mill 1:1 Gluten Free Flour
- ¼ tsp of baking powder
- 2 tsp pumpkin pie spice
- 1/4 tsp cloves
- ½ tsp salt
- 1 cup of White Chocolate, I used a chocolate bar that I broke into chunks.
Instructions
Spooky Oreo Blondies

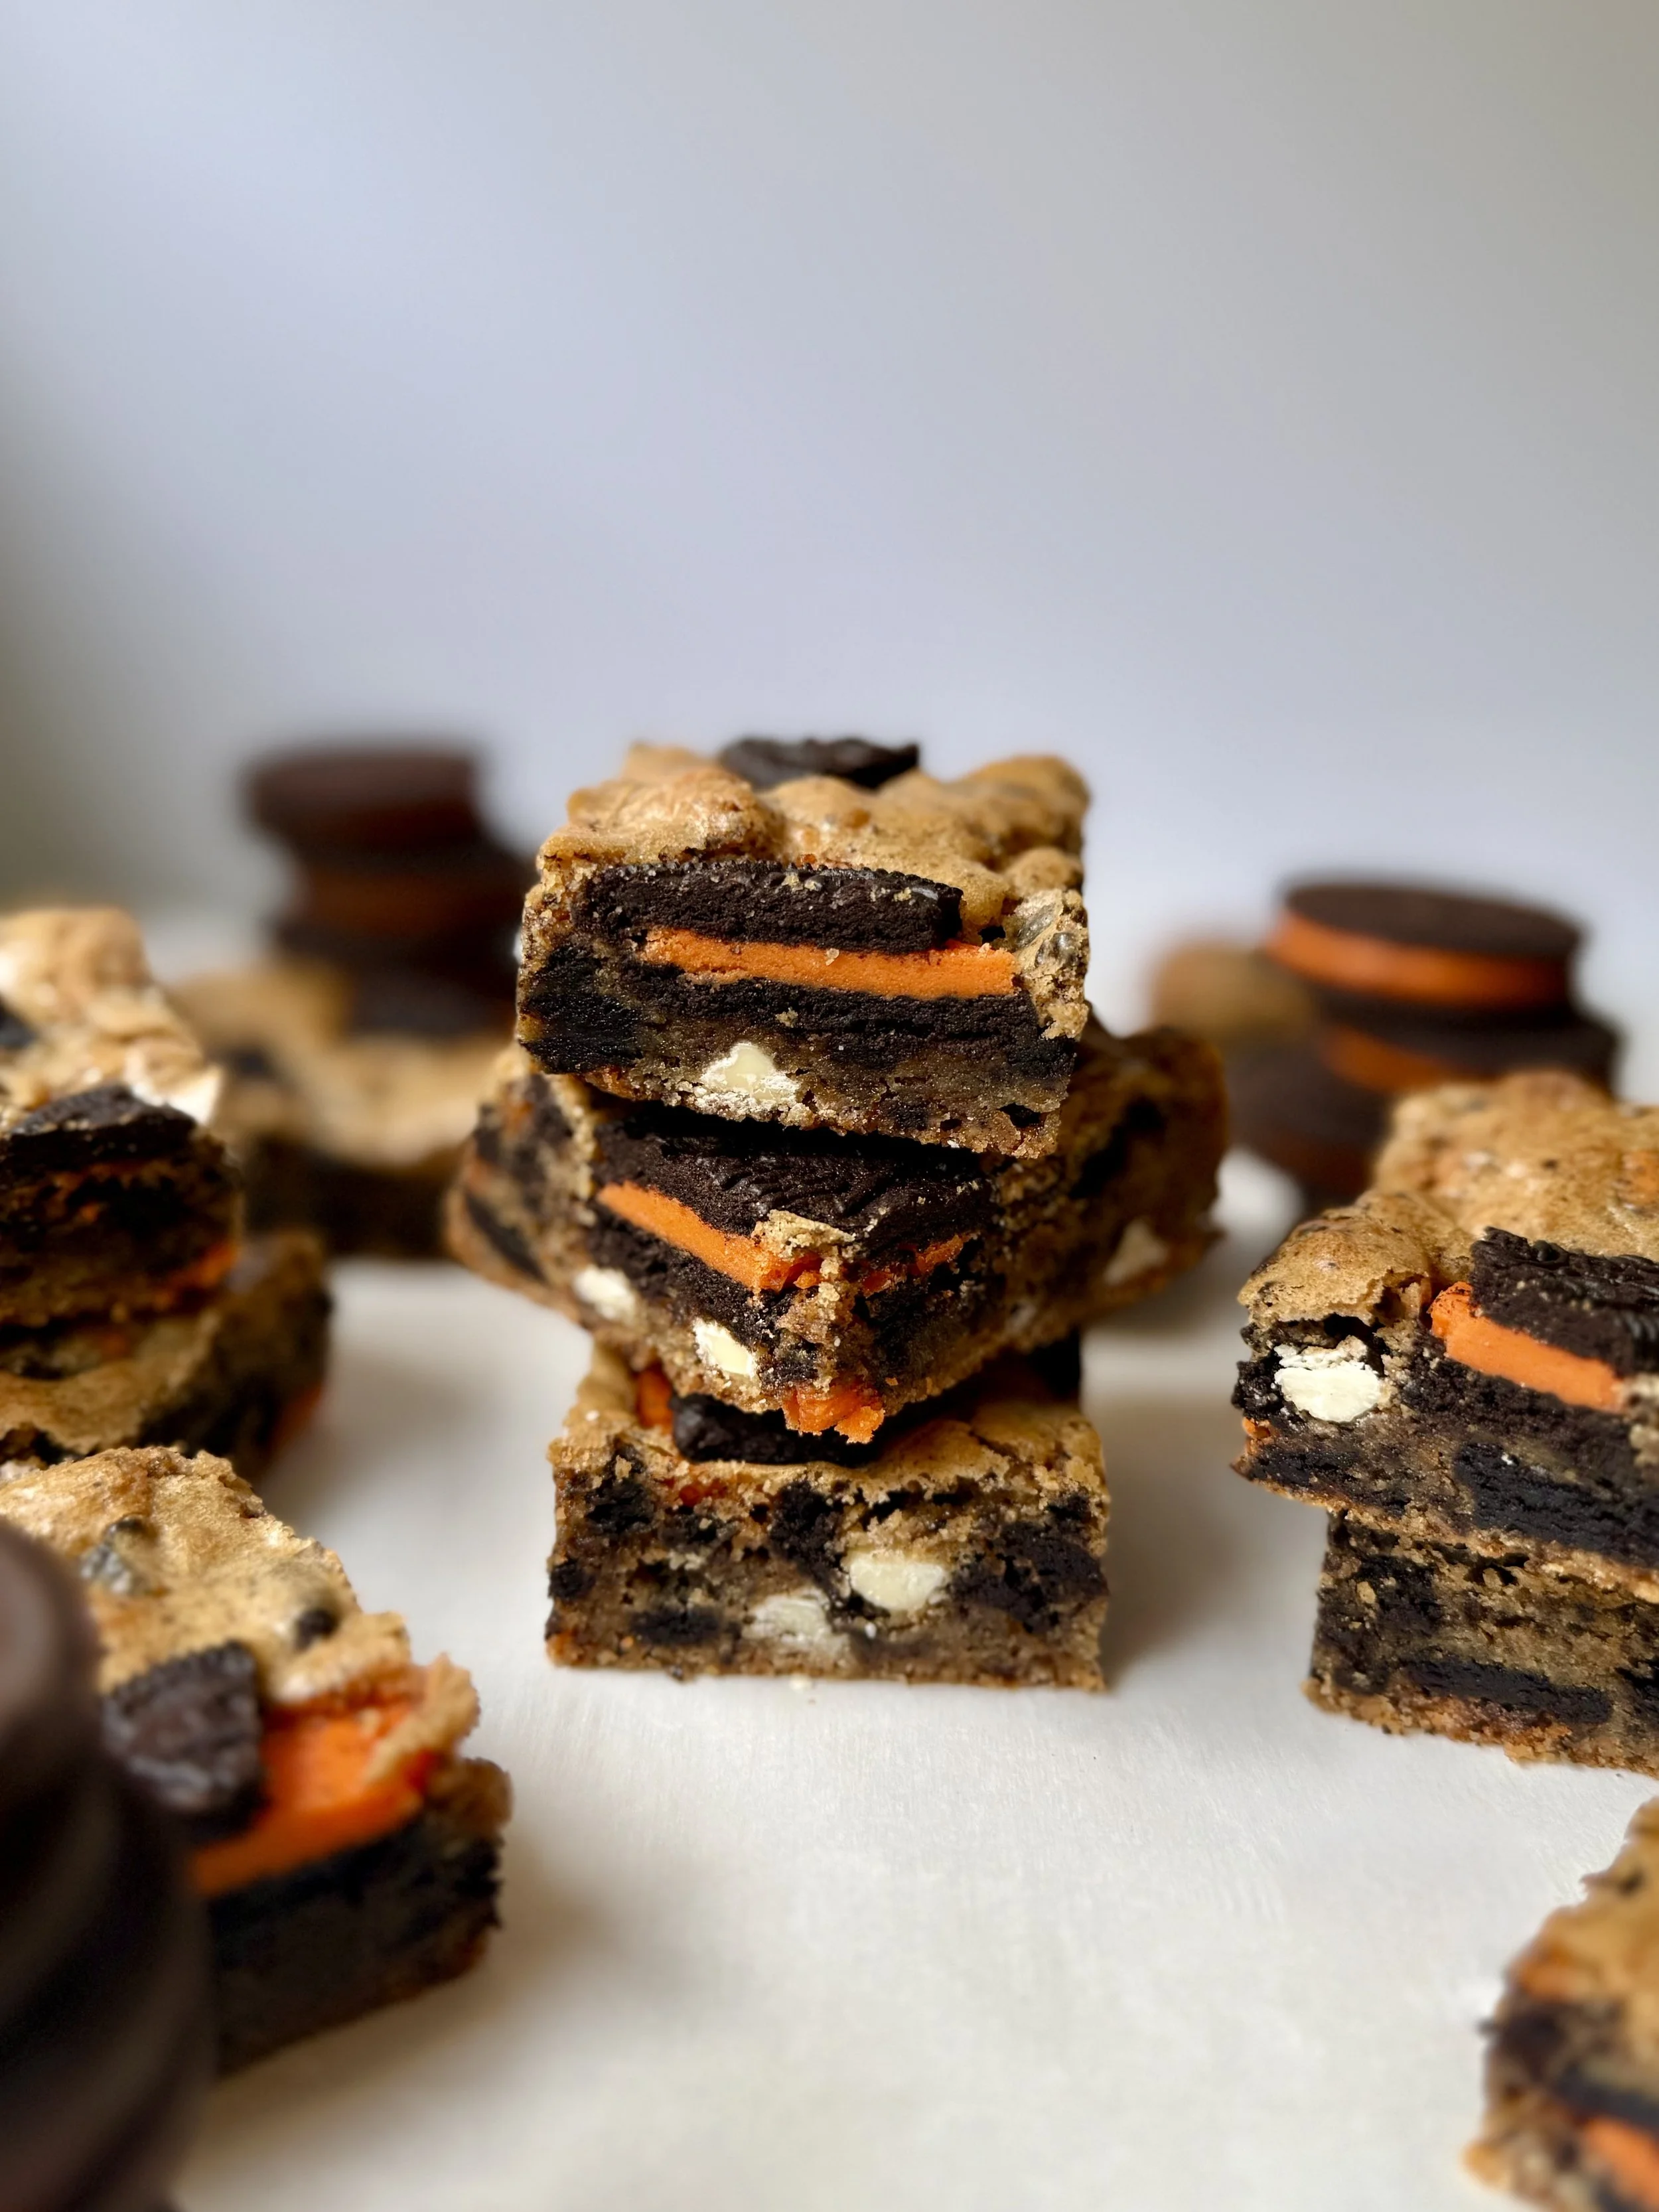
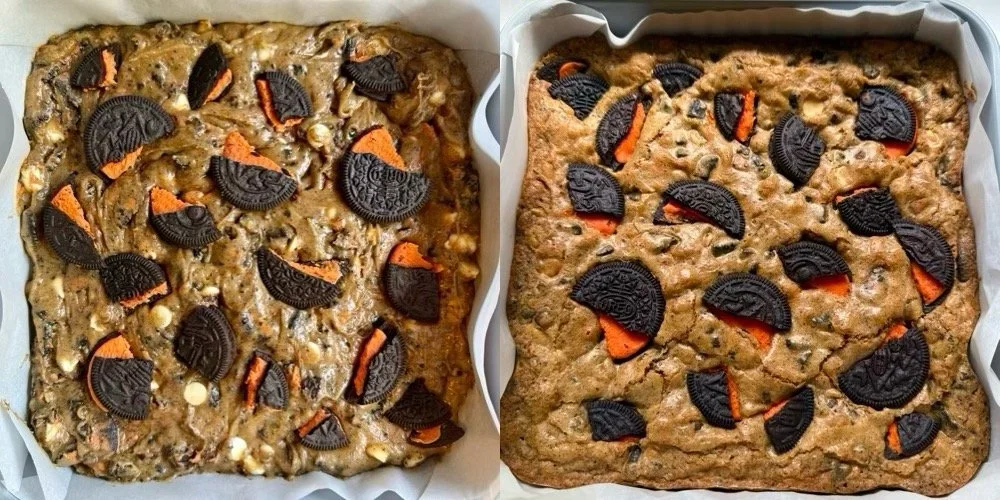
🎃 Spooky Halloween Oreo Blondies
Thick, chewy, and packed with festive orange crème Oreos and gooey white chocolate chips, these Spooky Halloween Oreo Blondies are the perfect easy treat for fall gatherings, trick-or-treat night, or just a cozy October bake. Whether you're a beginner or a seasoned baker, this recipe is simple, fun, and frightfully delicious.
Oreos are an all-time favorite in my house, and I love finding any way to spruce them up into a new dessert to fall in love with them all over again.
Ingredients & Why They Matter
| Ingredient | Amount | Why It’s Important |
|---|---|---|
| Salted Butter (melted) | ½ cup | Adds rich flavor and moisture. Melting it gives the blondies a dense, chewy texture. Salted butter also balances the sweetness. |
| Brown Sugar | 1 cup | Provides sweetness, moisture, and a caramel-like flavor. Essential for a soft, chewy blondie texture. |
| Eggs (room temp) | 2 | Bind everything together and provide structure. Room temp eggs mix more evenly and help trap air for better rise. |
| Vanilla Extract | 1 tbsp | Enhances all the other flavors, especially the chocolate and Oreo notes. |
| All-Purpose Flour | 1 cup | The main structure of your blondies. Be sure to measure correctly to avoid dryness. |
| White Chocolate Chips | ½ cup | Add creamy sweetness and contrast beautifully with the Oreos. |
| Halloween Orange Creme Oreos | 16 total | 10 are crushed for flavor and texture in the batter; 6 are hand-broken for topping with a spooky effect. |
| Baking Powder | ¼ tsp | Helps the blondies puff up slightly for a soft bite. |
| Salt | ½ tsp | Balances sweetness and sharpens all the other flavors — don’t skip it! |
Instructions (with Tips for Every Step)
1. Preheat & Prep
Preheat your oven to 350°F (175°C).
Line a 9x9-inch baking pan with parchment paper. Leave an overhang on the sides to easily lift the blondies out later.
🔪 Tip: Grease the pan lightly before adding parchment so it sticks and doesn’t move around.
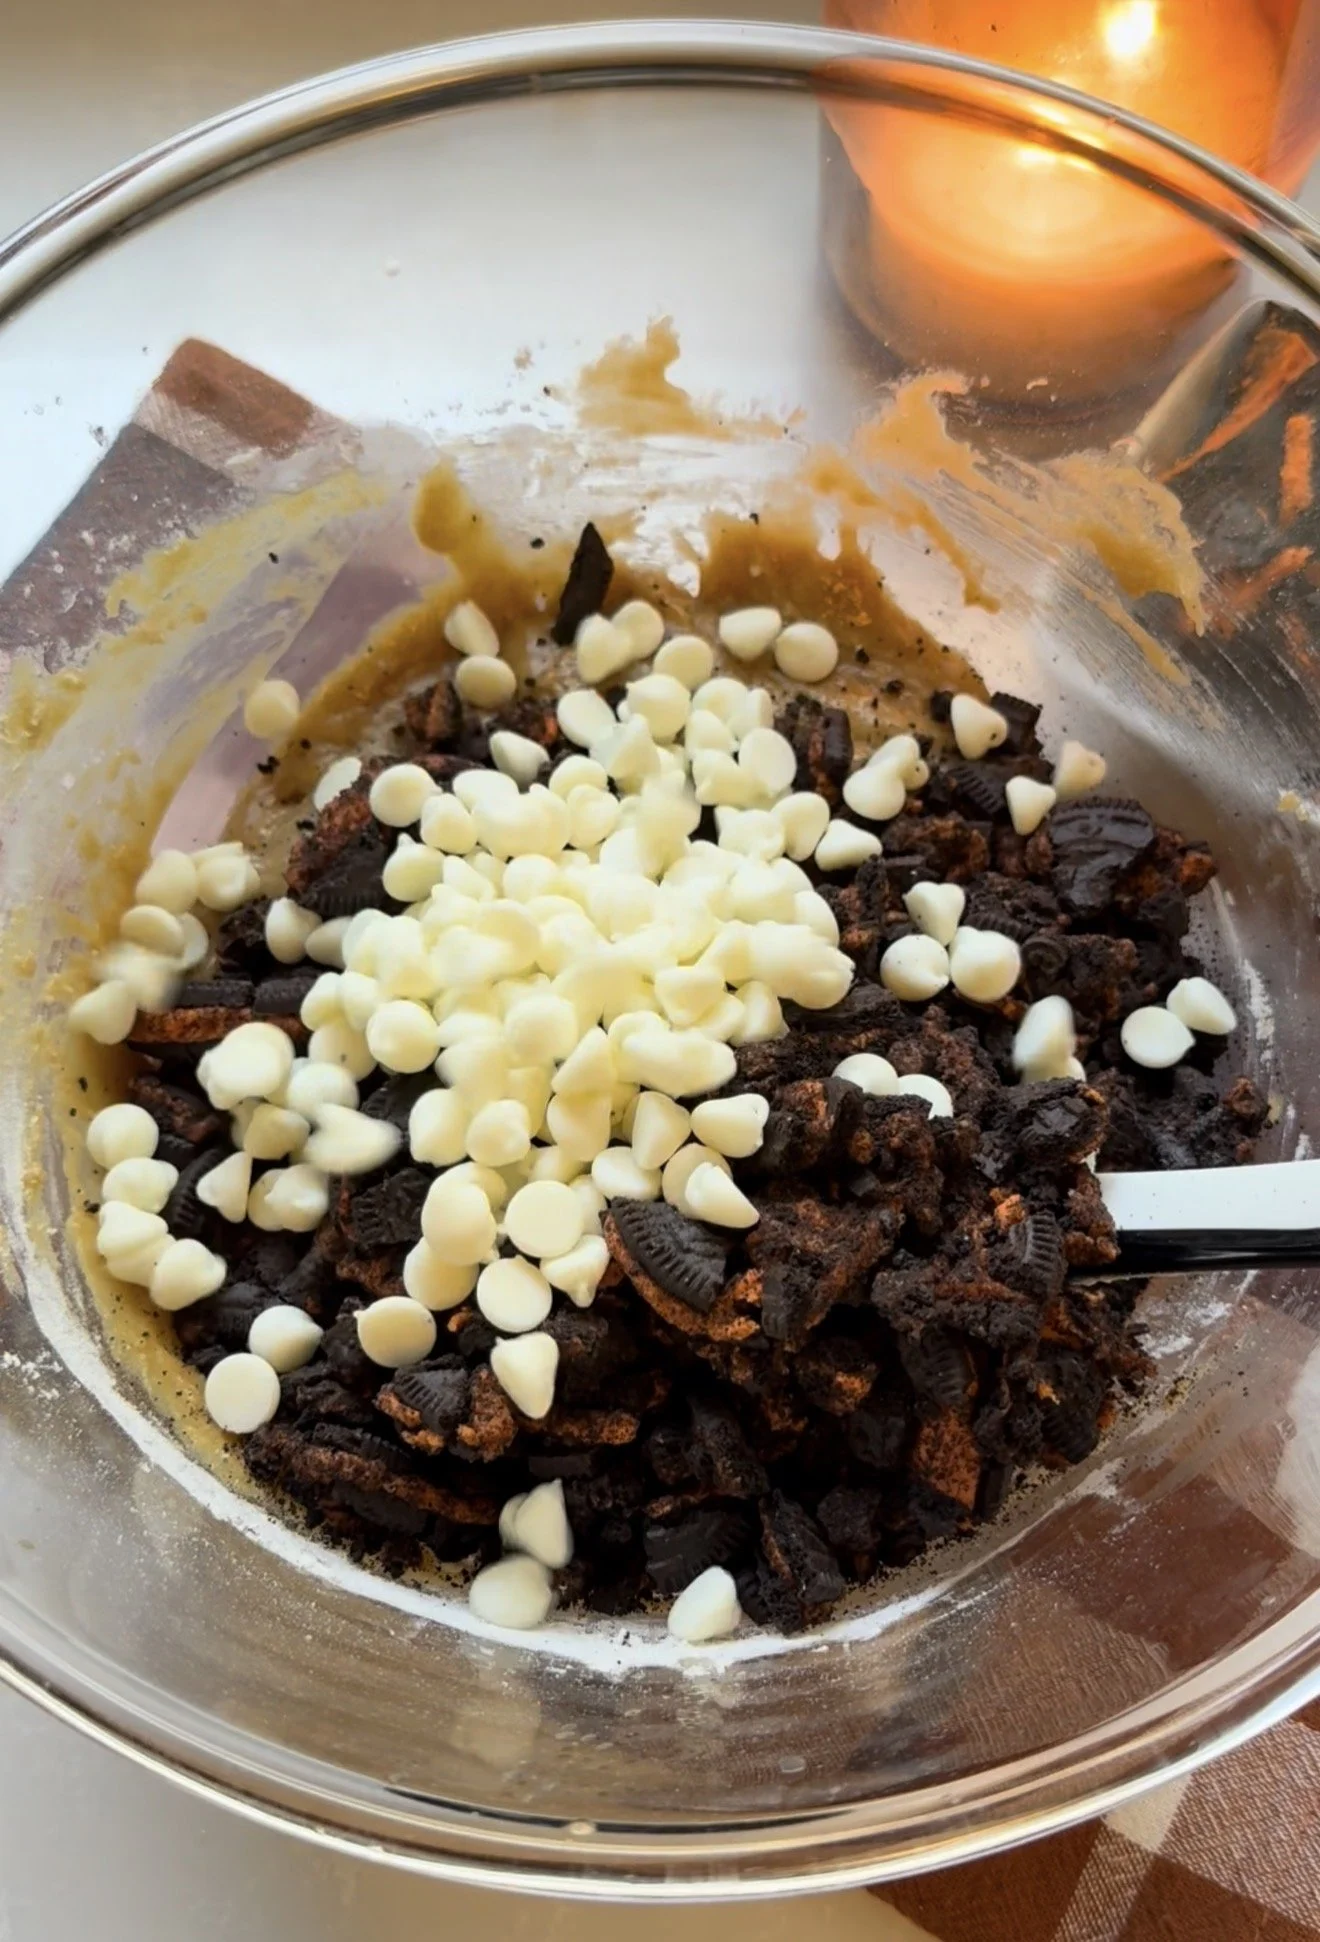
2. Crush the Oreos
Crush 10 Oreos using a zip-top bag and rolling pin for a mix of textures, or pulse gently in a blender.
Break 6 more Oreos by hand into larger chunks. These are for the top; you want them visible and spooky!
👻 Tip: Hand-breaking the topping Oreos gives that perfect chunky Halloween look.
3. Mix the Wet Ingredients
In a large bowl, combine melted (and slightly cooled) butter with brown sugar. Stir until smooth and glossy.
Add the eggs and vanilla extract, mixing just until combined.
🧈 Why cooled butter? Too-hot butter can scramble the eggs. Let it sit 5-10 minutes before mixing.
4. Add the Dry Ingredients
Add flour, baking powder, and salt directly into the wet mixture.
Fold everything gently with a spatula until no streaks of flour remain.
🚫 Avoid overmixing: Overmixing can cause tough blondies. Stop as soon as the flour is incorporated.
5. Add Mix-ins
Gently fold in the crushed Oreos and white chocolate chips.
💡 Mix-in tip: Reserve a few white chocolate chips to press into the top for an extra-spooky presentation.
6. Assemble & Bake
Spread the batter evenly into the prepared pan.
Press the hand-broken Oreo chunks and extra chips (if any) onto the surface.
Bake for 30–35 minutes, or until the edges are golden and the center is set but soft.
🔥 Don’t overbake: Blondies will firm up as they cool. A toothpick may still come out with moist crumbs; that’s perfect!
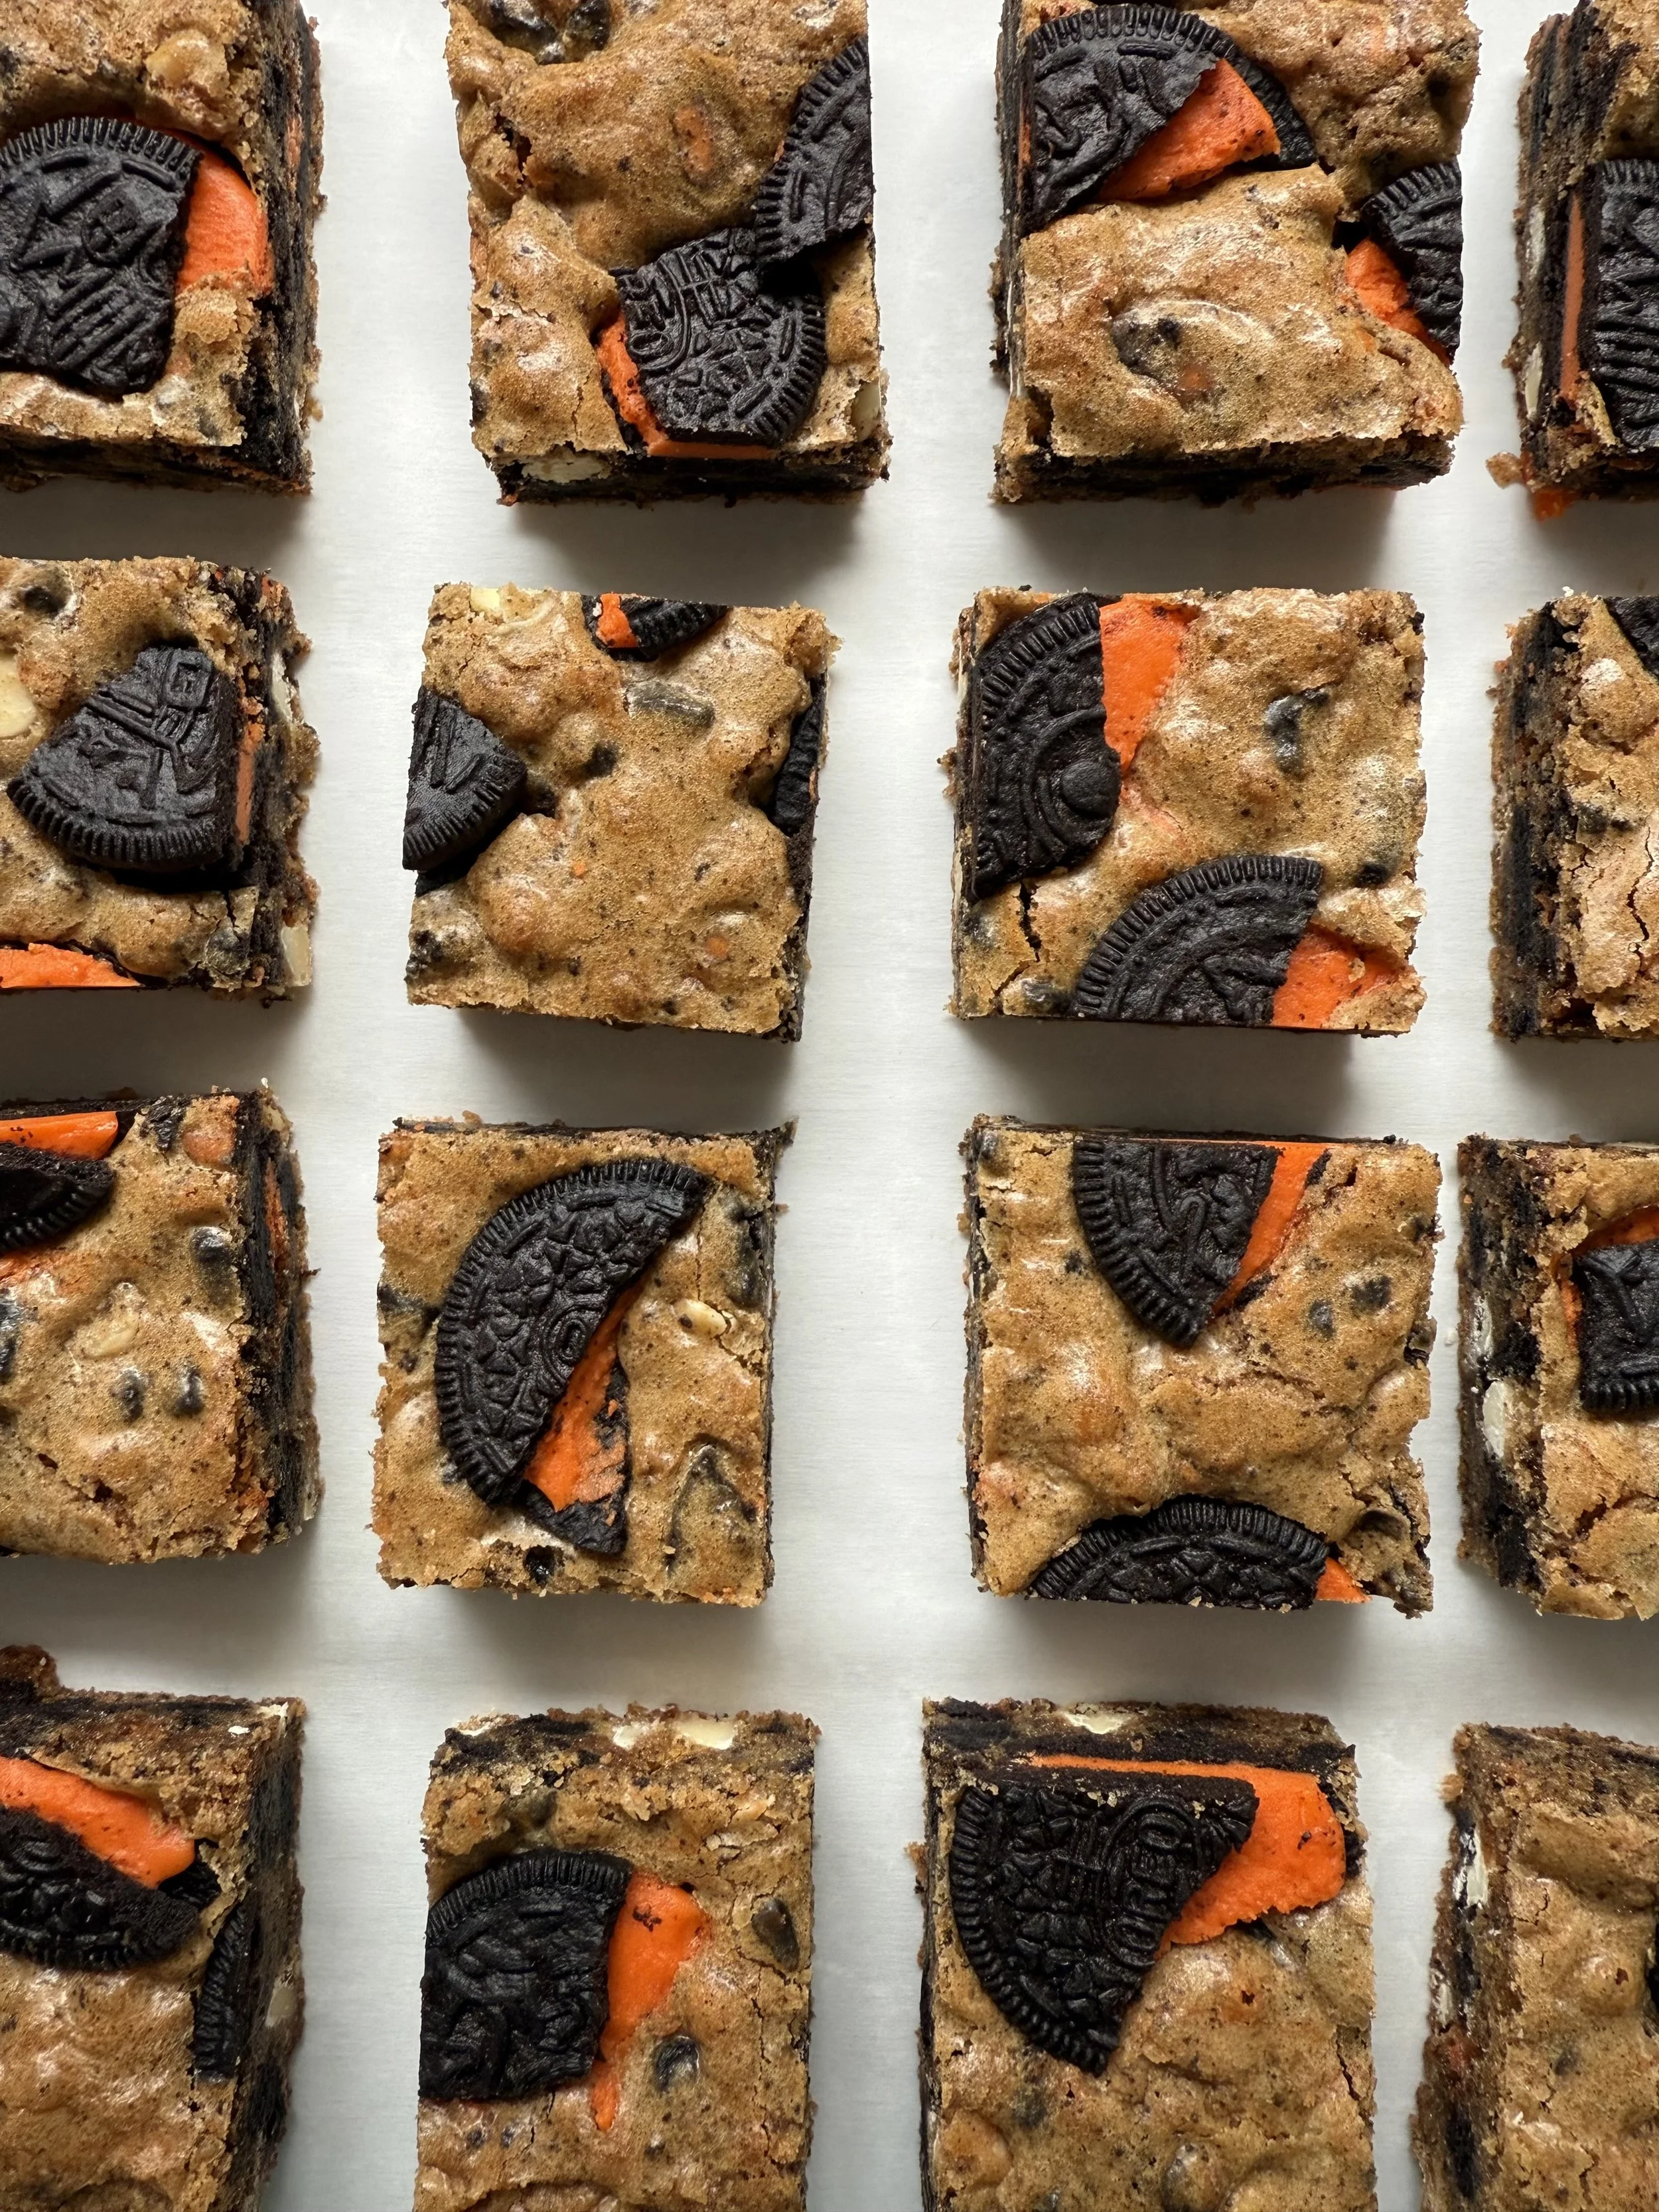
7. Cool & Slice
Let the blondies cool in the pan for at least 20–30 minutes before lifting them out and slicing.
🎃 For clean cuts: Chill in the fridge for 30 minutes after cooling. Use a sharp knife, wiping it clean between slices.
Storage & Freezing Tips
| Method | How to Store | Shelf Life |
|---|---|---|
| Room Temp | In an airtight container | 3–4 days |
| Refrigerated | Airtight container | Up to 1 week |
| Frozen | Wrap individually, then seal in a freezer bag | Up to 2 months |
Troubleshooting & Tips
| Issue | Likely Cause | Fix |
|---|---|---|
| Too dry | Overbaked or too much flour | Check early, and use the spoon-and-level method to measure flour. |
| Gooey center | Undercooked | Add 3–5 more minutes, or let cool fully to set. |
| Sinking center | Overmixed or oven door opened early | Fold gently, and keep the oven closed during baking. |
| Oreos burned on top | Too close to the heating element | Tent with foil halfway through if they’re browning too fast. |
🎃 Make It Extra Spooky!
Drizzle with orange-colored white chocolate or candy melts after baking.
Add Halloween sprinkles on top before baking.
Swap in Pumpkin Spice Oreos or Boo Oreos for fun variations.
Final Thoughts
These Spooky Oreo Blondies are the ultimate no-fuss Halloween dessert. The melty white chocolate, bold pops of Oreo crunch, and festive orange filling make every bite a celebration of spooky season. Whether you're baking for a party or just treating yourself, I hope you enjoy these blondies. If you’re craving other Oreo treats, you may like these:
Oreo Blondies - stuffed with an entire Oreo in each blondie!
Stuffed Oreo Cookies - stuffed with an entire Oreo in each cookie!
Oreo Cheesecake Bars - The perfect cream cheese and Oreo duo!
Leave a comment below if you also love all things Oreo and would try these?

Spooky Oreo Blondies
These spooky Oreo blondies are thick, chewy bars packed with crushed Halloween Orange Creme Oreos and melty white chocolate chips, giving each bite a festive pop of orange and black. Perfectly gooey and hauntingly delicious, they’re a frightfully fun treat for any Halloween party!
Ingredients
- ½ cup Salted Butter (melted)
- 1 cup Brown Sugar
- 2 Eggs (room temperature)
- 1 tbsp Vanilla Extract
- 1 cup of All-Purpose Flour
- 1/2 cup White Chocolate Chips
- 16 Halloween Orange Cream Oreos (10 for filling, 6 for topping)
- ¼ tsp of Baking Powder
- ½ tsp Salt
Instructions

Pumpkin Spice Cinnamon Roll Blondies
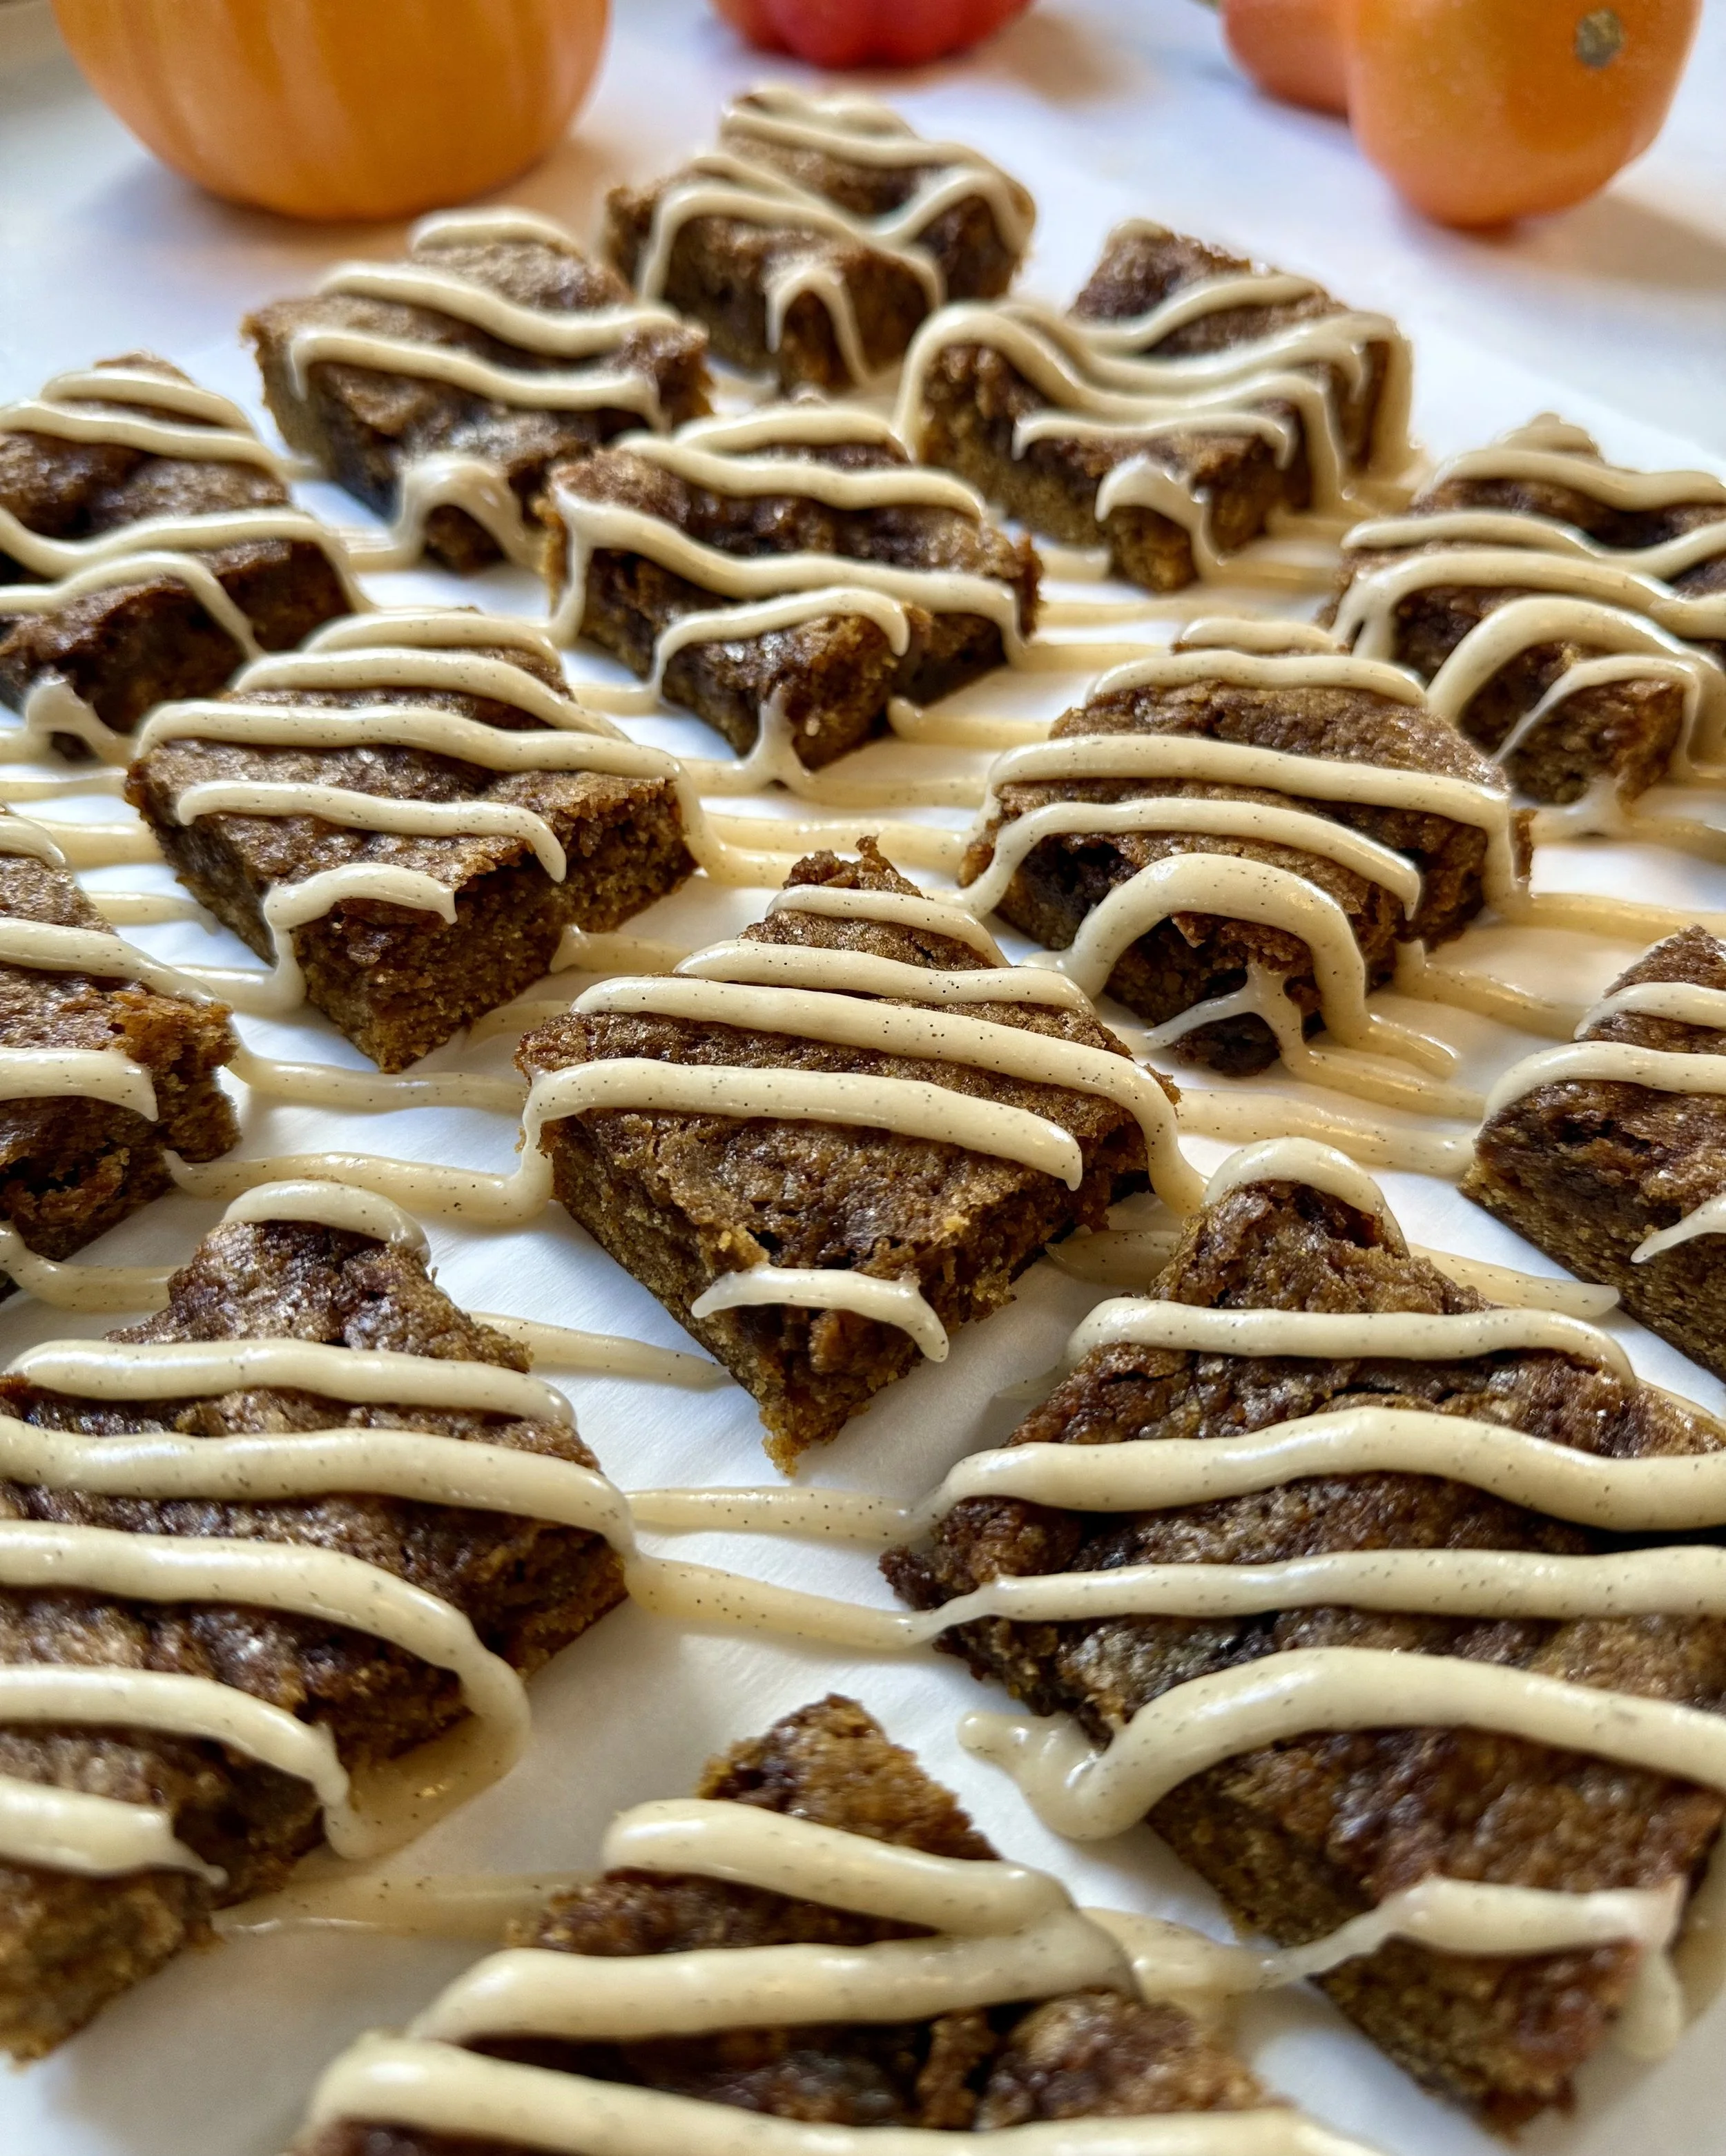
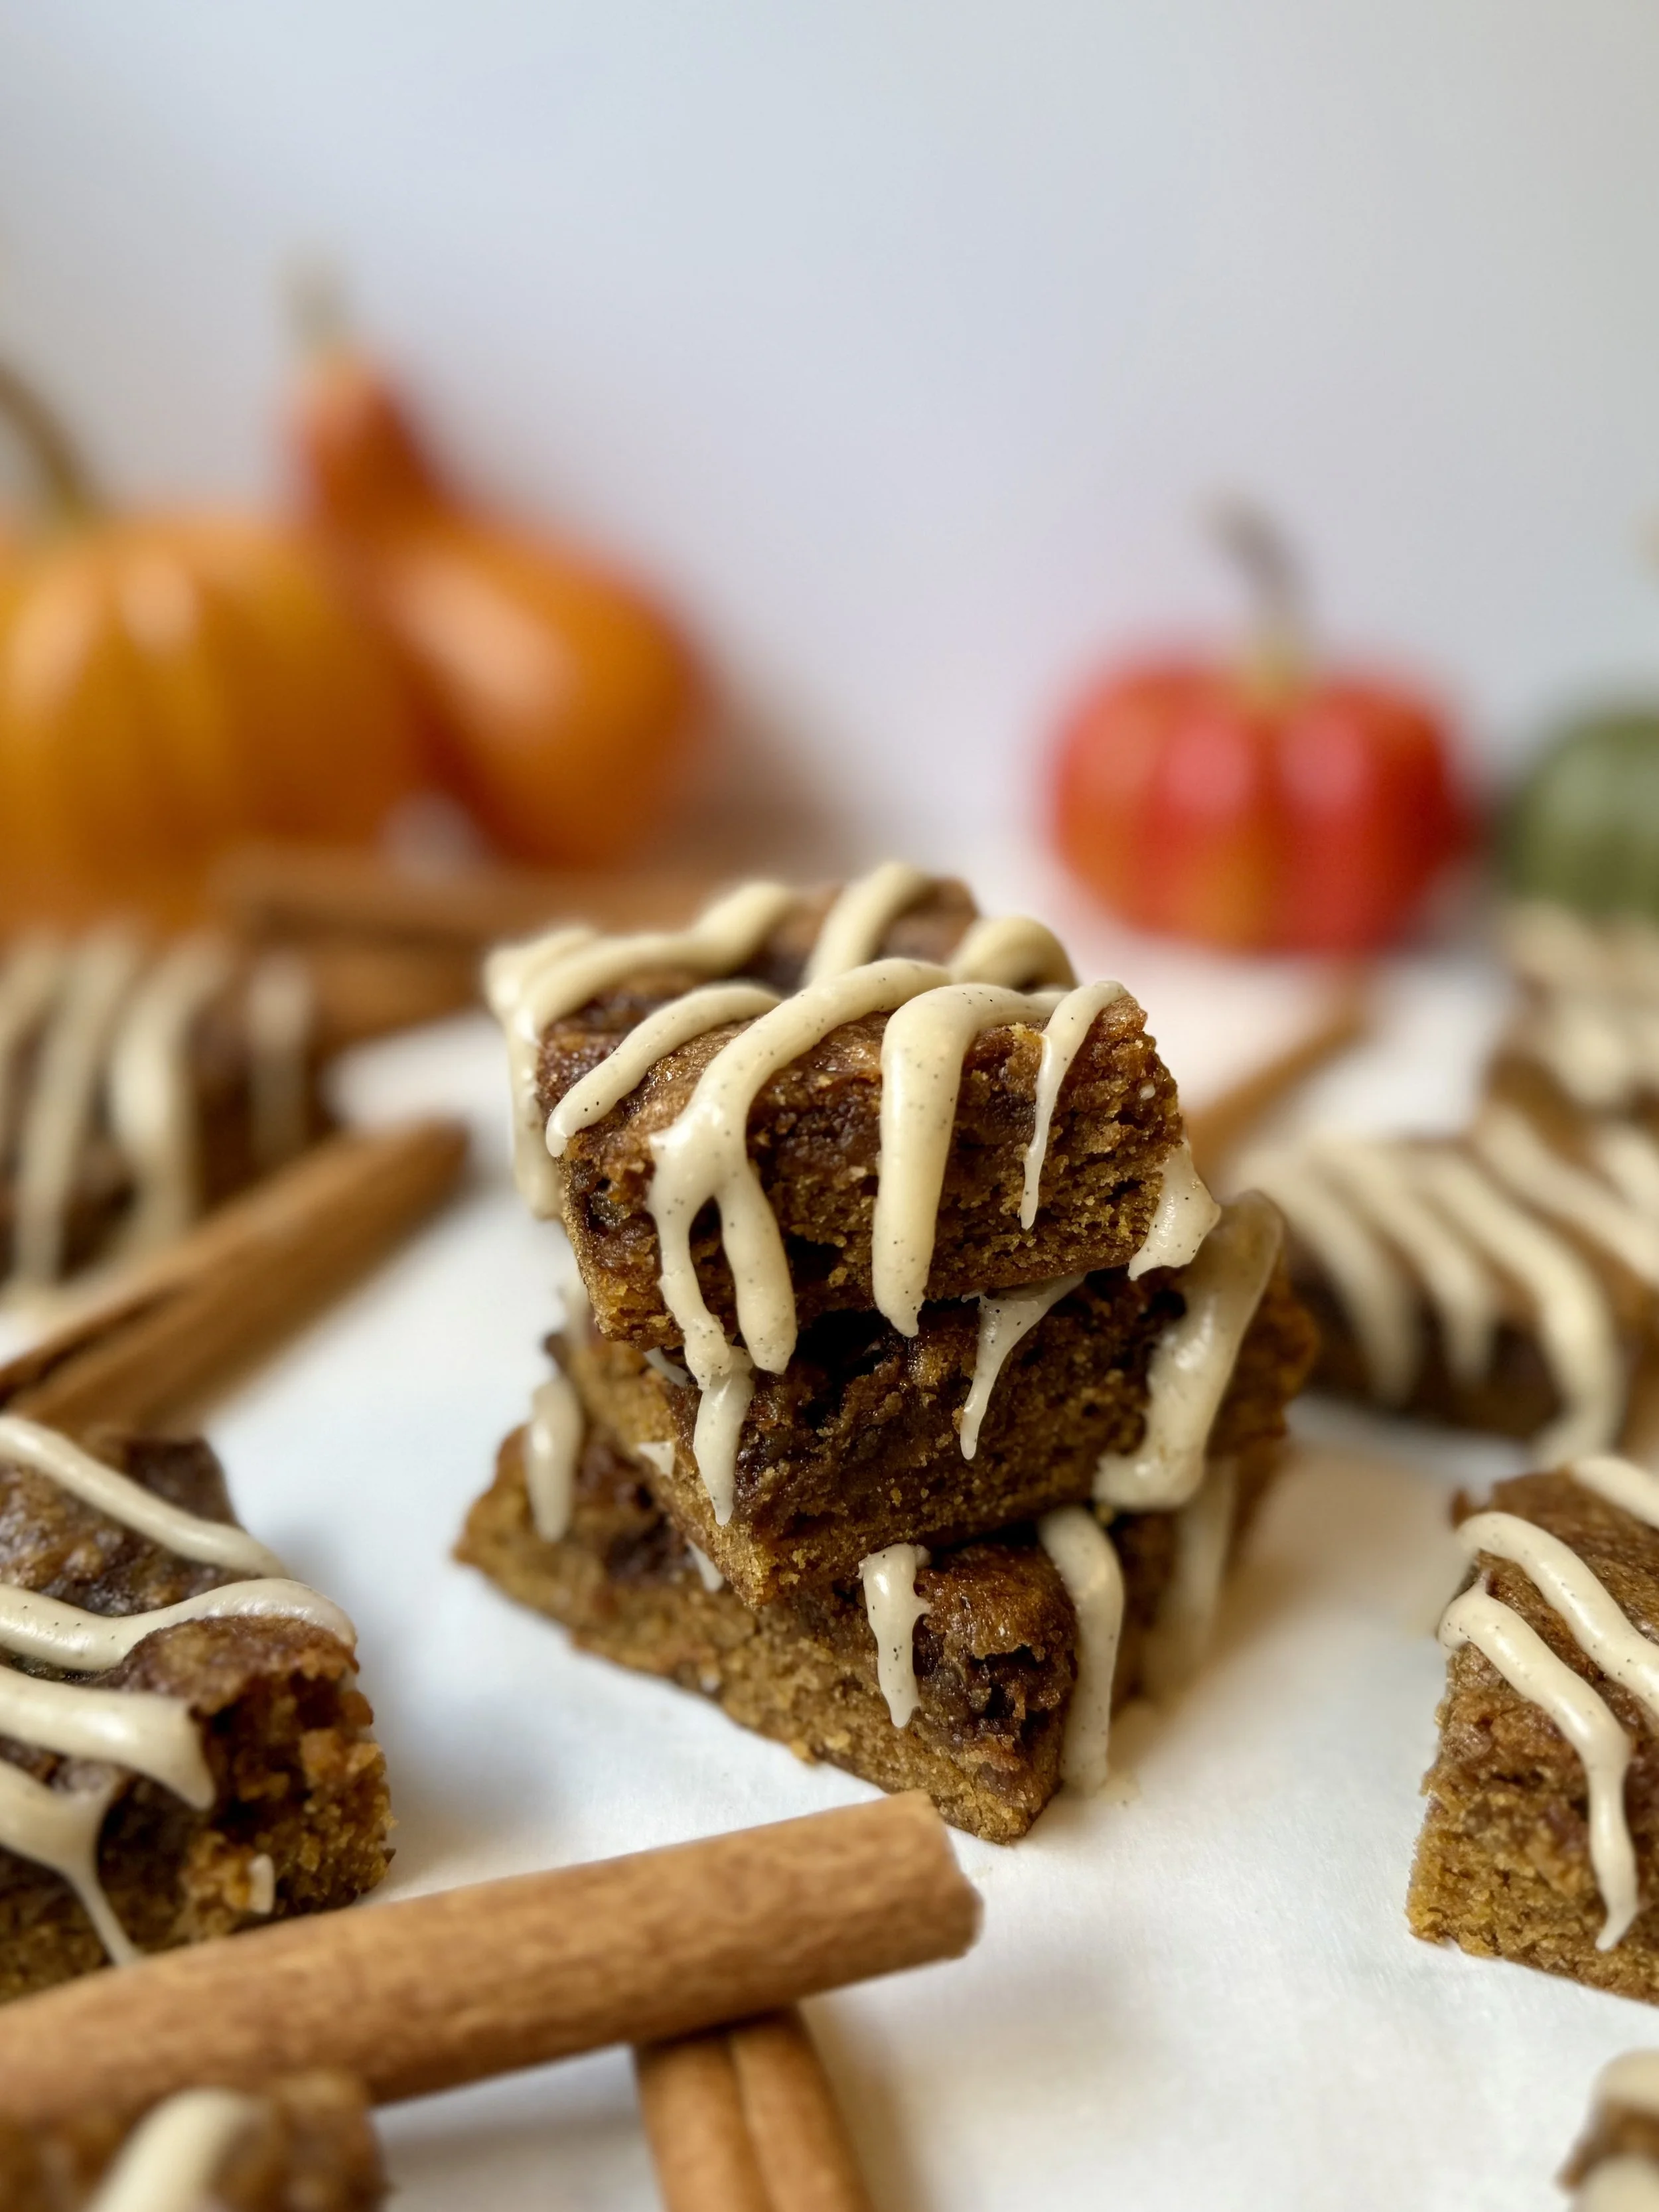
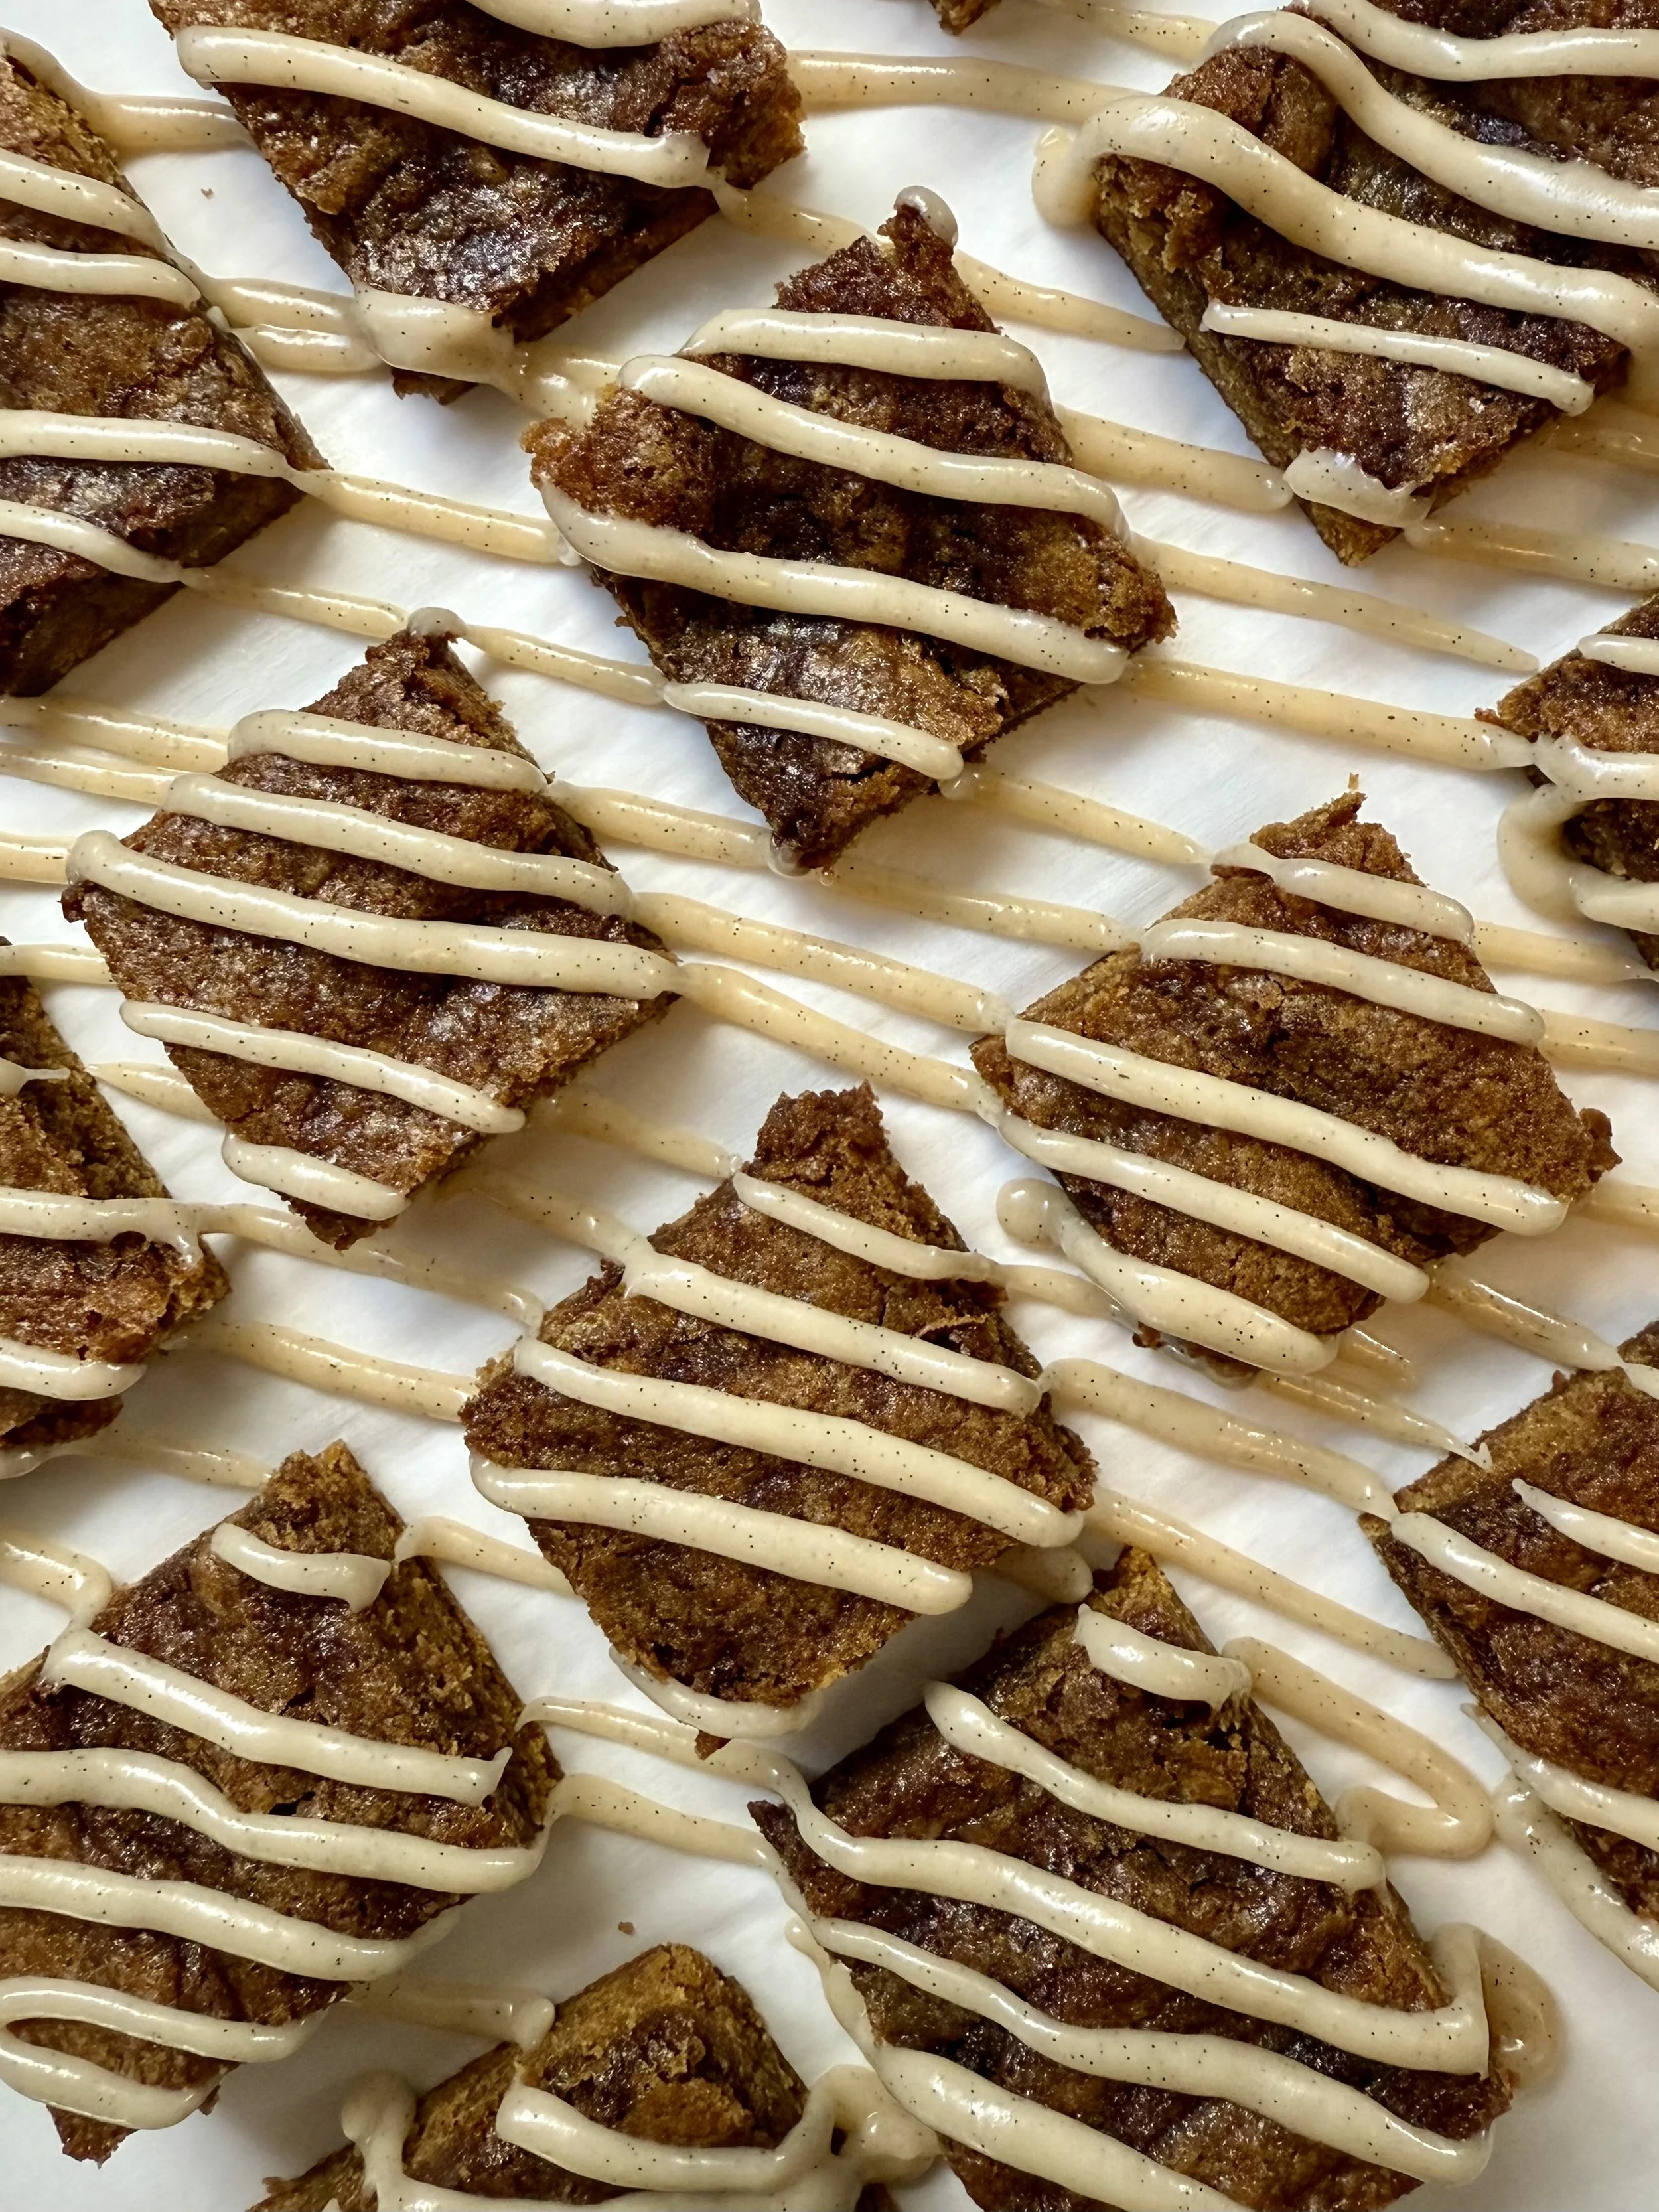
🍂 Pumpkin Spice Cinnamon Roll Blondies🍂
A cozy, chewy twist on two fall favorites
There's something magical about warm spices, pumpkin, and a swirl of cinnamon sugar in every bite. These Pumpkin Spice Cinnamon Roll Blondies are chewy like a classic blondie, swirled with a gooey cinnamon filling, and finished with a smooth cream cheese drizzle. Think of them as the love child between a pumpkin spice latte and a cinnamon roll, and yes, they taste like fall in bar form.
I don’t know about you, but the ‘ber months are my favorite time of the year. I do love summer, don’t get me wrong, but there’s something so nostalgic about watching spooky movies, sipping a pumpkin spice latte, and of course, a seasonal sweet treat. I love these blondies because they’re simple, quick to make, and have the perfect fall flavors packed into one dessert. Cinnamon rolls have also been one of my favorite treats, and these blondies have it all (I may be biased).
Ingredients & Their Purpose
Blondie Base:
½ cup unsalted butter (melted) – Adds richness and moisture. Melted butter gives a denser, chewier blondie.
1 cup brown sugar – Sweetens and adds caramel depth + chew thanks to molasses.
1 egg (room temperature) – Binds everything together and helps with structure.
¼ cup pumpkin purée – Adds subtle flavor, moisture, and fall flair. Not pumpkin pie filling!
1 tbsp vanilla extract – Balances the spices and deepens flavor.
1 cup all-purpose flour – The structure! Too much = cakey blondies, so measure carefully.
2 tsp pumpkin pie spice, ¼ tsp cloves, ¼ tsp nutmeg – Warm, cozy spices. You can adjust to taste or use a custom blend.
¼ tsp baking powder – A little lift to avoid gumminess.
½ tsp salt – Balances sweetness and enhances all flavors.
Cinnamon Swirl:
¼ cup butter (room temp or slightly softened) – Helps create that gooey, cinnamon-roll effect.
½ cup brown sugar – Sweetens and caramelizes during baking.
½ tbsp cinnamon, ½ tbsp pumpkin pie spice, ¼ tsp each: cloves, nutmeg, ginger – Bold spice mix for flavor and swirl aesthetics.
Cream Cheese Frosting:
1 oz cream cheese – Tangy and creamy to balance the sweet.
1 tbsp heavy cream – Thins and smooths.
1 tsp vanilla bean paste (or extract) – Vanilla adds depth; paste gives those pretty specks.
¾ cup powdered sugar – Sweetens and creates a smooth texture.
Pinch of salt – Cuts the sweetness just enough.
Ingredient Swaps
| Original | Possible Swap | Notes |
|---|---|---|
| Butter | Plant-based butter | For dairy-free version |
| Brown Sugar | Coconut sugar or maple sugar | Adds slight molasses/nutty flavor |
| Pumpkin Purée | Mashed sweet potato | Similar texture, different taste |
| Cream Cheese | Vegan cream cheese | Works well for dairy-free |
| Heavy Cream | Coconut cream or thick oat milk | Maintains creamy texture |
Instructions
1. Prep your oven and pan
Preheat oven to 350°F (175°C).
Line a 9x9-inch pan with parchment paper for easy removal.
💡 Tip: Use metal clips to keep parchment paper in place while spreading the batter.
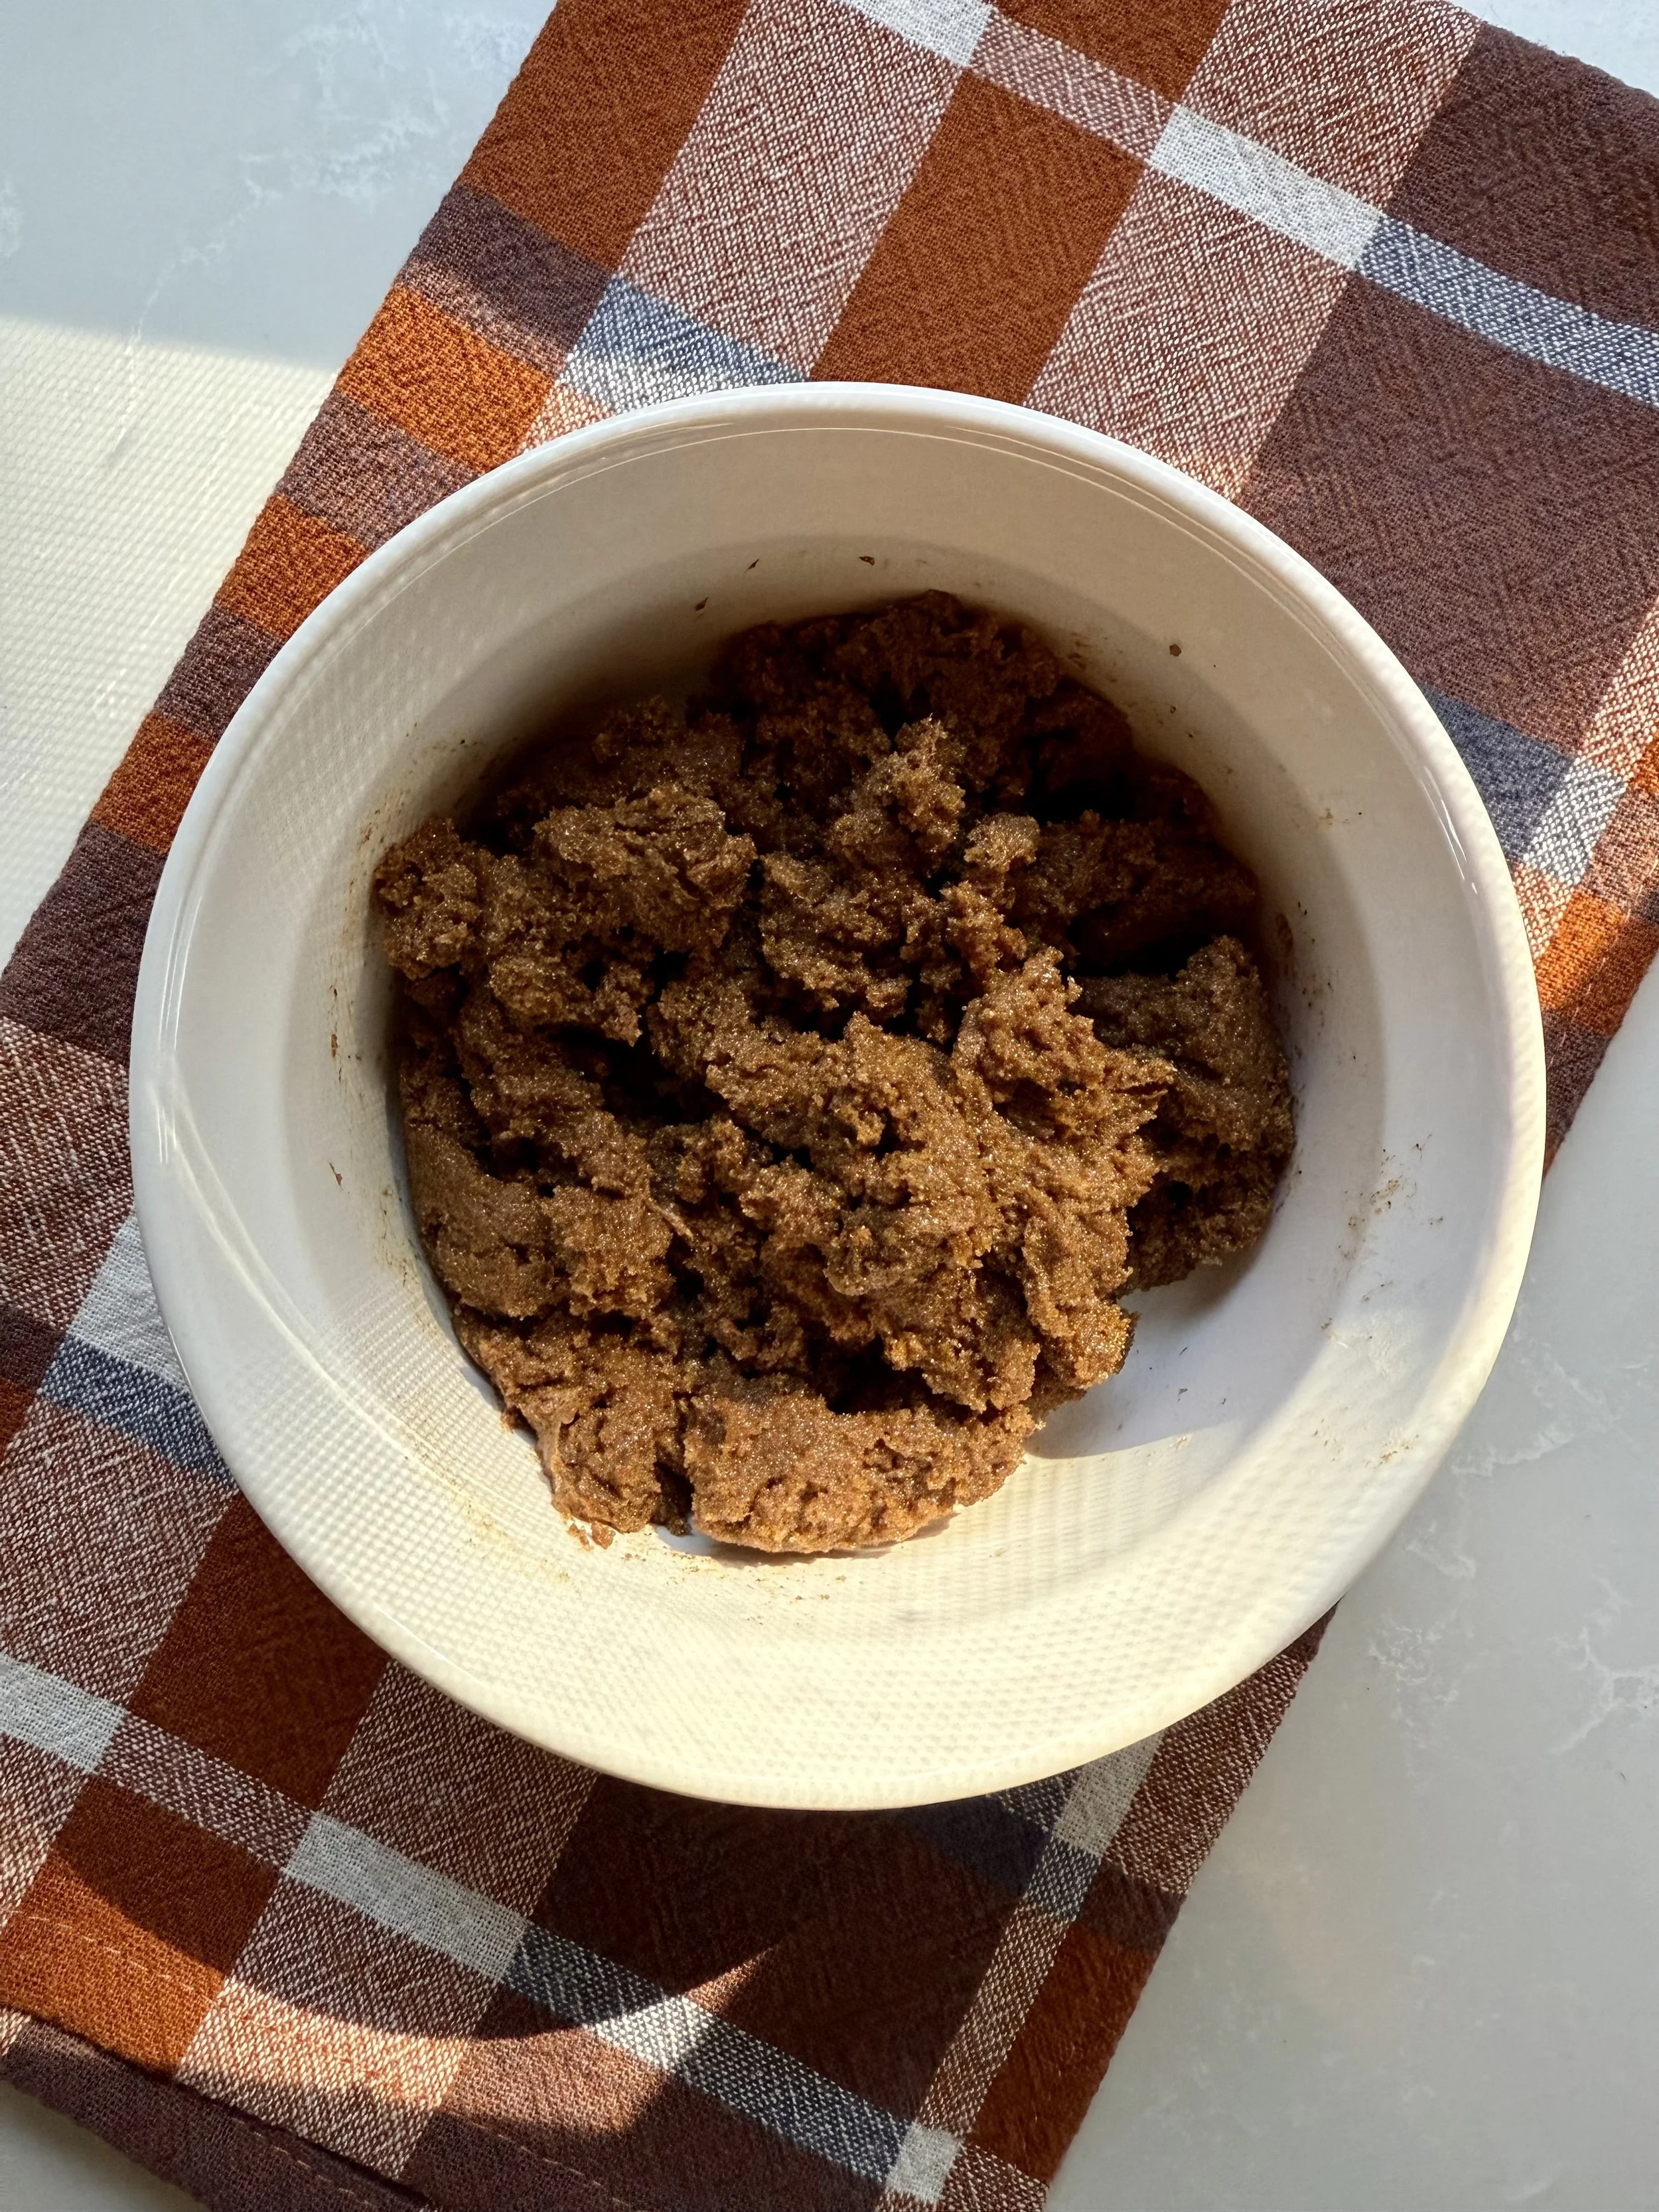
2. Make the Cinnamon Swirl Filling
In a bowl, mix:
¼ cup room-temp butter
½ cup brown sugar
½ tbsp cinnamon
½ tbsp pumpkin pie spice
¼ tsp each of cloves, nutmeg, and ginger
Use a fork to mash everything together until you get a thick, paste-like texture. Set aside.
💡 Optional shortcut: Slightly melt the butter to make it easier to combine if you're in a rush.
3. Make the Blondie Batter
In a large bowl:
Mix melted (but slightly cooled) butter with brown sugar until smooth.
Add the egg, pumpkin purée, and vanilla; stir until just combined.
Add flour, pumpkin pie spice, cloves, nutmeg, baking powder, and salt.
Fold gently until no dry streaks remain.
🚫 Avoid overmixing – it can make the blondies tough.
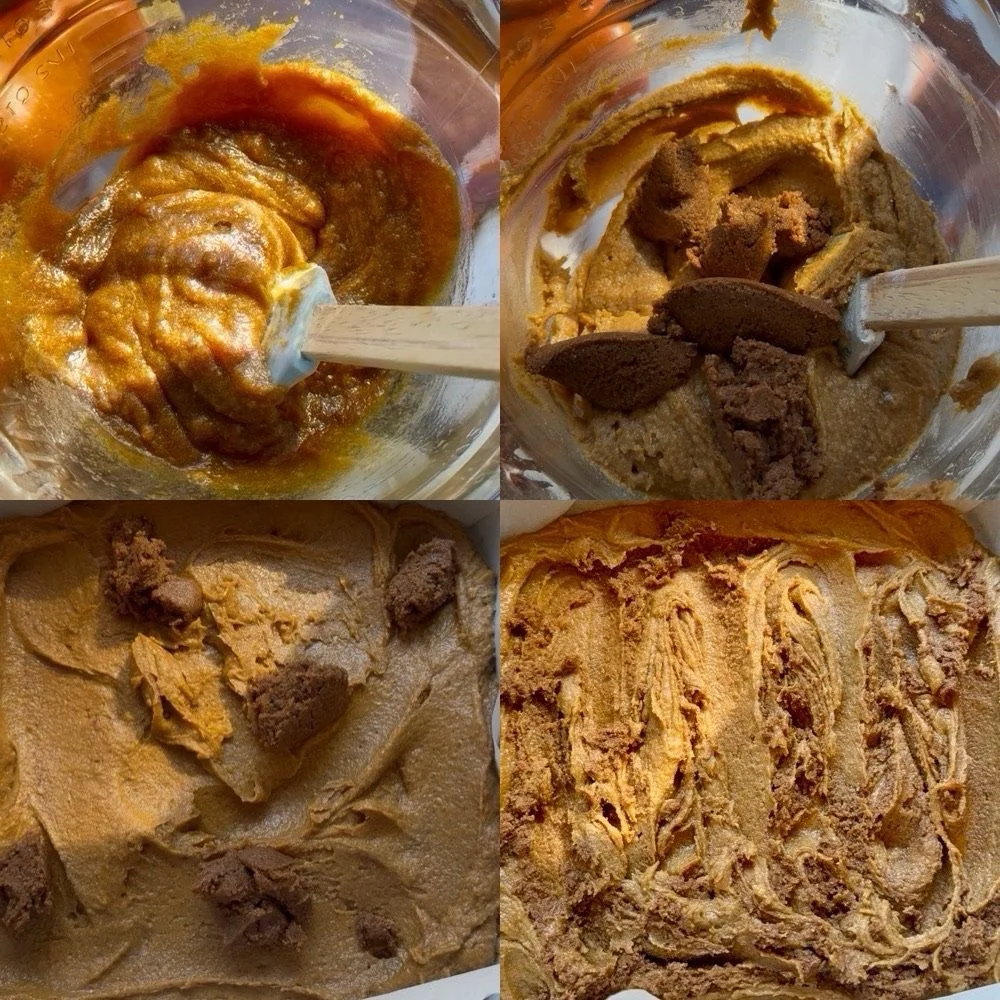
4. Swirl It Up
Add half of the cinnamon swirl mixture into the blondie batter.
Mix gently, leaving chunks visible for gooey pockets.
Pour into the prepared pan and smooth the top.
Dot the remaining swirl mixture on top and use a butter knife to swirl gently.
💡 Swirl tip: Don’t overdo it, less swirling = more flavor pockets.
5. Bake
Bake for 30–35 minutes, or until the edges are golden and the center is just set.
Let cool completely in the pan before frosting.
💡 Check doneness: A toothpick should come out with moist crumbs, not raw batter.
6. Make the Frosting
In a small saucepan over low heat, whisk together:
1 oz cream cheese
1 tbsp heavy cream
1 tsp vanilla bean paste
Once smooth, remove from heat and whisk in ¾ cup powdered sugar + pinch of salt until no lumps remain.
💡 Adjust consistency:
Too thick? Add more cream ½ tbsp at a time.
Too runny? Let it sit for a few minutes to thicken.
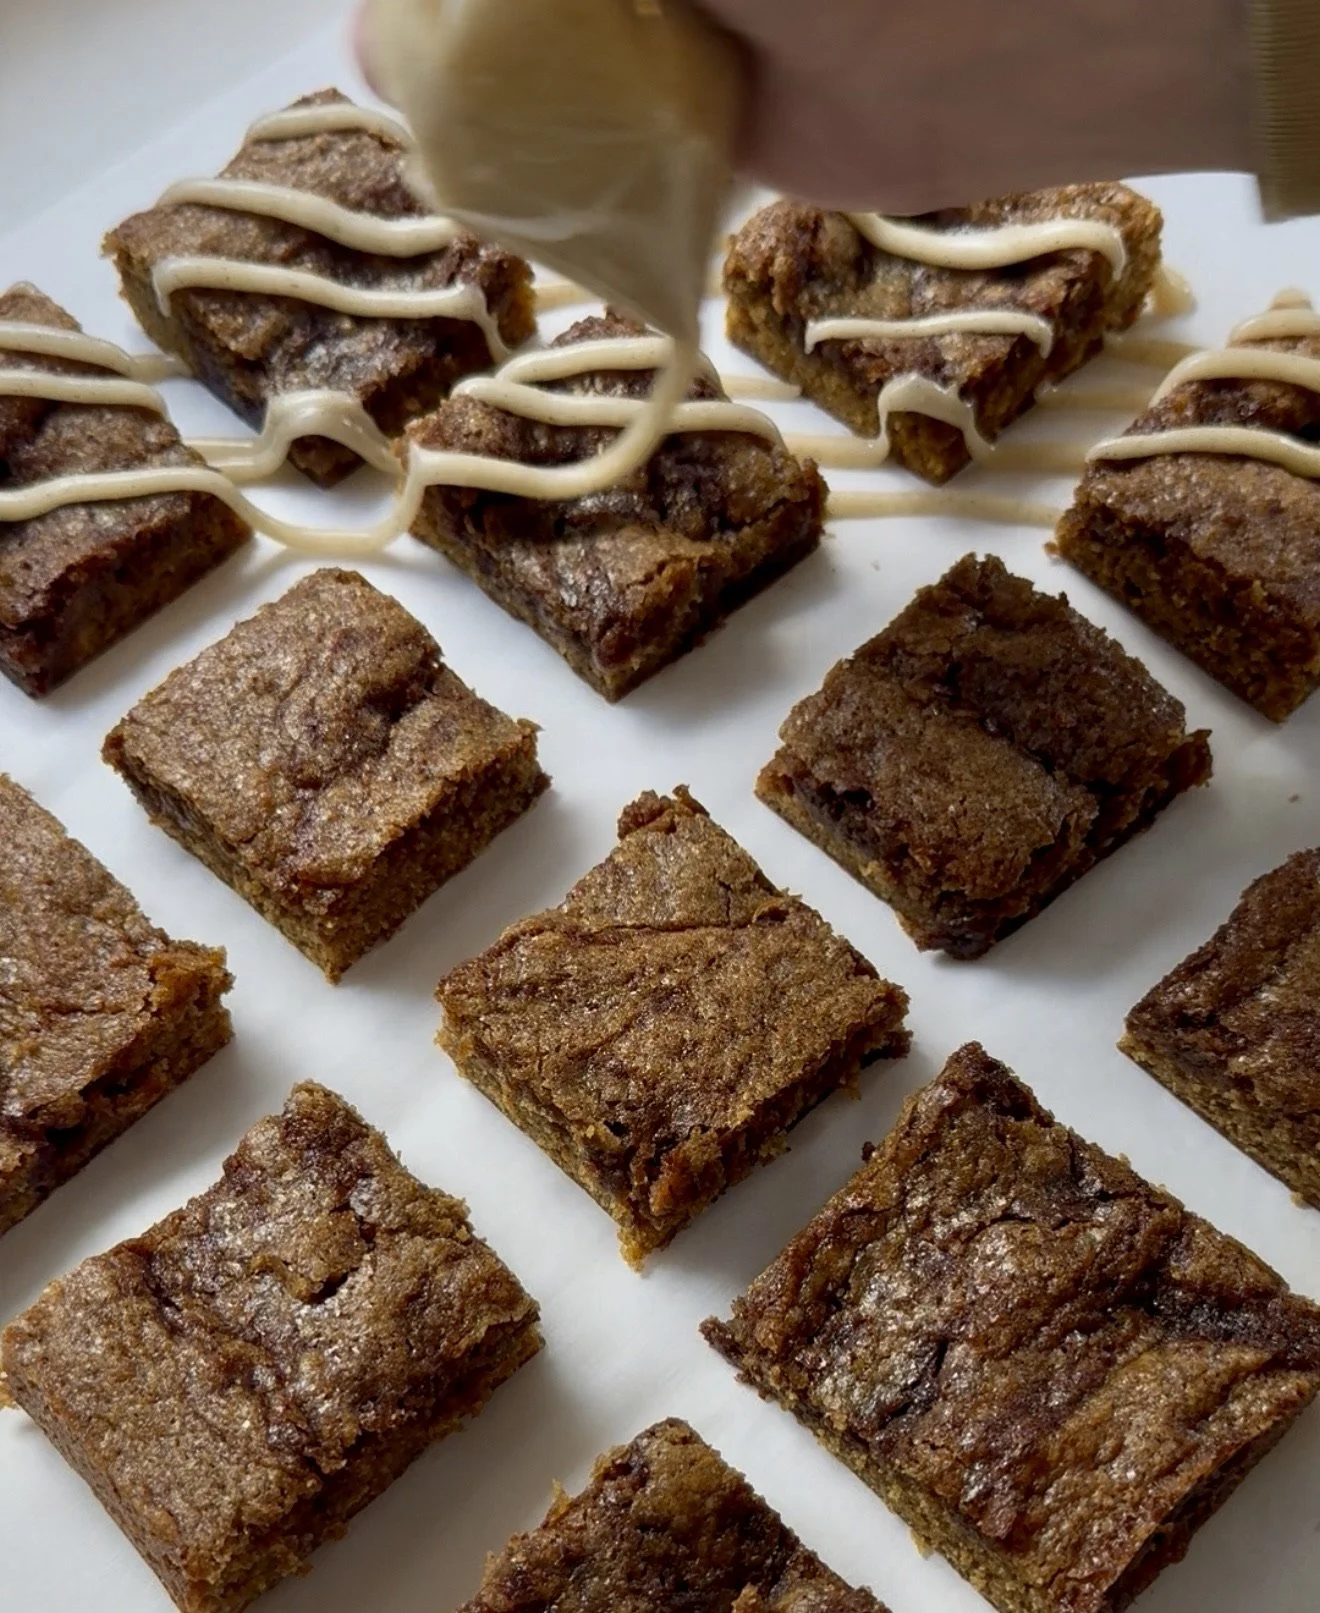
7. Drizzle & Serve
Once the blondies are cool, use a spoon, whisk, or ziploc/piping bag to drizzle the frosting over the top. Slice, serve, and enjoy the cinnamon-roll-pumpkin-blondie bliss.
Pro Tips
Room temperature egg: Helps it incorporate smoothly. Cold eggs can cause separation.
Use a scale if possible: Especially for flour, over-measuring = dry blondies.
Chill before slicing: For cleaner cuts and gooier centers.
Double it: This recipe doubles beautifully in a 9x13 pan. Add 5–10 minutes to bake time.
Storage
Room temp: Store in an airtight container for up to 2 days.
Fridge: Up to 5 days (bring to room temp before serving).
Freeze: Freeze slices (unfrosted) for up to 2 months. Thaw and drizzle fresh frosting when ready.
I hope you enjoy this recipe has much as I do. Let me know how you like them in the comments below!

Pumpkin Spice Cinnamon Roll Blondies
Cozy and full of fall flavor, these Pumpkin Spice Cinnamon Roll Blondies combine the soft, chewy texture of a blondie with warm spices and a sweet cinnamon swirl. Perfect for autumn gatherings or a cozy night in!
Ingredients
- ½ cup unsalted butter (melted)
- 1 cup brown sugar
- 1 egg (room temperature)
- 1/4 cup pumpkin puree
- 1 tbsp vanilla extract
- 1 cup of all-purpose flour
- 2 tsp pumpkin pie seasoning
- 1/4 tsp cloves
- 1/4 tsp nutmeg
- ¼ tsp of baking powder
- ½ tsp salt
- 1/4 butter, room temperature
- 1/2 cup brown sugar
- 1/2 tbsp cinnamon
- 1/2 tbsp pumpkin pie seasoning
- 1/4 tsp cloves
- 1/4 tsp nutmeg
- 1/4 tsp ginger
- 1 ounce cream cheese
- 1 tbsp heavy cream
- 1 teaspoon vanilla bean paste (can substitute for extract)
- 3/4 cup powdered sugar
- Pinch of salt
Instructions
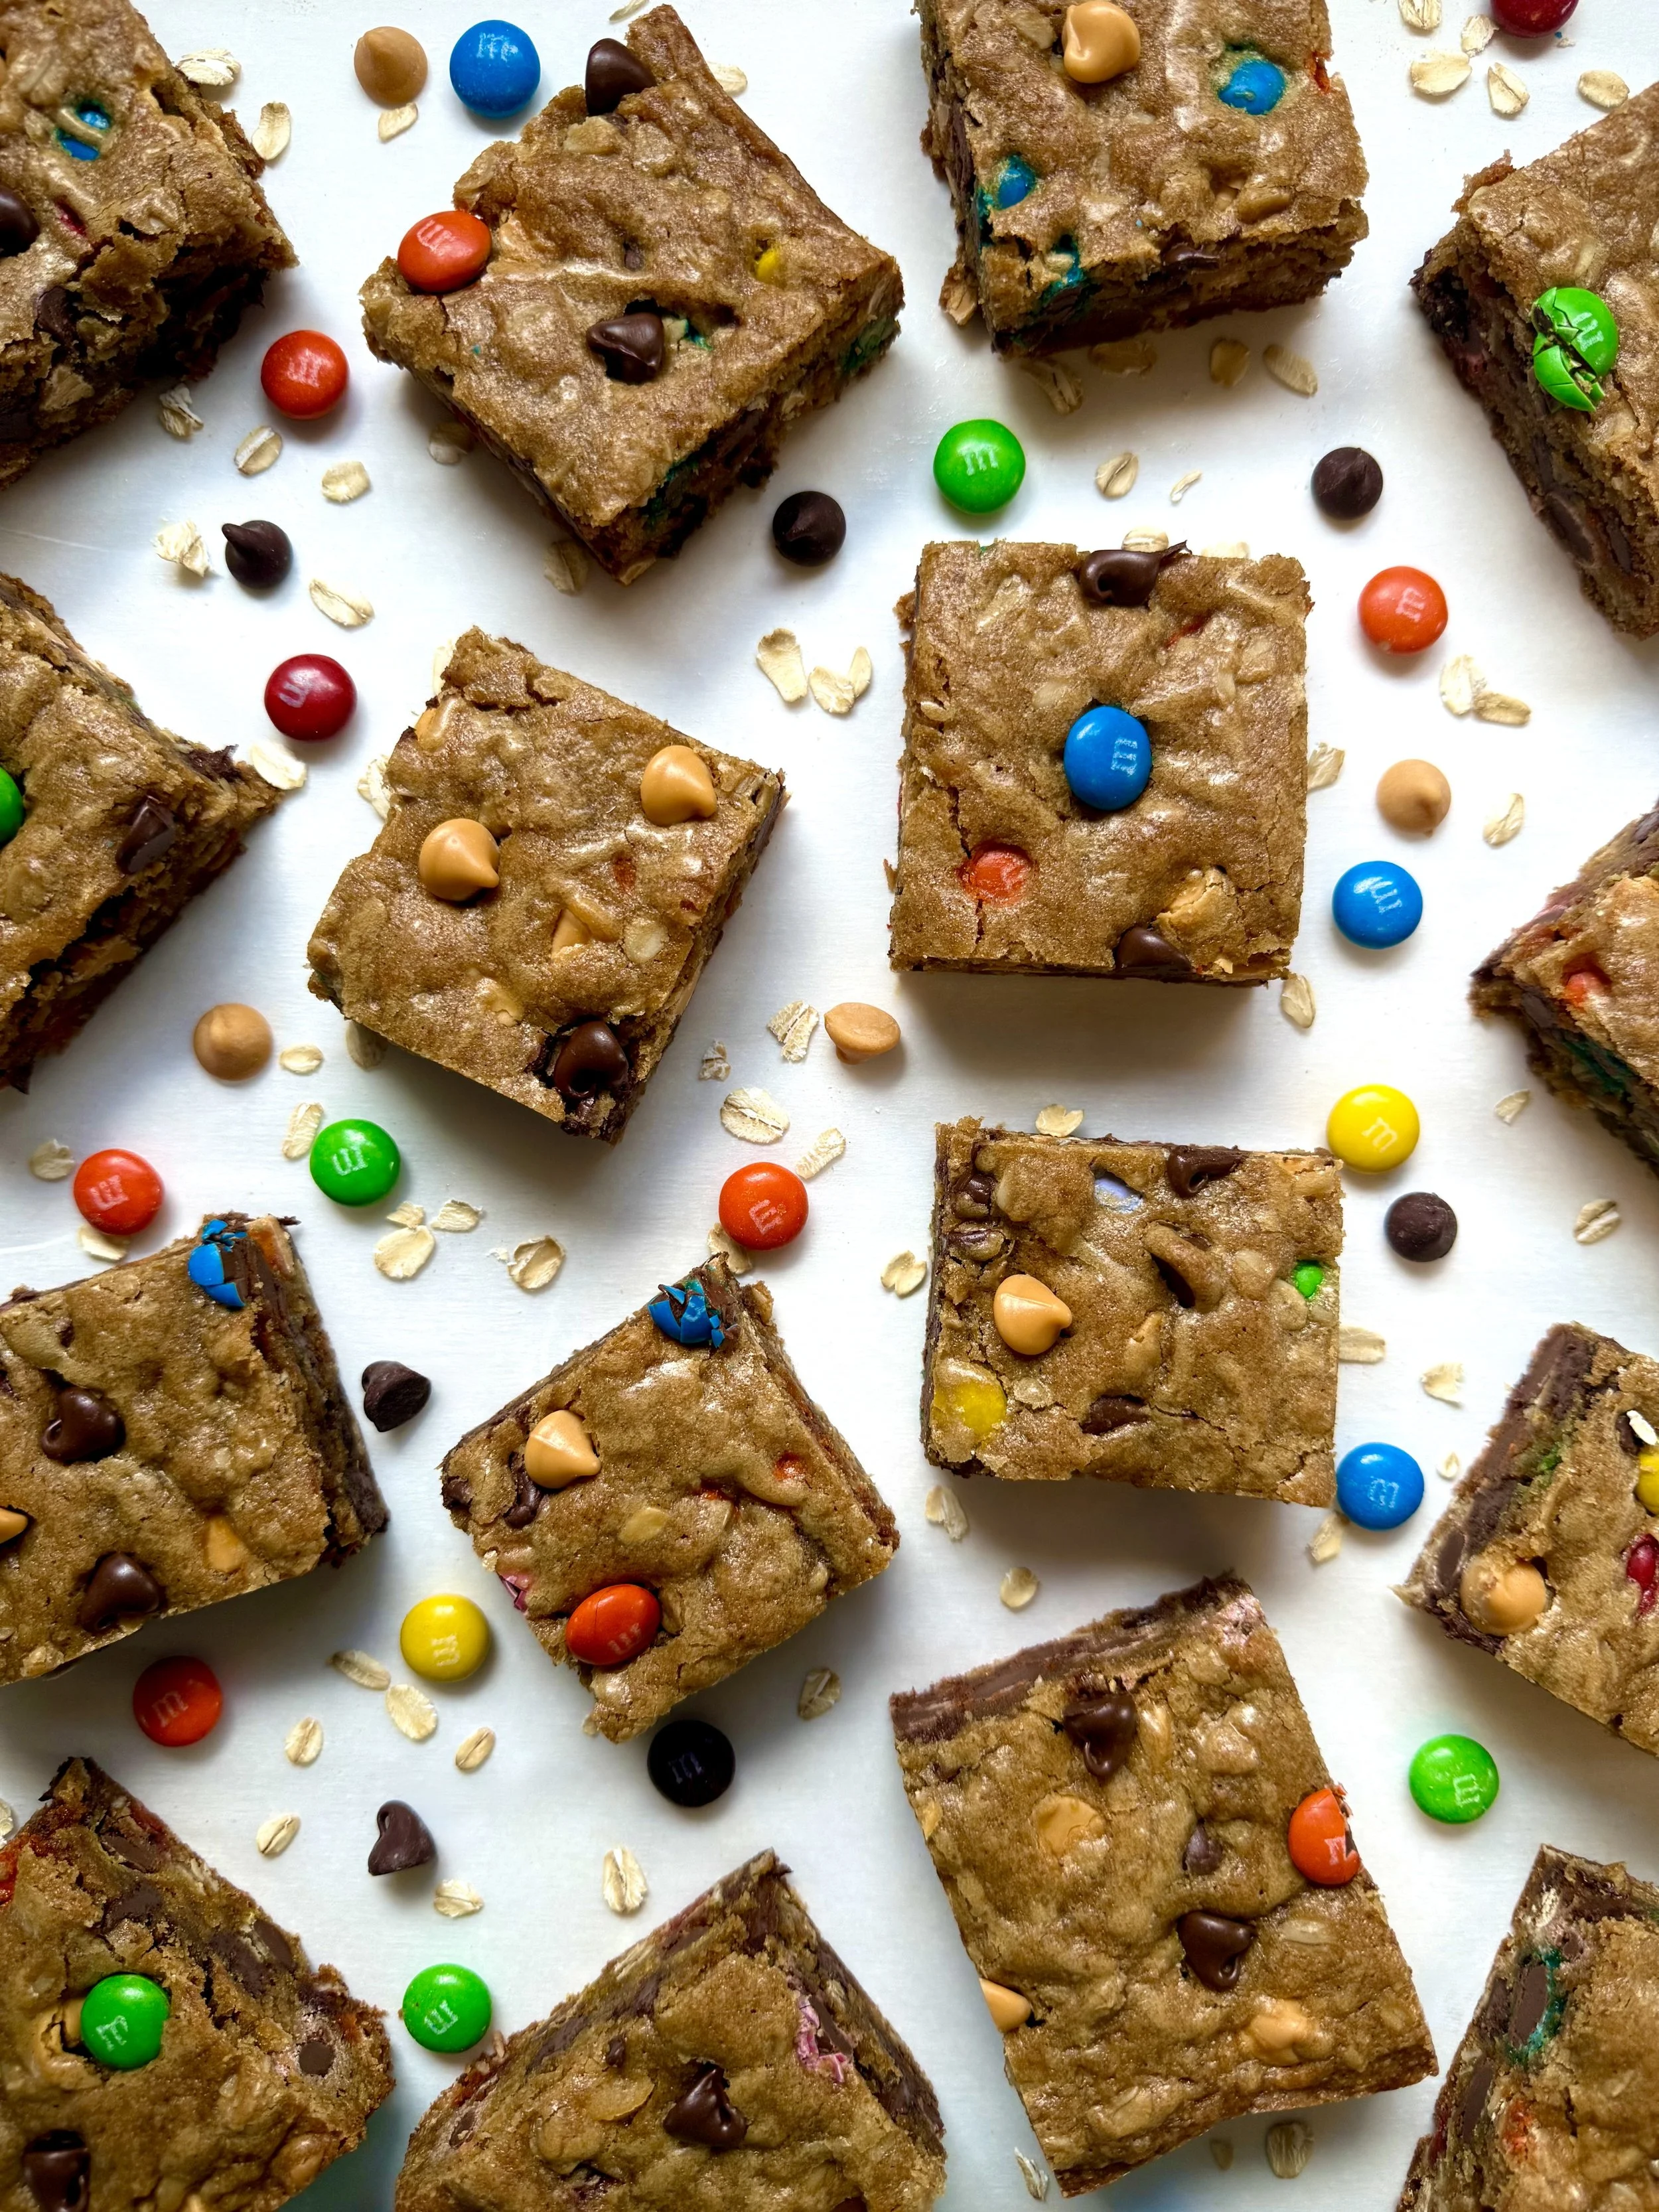
Monster Cookie Bars

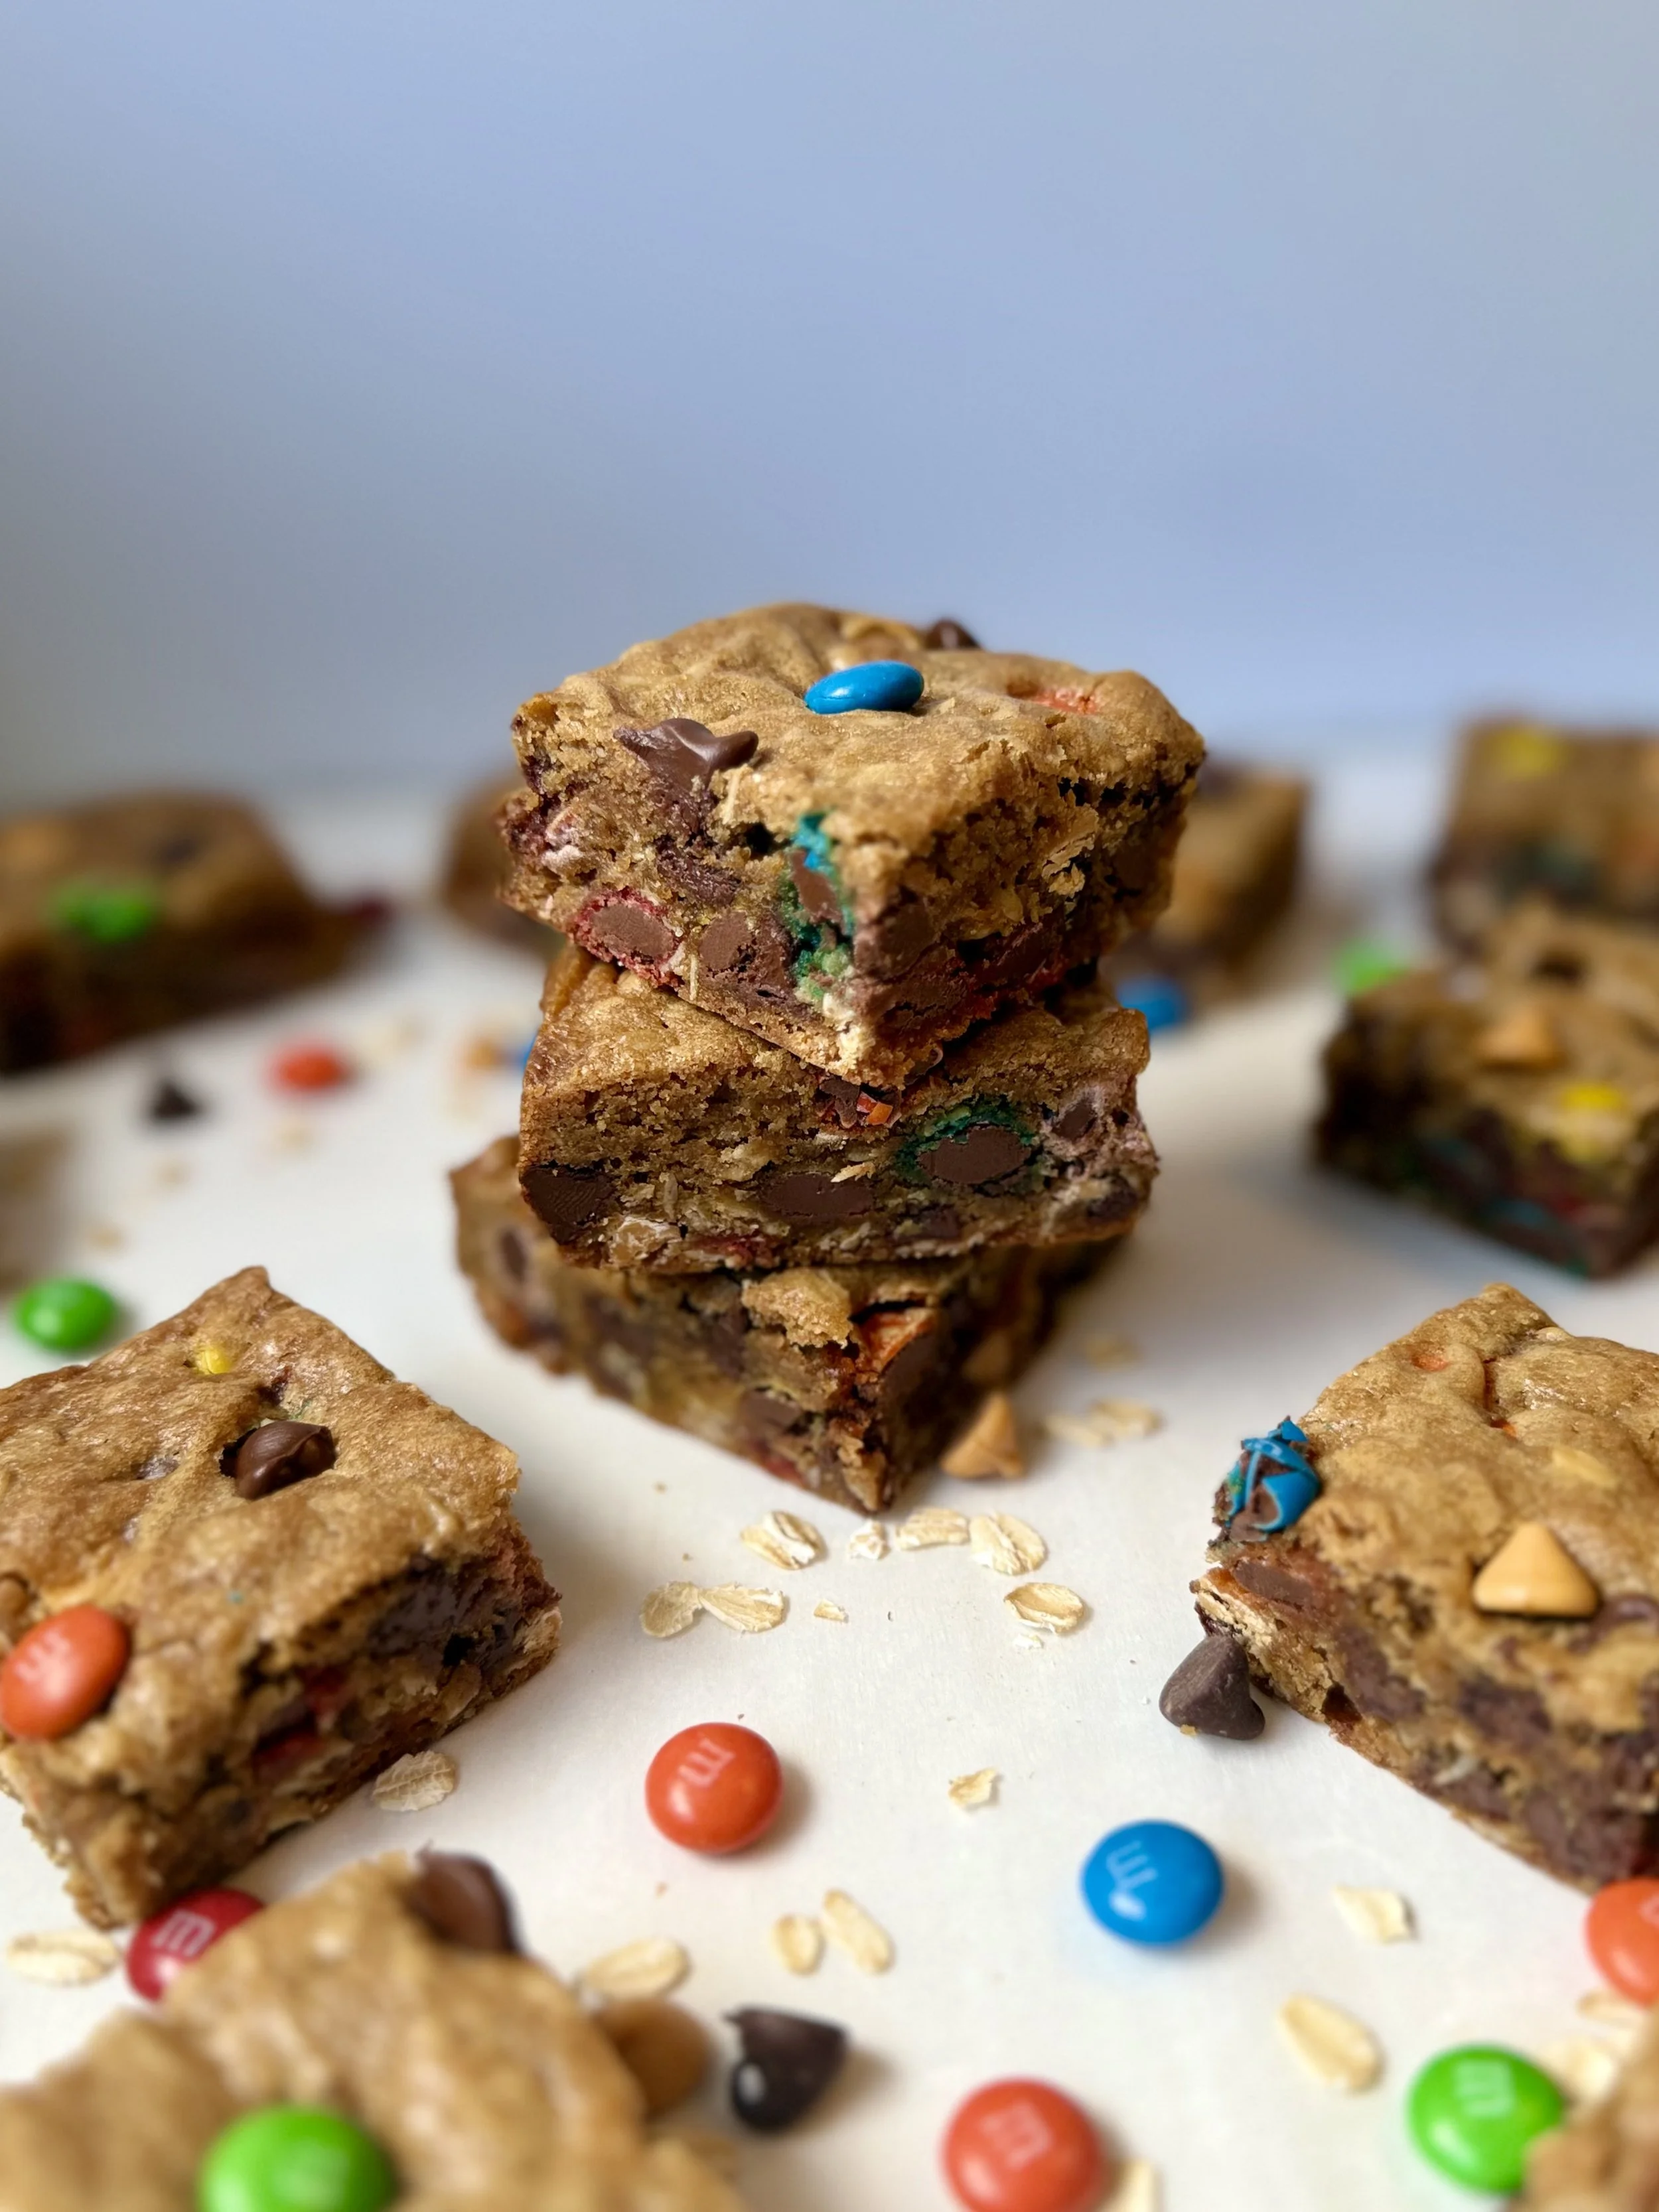
If you're looking for the ultimate feel-good, crowd-pleasing dessert, these Monster Cookie Bars check all the boxes. They’re chewy, chocolatey, a little salty-sweet, and packed with colorful fun thanks to the M&Ms.
Why I love monster cookies: they include all of my favorite sweet tooth cravings. Chocolate, peanut butter, butterscotch, and oatmeal and require no need to chill dough or scoop individual cookies. I created these bars to capture that peanut-buttery goodness in a no-fuss, one-pan version. They’re easier to make than cookies, but just as addictive.
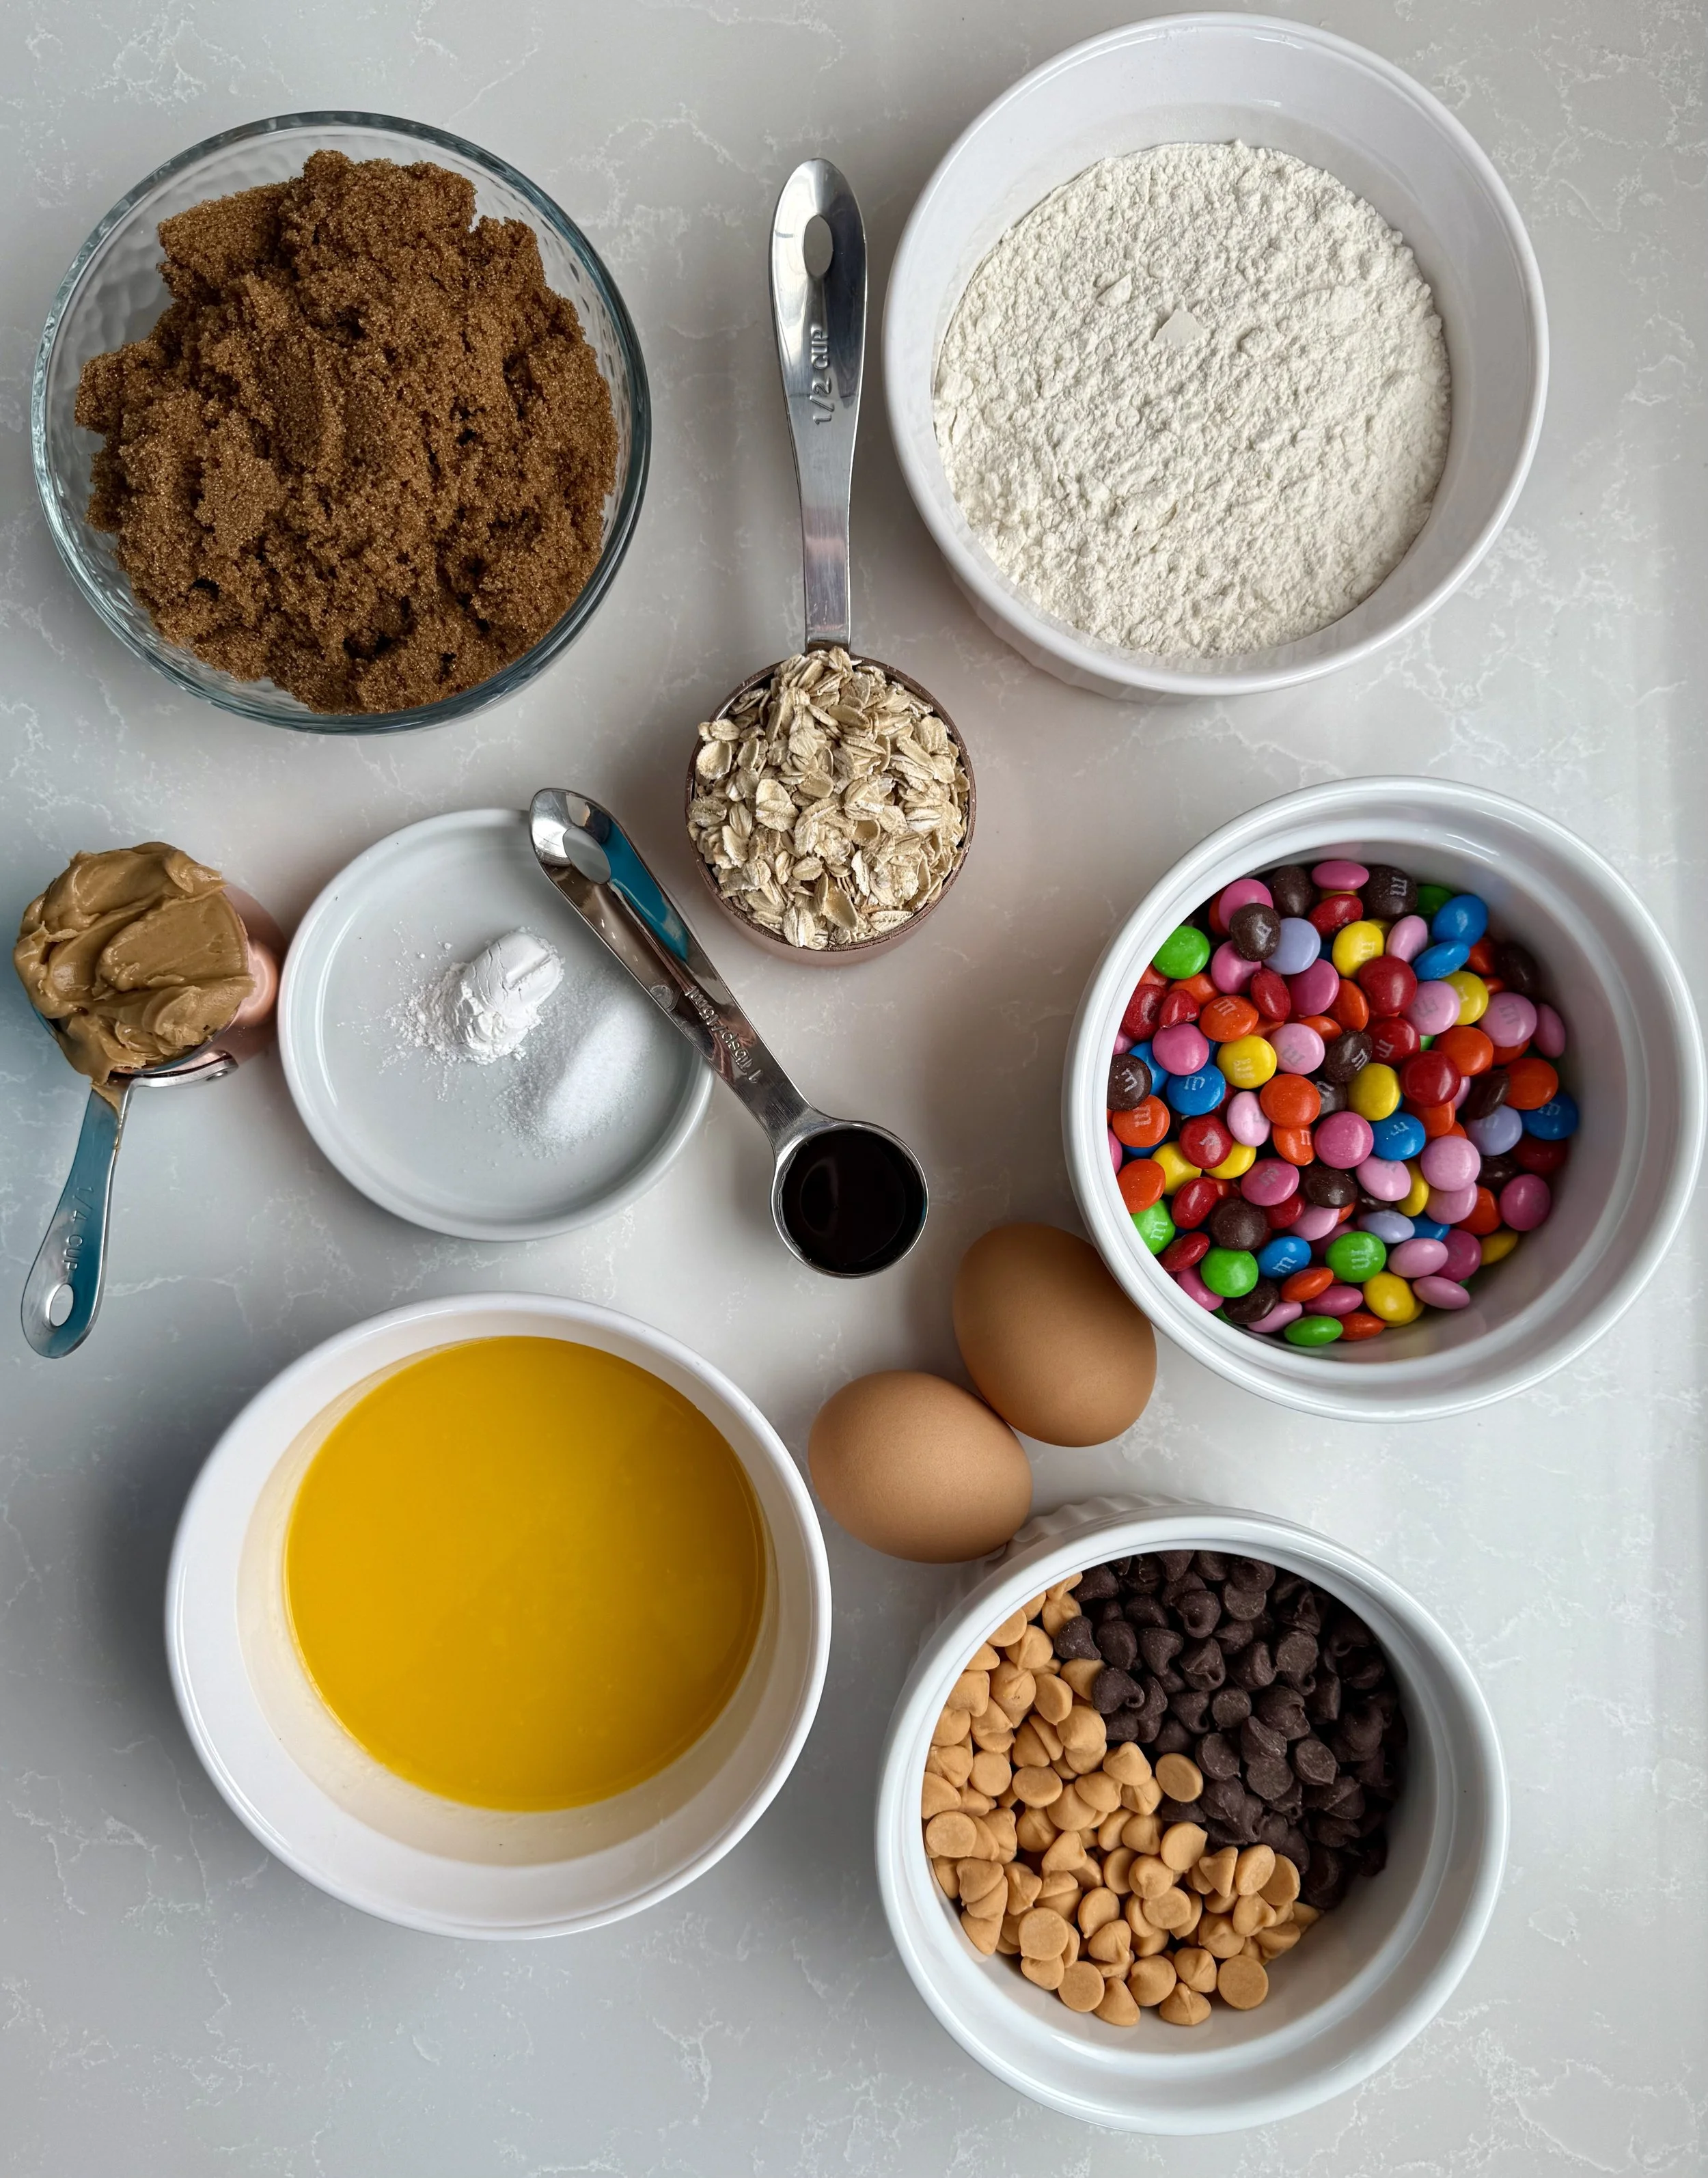
Ingredients
| Ingredient | Amount | Purpose |
|---|---|---|
| Salted Butter (melted) | ½ cup | Adds richness and moisture. Melting helps give a fudgy, chewy texture. Salted butter also balances sweetness. |
| Brown Sugar | 1 cup | Adds sweetness and moisture. Brown sugar helps the bars stay soft and adds a caramel-like flavor. |
| Eggs (room temp) | 2 large | Provide structure and help the bars hold together. Room temp eggs mix more evenly. |
| Vanilla Extract | 1 tbsp | Enhances flavor and adds warmth. |
| Creamy Peanut Butter | ¼ cup | Adds flavor, richness, and a soft texture. Also complements the chocolate beautifully. |
| All-Purpose Flour | 1 cup | The main structure of the bars. |
| Baking Powder | ½ tsp | Helps the bars rise slightly and not turn out too dense. |
| Salt | ½ tsp | Enhances all the other flavors and balances sweetness. |
| Rolled Oats | ½ cup | Add chewiness and a bit of texture. Classic in monster cookies. |
| M&Ms | ¾ cup (+ extra for top) | Add color, crunch, and pockets of chocolate. Topping makes them look extra fun. |
| Chocolate Chips | ½ cup | Melty chocolate throughout for gooey bites. |
| Butterscotch Chips | ½ cup | Sweet and buttery flavor that complements the peanut butter and oats. |
Step-by-Step Instructions
Step 1: Prep Your Pan & Oven
Preheat your oven to 350°F (175°C).
Line a 9x9-inch baking pan with parchment paper, leaving some overhang so you can easily lift the bars out later. This prevents sticking and helps with easy cleanup.
Tip: Lightly grease the pan before adding parchment so it stays in place.
Step 2: Melt the Butter
Melt ½ cup of salted butter in a microwave-safe bowl or on the stovetop.
Let it cool slightly (about 5 minutes). You want it warm, not hot, so it doesn’t cook the eggs.
Why melt it? Melted butter creates a denser, chewier texture, perfect for bars.
Step 3: Mix Wet Ingredients
In a large mixing bowl, add the melted butter and 1 cup brown sugar. Stir with a spatula or wooden spoon until combined and smooth.
Add 2 room-temperature eggs and 1 tablespoon of vanilla extract. Mix until just combined.
Add ¼ cup creamy peanut butter and stir until fully incorporated.
Tip: Use room temp eggs to help everything mix evenly and prevent curdling.
Step 4: Add Dry Ingredients
Sprinkle in 1 cup of flour, ½ tsp baking powder, and ½ tsp salt.
Gently fold the mixture together using a spatula. Mix just until you no longer see dry flour; don’t overmix.
Why fold? Overmixing can make the bars tough. Gentle folding keeps them soft and chewy.
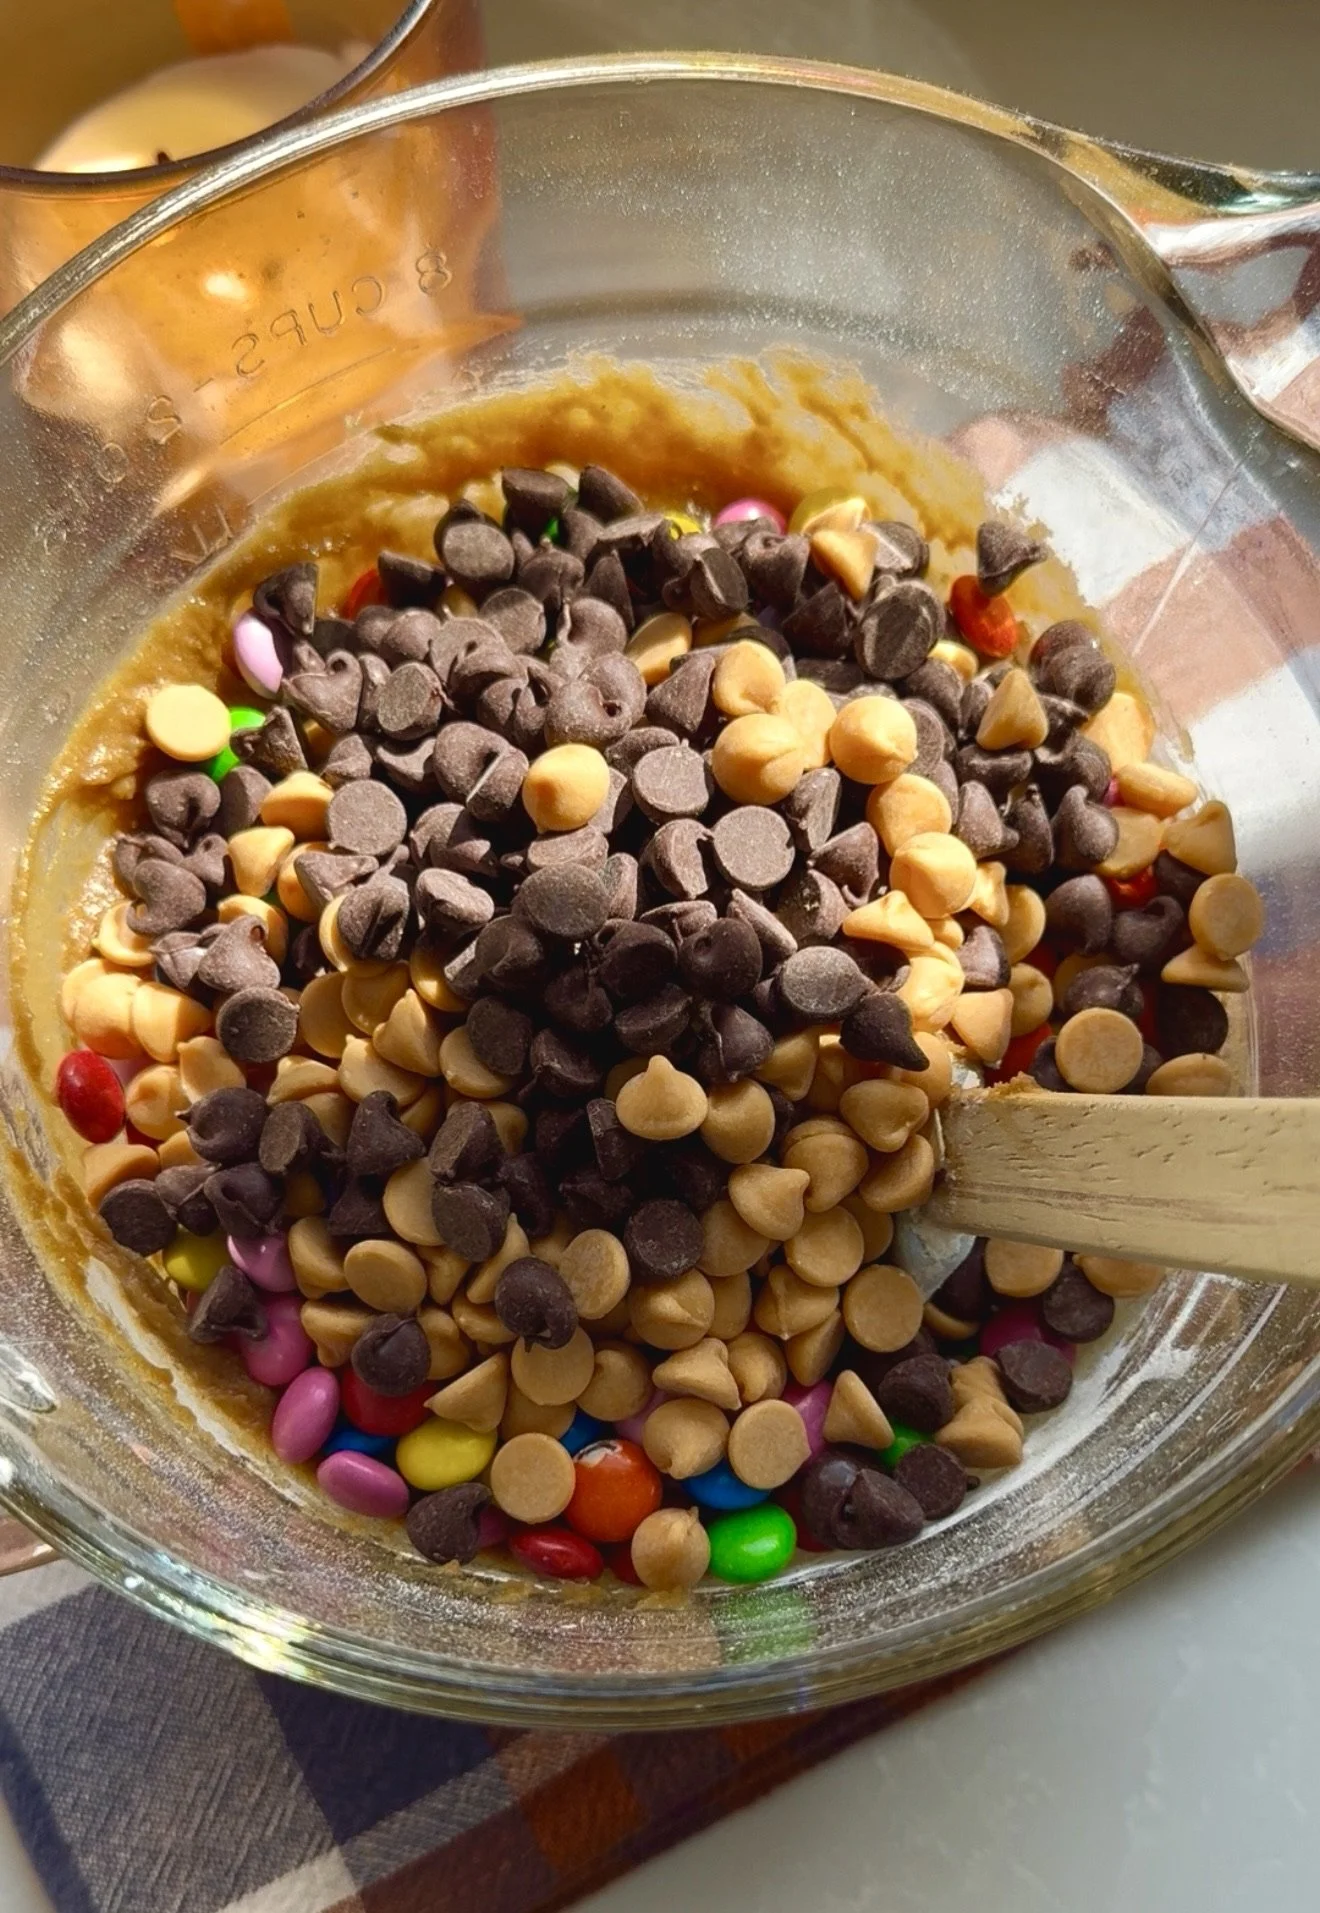
Step 5: Add the Fun Stuff!
Fold in:
¾ cup M&Ms
½ cup chocolate chips
½ cup butterscotch chips
½ cup rolled oats
Tip: Save a few M&Ms to press on top of the dough just before baking. It makes the bars look bakery-style!
Step 6: Bake
Pour the batter into your prepared pan and spread it evenly.
Bake for 30–35 minutes, or until:
The edges are golden brown.
The center looks set but slightly soft (it will firm up as it cools).
Don't overbake! Slightly underbaking = gooey, soft bars. A toothpick inserted in the center should come out with a few moist crumbs (not raw batter).
Step 7: Cool & Slice
When the bars are out of the oven. Carefully press a few extra M&Ms, chocolate chips, and butterscotch chips on top for decoration.
Let the bars cool completely in the pan. This helps them set and makes slicing easier.
Once cool, lift them out using the parchment paper and slice into squares.
Ingredient Swaps & Variations
| Ingredient | Swap Option | Notes |
|---|---|---|
| Salted Butter | Unsalted Butter + ¼ tsp extra salt | Balances flavor if using unsalted butter. |
| Peanut Butter | Almond Butter or Sunflower Seed Butter | Great for peanut allergies. Use creamy, not natural oils-on-top types. |
| M&Ms | Mini M&Ms, Reese’s Pieces, or Chopped Candy | For fun variations or seasonal themes. Reese’s adds more peanut butter flavor. |
| Butterscotch Chips | White Chocolate Chips or Extra Chocolate Chips | Use based on your taste preferences or what you have on hand. |
| Rolled Oats | Quick Oats | Softer texture. Avoid steel-cut oats—they’re too coarse for baking. |
| Brown Sugar | Coconut Sugar | Less sweet with a deeper, molasses-like flavor. Good for a natural option. |
Extra Tips for Success
Don’t skip the parchment paper – it makes removing the bars clean and easy.
Use room-temperature ingredients – eggs and peanut butter mix better when not cold.
Customize mix-ins – Add chopped nuts, shredded coconut, or a swirl of Nutella!
Double the recipe – for a crowd, double the ingredients and use a 9x13 pan. Add 5–10 minutes to the bake time.
How to Store Monster Cookie Bars
Room Temperature
Storage Time: Up to 5 days
How: Place the cooled bars in an airtight container, separating layers with parchment or wax paper to prevent sticking.
Tip: Store in a cool, dry place away from direct sunlight or heat sources.
Best for keeping the bars soft and chewy without any extra steps.
Refrigerator
Storage Time: Up to 1 week
How: Use an airtight container or tightly wrap the entire slab in plastic wrap.
Tip: Let bars sit at room temp for 10–15 minutes before serving to soften slightly, or warm briefly in the microwave.
Chilling helps extend shelf life but may make them firmer in texture.
Freezer
Storage Time: Up to 3 months
How: Wrap individual bars in plastic wrap or foil, then place them in a freezer-safe bag or container. Remove as much air as possible to prevent freezer burn.
To Thaw: Let thaw at room temperature for about 30 minutes, or microwave for 10–15 seconds.
Perfect for meal prep, bake sales, or keeping a sweet stash on hand!
Reheating Tips (Optional)
Microwave for 5–10 seconds for a warm, gooey texture (especially good if they’ve been in the fridge).
If frozen, unwrap and microwave for 15–20 seconds or let thaw naturally.
If you make and love these Monster Cookie Bars or add any fun mix-in’s let me know in the comments below.

Monster Cookie Barss
These chewy monster cookie bars are packed with chocolate chips, butterscotch chips, M&Ms, creamy peanut butter, and hearty oats for the ultimate sweet and salty treat. Perfect for parties, lunchboxes, or anytime cravings hit!
Ingredients
- 1/2 cup salted butter (melted)
- 1 cup brown sugar
- 2 eggs (room temperature)
- 1 tbsp vanilla extract
- 1/4 cup creamy peanut butter
- 1 cup of all-purpose flour
- 1/2 tsp of baking powder
- 1/2 tsp salt
- 1/2 cups rolled oats
- 3/4 cup M&M's (plus a few more to top)
- 1/2 cup chocolate chips
- 1/2 cup butterscotch chips
Instructions

Pumpkin Chocolate Chip Blondies
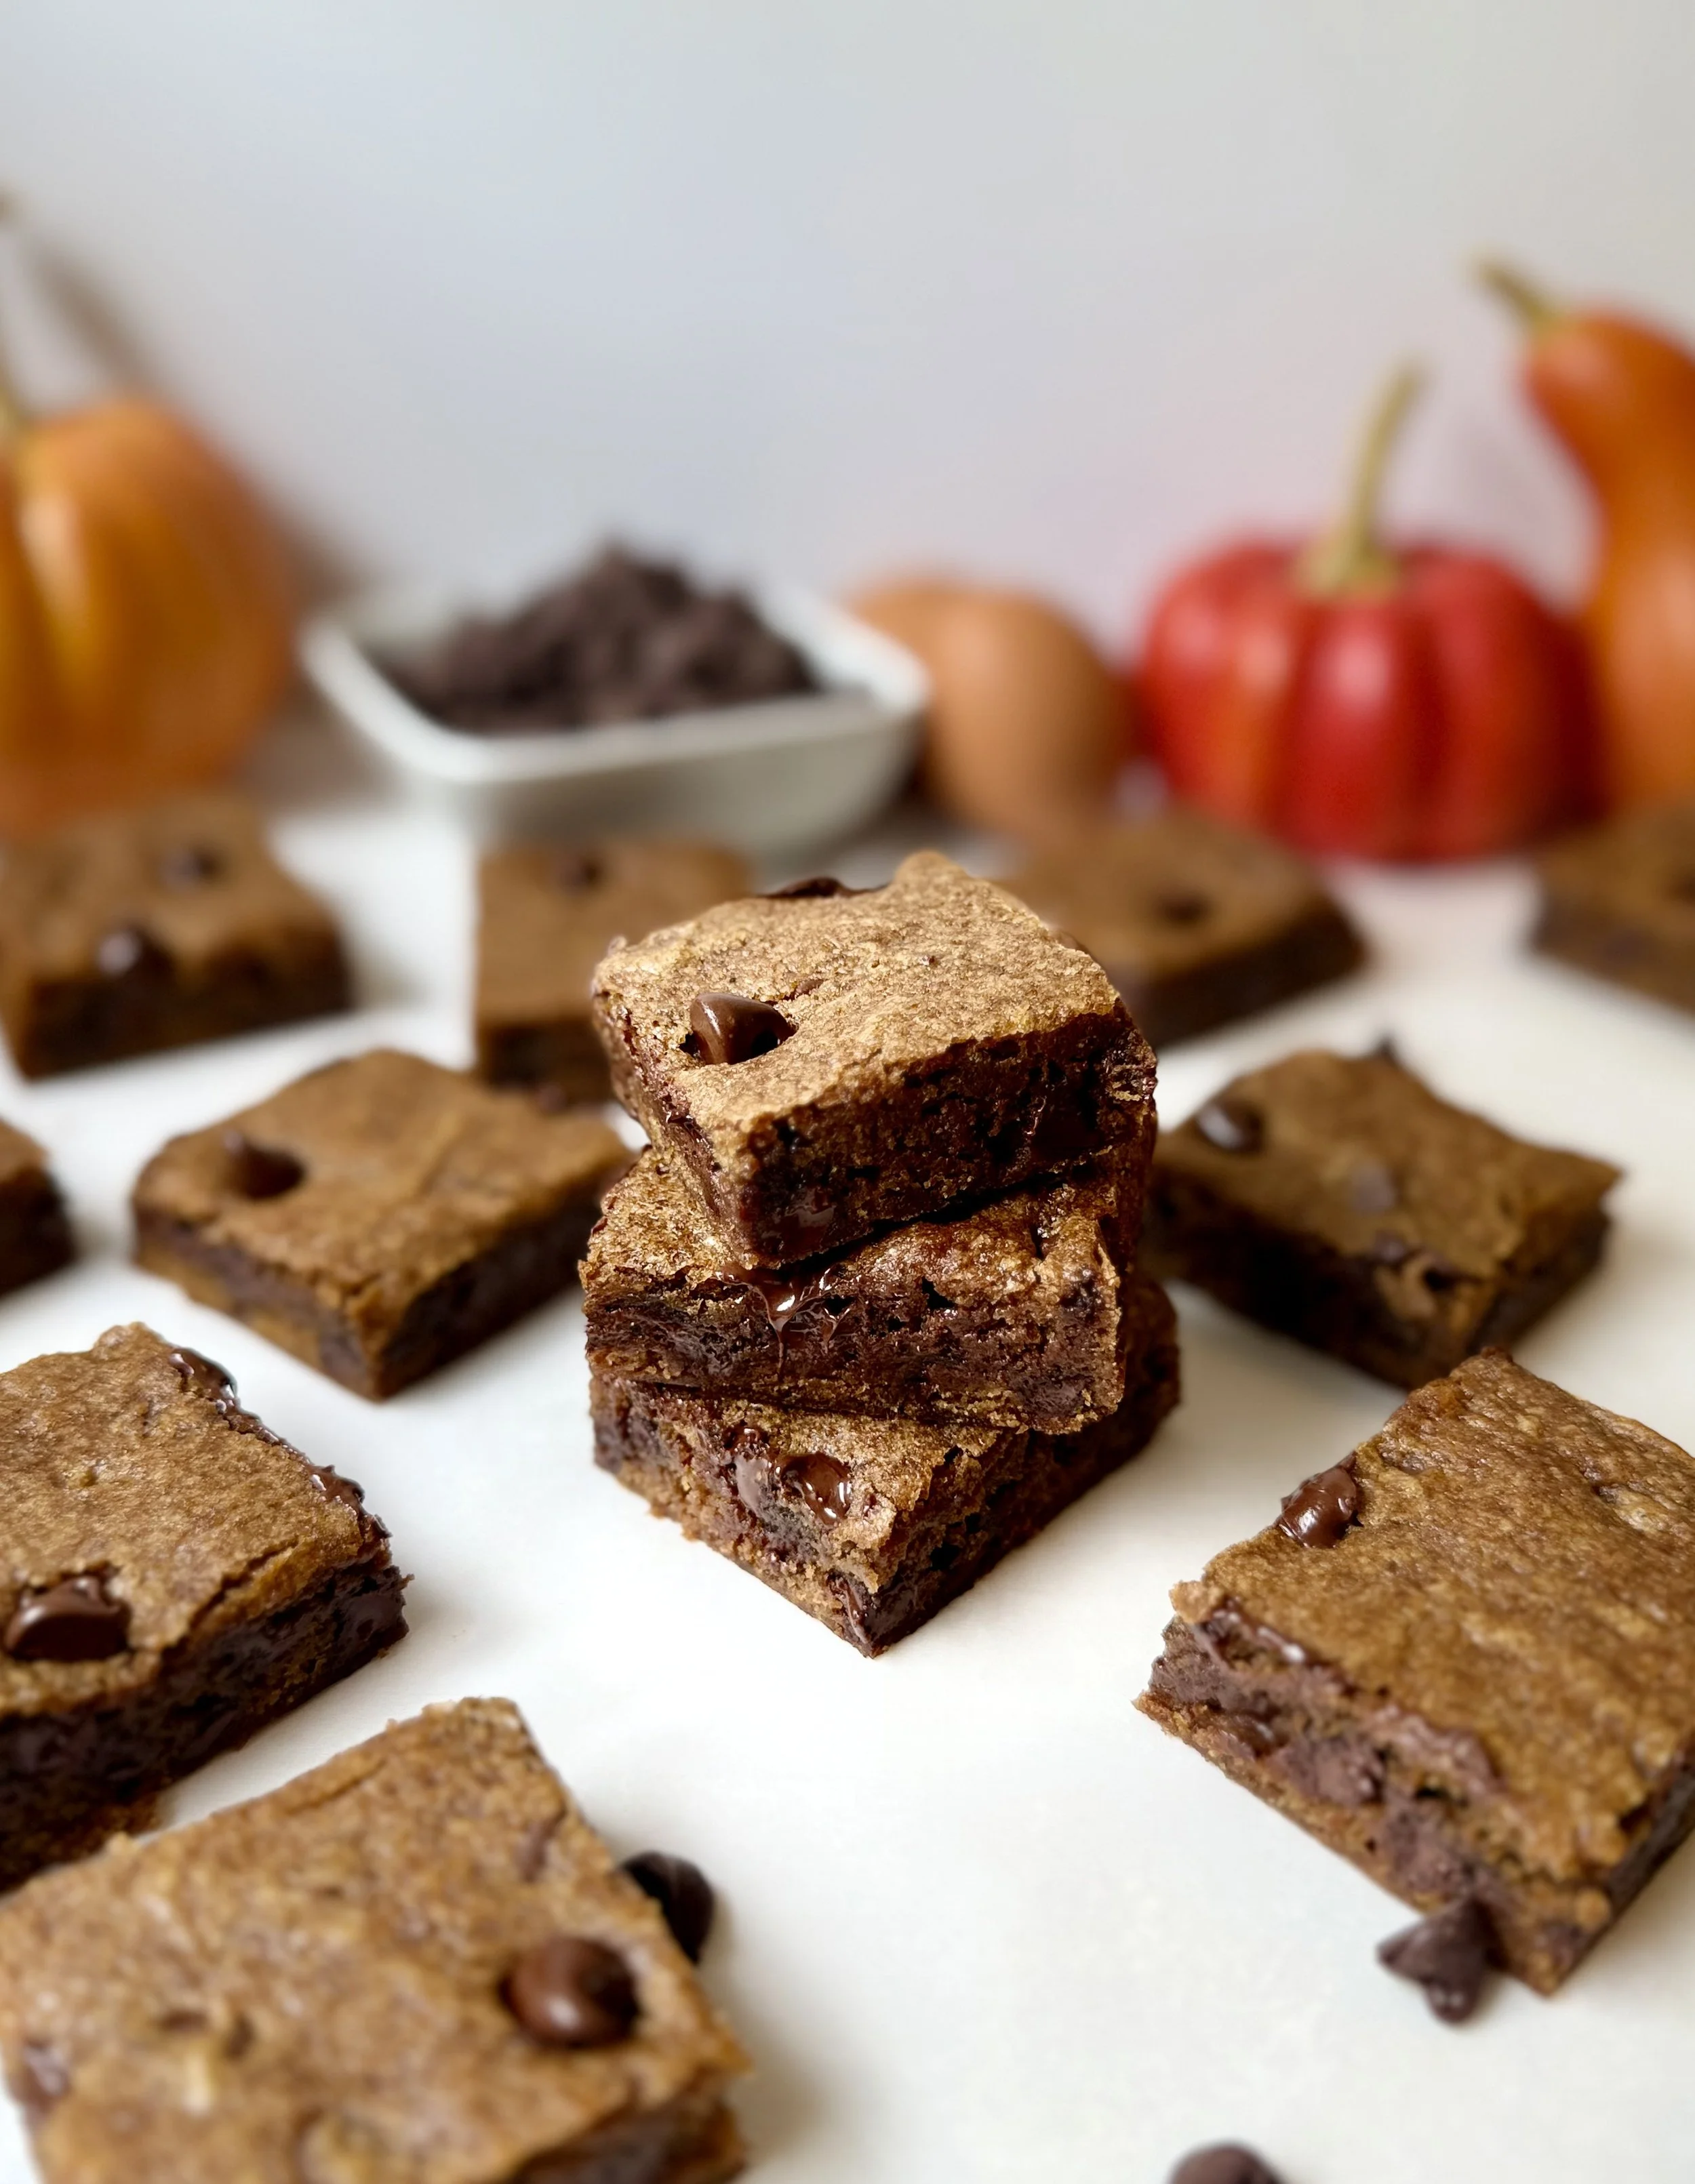
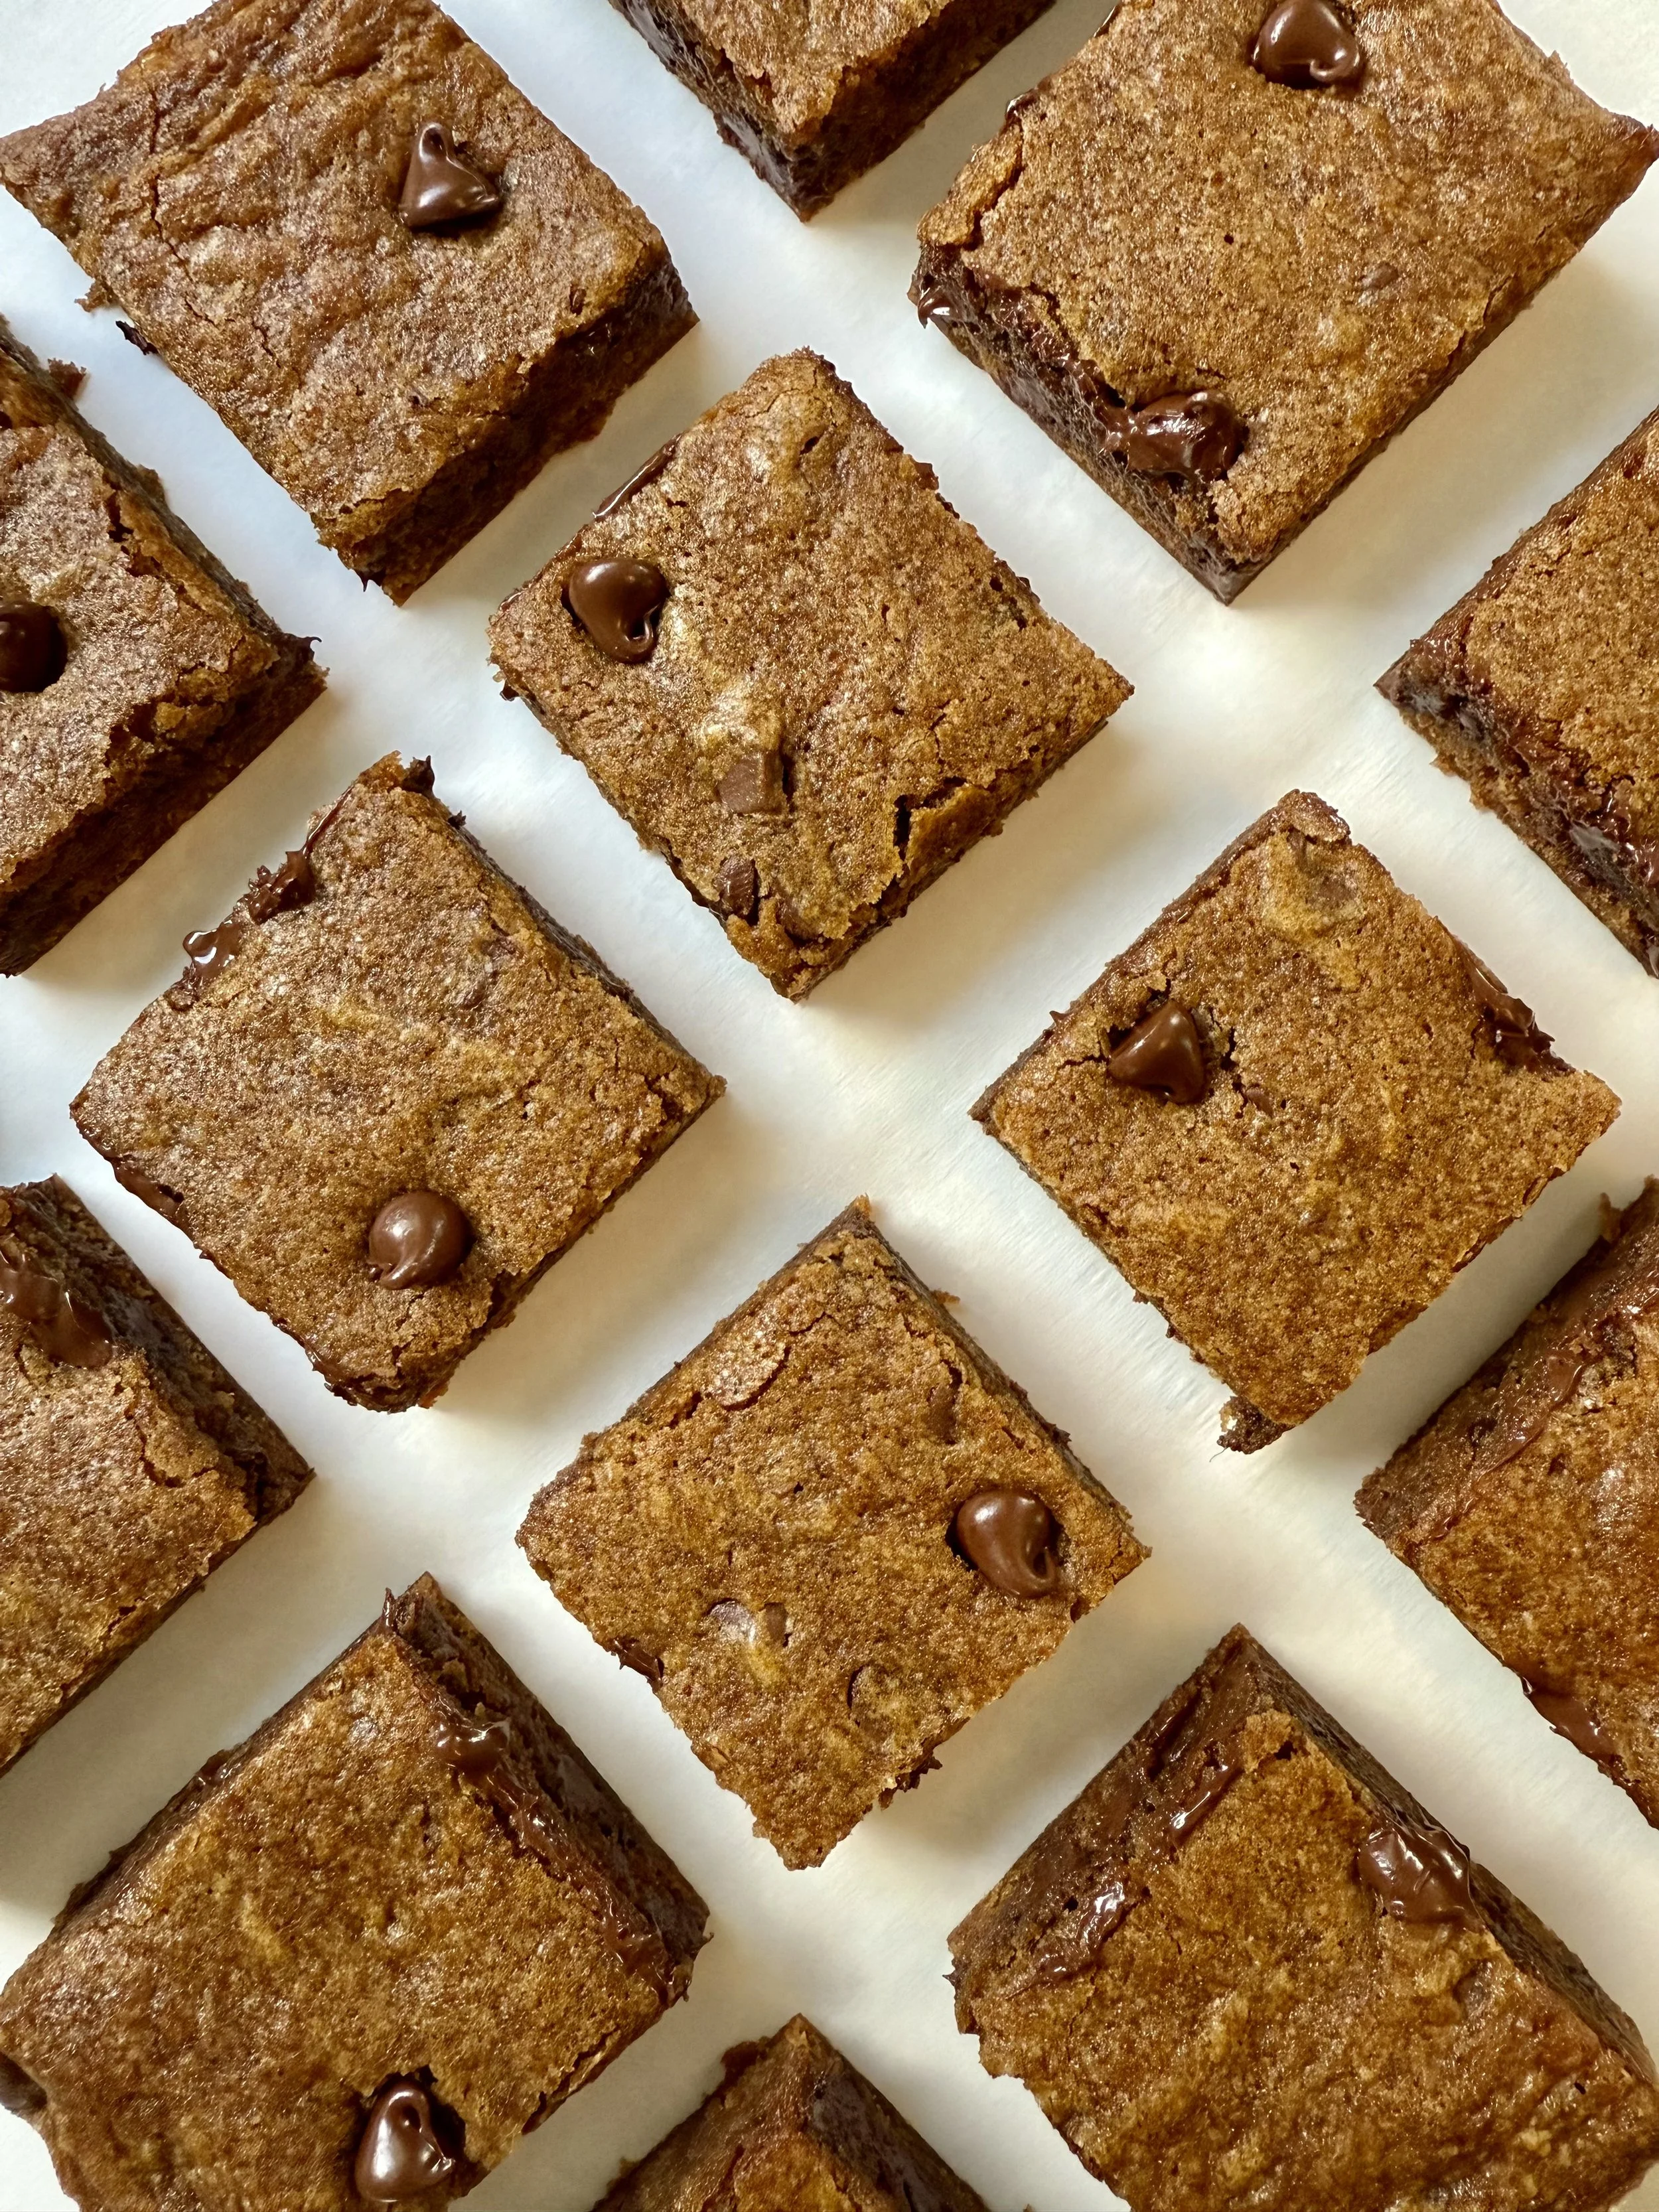
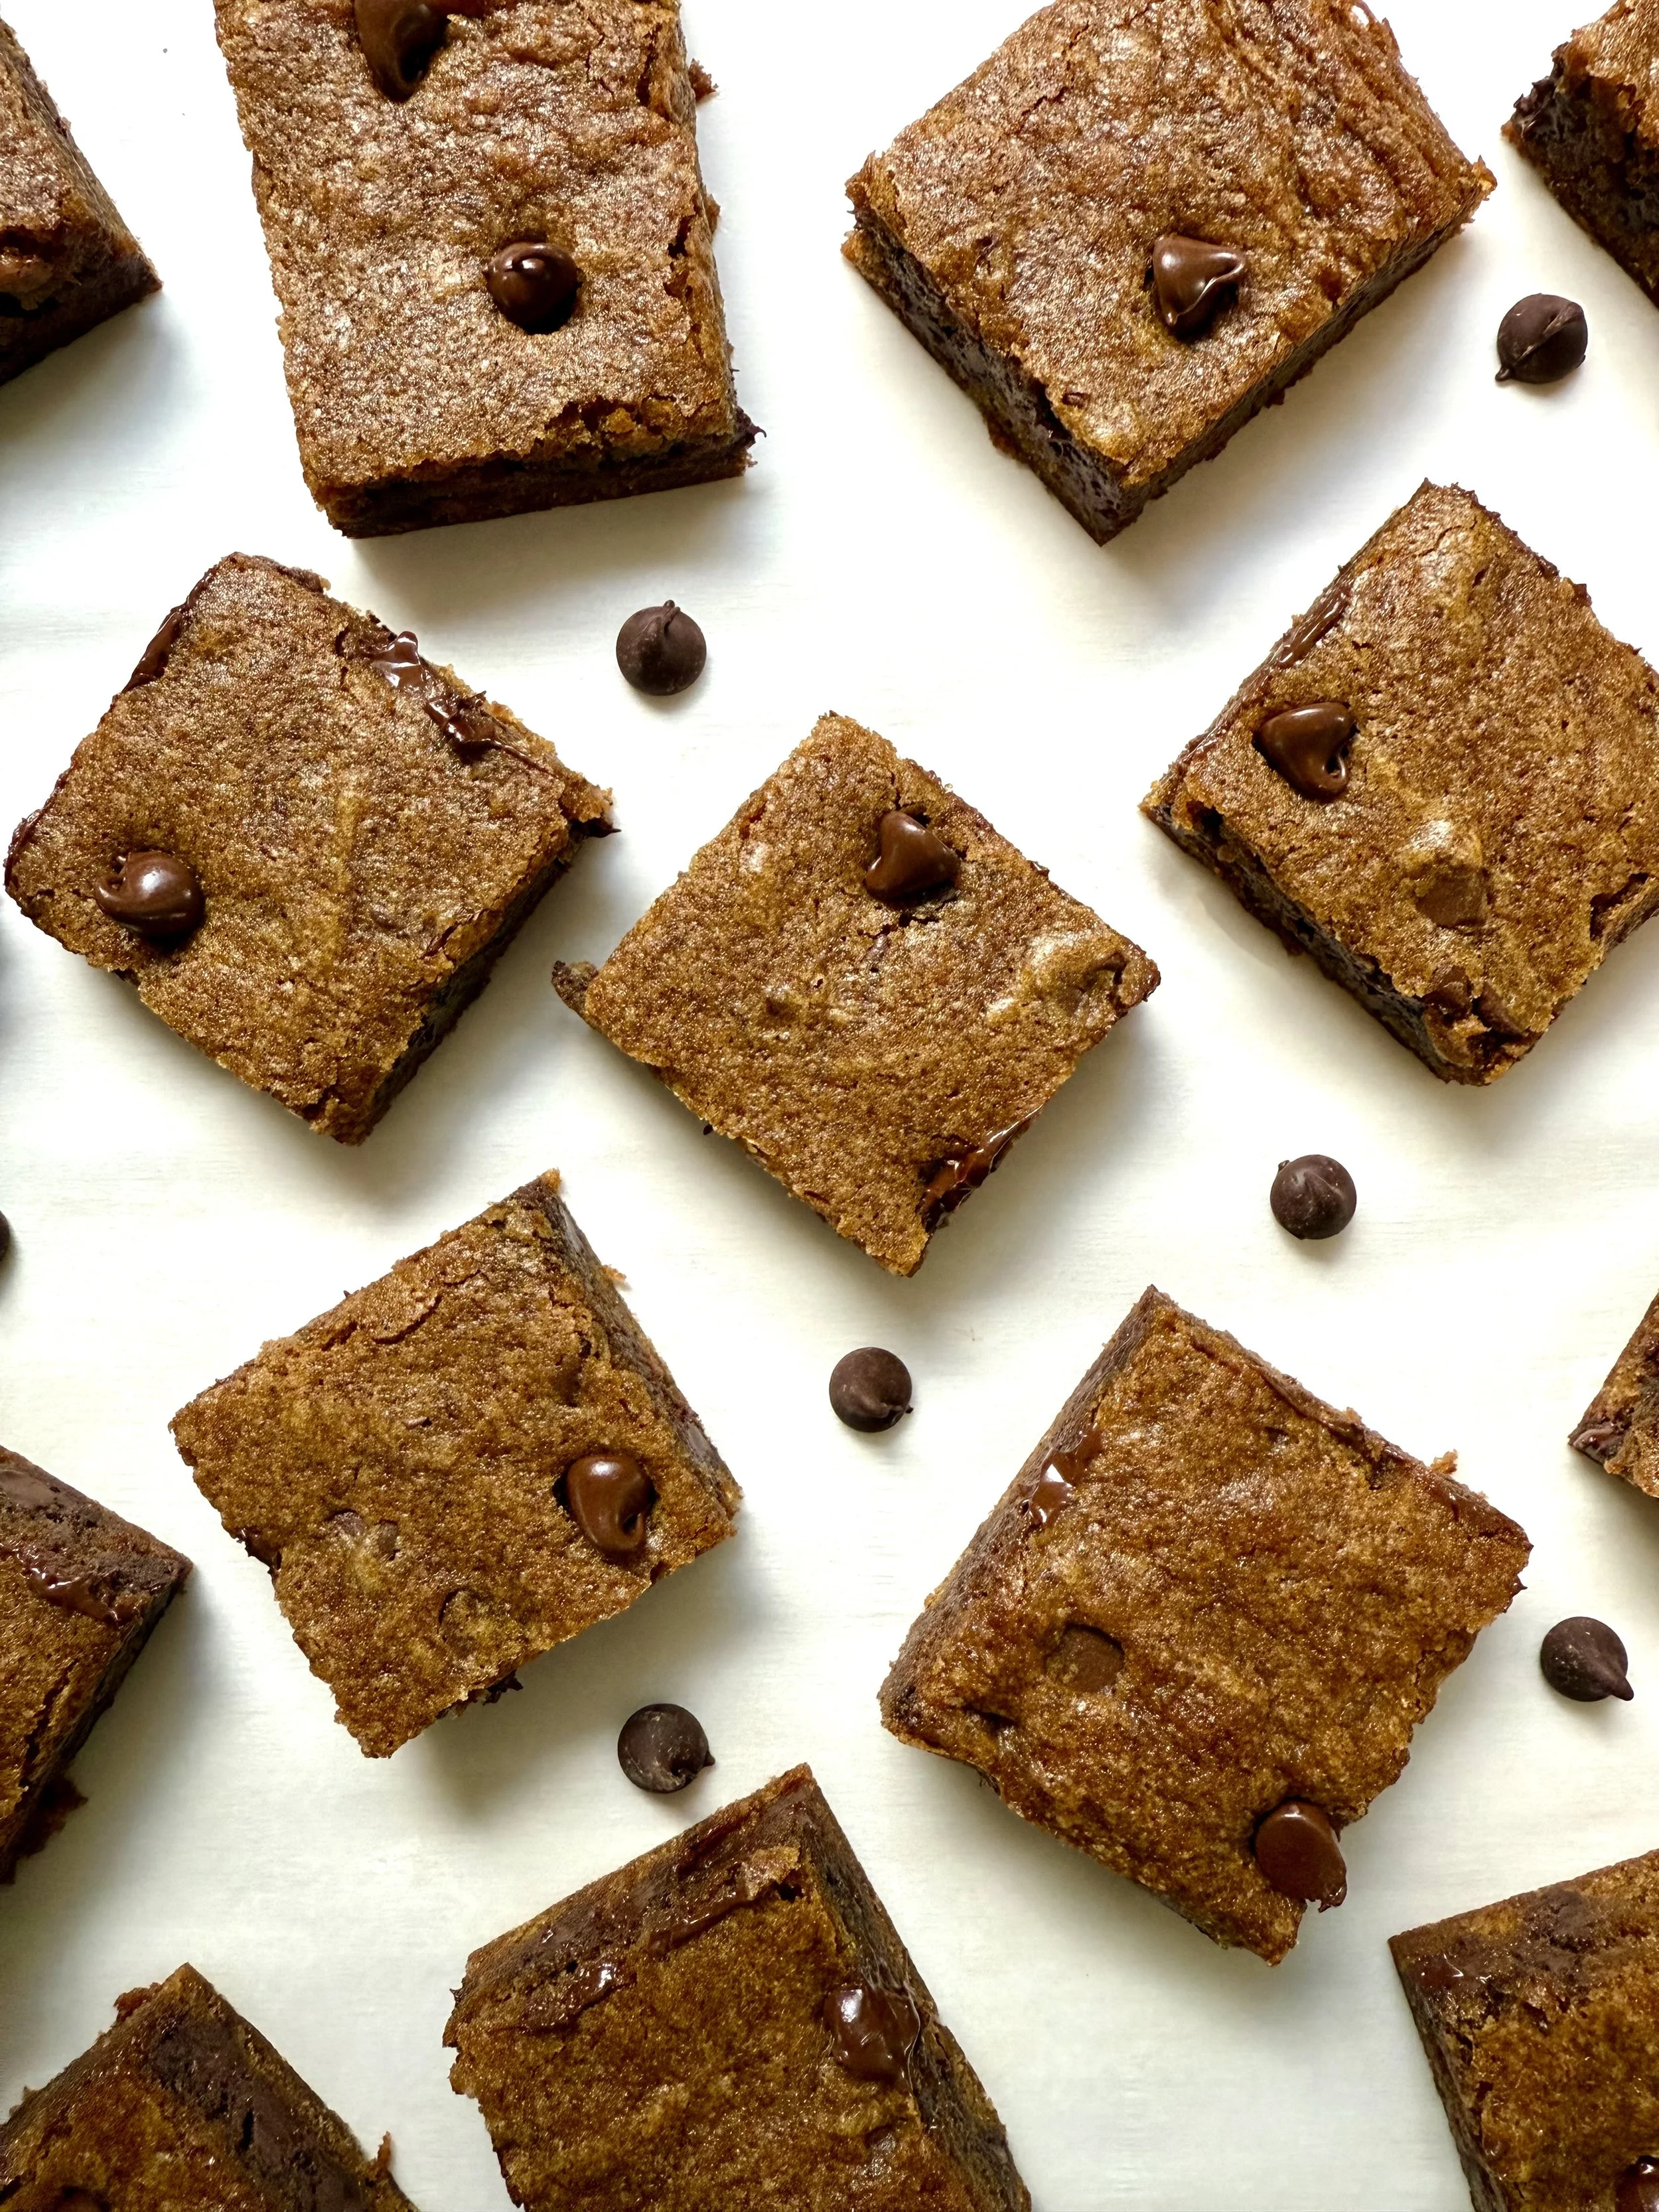
Irresistible Pumpkin Chocolate Chip Blondies: A Cozy Fall Treat
These Pumpkin Chocolate Chip Blondies are the perfect blend of soft, chewy, and warmly spiced goodness, making them a must-bake for autumn (or anytime you want a little pumpkin-flavored comfort). With rich melted butter, real pumpkin puree, and melty chocolate chips throughout, they’re a deliciously satisfying treat that’s easy to whip up and sure to please any crowd.
I know it’s still August, but I am craving pumpkin everything, and it’s never too early to start enjoying some fall desserts, right? These Pumpkin Chocolate Chip blondies, I feel, are the perfect introduction to fall flavors.
The subtle blend of pumpkin pie spice and cloves gives these blondies their signature cozy flavor, while the chocolate chips add just the right amount of sweet indulgence. Whether you’re baking for a holiday gathering or a simple family dessert, this recipe delivers moist, flavorful blondies with minimal fuss.
Ingredients
½ cup unsalted butter (melted)
1 cup brown sugar
1 egg (room temperature)
¼ cup pumpkin puree
1 tsp vanilla extract
1 cup all-purpose flour
¼ tsp baking powder
2 tsp pumpkin pie spice
¼ tsp ground cloves
½ tsp salt
1 cup chocolate chips
Instructions
Prepare Oven and Pan:
Preheat your oven to 350°F (175°C). Line a 9x9-inch baking pan with parchment paper for easy removal.Mix Wet Ingredients:
Melt the butter and let it cool slightly. In a mixing bowl, combine the melted butter and brown sugar using a spatula until smooth and combined. Add the egg, vanilla extract, and pumpkin puree, mixing until just combined.Add Dry Ingredients:
Scrape down the sides of the bowl, then add the flour, baking powder, pumpkin pie spice, cloves, and salt. Gently fold the ingredients together until no streaks or clumps of flour remain. Avoid overmixing to keep the blondies tender.Stir in Chocolate Chips:
Fold the chocolate chips evenly into the batter.Bake:
Pour the batter into the prepared pan and spread it out evenly. Bake for 30-35 minutes, or until the edges turn golden brown and a toothpick inserted into the center comes out mostly clean (a few moist crumbs are fine).Cool and Serve:
Allow the blondies to cool completely in the pan before cutting into squares. This helps them set and gives you clean, perfect edges.
Tips for Perfect Pumpkin Blondies
Don’t Overmix: Overworking the batter can lead to dense blondies. Fold ingredients gently just until combined.
Pumpkin Puree: Use pure pumpkin, not pumpkin pie filling, to avoid added sugars and spices.
Spices: Feel free to adjust the pumpkin pie spice and cloves to your taste or substitute with cinnamon and nutmeg for a slightly different flavor profile.
Check for Doneness: Oven temperatures vary, so start checking at 28 minutes to avoid overbaking. The blondies should be set but still moist in the center.
Storage Instructions
Room Temperature: Store blondies in an airtight container for up to 3 days.
Refrigerator: Keep them in a sealed container for up to 1 week. Bring to room temperature or warm slightly before serving for the best texture.
Freezer: Freeze baked blondies in an airtight container or freezer-safe bag for up to 2 months. Thaw overnight in the fridge or at room temperature before serving.
These pumpkin chocolate chip blondies bring together the best flavors of fall with the perfect texture every time. Whether you enjoy them with a cup of coffee or pack them as a sweet snack, they’re sure to become a seasonal favorite! Leave a comment below to let me know how you enjoyed them.

Pumpkin Chocolate Chip Blondies
These pumpkin blondies are soft, chewy, and warmly spiced, made with real pumpkin and loaded with gooey chocolate chips. They're the perfect cozy treat for fall — or anytime you're craving something sweet and satisfying.
Ingredients
- 1/2 cup unsalted butter (melted)
- 1 cup brown sugar
- 1 egg (room temperature)
- 1/4 pumpkin puree
- 1 tsp vanilla extract
- 1 cup of all-purpose flour
- ¼ tsp of baking powder
- 2 tsp pumpkin pie spice
- 1/4 tsp cloves
- ½ tsp salt
- 1 cup chocolate chips
Instructions
Brown Butter Espresso Blondies with Chocolate Chips

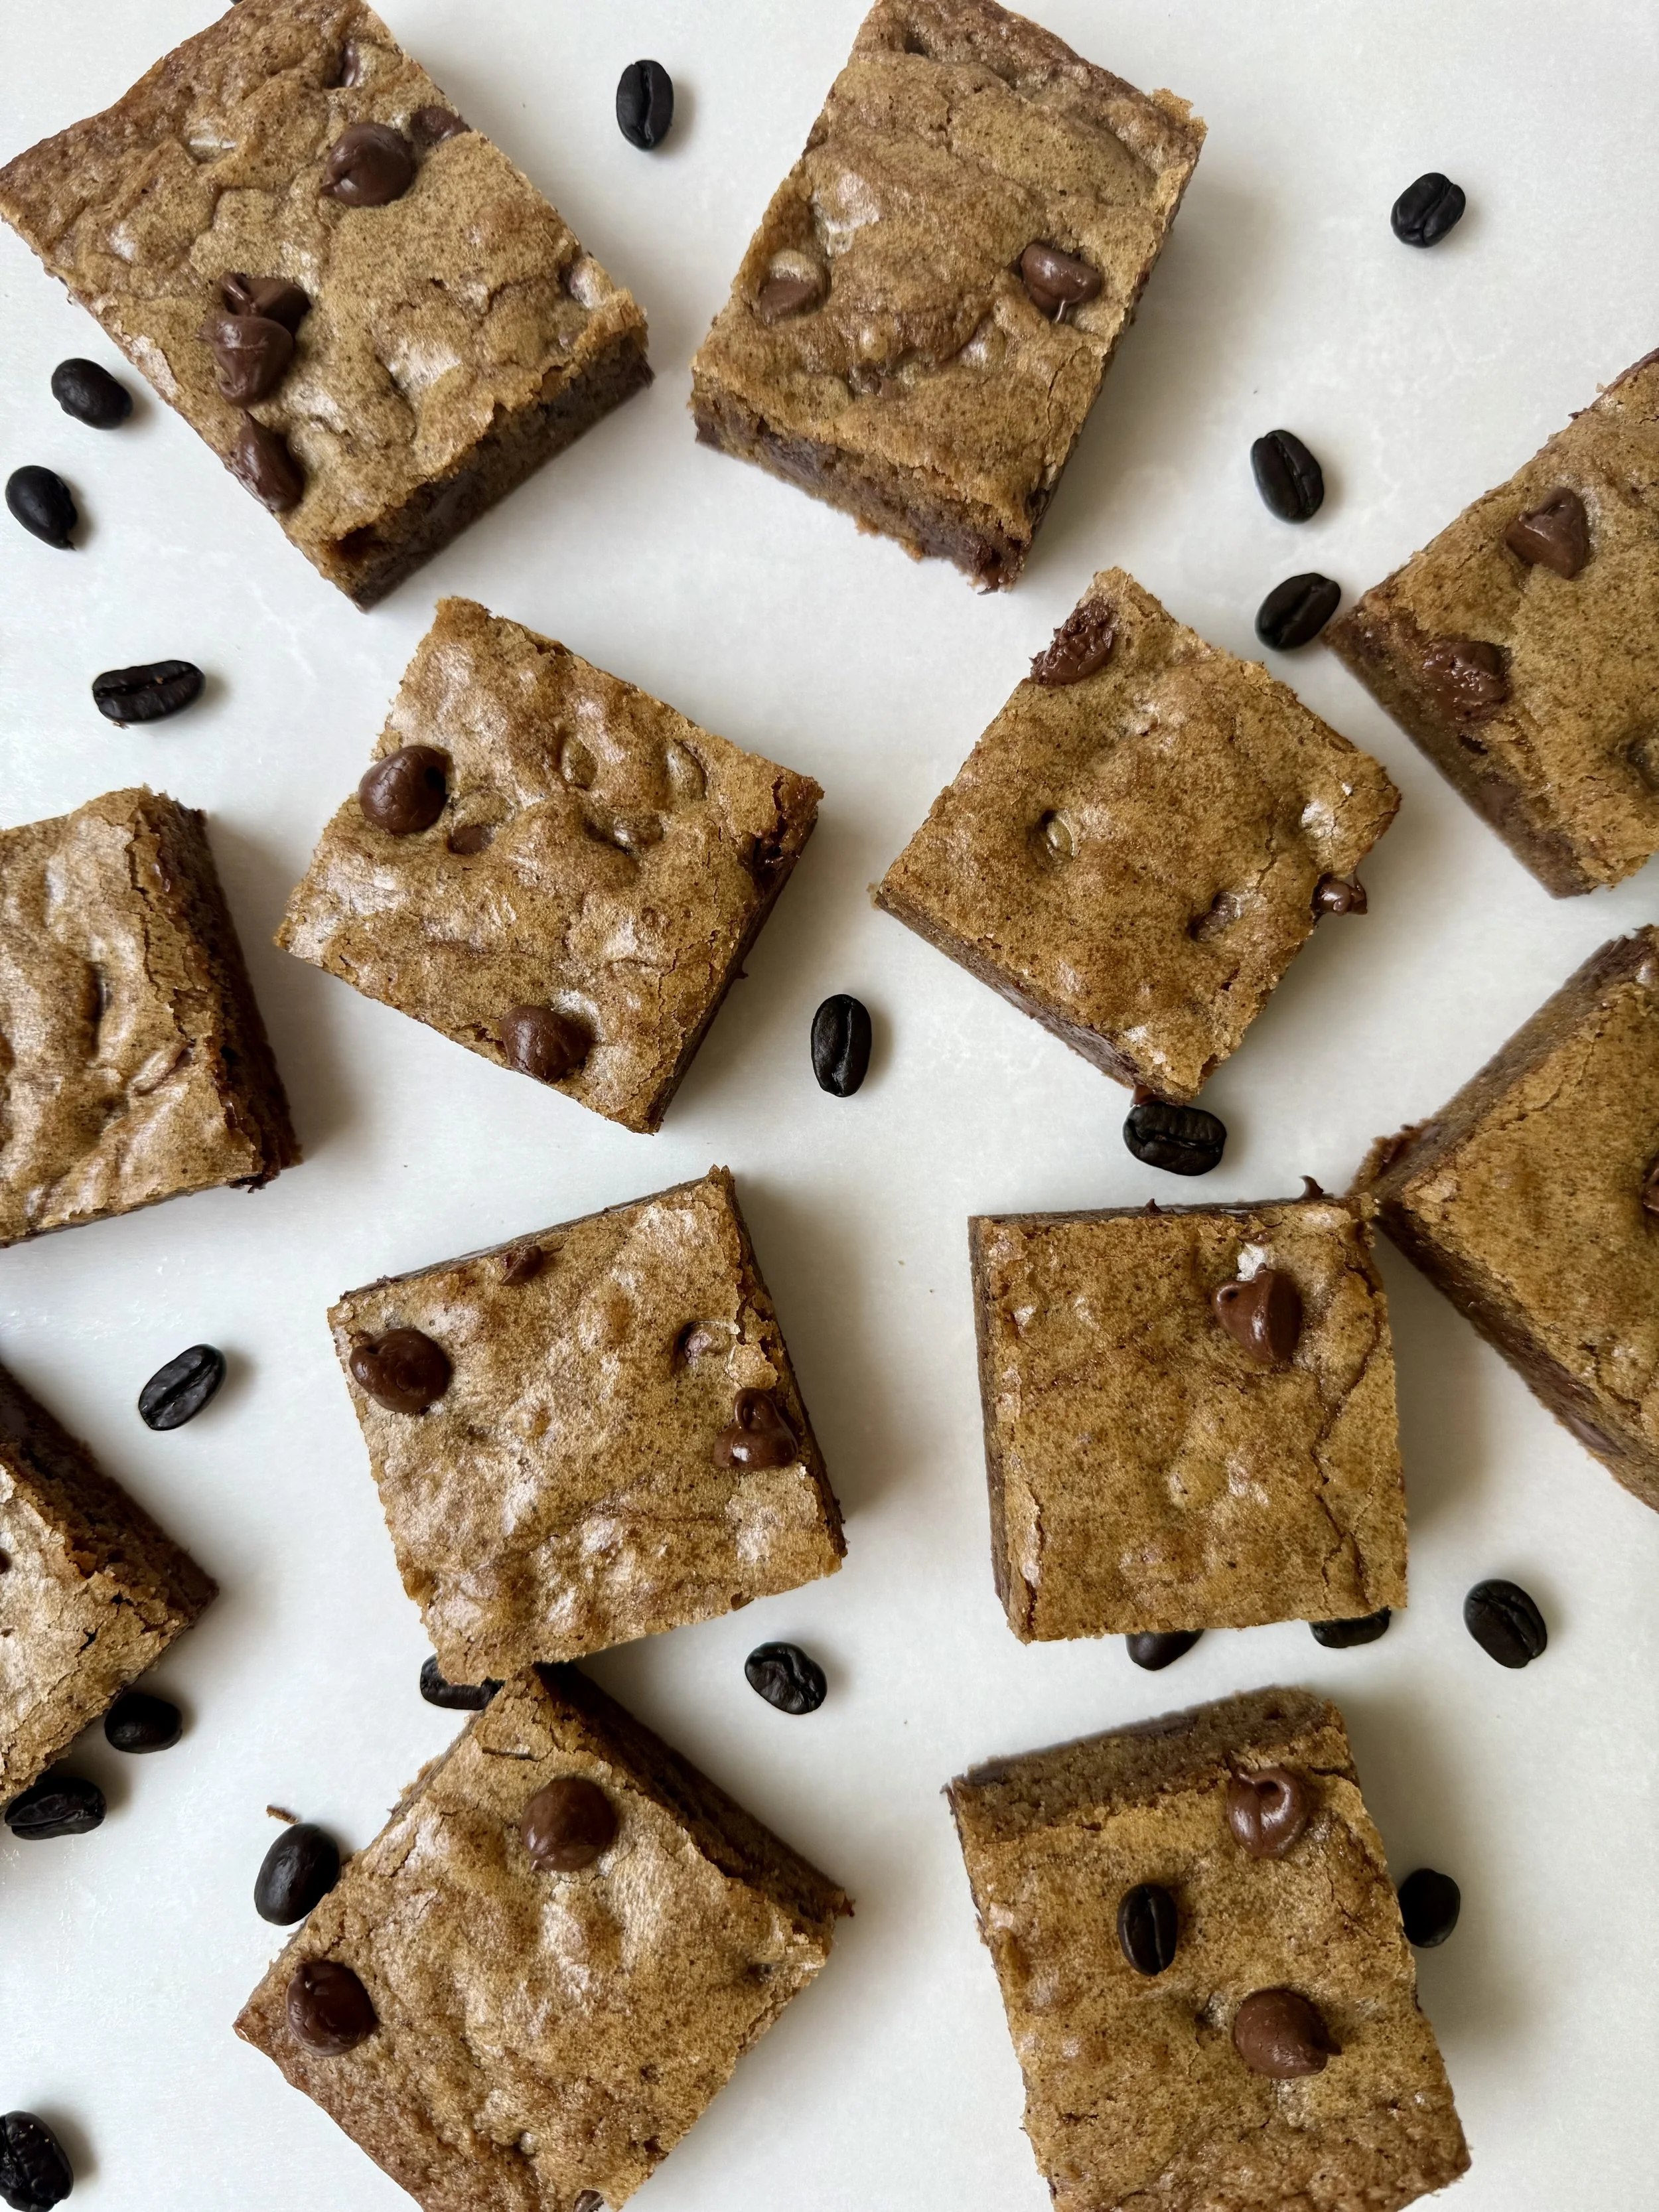
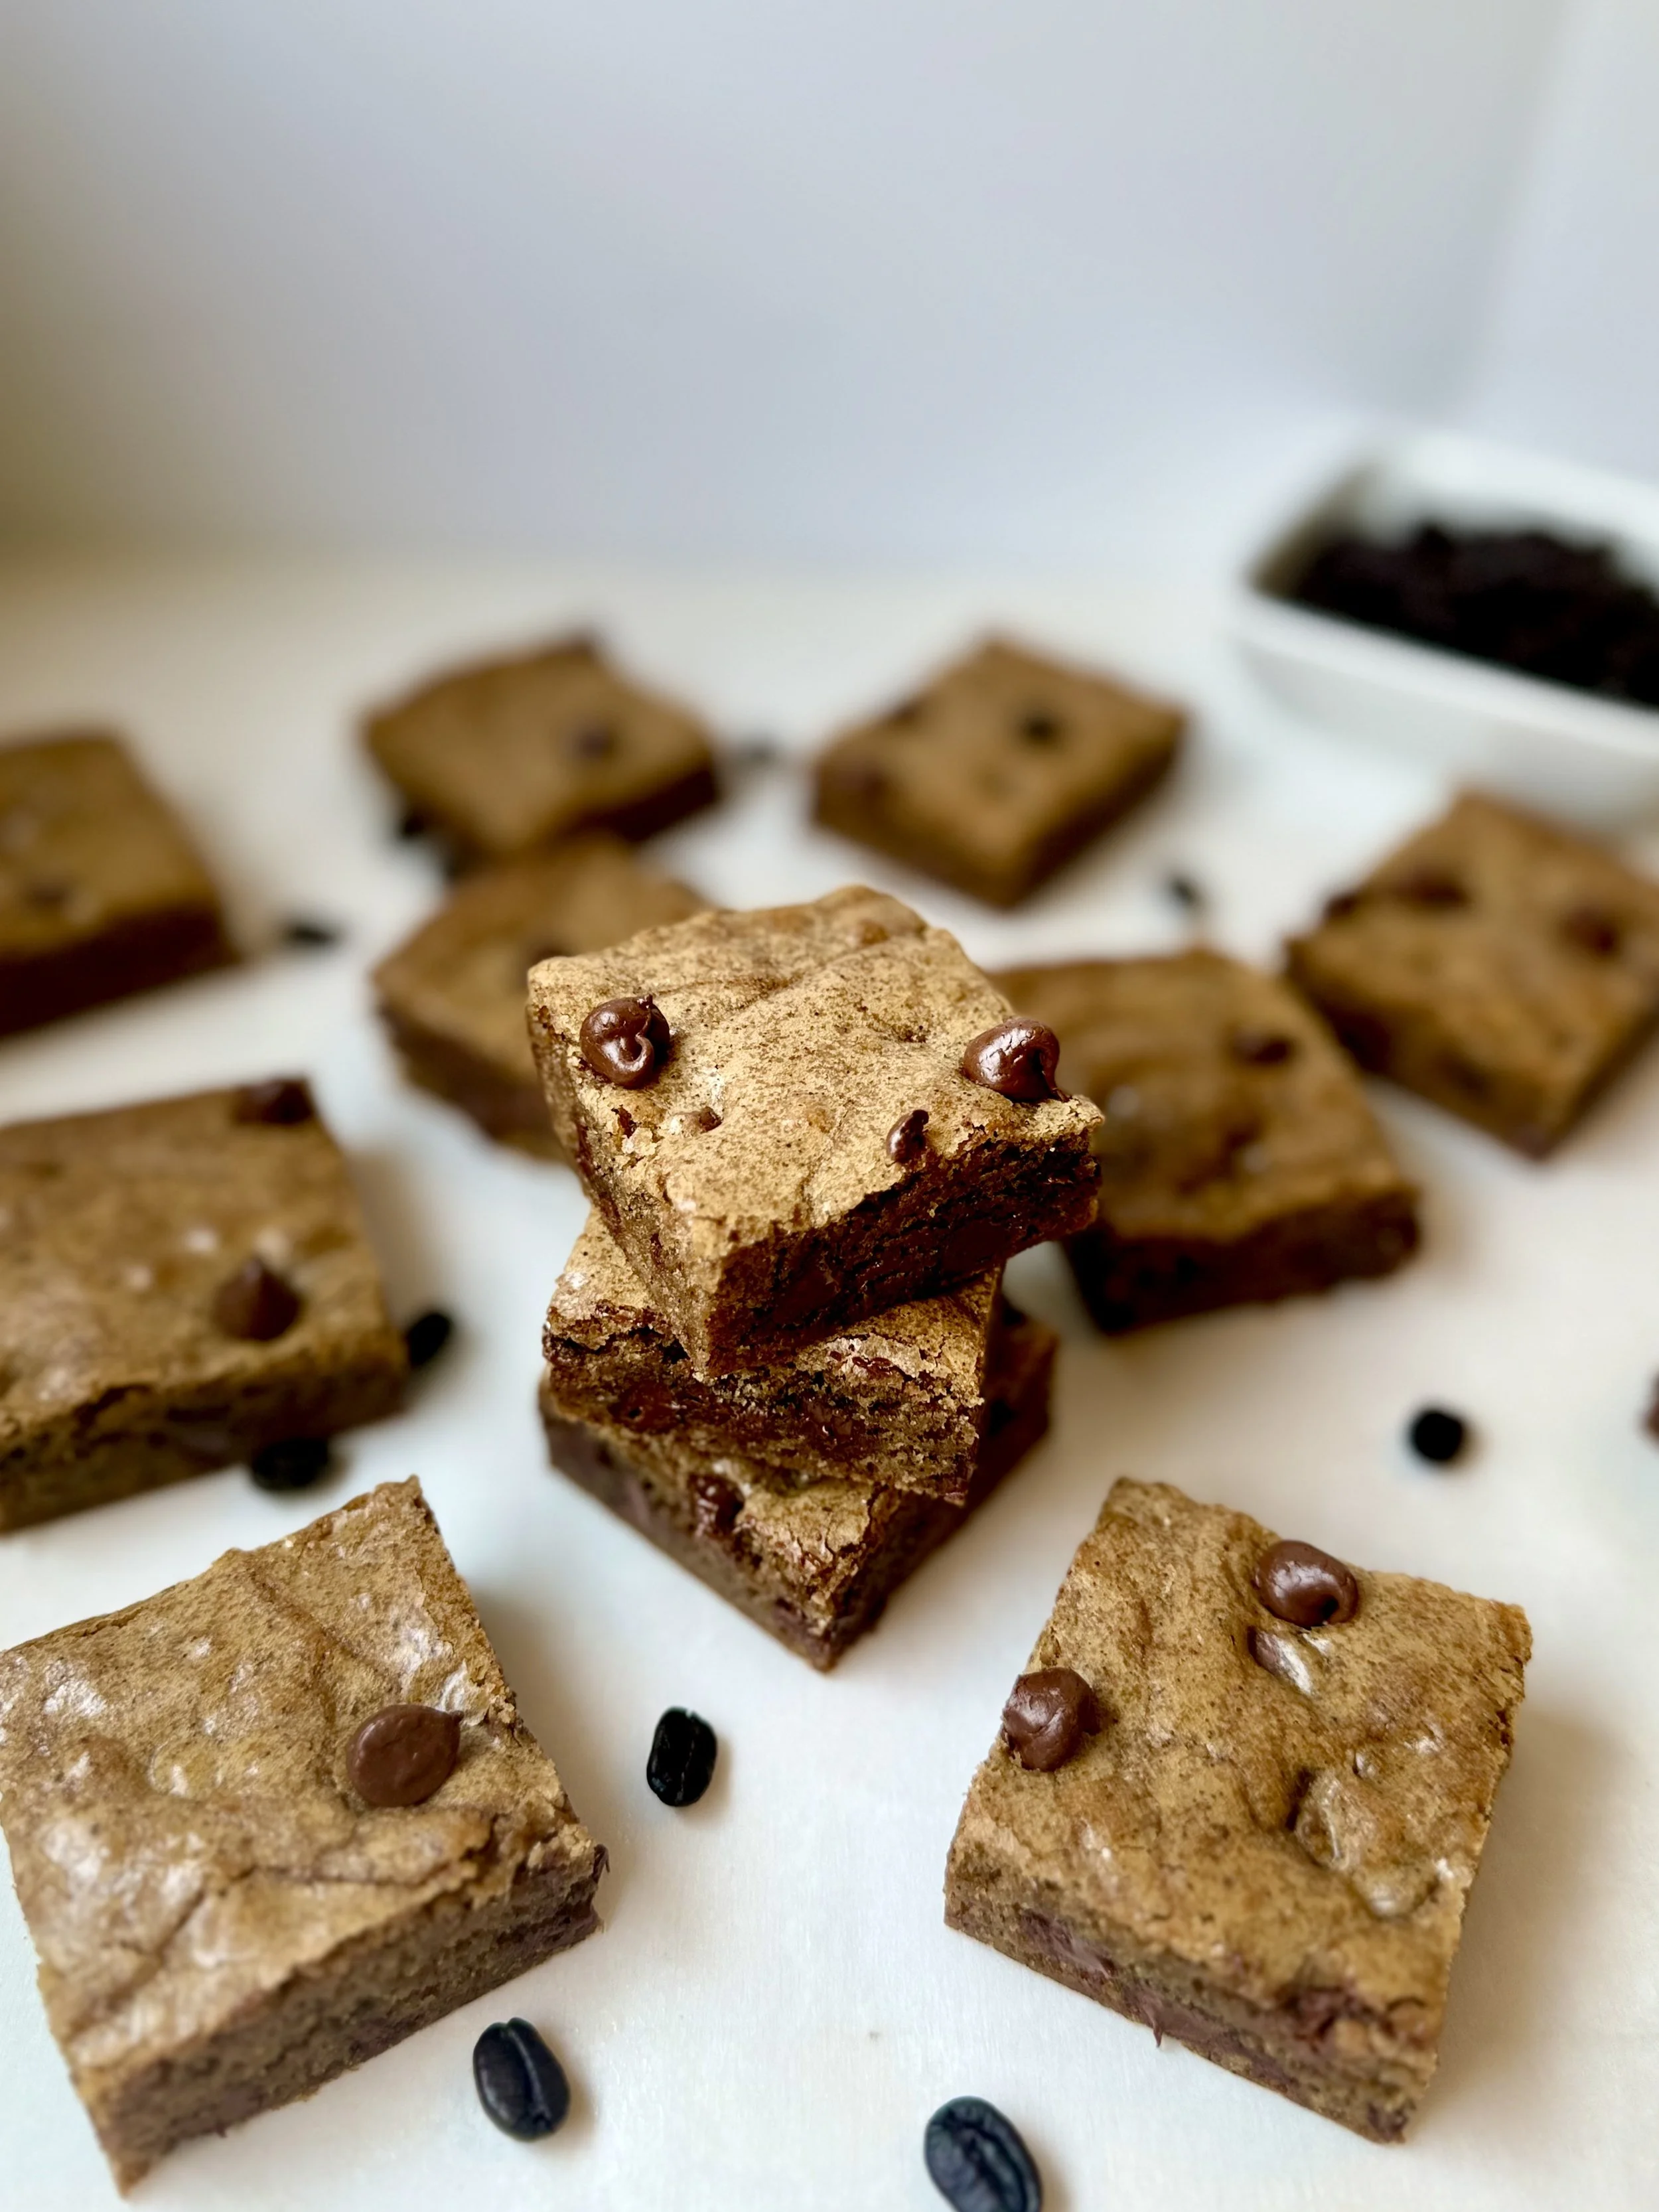
Brown Butter Espresso Blondies with Chocolate Chips
These brown butter espresso blondies are chewy, rich, and packed with deep, nutty flavor—thanks to the magic of browned butter and a touch of espresso. Finished with melty milk chocolate chips, they're the perfect mash-up of bold and sweet. Whether you're baking for a cozy afternoon treat or sharing with friends, these blondies are a guaranteed crowd-pleaser.
I developed this recipe while thinking about a few of my friends and how they love espresso. Whether it’s a nice shot of espresso, an espresso martini, or tiramisu. I simply followed my Brown Butter Chocolate Chip Blondie recipe and added some espresso powder to give it the best flavor boost.

Ingredients
½ cup + 1 tablespoon unsalted butter (1 stick + 1 tbsp, see notes)
1 cup brown sugar (light or dark, depending on your preference)
2 large eggs, at room temperature
1 tablespoon vanilla bean paste (can substitute for extract).
1 cup all-purpose flour
2 teaspoons instant espresso powder
¼ teaspoon baking powder
½ teaspoon salt
1 cup milk chocolate chips, plus a few extra for topping
Instructions
1. Preheat and prepare your pan.
Preheat your oven to 350°F (175°C). Line a 9x9-inch baking pan with parchment paper, leaving a little overhang on the sides for easy removal later.
2. Brown the butter.
In a light-colored saucepan (this helps you see the color changes), melt the butter over medium heat. Stir constantly as it foams, then turns golden and smells nutty. This usually takes around 5–7 minutes. Once the butter has browned, remove it from the heat right away to avoid burning. Set aside to cool slightly.
3. Combine the butter and sugar.
In a large mixing bowl, combine the browned butter and brown sugar. Use a spatula or whisk to stir until smooth and fully combined.
4. Add wet ingredients.
Add the eggs and vanilla extract to the bowl. Mix until just combined, no need to overbeat here.
5. Mix in dry ingredients.
Sprinkle in the flour, espresso powder, baking powder, and salt. Gently fold everything together using a spatula until no dry flour remains. Be careful not to overmix; stop as soon as the batter looks uniform.
6. Add chocolate chips.
Fold in the chocolate chips evenly throughout the batter.
7. Transfer and bake.
Pour the batter into your prepared pan and smooth the top. Bake for 30–35 minutes, or until the edges are set and a toothpick inserted into the center comes out with just a few moist crumbs.
Optional tip:
For a prettier finish, take the blondies out of the oven after about 20 minutes and press a few extra chocolate chips on top. Return to the oven to finish baking.
8. Cool and enjoy.
Let the blondies cool completely in the pan before slicing into squares. Enjoy with a cup of coffee, or better yet, espresso!
Recipe Notes
Why extra butter? Browning butter causes it to lose moisture as the water evaporates. That’s why I use 1 tablespoon extra to make up for the difference. After browning, you should be left with roughly ½ cup of liquid gold.
Use quality butter: For the best flavor and results, use a high-quality butter with a higher butterfat content (like Kerrygold). It browns beautifully and adds extra richness.
Espresso powder: This enhances the deep, caramel-like notes of the blondies without overpowering them. Feel free to adjust based on your preference.
How to Store Your Blondies
These brown butter espresso blondies stay soft and chewy for days, if they last that long!
At room temperature: Store blondies in an airtight container for up to 4–5 days. Keep them in a cool, dry place (away from direct sunlight or heat). You can separate layers with parchment paper to prevent sticking.
In the fridge: If you want to keep them a bit longer, they’ll stay fresh in the fridge for up to a week. Just be sure they’re in a sealed container to prevent them from drying out. Let them come to room temperature before serving, or microwave for a few seconds for a warm, gooey treat.
Freezing blondies: These freeze beautifully! Wrap individual squares tightly in plastic wrap or foil, then place them in a freezer-safe bag or container. They’ll keep for up to 3 months. To enjoy, thaw at room temperature or microwave for 20–30 seconds for that fresh-baked feel.
Substitutions & Variations
Here are some easy swaps and creative twists to customize these blondies to your taste, or what you have on hand:
Butter
Alternative: Use plant-based butter for a dairy-free option. Make sure it browns well (like Miyoko’s).
Clarified butter or ghee: Adds a similar nutty flavor but skips the browning step (since milk solids are already removed).
Brown Sugar
Swap: Use coconut sugar for a refined sugar-free version. It will be slightly less moist and a bit more caramel-like in flavor.
Half white + half brown sugar: If you’re low on brown sugar, a 50/50 mix works too, just expect a slightly less chewy texture.
Chocolate Chips
Options: Sub in dark chocolate, white chocolate, chopped chocolate bars, or even butterscotch chips.
Add-ins: A handful of chopped nuts (like walnuts or pecans) can add crunch and balance the sweetness.
Espresso Powder
Less intense: Use 1 tsp instead of 2 if you want a milder coffee flavor.
No espresso powder? Try instant coffee granules, crushed finely (not ideal, but better than brewed coffee, which adds too much liquid).
Caffeine-free: Use decaf espresso powder for all the flavor without the buzz.
Eggs
Egg-free option: Use a flax egg (1 tbsp ground flaxseed + 2.5 tbsp water, let sit 5 min) per egg. Note: the texture will be slightly denser.
Flour
Gluten-free: A 1:1 gluten-free baking flour blend should work well. Avoid straight almond or coconut flour unless you're experienced with adjusting for moisture and structure.
If you try any of these swaps, let me know how it turns out in the comments! I’d love to hear what variations you come up with!

Brown Butter Espresso Blondies
Rich and chewy, these brown butter espresso blondies are infused with bold coffee flavor and loaded with melty chocolate chips. The nutty depth of browned butter takes them to the next level of indulgence.
Ingredients
- ½ cup + 1 tablespoon unsalted butter. (1 stick + 1 tablespoon, see notes).
- 1 cup brown sugar
- 2 eggs (room temperature)
- 1 tbsp vanilla extract
- 1 cup of all-purpose flour
- 2 tsp of instant espresso powder
- ¼ tsp of baking powder
- ½ tsp salt
- 1 cup milk chocolate chips + a few extra for topping
Instructions
Notes
- Browning butter evaporates extra moisture in the butter, losing volume. Because of this, you'll need a little extra butter. I've found that an extra tablespoon when browning equates to a 1/2 cup melted/browned. However, every butter is different. This recipe works great with a good, high-quality butter with higher butterfat. (I use Kerrygold Butter for this recipe.)

Lemon Blondies

Bright, Chewy, and Bursting with Citrus: Lemon Blondies with White Chocolate Chips & Lemon Ganache
If you're looking for the perfect balance of sweet, citrusy, and indulgent, these lemon blondies with white chocolate chips and a tangy lemon ganache drizzle are about to become your go-to treat. Imagine the dense, chewy texture of a classic blondie infused with fresh lemon zest, sweet vanilla, and creamy white chocolate—finished off with a drizzle that's zippy, smooth, and absolutely irresistible.
These bars are a celebration of lemon in every bite—bold and bright but mellowed by the richness of white chocolate. The brown sugar base adds a subtle caramel undertone, creating a harmony between the tang and sweetness that’s hard to beat.

🍋 How to Make Lemon Blondies with White Chocolate Chips and Lemon Ganache
These lemon blondies are packed with bright flavor, perfectly chewy, and incredibly easy to make. Here’s a detailed guide to help you bake them like a pro, even if it’s your first time.
✅ Step 1: Preheat and Prep
Start by preheating your oven to 350°F (175°C). Line a 9x9-inch square baking pan with parchment paper. This makes it easier to lift the blondies out of the pan once they’ve cooled—no sticking, no mess.
✅ Step 2: Melt the Butter and Zest the Lemons
In a small saucepan or microwave-safe bowl, melt ½ cup of unsalted butter. Set it aside to cool slightly—you want it warm, not hot.
While the butter cools, zest your lemons. You’ll need 4 tablespoons of lemon zest, which is roughly the zest of 2 large lemons. Use a microplane or the fine side of a cheese grater to get that flavorful outer skin (avoid the bitter white pith).
✅ Step 3: Mix the Wet Ingredients
In a medium mixing bowl, combine the melted butter, ½ cup of brown sugar, and ½ cup of granulated sugar. Stir with a spatula or wooden spoon until the mixture is smooth and glossy.
Now, mix in:
2 room-temperature eggs
1 tsp vanilla extract
½ tsp lemon extract (optional, but really boosts the lemon flavor)
All the lemon zest
Mix until everything is well combined, but don’t overbeat. You’re just looking for a cohesive batter at this stage.
✅ Step 4: Fold in the Dry Ingredients
Sprinkle in:
1 cup of all-purpose flour
¼ tsp baking powder
½ tsp salt
Use a spatula to gently fold the dry ingredients into the wet mixture until no flour streaks remain. Be careful not to overmix—this keeps your blondies soft and tender.
Once the batter is smooth, fold in 1 cup of white chocolate chips. These add a creamy sweetness that pairs beautifully with the citrus.
✅ Step 5: Bake the Blondies
Pour the batter into your prepared pan and smooth the top with a spatula.
Bake in the preheated oven for 30–35 minutes, or until the edges are golden brown and a toothpick inserted into the center comes out with just a few moist crumbs (not wet batter!).
Let the blondies cool completely in the pan before drizzling with ganache—this helps them set properly and makes cutting easier.
✅ Step 6: Make the Lemon Ganache Drizzle
Once the blondies are cool, it’s time for the magic: lemon white chocolate ganache.
In a microwave-safe bowl, combine:
½ cup white chocolate chips
½ tsp coconut oil (or vegetable shortening)
Microwave in 20-second intervals, stirring after each, until the chocolate is fully melted and smooth.
Now stir in:
1 tbsp lemon zest
At this point, the mixture may seize a bit or become slightly grainy—that’s totally normal! The citrus reacts with the chocolate. To fix it, stir in:
1 tbsp heavy cream
If needed, microwave for another 10–20 seconds to fully smooth it out. The ganache should be thick but pourable—perfect for drizzling.
✅ Step 7: Drizzle and Serve
Use a spoon, a small spatula, or even a zip-top bag with the corner snipped off to drizzle the ganache over your cooled blondies. If the ganache is too thin, let it cool a bit first; if it’s too thick, stir in a bit more cream—½ tablespoon at a time—until it’s just right.
Let the ganache set slightly before slicing the blondies into squares.
🍋 Final Notes
These lemon blondies are everything: tangy, chewy, sweet, and slightly gooey from the white chocolate. They’re a fresh twist on a classic bar dessert and perfect for spring and summer gatherings—or anytime you’re craving something citrusy and comforting.

Why You’ll Love This Recipe
Easy to make: One bowl and a handful of pantry staples are all you need.
Citrus-forward flavor: With 4 tablespoons of fresh lemon zest, the lemon flavor truly shines.
Perfect texture: Soft and chewy on the inside, with golden edges and melty white chocolate chips throughout.
That ganache though...: The lemon white chocolate ganache drizzle is a game-changer—bright, creamy, and totally addictive.
Tips for Success
Use fresh lemon zest: It makes a huge difference in flavor. Two large lemons should do the trick.
Don't overmix once you add the flour—this helps keep the blondies soft and chewy.
The ganache may look odd at first once the lemon zest goes in (it might seize a little), but don’t worry! A splash of heavy cream brings it back to life.
Serving & Storage
These blondies are perfect on their own or paired with a scoop of vanilla ice cream or a cup of tea. Store them in an airtight container at room temperature for 2–3 days, or refrigerate for up to a week (if they last that long!).

📸 Share Your Bake!
If you give these lemon blondies a try, I’d love to see how they turn out! Snap a photo and tag me on social media so I can celebrate your delicious creation—nothing makes me happier than seeing your bakes in action. And if you have any questions, tweaks, or just want to say hi, drop a comment below. Happy baking! 🍋💛

Lemon Blondies
Bright and zesty, these lemon blondies are studded with creamy white chocolate chips and finished with a tangy lemon ganache drizzle. Perfectly soft and chewy, they strike the ideal balance of sweet and citrusy in every bite.
Ingredients
- ½ cup unsalted butter (melted)
- 1/2 cup brown sugar
- 1/2 cup granulated sugar
- 2 eggs (room temperature)
- 4 tbsp lemon zest (2 large lemons' worth).
- 1 tsp vanilla extract
- 1/2 tsp lemon extract
- 1 cup of all-purpose flour
- ¼ tsp of baking powder
- ½ tsp salt
- 1 cup white chocolate chips
- 1/2 cup white chocolate chips
- 1/2 tsp coconut oil
- 1 tbsp lemon zest
- 1 tbsp heavy cream
Instructions

No-Bake Nutter Butter Cheesecake Bars
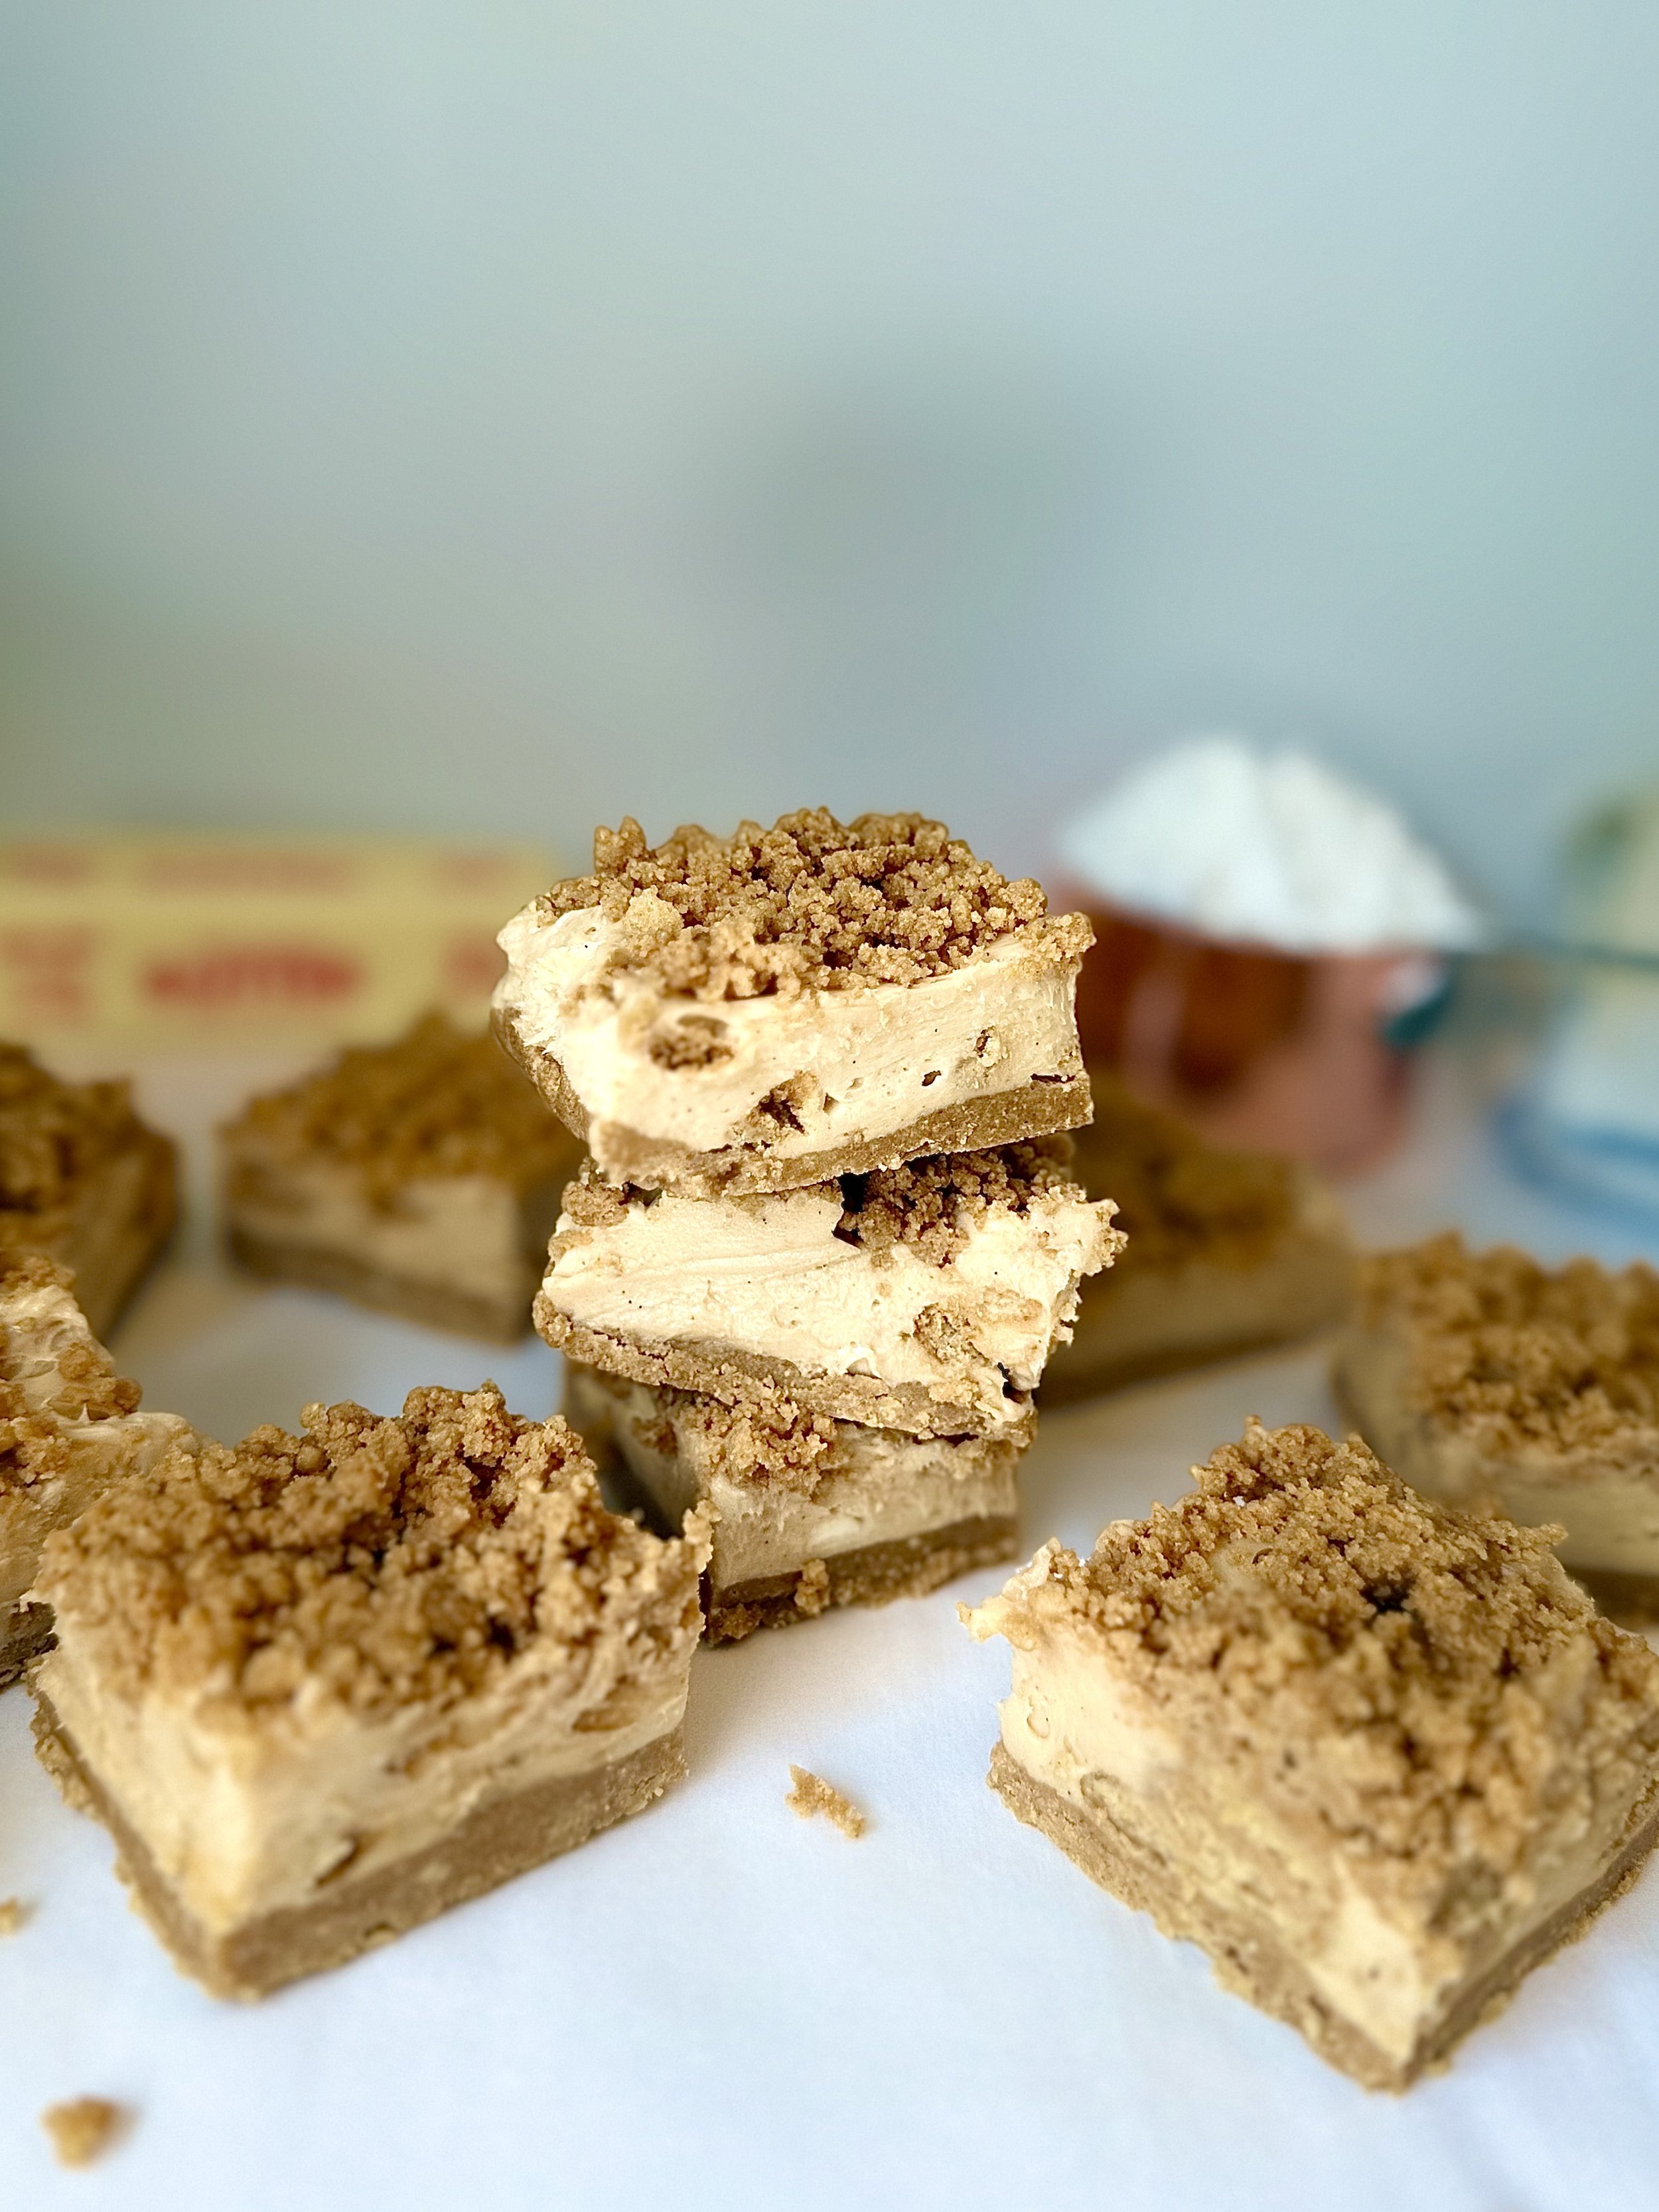
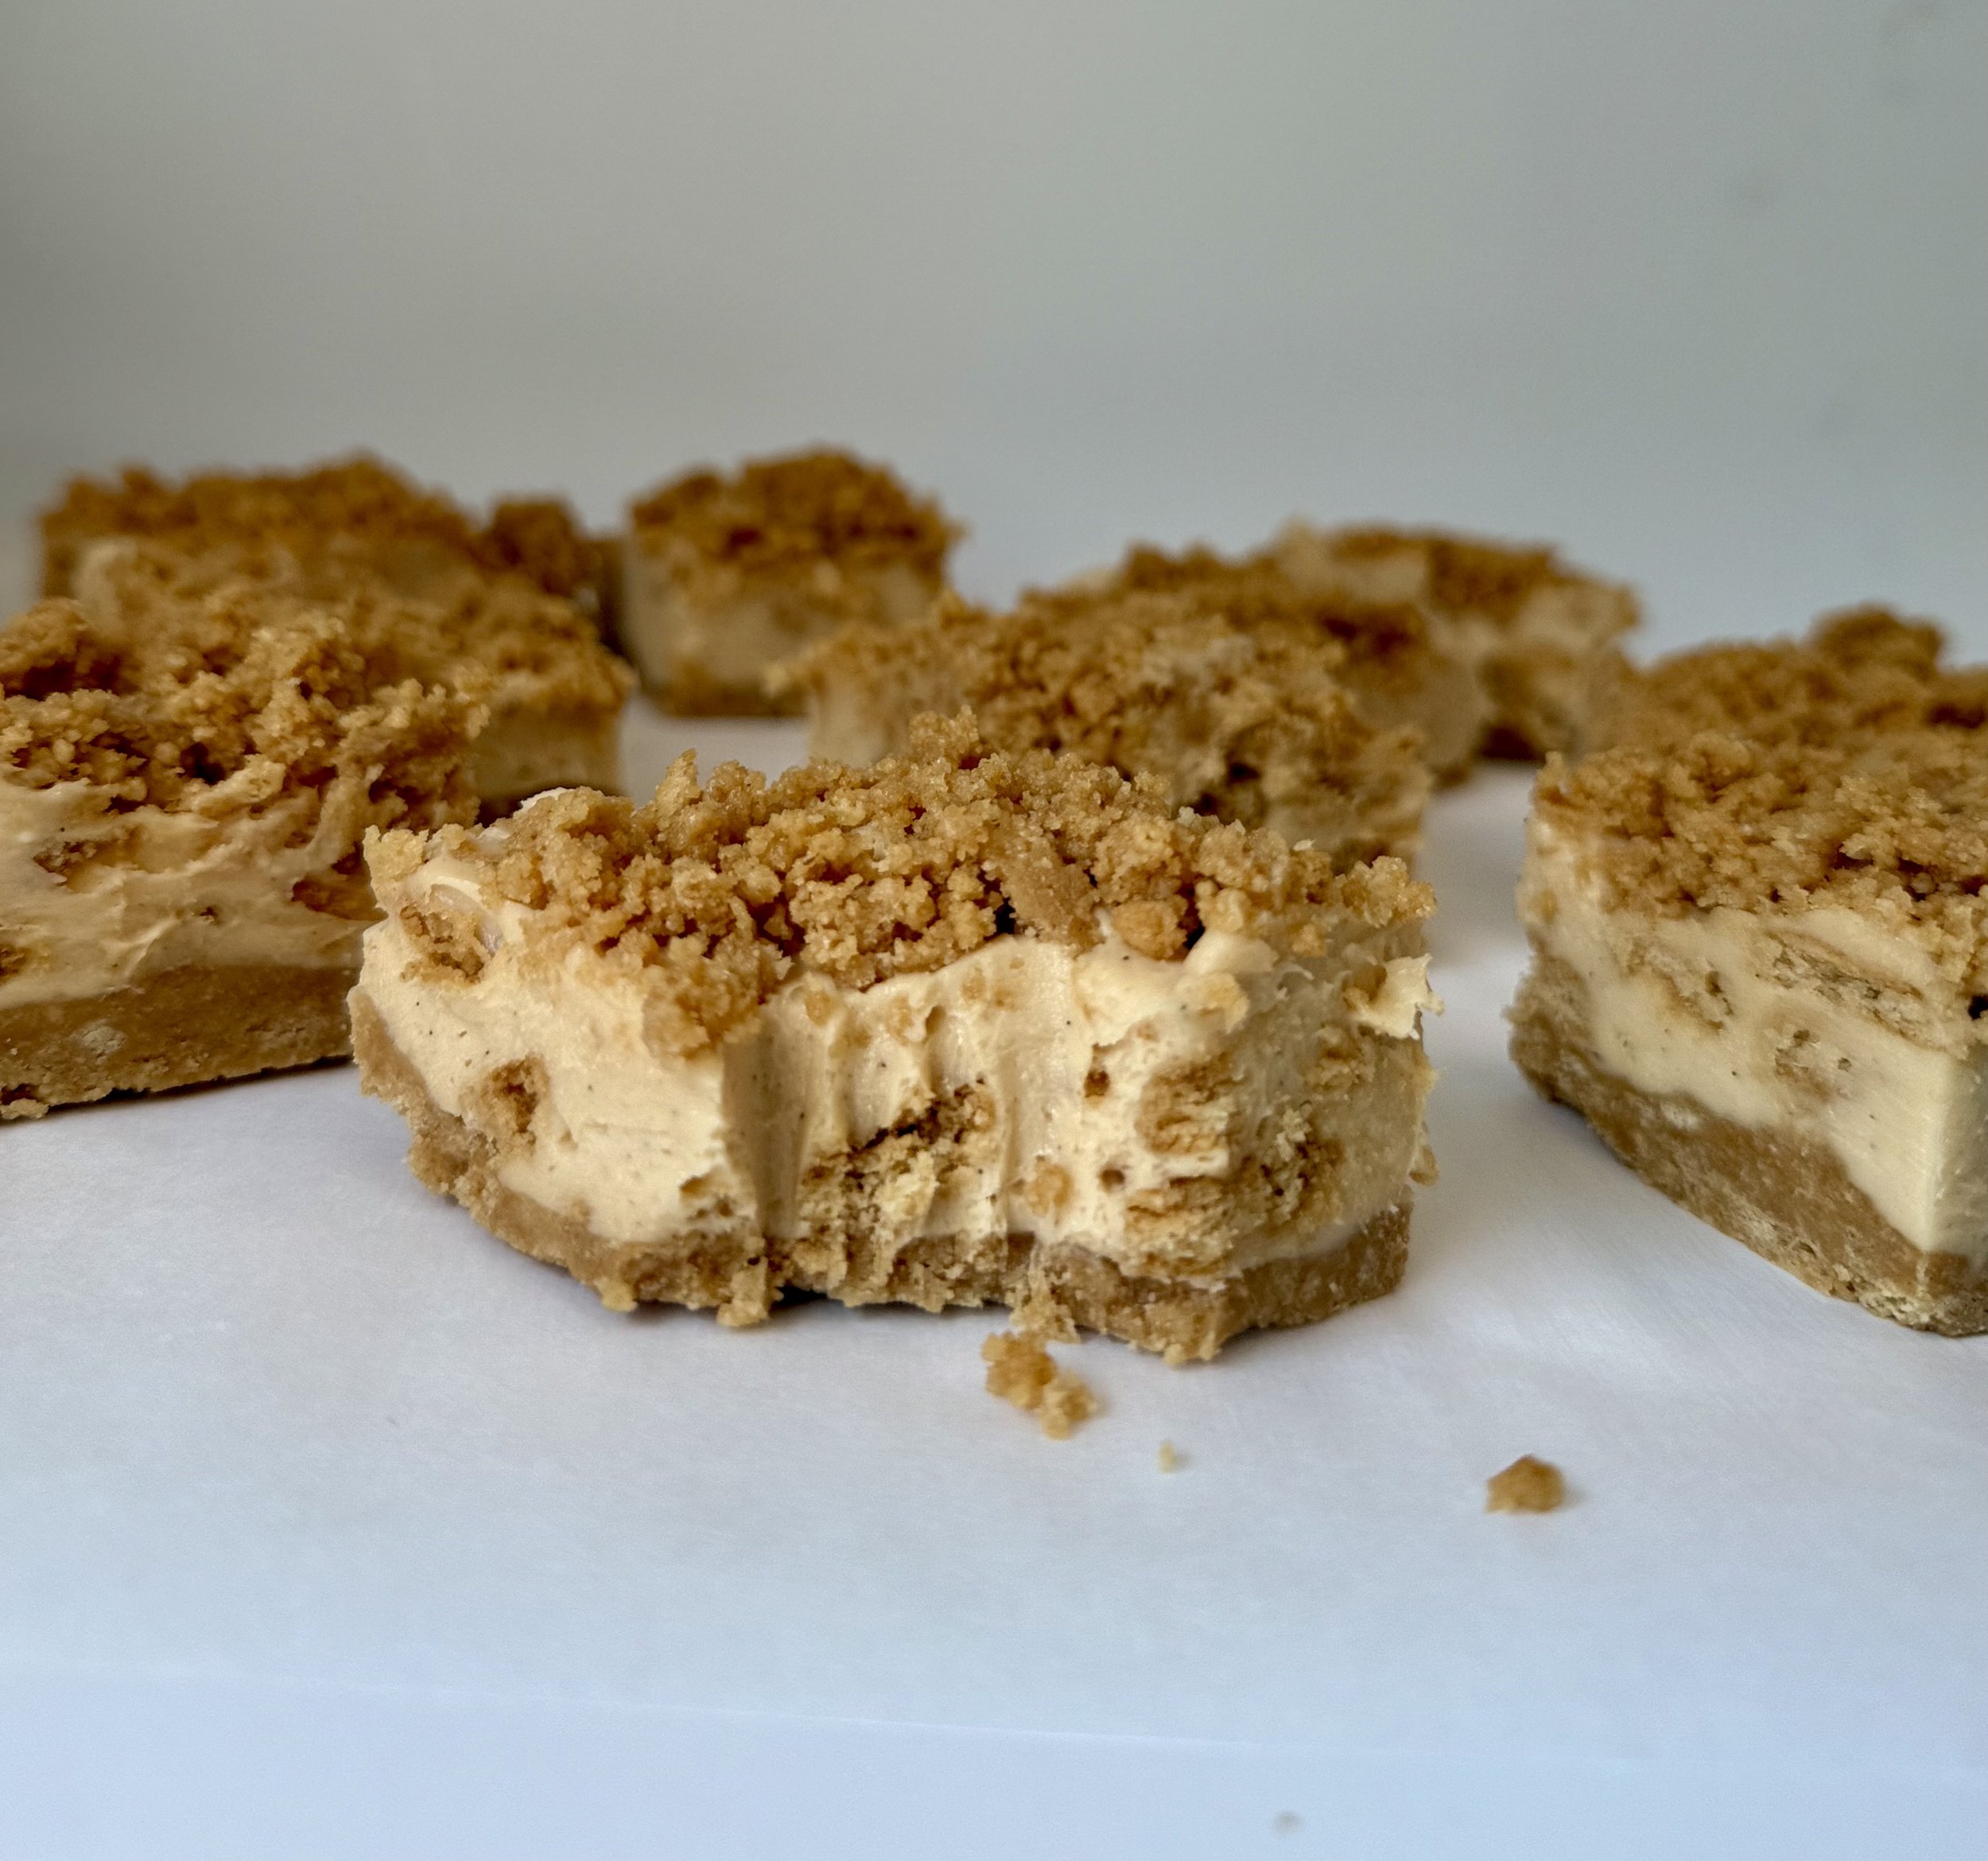
If you're a peanut butter lover like me, you're in for a serious treat. These No-Bake Nutter Butter Cheesecake Bars are the kind of dessert that feels indulgent but comes together with minimal effort—and no oven required! With a buttery Nutter Butter cookie crust, a light and creamy peanut butter cheesecake filling, and a crumbly topping made from the same cookies, every bite is rich, crunchy, and just sweet enough to keep you coming back for more.
What I love most about this recipe is how simple it is. It uses just a handful of ingredients, but the flavors are bold and nostalgic, like a cross between a cheesecake and your favorite childhood cookie. It's the perfect make-ahead dessert for parties or anytime you want to impress without breaking a sweat in the kitchen. I made these tasty bars for my Dad on Father’s Day, and let’s just say a few bars were spared…
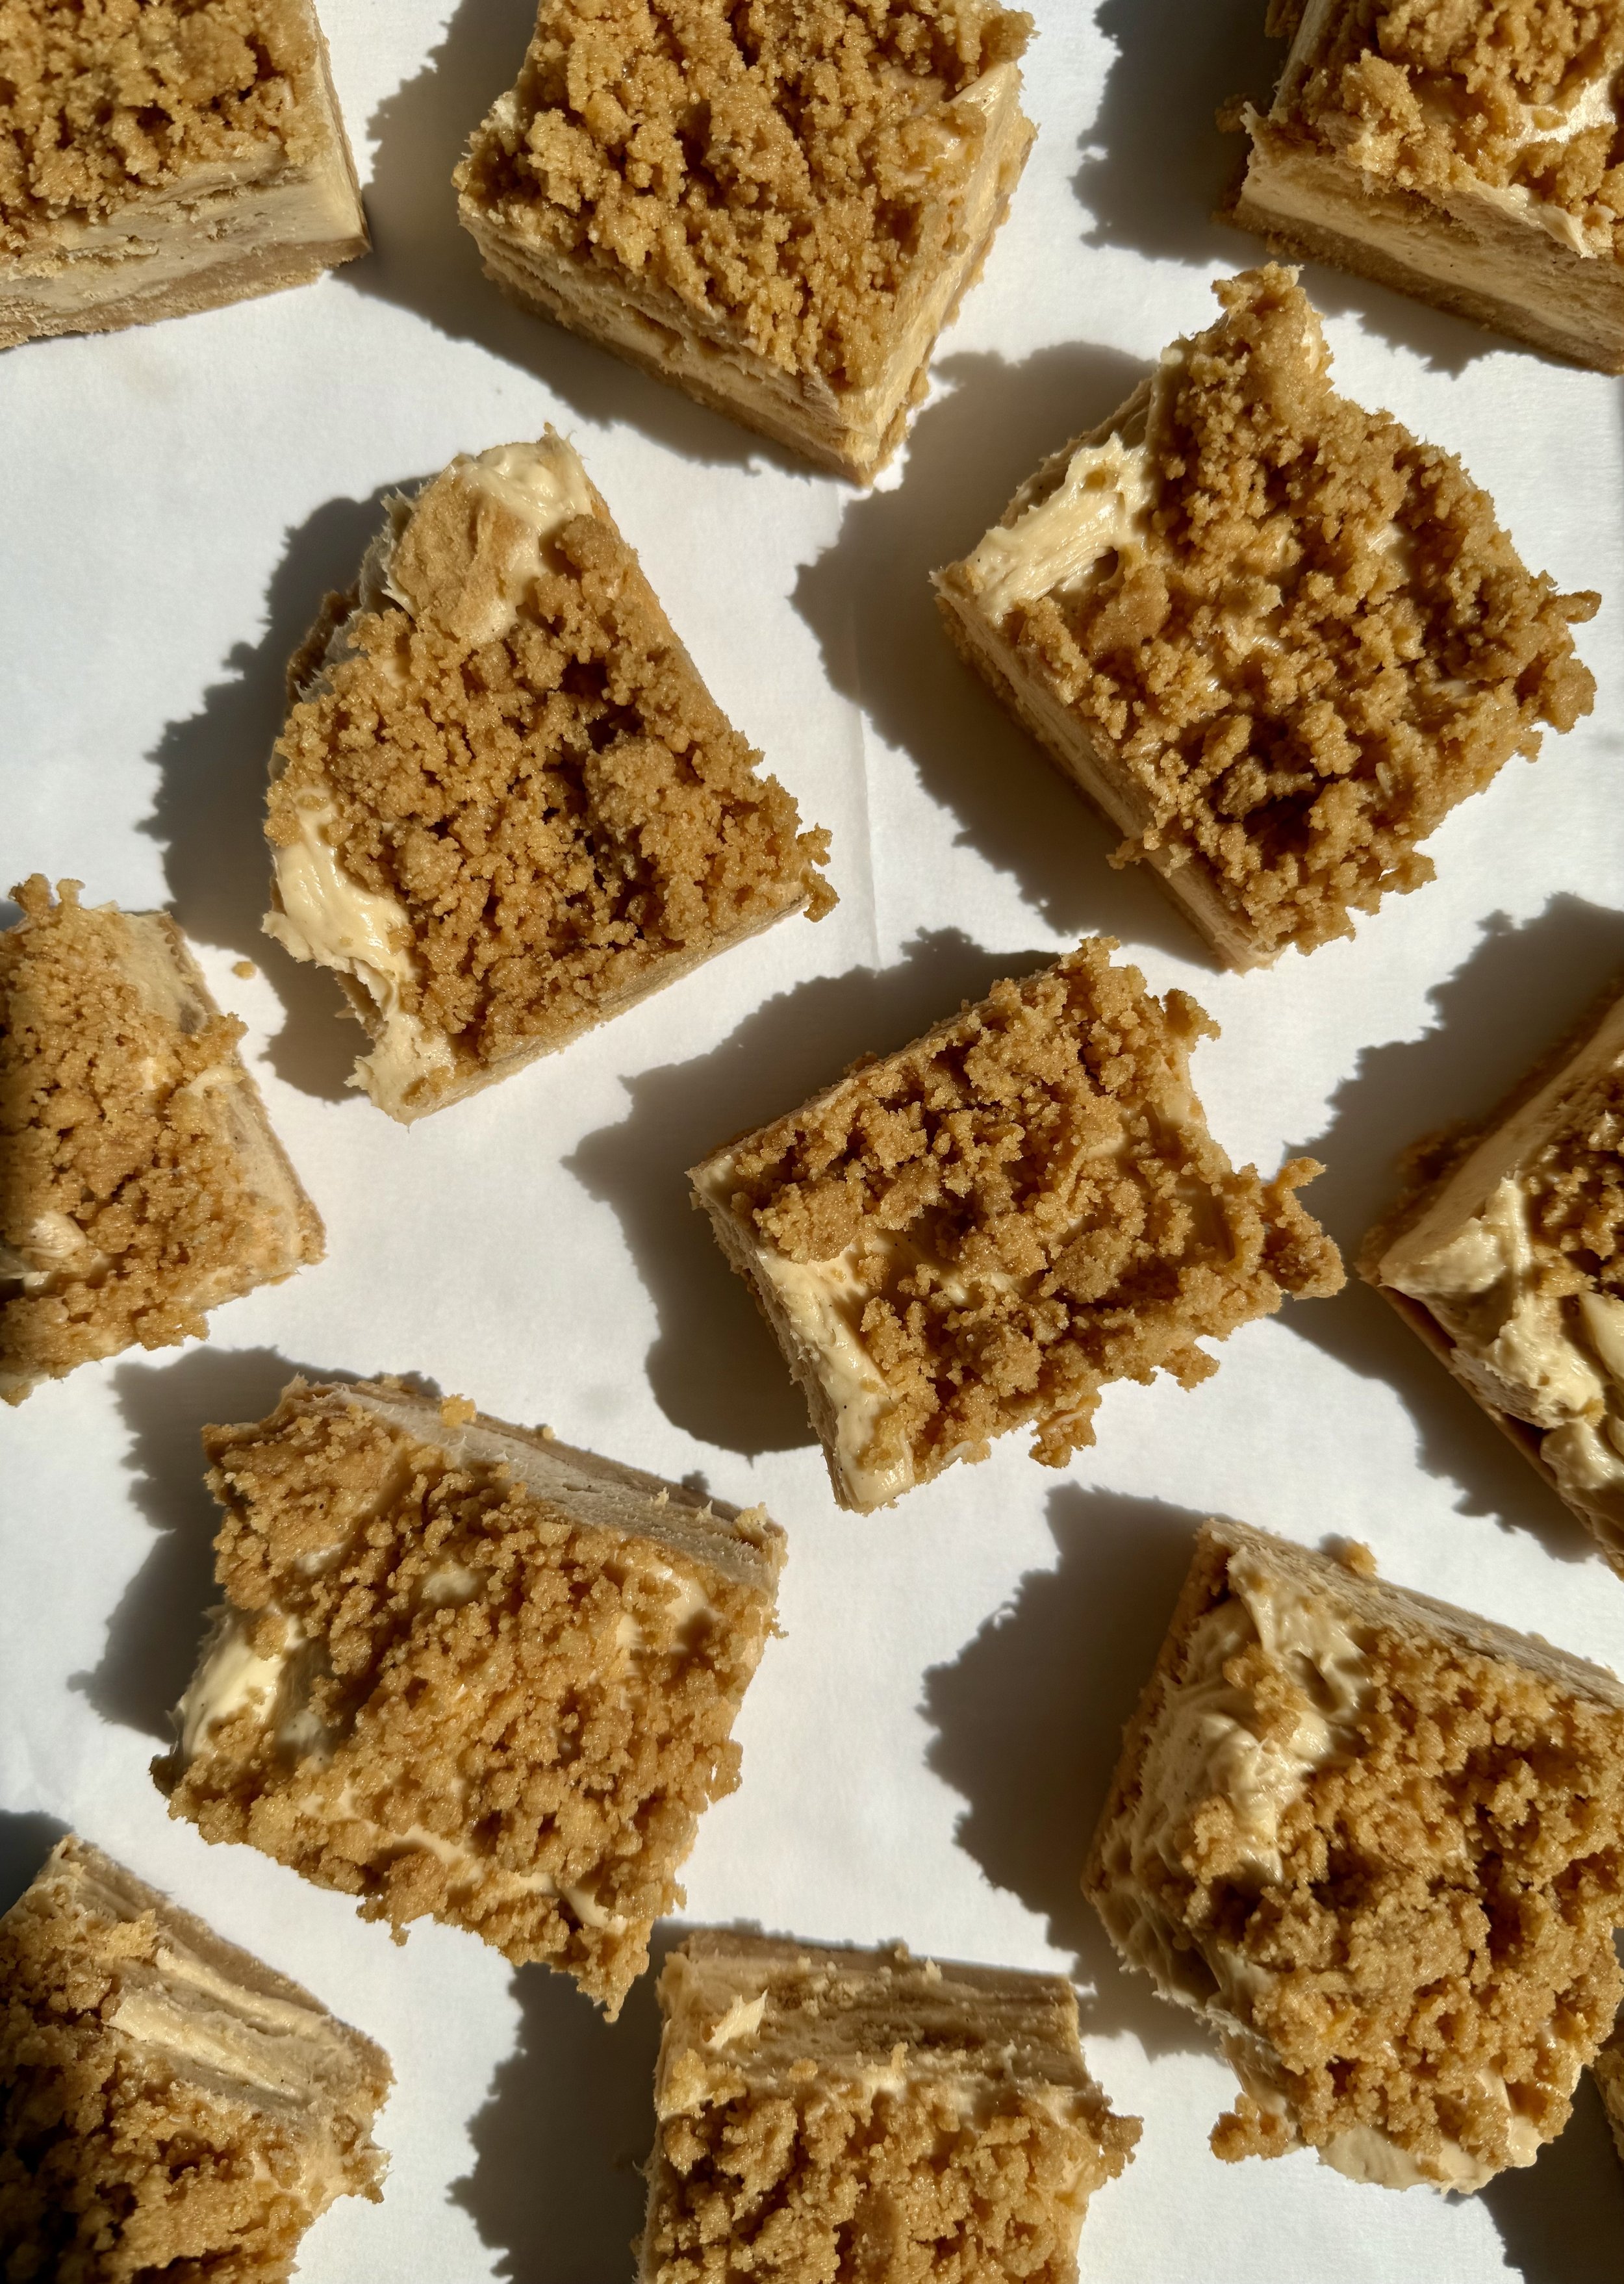
This recipe is a total lifesaver when you need an easy, make-ahead dessert that looks impressive but doesn’t require you to turn on the oven— especially with the weather getting warmer! The base is a buttery Nutter Butter crust (it’s amazing), and the filling is a smooth, peanut buttery cheesecake with crushed cookies folded in for extra texture. A crumbly cookie topping finishes it off for the ultimate trifecta: creamy, crunchy, and crazy delicious.
Let’s walk through it step by step!
Ingredients You’ll Need
For the crust:
2 cups crushed Nutter Butter cookies (about 26 cookies)
1/2 cup melted butter (1 stick)
For the peanut butter cheesecake filling:
16 oz cream cheese, softened (2 blocks)
1/2 cup creamy peanut butter
1 tsp vanilla bean paste (or vanilla extract)
1 cup powdered sugar
8–10 Nutter Butter cookies, broken into chunks
How to Make Nutter Butter Cheesecake Bars
1. Prep Your Ingredients
Start by softening the cream cheese. Let it sit at room temperature for about 30 minutes—this makes it easier to mix and helps you get that super creamy texture.
Also, line a 9x9-inch baking dish with parchment paper. This makes it way easier to lift the bars out once they’re set.
2. Make the Crust
Crush about 26 Nutter Butter cookies in a food processor or blender until you get fine crumbs. Pour them into a mixing bowl and stir in the melted butter. Mix it up until the texture feels like wet sand—it should stick together when pressed.
Set aside about one-third of the mixture (this will be your topping), and press the rest into the bottom of your baking dish to form a nice, even crust. Use your hands or the back of a spoon to really pack it in.
3. Whip Up the Filling
In a large bowl, beat the softened cream cheese, peanut butter, and vanilla until smooth and well combined. Then add the powdered sugar and mix again until light and fluffy.
Now for the fun part: crumble 8–10 Nutter Butter cookies into chunky pieces and fold them into the cream cheese mixture. These add amazing texture and little bursts of peanut butter cookie goodness in every bite.
4. Assemble
Spread the cheesecake filling evenly over the crust and smooth the top with a spatula.
Take the reserved crust mixture and crumble it over the top using your fingers or a fork. This adds the perfect crumbly finish and a little extra crunch.
5. Chill and Set
Cover the pan and pop it in the fridge for at least 6 hours, or overnight if you can wait that long. This gives the bars time to firm up so they slice beautifully.
Serve and Enjoy!
Once they’re set, lift the bars out using the parchment paper and cut into squares. You’ll get layers of cookie crust, fluffy peanut butter cheesecake, and a crunchy topping in every single bite.
These are perfect for potlucks, birthday parties, summer BBQs—or honestly, just a Wednesday night when you need a little joy. If you feel like you want another tasty peanut butter treat, try my Stuffed Peanut Butter Cookies.
How to Store Nutter Butter Cheesecake Bars
These bars are a great make-ahead dessert because they store beautifully!
Refrigerator:
Store the bars in an airtight container in the refrigerator for up to 5 days. If you're stacking them, place a sheet of parchment paper between layers to prevent sticking.
Freezer:
Want to make them ahead for a future event? You can freeze these bars, too! After chilling and slicing, wrap each bar individually in plastic wrap and place them in a freezer-safe container or zip-top bag. Freeze for up to 2 months. When you're ready to enjoy, just thaw them in the fridge for a few hours or overnight.
Tip: For the best texture, serve chilled straight from the fridge. They’re firm enough to hold their shape but still creamy and soft with every bite.
These truly are super tasty! As I procrastinate my homework to type this out, it also has me thinking about my No-Bake Oreo Cheesecake Bars and how I will be making those again next. If you love this recipe, feel free to comment below or tag me along.

No Bake Nutter Butter Cheesecake Bars
These No-Bake Nutter Butter Cheesecake Bars are a rich, creamy dessert with a crunchy cookie crust and a smooth peanut butter cheesecake filling. Perfect for any occasion, they come together quickly without ever turning on the oven!
Ingredients
- 2 cups crushed Nutter Butter cookies (about 26 individual cookies)
- 1/2 cup butter (1 stick)
- 16 ounces of cream cheese, slightly softened (2 bricks).
- 1/2 cup creamy peanut butter
- 1 tsp vanilla bean paste (or extract).
- 1 cup powdered sugar
- 8-10 Nutter Butter Cookies (broken into chunks for filling).
Instructions

Nutella Swirl Blondies

If you're looking for the perfect fusion of gooey, buttery blondies and the rich, chocolate-hazelnut decadence of Nutella, these Nutella Swirl Blondies are your new go-to treat. Made with a classic blondie base—think brown sugar, vanilla, and a soft, chewy texture—they're already packed with flavor before the Nutella even hits the batter. But what really sets them apart is the generous swirl of Nutella throughout each bar, creating a marbled effect that's as beautiful as it is delicious.
The blondies bake up with crisp, golden edges and a soft, slightly fudgy center, making them ideal for dessert, an indulgent snack, or even as a sweet addition to a brunch table. Each bite gives you the perfect mix of caramel-like richness and nutty chocolate notes. Best of all, they’re quick to whip up in a single bowl, no mixer required—just swirl, bake, and enjoy.

I don’t know about anyone else, but I absolutely love Nutella. I love the many ways it can be used, and these Nutella swirl blondies are one of my favorite ways to use it. What I love most about making these blondies is that you can make them in one bowl if you want, which saves a lot on the cleanup.
Why Is Nutella So Good?
Perfect Flavor Combo: Nutella blends rich cocoa with roasted hazelnuts, creating a creamy, nutty-chocolate flavor that’s both comforting and indulgent. It’s sweet, but not overwhelmingly so, and has just enough salt to keep it balanced.
Ultra-Creamy Texture: One of Nutella’s most appealing traits is its smooth, spreadable consistency. It melts slightly on warm toast, swirls beautifully into batters, and feels luxurious on the tongue.
Aromatic Hazelnuts: Ferrero uses specially selected hazelnuts that are roasted to enhance their deep, buttery aroma. Hazelnuts give Nutella its signature flavor and set it apart from plain chocolate spreads.
Touch of Vanilla: There’s a hint of vanilla flavoring that adds warmth and enhances the overall sweetness without being overpowering.
Nostalgic Factor: For many people, Nutella is tied to childhood memories—like spreading it on toast before school (a staple breakfast of mine), dipping fruit into it, or sneaking a spoonful straight from the jar. That emotional connection makes it taste even better.
Versatility: It’s a one-jar wonder. You can spread it, swirl it, bake with it, or eat it by the spoonful. It works with everything from fruit and bread to desserts and even pancakes.

How to Store Nutella Swirl Blondies
To keep your Nutella Swirl Blondies fresh and chewy, store them in an airtight container at room temperature for up to 4 days. If you want them to stay extra soft, you can add a slice of bread to the container—the moisture from the bread helps prevent the blondies from drying out.
For longer storage, these blondies freeze beautifully. Wrap each bar individually in plastic wrap, then place them in a freezer-safe zip-loc bag or container. They’ll keep well in the freezer for up to 2 months. When you're ready to enjoy, just let them thaw at room temperature or give them a quick 10–15 seconds in the microwave for that fresh-from-the-oven feel.
I love making blondies when I need a quick pick-me-up, and these Nutella swirl blondies did not disappoint. Leave a comment below if you love these blondies too! 😊

Nutella Swirl Blondies
These Nutella Swirl Blondies are rich, buttery bars with a fudgy center and irresistible ribbons of creamy hazelnut spread in every bite. Perfectly chewy and indulgent, they strike the ideal balance between sweet simplicity and decadent flavor.
Ingredients
- ½ cup unsalted butter (melted)
- 1 cup brown sugar
- 2 eggs (room temperature)
- 1 tbsp vanilla extract
- 1 cup of all-purpose flour
- ¼ tsp of baking powder
- ½ tsp salt
- 1/2 cup mini chocolate chips
- 1/2 cup Nutella
- Sprinkle of coarse salt on top (optional)
Instructions

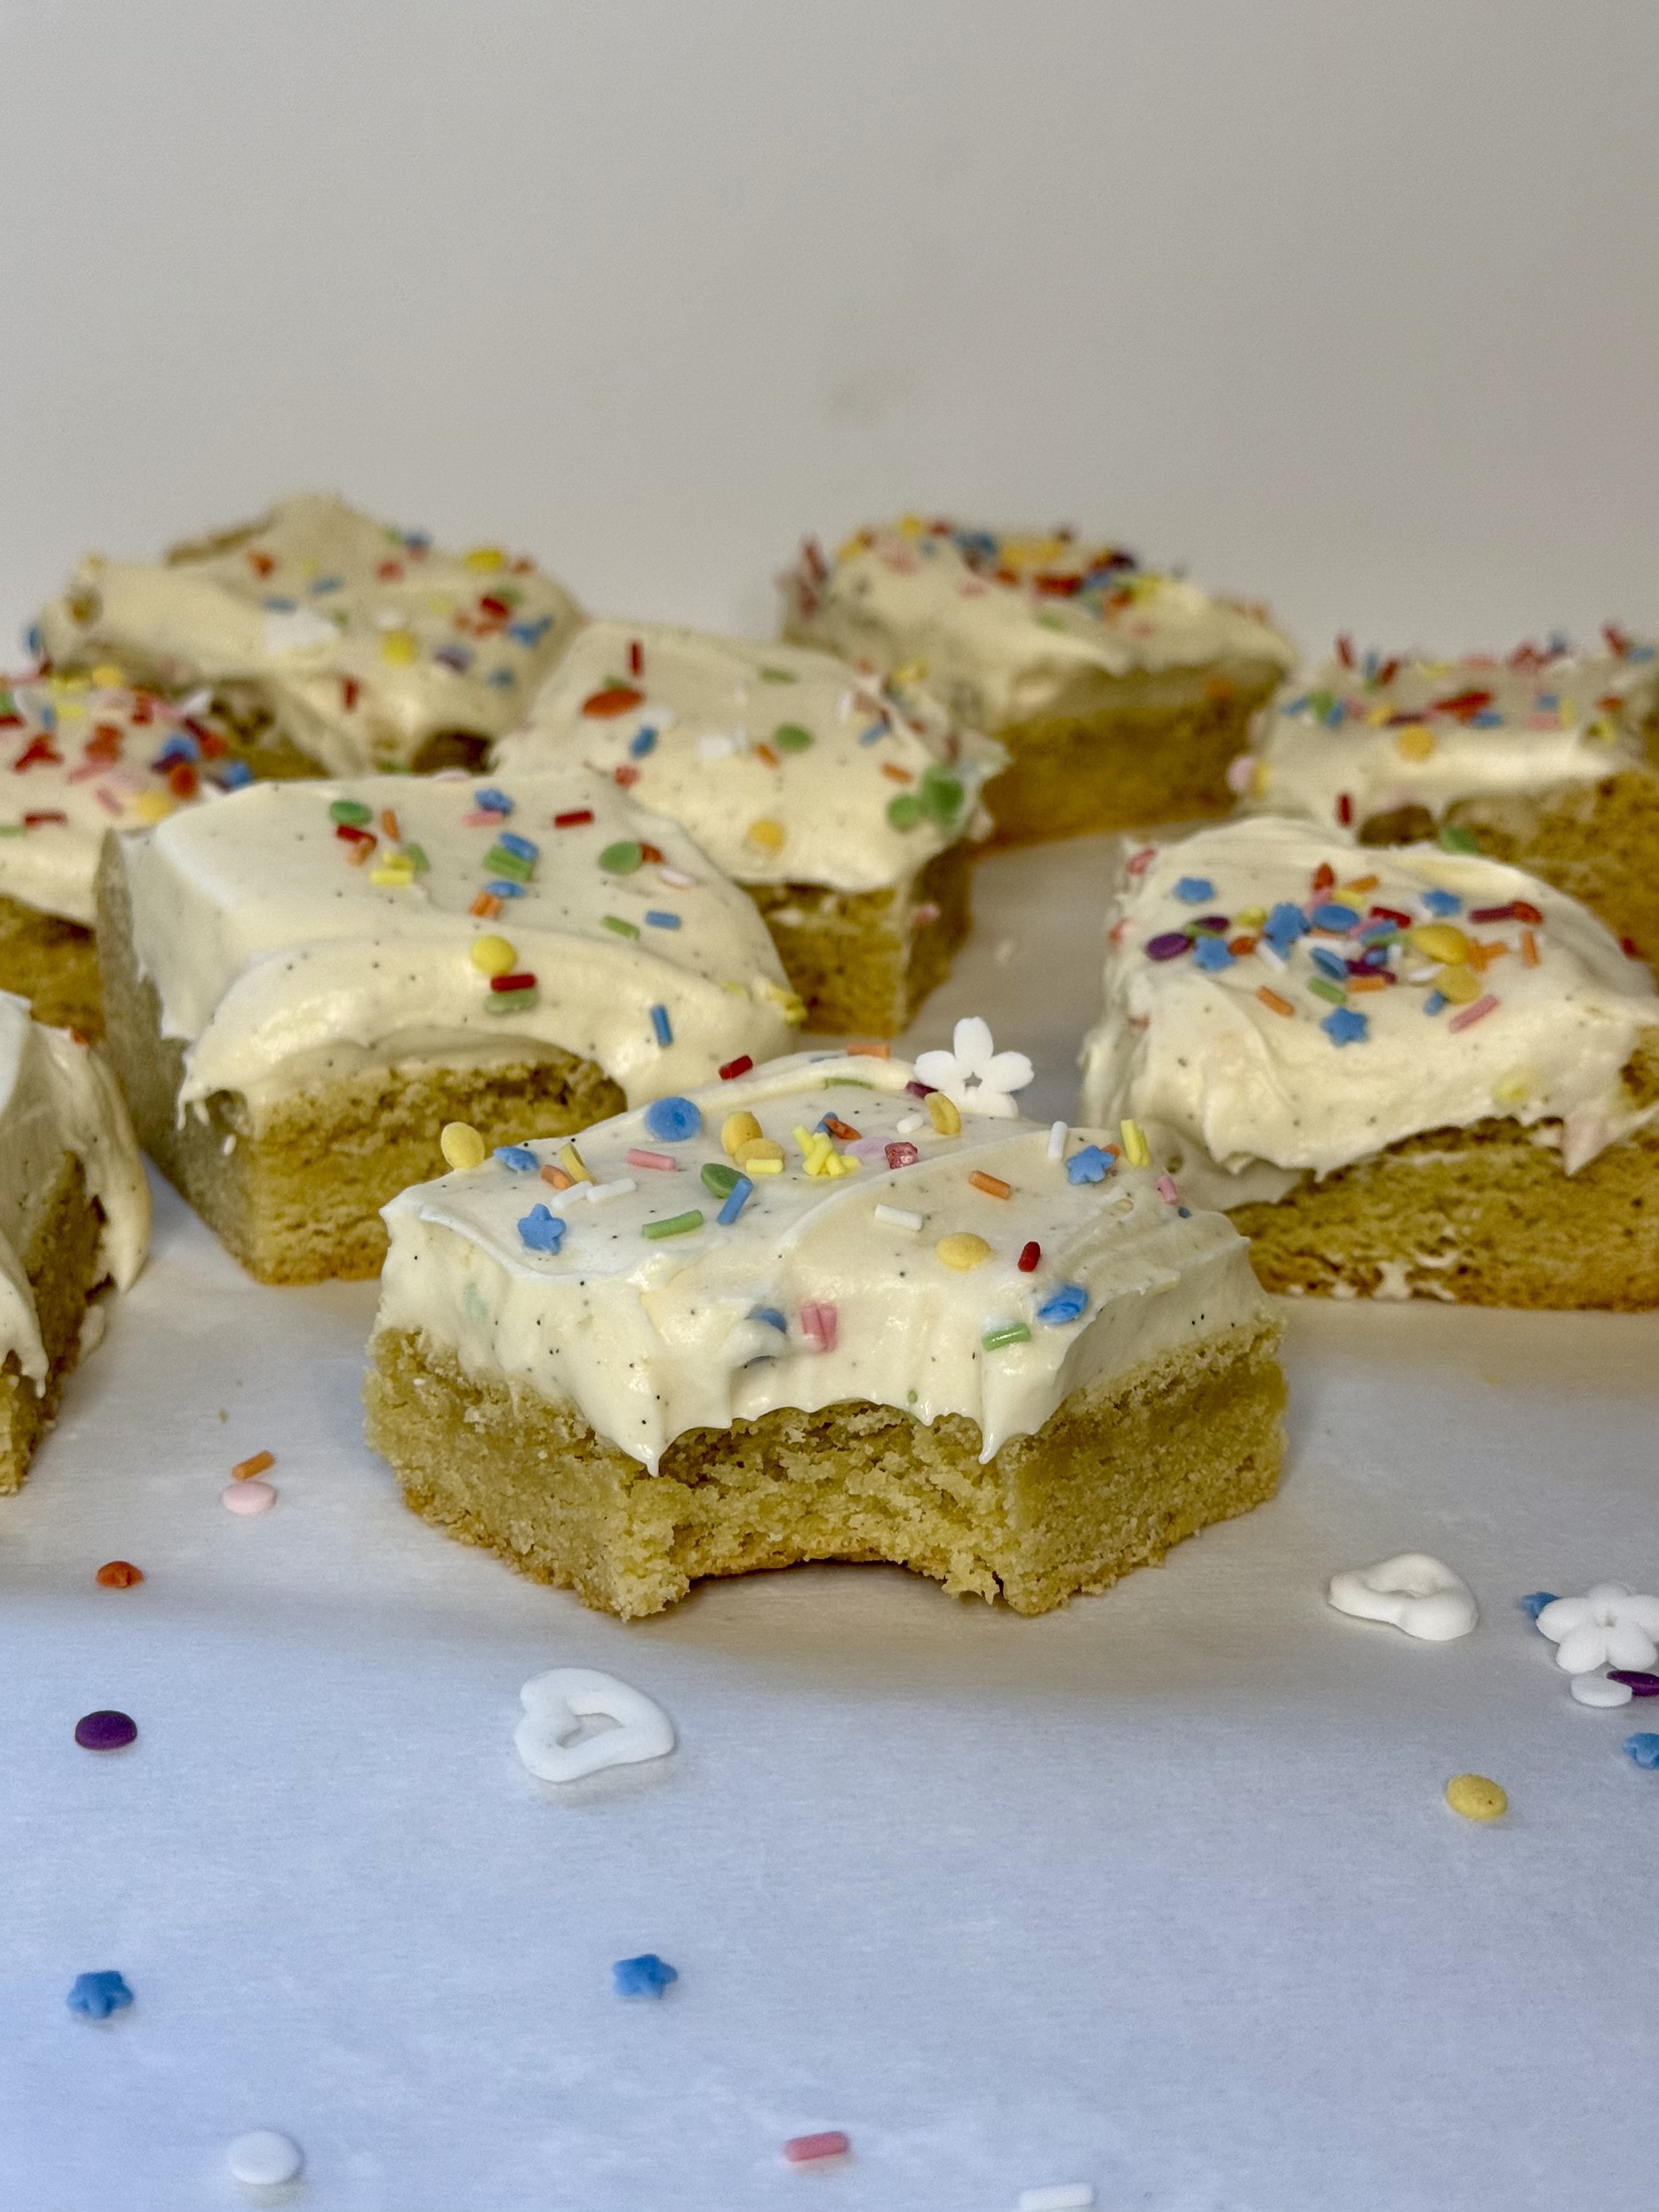
Sugar Cookie Bars
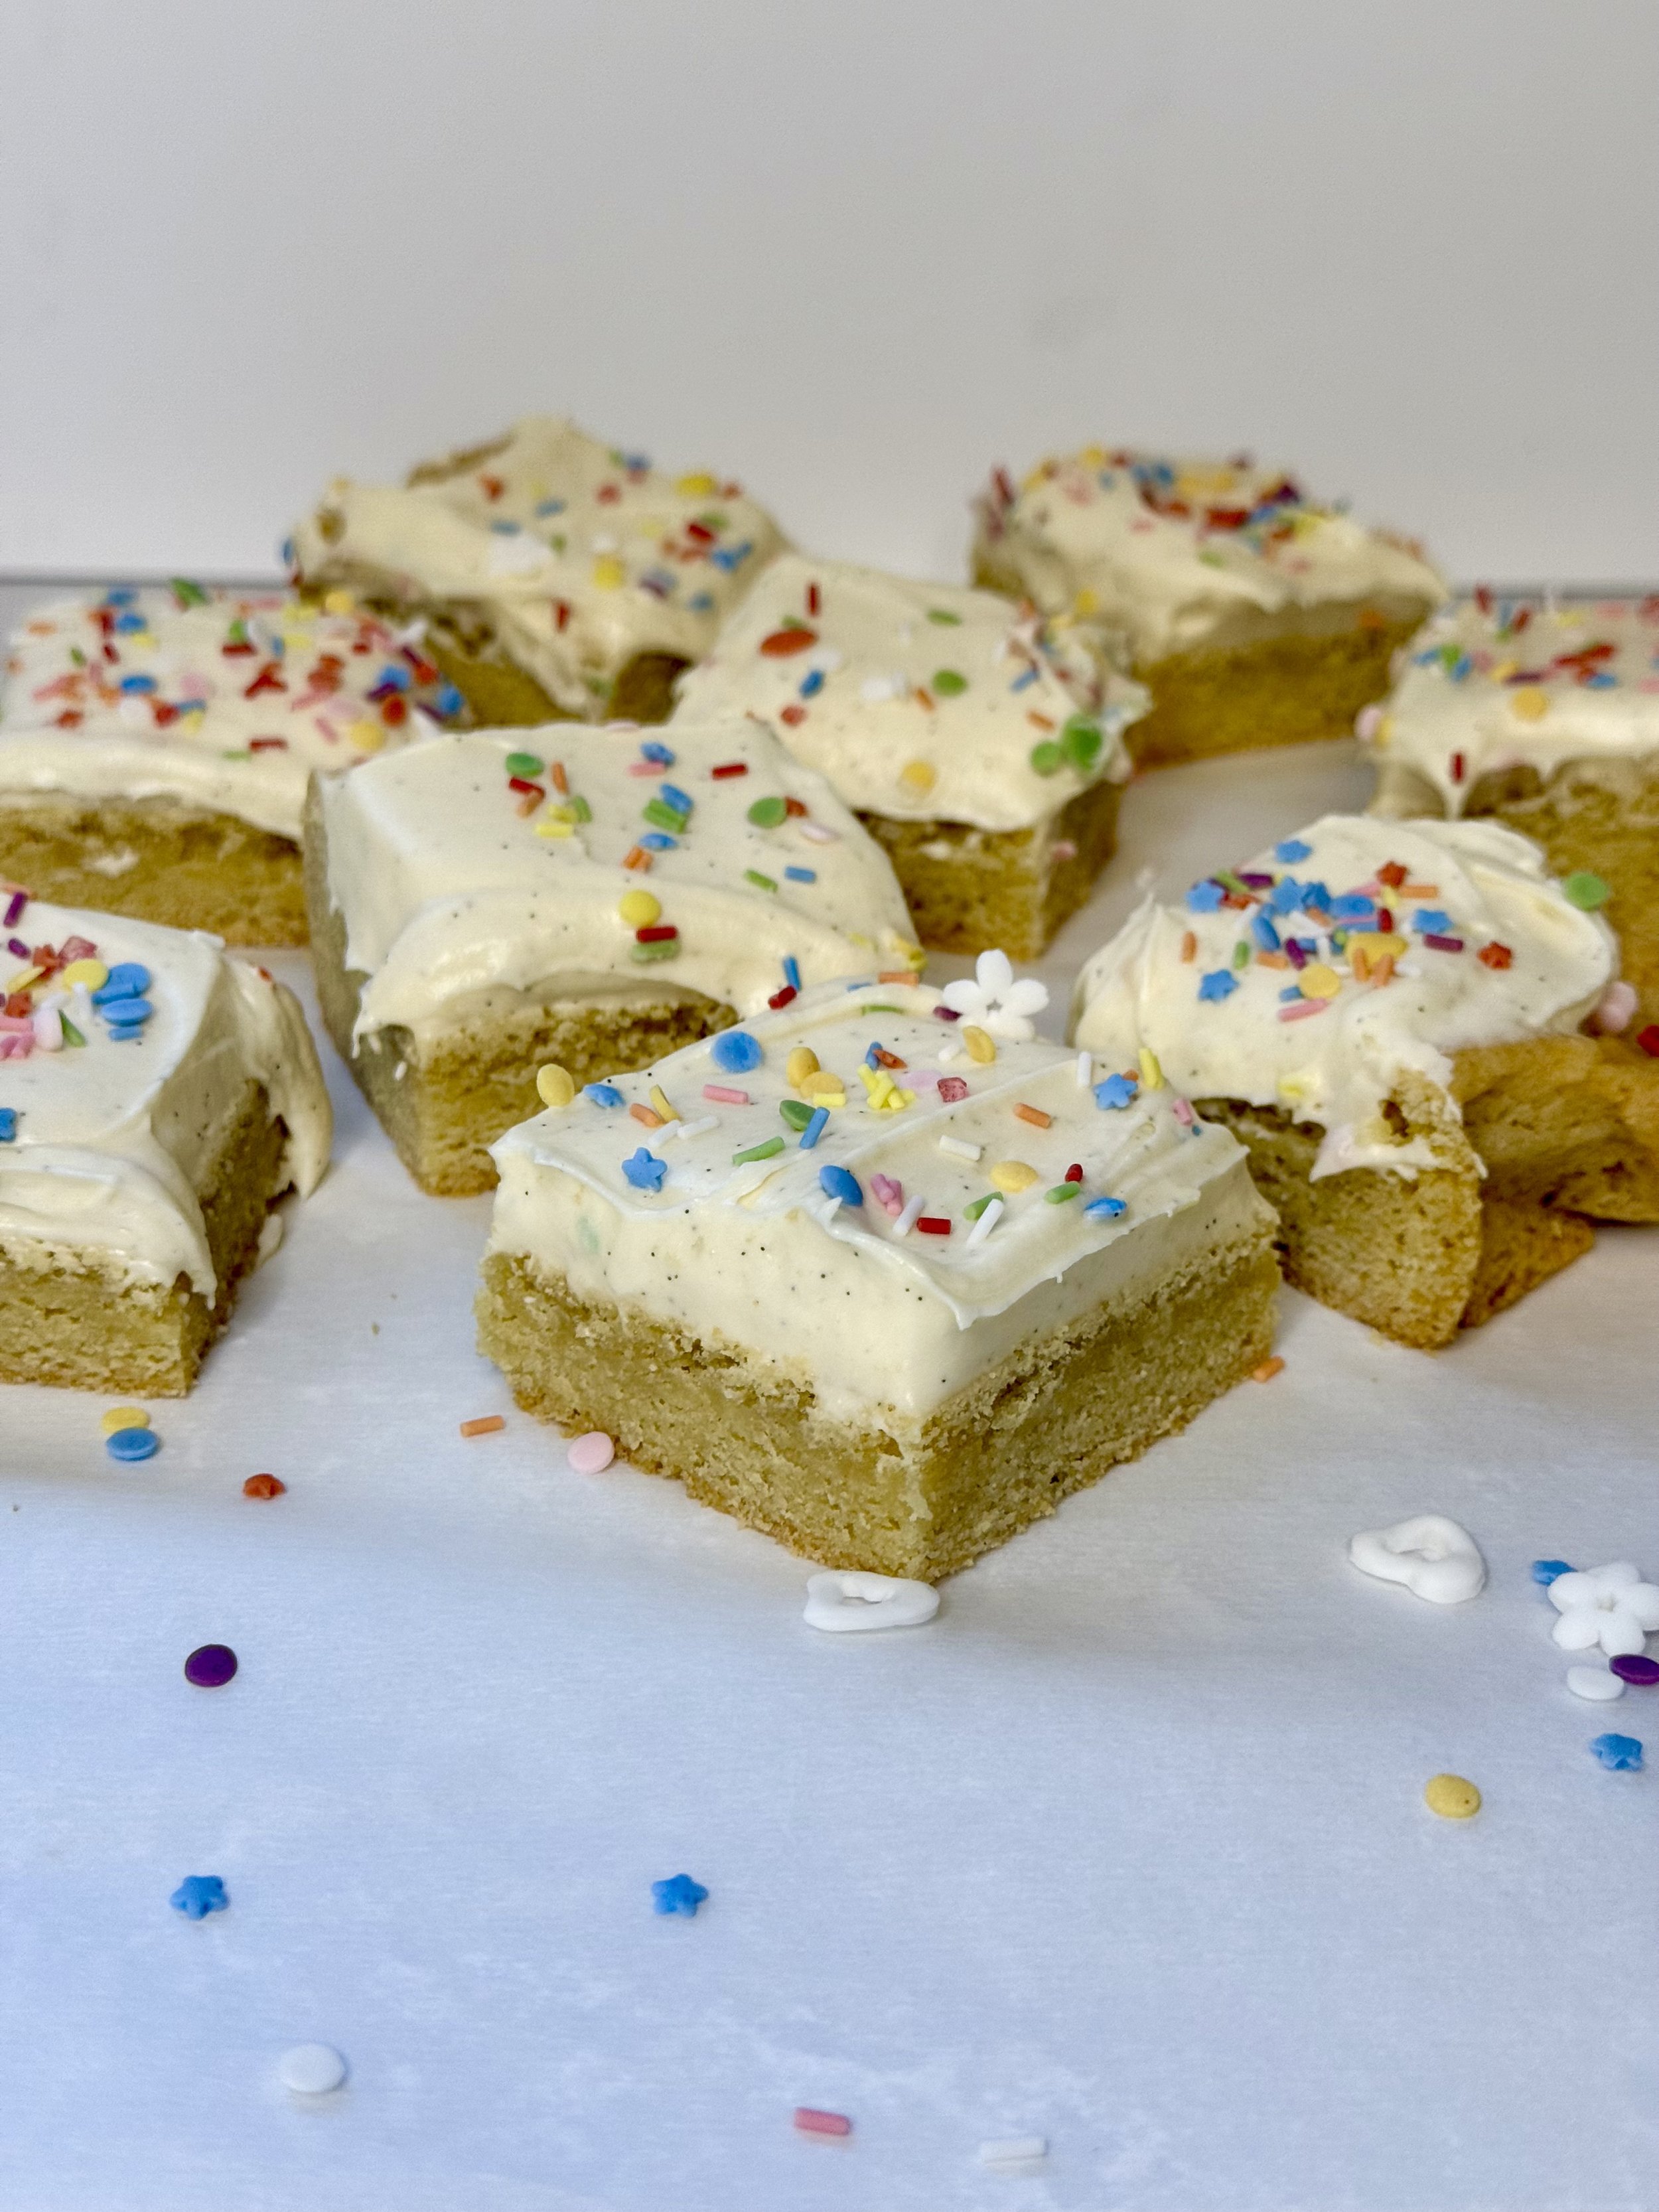
If you love classic sugar cookies but want to skip the hassle of rolling and cutting, sugar cookie bars are your new best friend. These buttery, soft bars deliver all the nostalgic flavor of traditional sugar cookies with half the effort. Baked in a single pan and topped with a generous layer of fluffy frosting (and, of course, plenty of sprinkles), they're perfect for parties, potlucks, or just because. Whether you're short on time or just craving something sweet and simple, sugar cookie bars check all the boxes.
What I love most about these sugar bars is how customizable they can be! Simply change the sprinkles to match any theme (Christmas, Halloween, Baby shower) or add food coloring to the frosting.

What takes these sugar cookie bars from delicious to downright irresistible? The cream cheese frosting. Its rich, tangy flavor perfectly balances the sweetness of the cookie base, adding a smooth, luxurious layer that melts in every bite. Unlike overly sweet buttercreams, cream cheese frosting brings a subtle depth that complements the soft, buttery bars without overpowering them. It’s the topping that makes people go back for seconds—and maybe even thirds.
In addition to the smooth frosting, the sugar cookie bars are packed with almond and vanilla extracts that create the perfect flavor for these chewy bars.
Ingredients
Butter
Sugar
Eggs
Egg yolk
Vanilla extract
Almond extract
All-purpose flour
Baking powder
Baking soda
Salt
Sprinkles - I used Trader Joe’s dye-free sprinkles for this recipe.
Storing
Once you’ve baked and frosted your sugar cookie bars to soft, sweet perfection, the next step is making sure they stay that way. Because these bars are topped with cream cheese frosting, proper storage is essential—not just for maintaining freshness and texture, but also for food safety.
After the bars are frosted and any decorations are added, allow them to sit at room temperature for about 30 minutes to help the frosting set slightly. Then, transfer the bars to an airtight container, separating layers with parchment or wax paper if you’re stacking them. Store the container in the refrigerator, where the bars will stay fresh for 4 to 5 days. The cool temperature helps preserve the cream cheese frosting while keeping the bars soft and flavorful.
If you’re planning ahead or find yourself with leftovers, sugar cookie bars also freeze beautifully. To freeze, place the bars in a single layer on a baking sheet and freeze until solid—this helps prevent smudging the frosting. Once frozen, stack the bars in a freezer-safe container with parchment paper between each layer. They’ll keep in the freezer for up to 2 months. When you’re ready to enjoy them, let the bars thaw in the refrigerator overnight or at room temperature for about an hour.
Whether you’re prepping for a party or savoring them one square at a time, proper storage ensures your sugar cookie bars stay as delicious as the day you made them.

I don’t know about you, but making anything that requires frosting is top tier for me. Frosting just adds the perfect touch to desserts, and when frosting desserts, it gives you a chance to feel like a professional.
If you make and love these sugar cookie bars, let me know below! Bonus points if you post a picture with your sprinkle choice!

Sugar Cookie Bars
Soft, chewy, and sweet, these sugar cookie bars are an easy twist on the classic treat—no rolling or cutting required! Topped with creamy frosting and sprinkles, they’re perfect for any celebration.
Ingredients
- 12 tablespoons of unsalted butter (1 1/2 sticks at room temperature).
- 1 1/2 cups sugar
- 2 eggs (room temperature)
- 1 egg yolk (room temperature)
- 1 tbsp vanilla extract
- 1/2 teaspoon almond extract
- 1 1/2 cups all-purpose flour
- 1 1/2 teaspoon baking powder
- 1/2 teaspoon baking soda
- 1/4 teaspoon salt
- Sprinkles for topping (optional)
- 3 ounces of cream cheese (softened)
- 6 tablespoons unsalted butter (softened)
- 1 3/4 cups powdered sugar
- 1/4 teaspoon salt
- 1 1/2 teaspoon vanilla bean paste (extract works too).
- 2 tablespoons milk
Instructions
Notes
- Take the cream cheese out of the refrigerator for up to one hour before making the frosting. Cream cheese is only good for up to 2 hours at room temperature.

Brown Butter Chocolate Chip Blondies

Brown Butter Chocolate Chip Blondies: A Rich, Chewy Upgrade on a Classic Treat
There’s something magical about the transformation that happens when you brown butter. That simple extra step—letting the butter melt, foam, and turn golden with little flecks of toasty milk solids—unlocks a deep, nutty aroma that adds incredible depth to baked goods. And when you swirl that into a chewy blondie batter loaded with melty chocolate chips, the result is nothing short of addictive.
Brown butter chocolate chip blondies are the dessert you make when you want something quick, comforting, and a little more special than your average cookie. The brown sugar gives them a soft, fudgy texture, while the browned butter brings a rich, toffee-like complexity that makes each bite irresistible. Whether you're baking for a gathering or just treating yourself, these blondies are the kind of simple, soul-satisfying dessert you'll find yourself making again and again.
How to Brown Butter (And Why It’s Worth It)
Browning butter is one of those small, magical steps that can totally transform your baking. It’s a simple technique—just heating butter until the milk solids toast and turn golden brown—but the result is a rich, nutty, almost caramel-like flavor that adds serious depth to everything from cookies to blondies to banana bread.
To brown butter, start with unsalted butter and use a light-colored pan (so you can see the color change clearly). Melt the butter over medium heat. First, it will melt, then bubble and foam as the water cooks off. Stir frequently, scraping the bottom of the pan with a spatula so the solids don’t stick. After about 5–7 minutes, you’ll notice golden specks forming at the bottom and a warm, nutty aroma—that’s your cue it’s ready.
As soon as it’s browned (not burned!), take the pan off the heat. You can use it immediately in your recipe, or let it cool slightly if needed. And don’t forget to scrape in all those flavorful browned bits—they’re the best part!
Brown butter is one of those game-changing ingredients that makes people wonder what your secret is—and now you know.
These blondies are the perfect treat for any occasion, or just an afternoon treat. The weather is finally getting warmer, and there’s just something about chocolate chip flavored things when it’s a sunny, warm day. These brown butter chocolate chip cookies are also perfect paired with a scoop of your favorite ice cream.

How to Store Your Blondies (If You Have Any Left!)
One of the best things about these brown butter chocolate chip blondies—aside from how insanely good they taste—is how well they keep. Once cooled completely, you can store them in an airtight container at room temperature for up to 4–5 days. They’ll stay soft and chewy, I also love how the flavor gets better the next day as the brown butter settles in.
For longer storage, blondies freeze beautifully. Just wrap individual squares tightly in plastic wrap, then pop them in a freezer-safe bag or container. They’ll keep for up to 2 months. When you're ready for a treat, let one thaw at room temperature or warm it in the microwave for a few seconds until soft and gooey again.
If you end up loving these blondies, let me know in the comments below :)

Brown Butter Chocolate Chip Blondies
Rich and chewy, these brown butter chocolate chip blondies are packed with nutty caramel flavor and melty chocolate in every bite. Perfectly golden and easy to make, they're a delicious twist on a classic treat.
Ingredients
- ½ cup + 1 tablespoon unsalted butter. (1 stick + 1 tablespoon, see notes).
- 1 cup brown sugar
- 2 eggs (room temperature)
- 1 tbsp vanilla extract
- 1 cup of all-purpose flour
- ¼ tsp of baking powder
- ½ tsp salt
- 1 cup milk chocolate chips
Instructions
Notes
- Browning butter evaporates extra moisture in the butter, losing volume. Because of this, you'll need a little extra butter. I've found that an extra tablespoon when browning equates to a 1/2 cup melted/browned. However, every butter is different. This recipe works great with a good, high-quality butter with higher butterfat. (I use Kerrygold Butter for this recipe.)

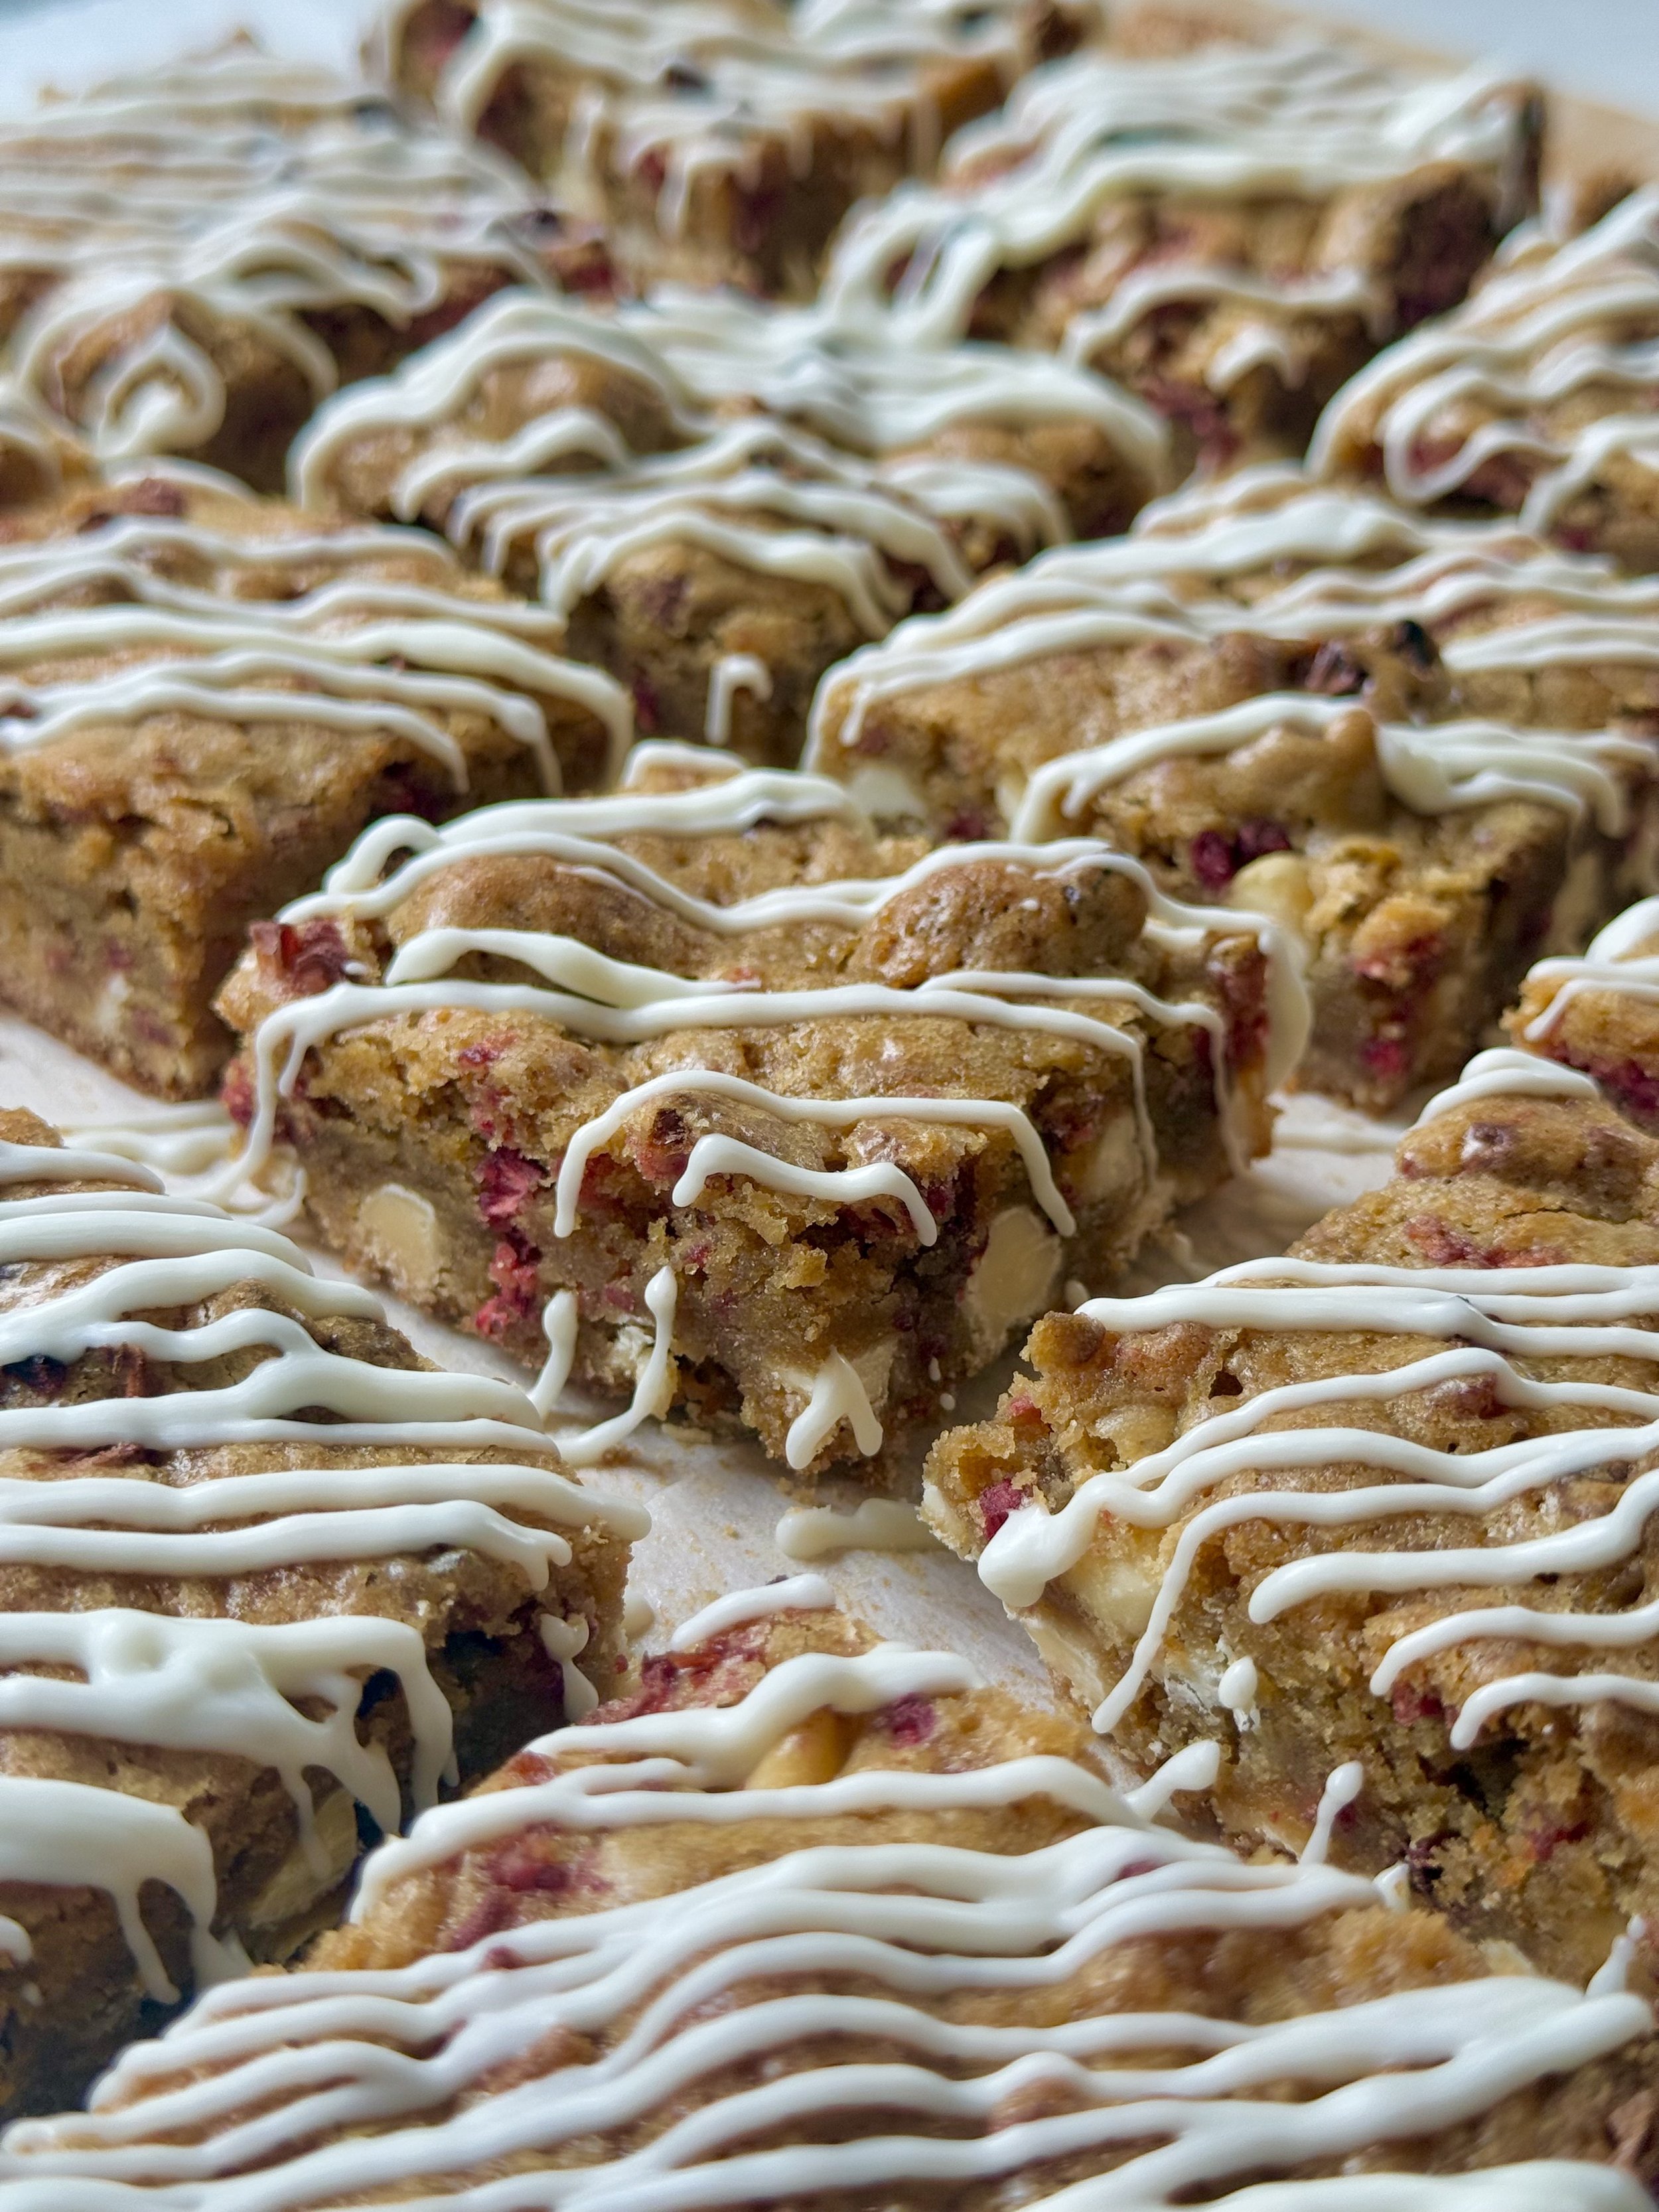
White Chocolate Raspberry Blondies

There’s something undeniably special about the combination of white chocolate and raspberries. The creamy sweetness of white chocolate pairs beautifully with the tart, fruity brightness of raspberries—and when you bring them together in a soft, buttery blondie, the result is nothing short of magical. These White Chocolate Raspberry Blondies are everything you want in a dessert bar: chewy on the inside, lightly golden on the edges, and bursting with flavor in every bite.
What makes these blondies so irresistible is their texture and balance. The rich, dense crumb is studded with melty pockets of white chocolate, adding creamy depth to each mouthful. Raspberries mixed through the batter create pockets of tangy contrast that cut through the sweetness and keep things interesting. It’s a dessert that feels both indulgent and sophisticated—perfect for bake sales, brunch spreads, afternoon tea, or simply a cozy night in.
Whether you serve them warm with a scoop of vanilla ice cream or enjoy them chilled straight from the fridge, these blondies are sure to become a favorite. They’re easy to make, beautiful to serve, and absolutely delicious to eat.
The absolute best part about making these white chocolate raspberry blondies is the simple ingredients!
Ingredients
Butter
Eggs
Vanilla
Flour
Baking Powder
Salt
Freeze-Dried Raspberries (I get mine from Trader Joe’s)
White Chocolate chips
Why freeze-dried raspberries?
One of the best upgrades you can make to your White Chocolate Raspberry Blondies is swapping out fresh raspberries for freeze-dried ones. While fresh raspberries are delicious, they can release a lot of moisture during baking, which may lead to soggy patches or an uneven texture in your blondies. Freeze-dried raspberries, on the other hand, pack all the bold, tart raspberry flavor without the added moisture. They retain their vibrant color and crisp texture, creating pretty speckles of raspberry throughout the blondie while maintaining that coveted chewy, buttery crumb. Plus, freeze-dried fruit is shelf-stable, easy to store, and available year-round—so you can enjoy this recipe anytime, no matter the season.
If you needed to make a swap from freeze-dried raspberries, I would use frozen!

I’m writing this recipe a week before I start my internship for school, and I am so excited to be near the end, with graduation two and a half months away. I’m currently enjoying a two-week break from classes until the next semester starts, and I am so grateful for these little breaks. Especially because it gives me more time to bake — I’ve always loved baking/cooking new recipes, feeling so satisfied when it turns out good. Trying out new recipes and sharing that satisfaction with you brings me so much joy, because who doesn’t like a good sweet treat?
Not to bore you too much.
How to store these White Chocolate Raspberry Blondies:
One of the best things about these blondies—aside from how amazing they taste—is how well they store. Once they’ve cooled completely, you can keep them in an airtight container at room temperature for up to 3 days. They’ll stay soft, chewy, and full of flavor. If you’d like to keep them fresher for longer, store them in the fridge for up to a week. The texture will become slightly firmer when chilled, but the flavor remains delicious, and some people even prefer them cold!
For longer storage, these blondies also freeze beautifully. Wrap individual squares tightly in plastic wrap and place them in a freezer-safe bag or container. They’ll keep well for up to 2 months. When you’re ready to enjoy one, just let it thaw at room temperature for about 30 minutes, or warm it briefly in the microwave for that fresh-baked taste.
Finally, the reason you’ve been scrolling for so long: ✨the recipe✨
If you make and love these blondies, let me know your thoughts in the comments below! Or if you didn’t like them 😢

White Chocolate Raspberry Blondies
These white chocolate raspberry blondies are rich, buttery bars studded with creamy white chocolate chips and tart raspberries for the perfect sweet-tangy balance. Soft, chewy, and bursting with flavor, they make an irresistible treat for any occasion.
Ingredients
- ½ cup unsalted butter (melted)
- 1 cup brown sugar
- 2 eggs (room temperature)
- 1 tbsp vanilla extract
- 1 cup of all-purpose flour
- ¼ tsp of baking powder
- ½ tsp salt
- 1 cup freeze-dried raspberries
- 1 cup white chocolate chips
- 1/2 cup white chocolate chips
- 1/2 tsp coconut oil
Instructions
Easter M&M Blondies

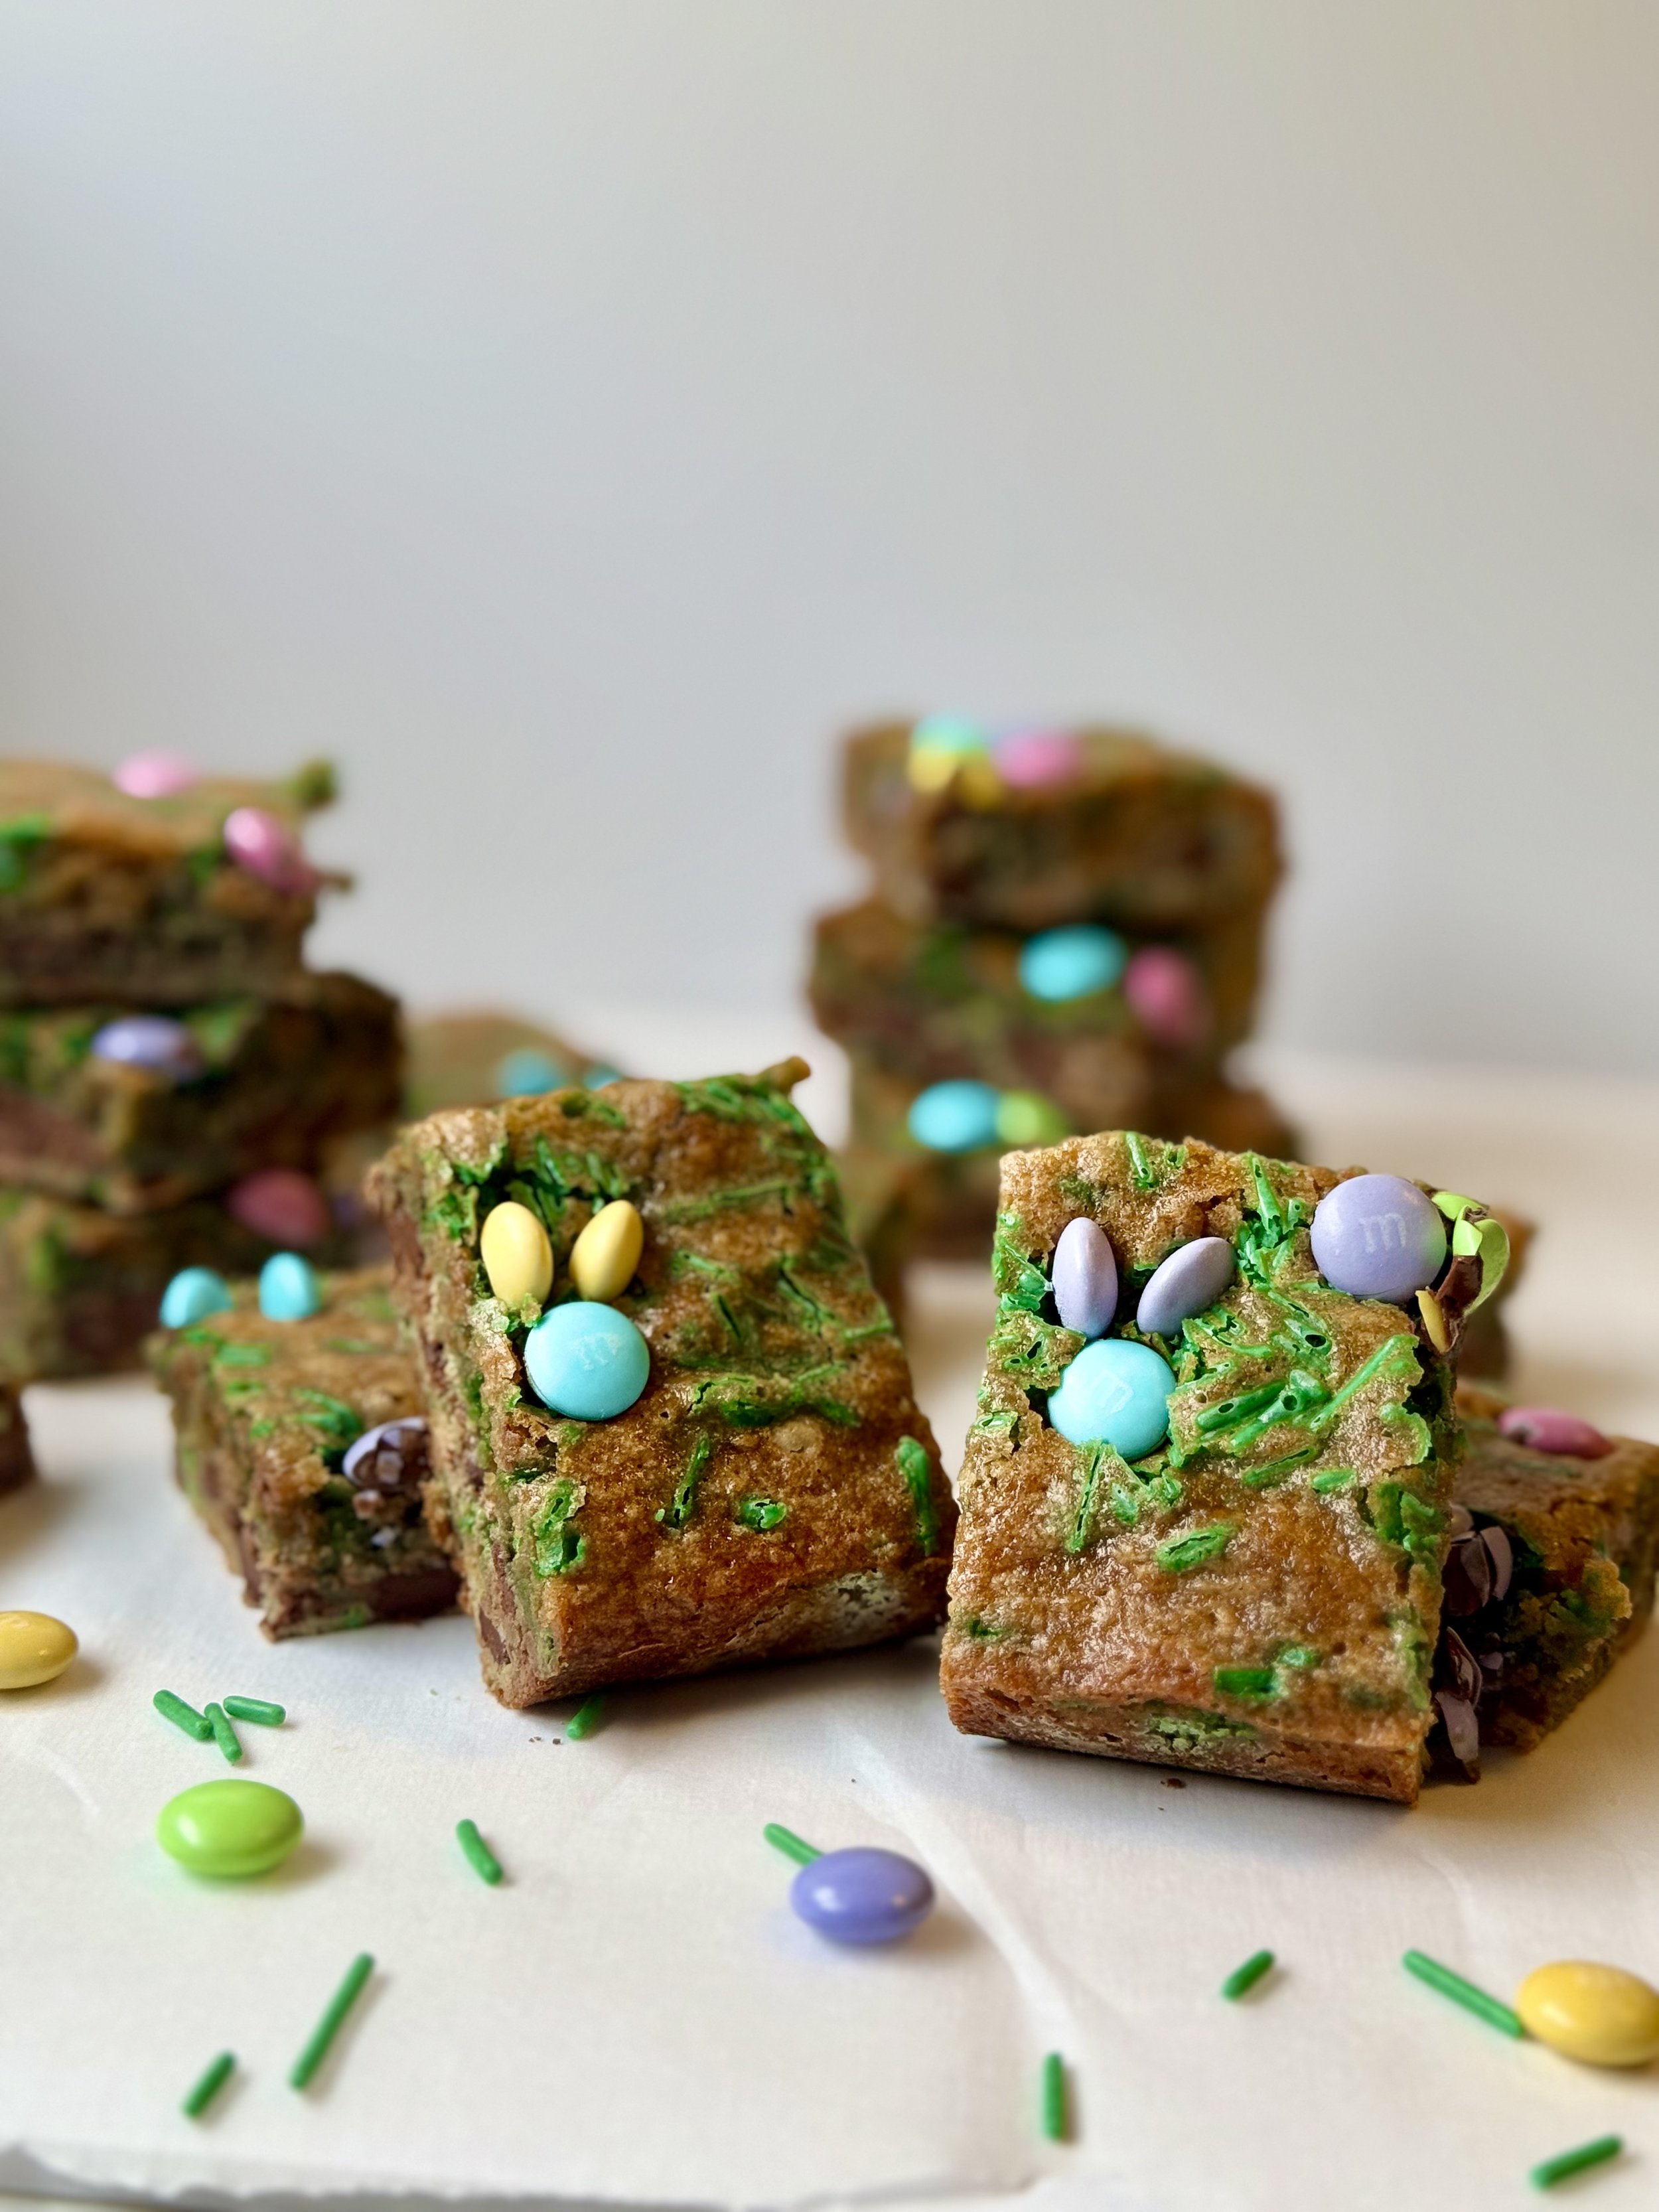
Easter M&M Blondies with Flower and Bunny-Shaped M&Ms
Easter is the perfect time to indulge in sweet treats, and these pastel-colored Easter M&M blondies take the holiday’s festive spirit to a whole new level! These soft and chewy blondies are packed with the rich flavor of brown sugar and butter, while the vibrant pastel M&Ms add a pop of color and a touch of Easter cheer.
What makes these blondies extra special is the inclusion of Easter-themed M&Ms shaped like flowers and bunnies! Imagine biting into a warm, gooey blondie and finding an M&M shaped like a cute little bunny or a delicate flower— it’s the perfect surprise that makes these treats even more charming and fun.
The pastel-colored M&Ms (think soft pinks, purples, blues, and yellows) not only look beautiful but add just the right amount of crunch and sweetness to balance the richness of the blondie base. If you’re baking for an Easter celebration, these blondies are not just a treat for the taste buds but also a visual delight!

One of the best parts of making these blondies is the needed simple ingredients!
Butter
Eggs
Vanilla
Flour
Baking Powder
Salt
Sprinkles
M&M’s

How to Make Easter-Colored M&M Blondies
Start by prepping your blondie base: melt butter and mix it together with brown sugar, eggs, and a dash of vanilla. Mix in flour, baking powder, and a pinch of salt until the batter is thick and smooth. Then add some sprinkles and M&M’s for the best part of the blondies. Pour the batter into a greased baking pan and top with extra green sprinkles to give it a grass-looking theme for the flowers and bunnies.
Bake the blondies until they’re golden and set in the middle, and then let them cool slightly before placing the flower and bunny-shaped M&M’s on top. When you slice through these blondies, you’ll see the bright and cheerful M&Ms peeking through, and each bite will have a balance of gooey, buttery goodness and the perfect hint of chocolate crunch from the M&Ms.

Storing
After baking your M&M blondies, storing them properly will help keep them fresh and delicious for as long as possible. Here’s how to store them after baking:
Cool Completely: Before storing, make sure your blondies are completely cooled. This prevents condensation from forming inside the storage container, which can make them soggy.
Room Temperature Storage: Store your blondies in an airtight container at room temperature to keep them soft and chewy. They will stay fresh for about 3-4 days this way. You can place a piece of parchment paper between layers to prevent them from sticking together.
Refrigeration: If you prefer, refrigerate your blondies to extend their freshness for up to a week. Just ensure they’re in an airtight container to prevent them from drying out. Before serving, let them sit at room temperature for a few minutes to regain their softness.
Freezing: If you want to store them even longer, freezing is a great option! Wrap individual blondies tightly in plastic wrap or foil, then place them in a zip-top bag or airtight container. They can stay frozen for up to 2-3 months. To enjoy, just let them thaw at room temperature or warm them in the microwave for a few seconds for that fresh-baked taste.
By following these simple storage tips, your blondies will stay as delicious and chewy as the day they were baked!
Why These Blondies Are a Must for Easter
Not only are these M&M blondies a treat for your taste buds, but they also make for a show-stopping dessert to bring to any Easter gathering. The bright pastel colors bring out the playful side of Easter, and the bunny and flower shapes are perfect for getting into the holiday spirit. Plus, they’re simple to make, meaning you can spend more time enjoying the holiday and less time in the kitchen.
Whether you’re baking for an Easter brunch, a family gathering, or just looking for a sweet treat to celebrate the season, these Easter-colored M&M blondies will surely be a hit. They’re adorable, delicious, and will have everyone asking for the recipe!
If you enjoy these blondies as much as I do, leave a comment below! Enjoy :)

Easter M&M Blondies
These chewy Easter M&M blondies with sprinkles are a delicious dessert filled with colorful candy-coated chocolate and a burst of sweetness from the vibrant green sprinkles. Their rich, buttery texture combined with the fun crunch of M&Ms makes every bite irresistible. Perfect for a fun Easter treat!
Ingredients
- ½ cup unsalted butter (melted)
- 1 cup brown sugar
- 2 eggs (room temperature)
- 1 tbsp vanilla extract
- 1 cup of all-purpose flour
- ¼ tsp of baking powder
- ½ tsp salt
- 1 cup pastel M&M's (plus a 1/4 cup to top)
- 1/4 cup green sprinkles, plus 1 tbsp for topping.
Instructions

Carrot Cake Blondies

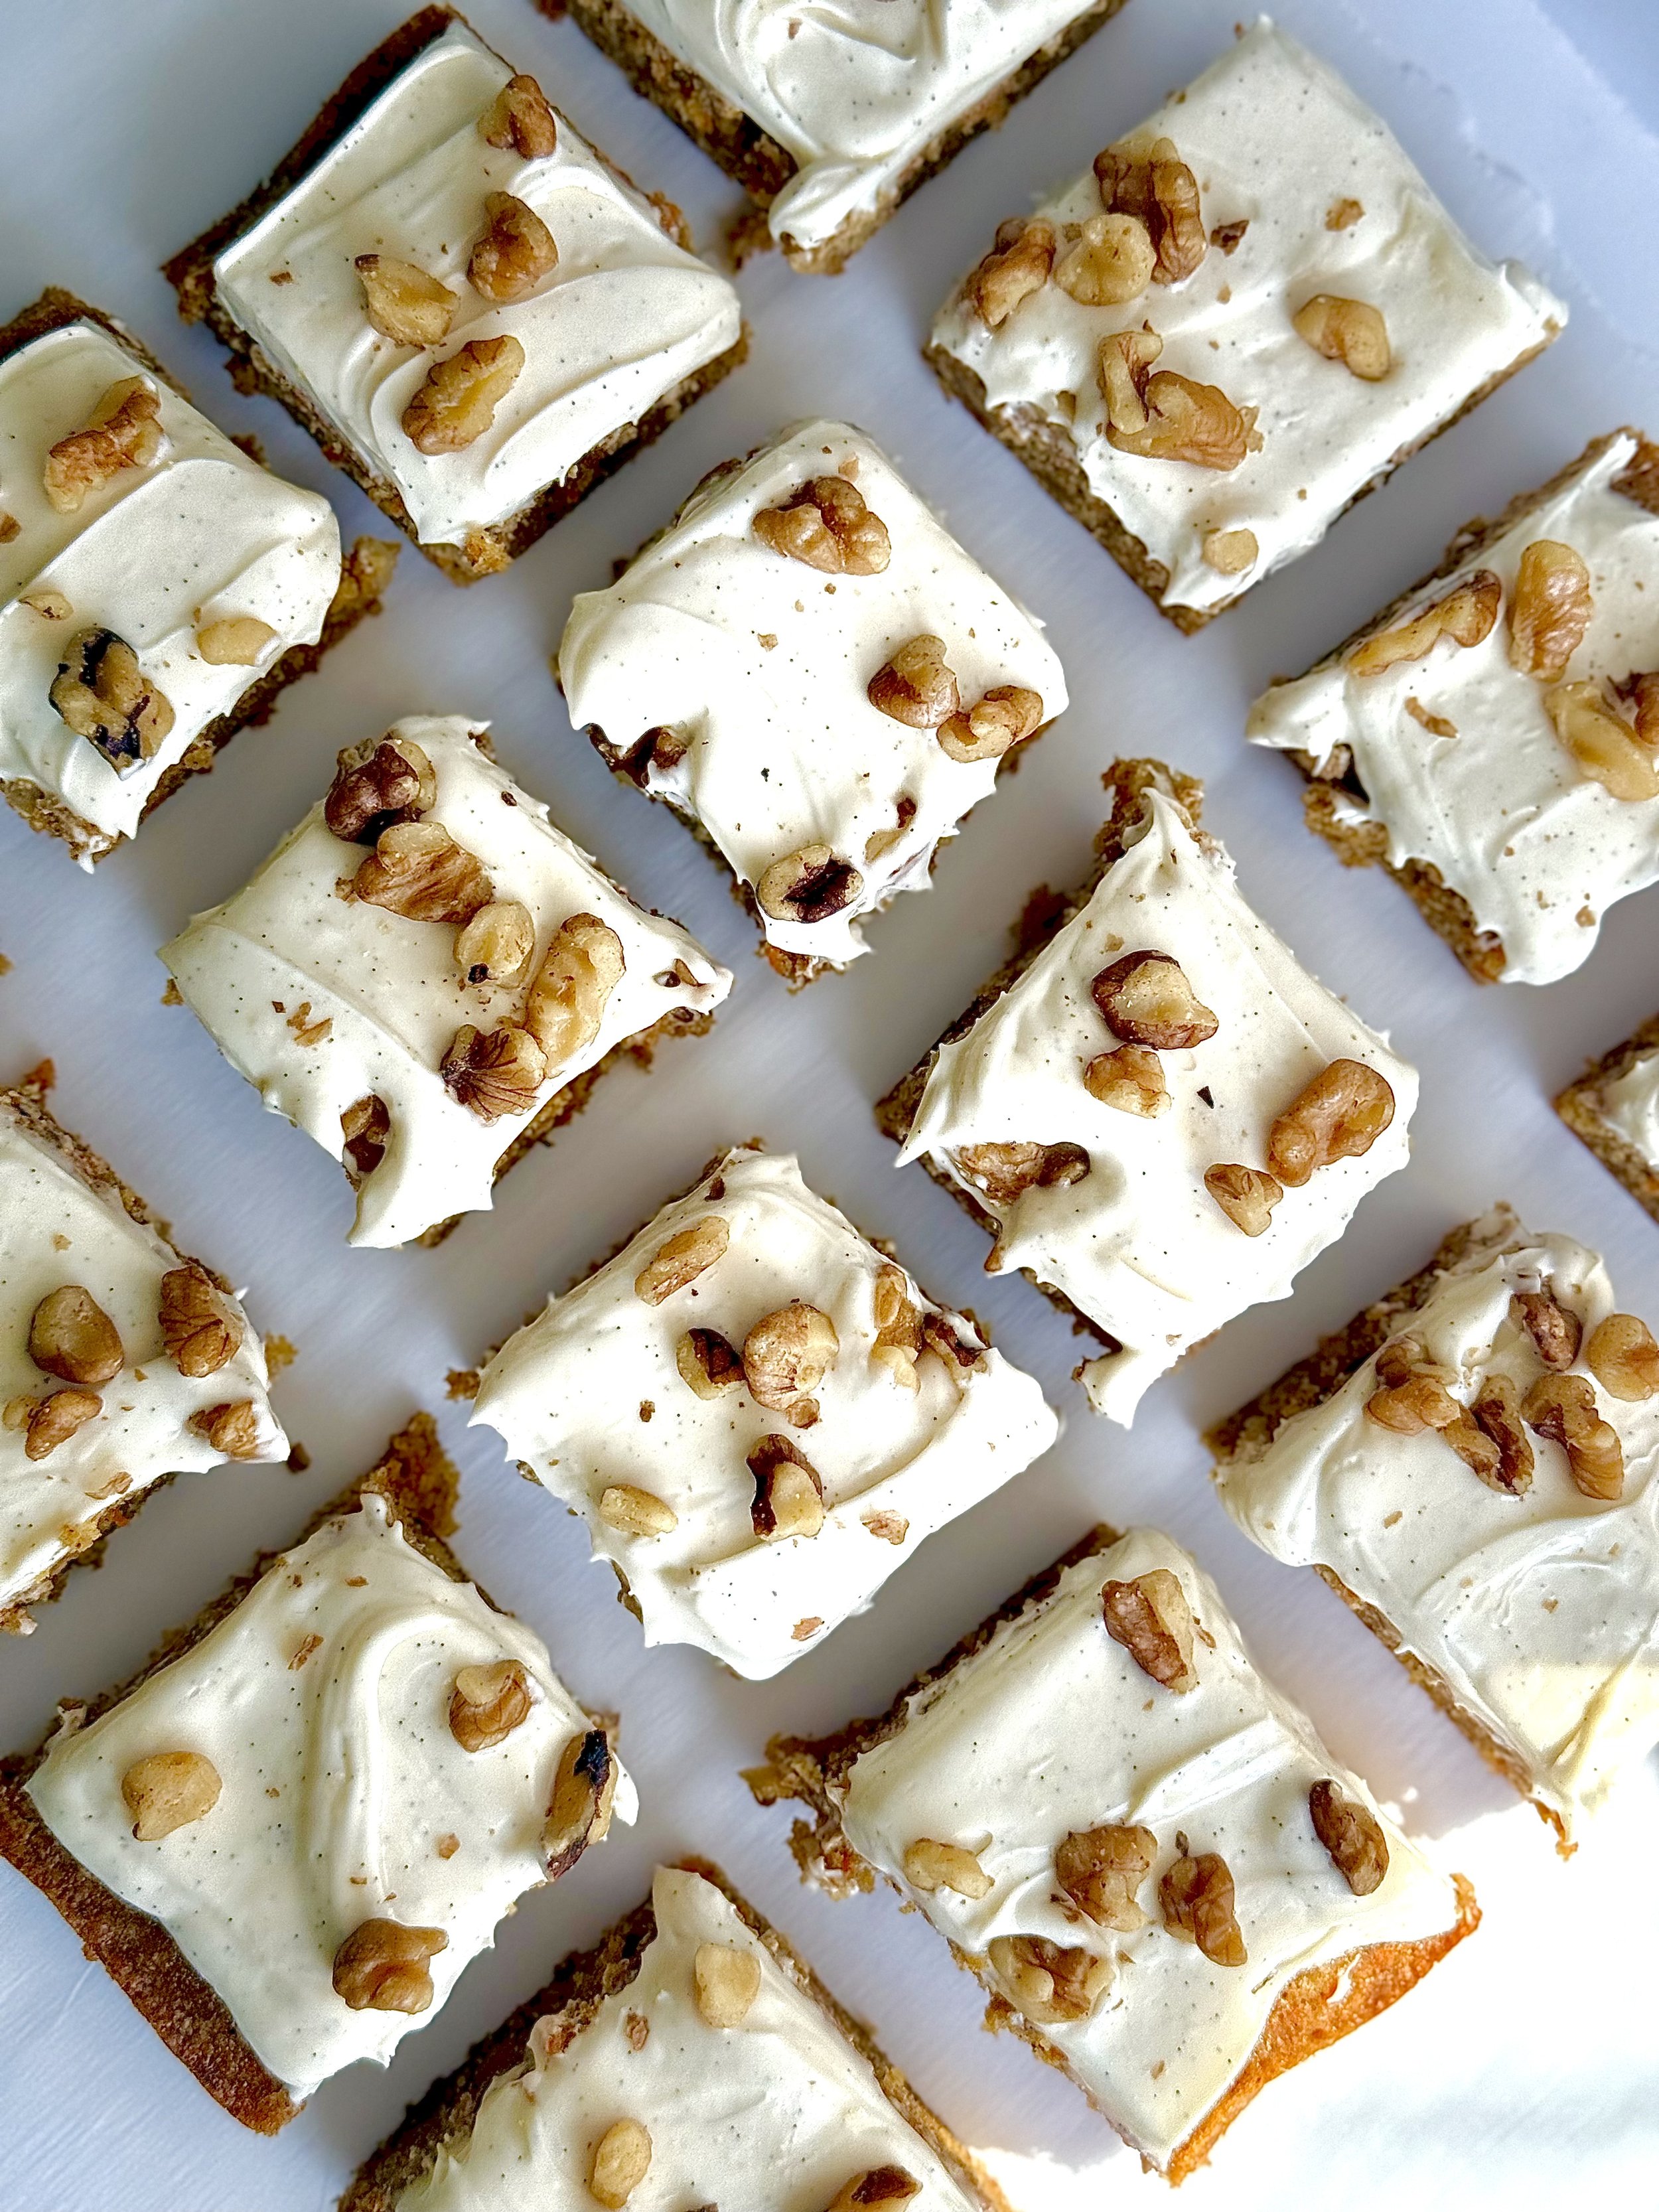
Carrot Cake Blondies: A Cozy Twist on a Classic Favorite
If you're a fan of carrot cake, you'll fall head over heels for these carrot cake blondies! They bring all the familiar warmth of cinnamon, nutmeg, ginger, cloves, and tender shredded carrots but in a chewy, indulgent bar form that's perfect for any occasion. These blondies offer the best of both worlds – the rich, buttery texture of a blondie with the comforting spices and sweetness of carrot cake. Whether you're looking for an easy-to-make dessert for a crowd or a cozy treat to enjoy with your afternoon coffee, carrot cake blondies are sure to satisfy your cravings. Plus, they’re a great way to sneak in some veggies while still indulging in a sweet, homemade treat!
If you’re here, it’s because you know carrot cake is absolutely amazing, but sometimes you don’t want to spend all that time whipping up an entire cake. Which is why I love these carrot cake blondies. Blondies, in general, are so great because they’re quick and easy and can be so versatile.
I’ve been working on my Master’s degree, and my debate of the day was studying and doing homework or baking… We know what I chose, but now I can regret the impending doom of homework hanging over my head with a delicious carrot cake blondie. Baking has really been a form of self-care while back in school, and while hectic and stressful at times, I’ve built this whole new passion I didn’t know I had. But anyway, I hope you love this recipe.

This recipe uses great ingredients that add so much warmth to these blondies.
Butter
Brown sugar
Eggs
Vanilla
Flour
Cinnamon
Ginger
Nutmeg
Cloves
Baking powder
Salt
Carrots
Chopped walnuts
Storing
Refrigeration: Store your carrot cake blondies in the fridge to keep them fresh. The cream cheese frosting should be kept cool to prevent it from spoiling. Place the blondies in an airtight container. They’ll stay in the fridge for up to 4–5 days.
Freezing: If you want to store them for a longer period, you can freeze the carrot cake blondies without the frosting. Here’s how:
Let the blondies cool completely before freezing.
Wrap them tightly in plastic wrap, followed by aluminum foil, or place them in a freezer-safe container.
They’ll last up to 3 months in the freezer. When you’re ready to eat, just thaw them in the fridge overnight or at room temperature for a few hours.
This will help keep both the blondies and the frosting fresh for as long as possible!
These blondies also taste absolutely amazing fresh out of the fridge!
If you find yourself loving this recipe, leave a comment below to let me know how you liked it or if you made any tweaks to the recipe. Happy baking :)

Carrot Cake Blondies
These carrot cake blondies are a delicious twist on traditional carrot cake, combining the rich flavors of cinnamon, nutmeg, ginger, cloves, and shredded carrots in a chewy, dense bar. With a sweet, buttery base and a slight spiced kick, these blondies are the perfect treat for any occasion.
Ingredients
- ½ cup unsalted butter (melted)
- 1 cup brown sugar
- 2 eggs (room temperature)
- 1 tbsp vanilla extract
- 1 cup of all-purpose flour
- 1 teaspoon cinnamon
- 1/2 teaspoon ginger
- 1/2 teaspoon nutmeg
- 1/4 teaspoon cloves
- ¼ teaspoon of baking powder
- ½ tsp salt
- 1 cup freshly shredded carrots
- 1/2 cup chopped walnuts (1/4 cup for the blondies + 1/4 cup for topping).
- 4 ounces of cream cheese (softened)
- 2 tablespoons unsalted butter (salted)
- 1 cup powdered sugar
- 1/4 teaspoon salt
- 1 teaspoon vanilla bean paste (extract works too).
Instructions
Notes
- Take the cream cheese out of the refrigerator for up to one hour before making the frosting. Cream cheese is only good for up to 2 hours at room temperature.
- You can add shredded coconut or raisins if you choose.

Churro Blondies

Churro blondies are a delicious twist on two beloved treats: the rich, chewy texture of blondies and the warm, spiced goodness of churros. These blondies are golden-brown squares of sweet, buttery dough swirled with a hint of cinnamon and sugar that mimic the flavor of the classic churro. The soft, gooey center is complemented by a slightly crisp, cinnamon-sugar-coated top, giving each bite the perfect combination of rich sweetness and spice.
What sets churro blondies apart is their irresistible flavor profile—think of the deep, caramelized sweetness of blondies paired with the comforting warmth of cinnamon, just like you'd find in a freshly fried churro. These treats are easy to make and are perfect for sharing at parties, baking for a casual get-together, or simply enjoying a cup of coffee or hot chocolate. The cinnamon-sugar topping not only adds a beautiful, sweet crunch but also gives that authentic churro experience, making every bite feel like a little celebration.
The best part about churro blondies? They’re the perfect fusion of two favorites, offering all the indulgent flavor of churros without the mess and frying. Whether you’re a fan of blondies, churros, or both, these chewy, cinnamon-infused bars will quickly become a new favorite dessert in your baking repertoire.
I love making blondies because not only are they fun and easy, but you don’t need any fancy tools or equipment to whip up a nice, chewy batch of blondies.
Ingredients
Butter
Brown sugar
Sugar
Eggs
Vanilla
Flour
Cinnamon
Baking powder
Salt
I love anything with cinnamon flavors, and these definitely hit a good cinnamon craving. I made this recipe for a friend who also loves absolutely everything Churro inspired, and blondies are much easier and less time-consuming to make than the real deal but still just as good.

Storing
Cool Completely: Before storing, make sure your blondies are completely cooled. This prevents condensation from forming inside the storage container, which can make them soggy.
Room Temperature Storage: To keep your blondies soft and chewy, store them in an airtight container at room temperature. They will stay fresh for about 3-4 days this way. You can place a piece of parchment paper between layers to prevent them from sticking together.
Refrigeration: If you prefer, you can refrigerate your blondies to extend their freshness for up to a week. Just make sure they’re in an airtight container to prevent them from drying out. Before serving, let them sit at room temperature for a few minutes to regain their softness.
Freezing: If you want to store them for an even longer period, freezing is a great option! Wrap individual blondies tightly in plastic wrap or foil, then place them in a zip-top bag or airtight container. They can stay frozen for up to 2-3 months. To enjoy, just let them thaw at room temperature or warm them in the microwave for a few seconds for that fresh-baked taste.
By following these simple storage tips, your blondies will stay as delicious and chewy as the day they were baked!

Why should you make churro blondies? Because they’re like the ultimate mashup of your favorite dessert dreams—soft, chewy blondies with the warm, cinnamon-sugar goodness of churros, all in one irresistible bite! Imagine sinking into that melt-in-your-mouth texture while the sweet cinnamon swirl dances on your taste buds. It’s like having the best of both worlds—no frying, no mess, just pure, unadulterated dessert bliss. Whether treating yourself or impressing your friends at a party, these churro blondies will surely steal the show and make you the dessert hero. Trust us, your taste buds will thank you!
Leave a comment below if you make and love these!

Churro Blondies
Ingredients
- ½ cup unsalted butter (melted)
- 1 cup brown sugar
- 2 eggs (room temperature)
- 1 tbsp vanilla extract
- 1 cup of all-purpose flour
- ½ tsp cinnamon
- ¼ tsp of baking powder
- ½ tsp salt
- 1/2 cup brown sugar
- 1 tbsp cinnamon
Instructions
- Preheat the oven to 350 degrees and line a 9x9 pan with parchment paper.
- Melt the ½ cup of butter and allow to cool slightly.
- While the butter cools, make the cinnamon mixture. Add 1/2 cup of sugar to a bowl with 1 tablespoon of cinnamon sugar and mix, then set aside.
- Add the melted butter and brown sugar to a mixing bowl and mix with a spatula until combined.
- Add the eggs and vanilla extract and mix until just combined.
- Use a spatula to scrape down the sides and add the flour, baking powder, cinnamon, and salt. Fold the ingredients together until there are no clumps of flour without overmixing.
- Add half the sugar mixture to the prepared baking pan, coating the entire bottom.
- Then, scoop the blondie dough carefully over the sugar mixture. It is tricky, so don't be alarmed if the sugar mixture mixes into the dough. Then, top the blondies with the remaining sugar mixture, coating the entire top.
- Bake for 30-35 minutes or until the edges are golden brown. Allow to cool then serve and enjoy!
- 9x9 baking pan
- Parchment paper
- Wire rack
- Spatula
- Bowls

No Bake Oreo Cheesecake Bars

Oreo cheesecake bars are the ultimate indulgence for anyone who loves a rich, creamy dessert with a bit of crunch. The bottom layer features a buttery, crumbly Oreo crust that perfectly complements the smooth, velvety cheesecake filling, which is rich and slightly tangy, offering a delightful contrast to the sweetness of the crust. Crushed Oreos are folded into the cheesecake filling, adding little pockets of chocolatey goodness throughout, while Oreo crumbs on top create a beautiful finishing touch.
What makes these bars so irresistible is their combination of textures—each bite gives you a satisfying crunch from the Oreo crust, followed by the creamy, melt-in-your-mouth cheesecake filling. They’re easy to make, requiring just a few simple ingredients, and are perfect for any occasion, whether it’s a family gathering, party, or just a treat for yourself. The best part? They can be made in advance, so you can enjoy a slice whenever the craving strikes. These Oreo cheesecake bars are sure to become a favorite in your dessert repertoire!

Making a no-bake cheesecake is far simpler than it might seem, so there’s no need to feel overwhelmed! The beauty of a no-bake cheesecake is that it requires very few ingredients and eliminates the need for an oven, which means less stress and more time to enjoy the process. You start with a simple crust— made from crushed cookies and melted butter—and press it into your pan. The cheesecake filling is just a matter of mixing cream cheese and powdered sugar until smooth. Then, you pour the filling over the crust, chill it in the fridge, and let time do the work.
The best part is that no-bake cheesecakes are incredibly customizable. Whether you add fruit, chocolate, or even candy toppings, you can make it your own with minimal effort. With just a little patience while the cheesecake sets in the fridge, you’ll have a delicious, creamy dessert without the hassle or worry of complicated baking techniques. So, instead of feeling intimidated, just enjoy the simplicity of it—no-bake cheesecakes are one of those treats that will always turn out amazing with very little effort!
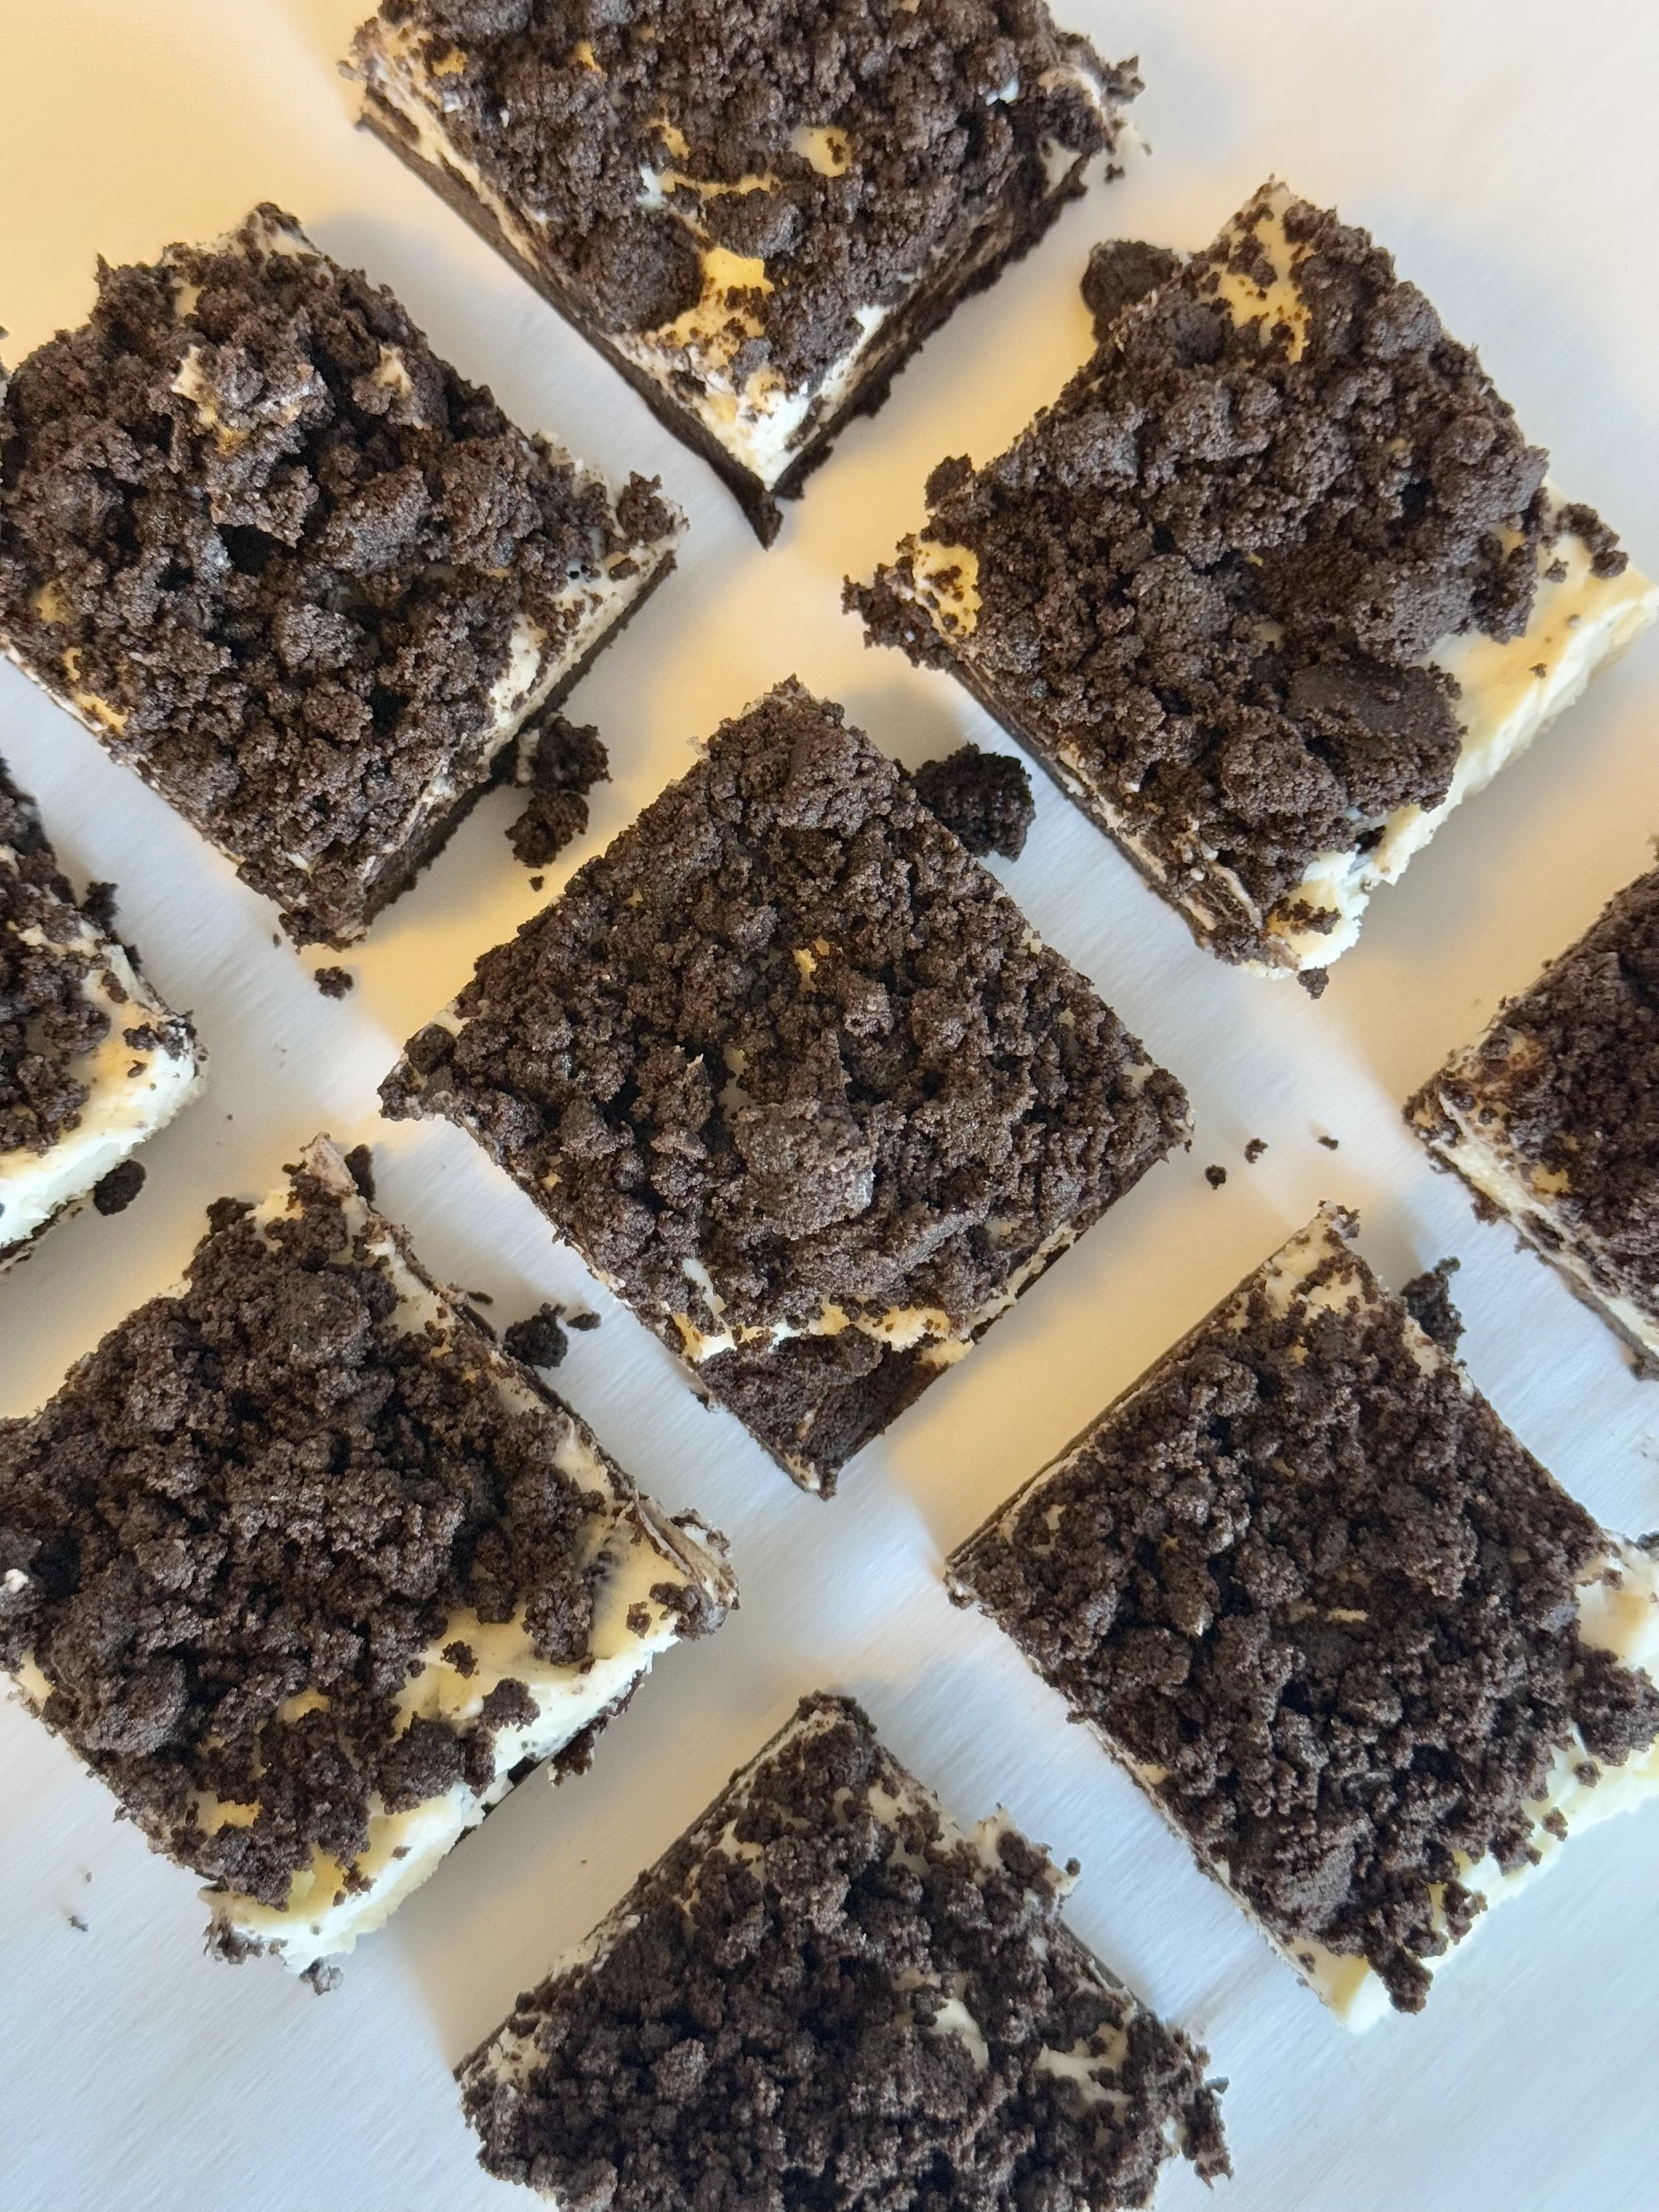
You can make these no-bake Oreo cheesecake bars with the simplest ingredients.
Oreo cookies
Butter
Cream Cheese
Powdered Sugar
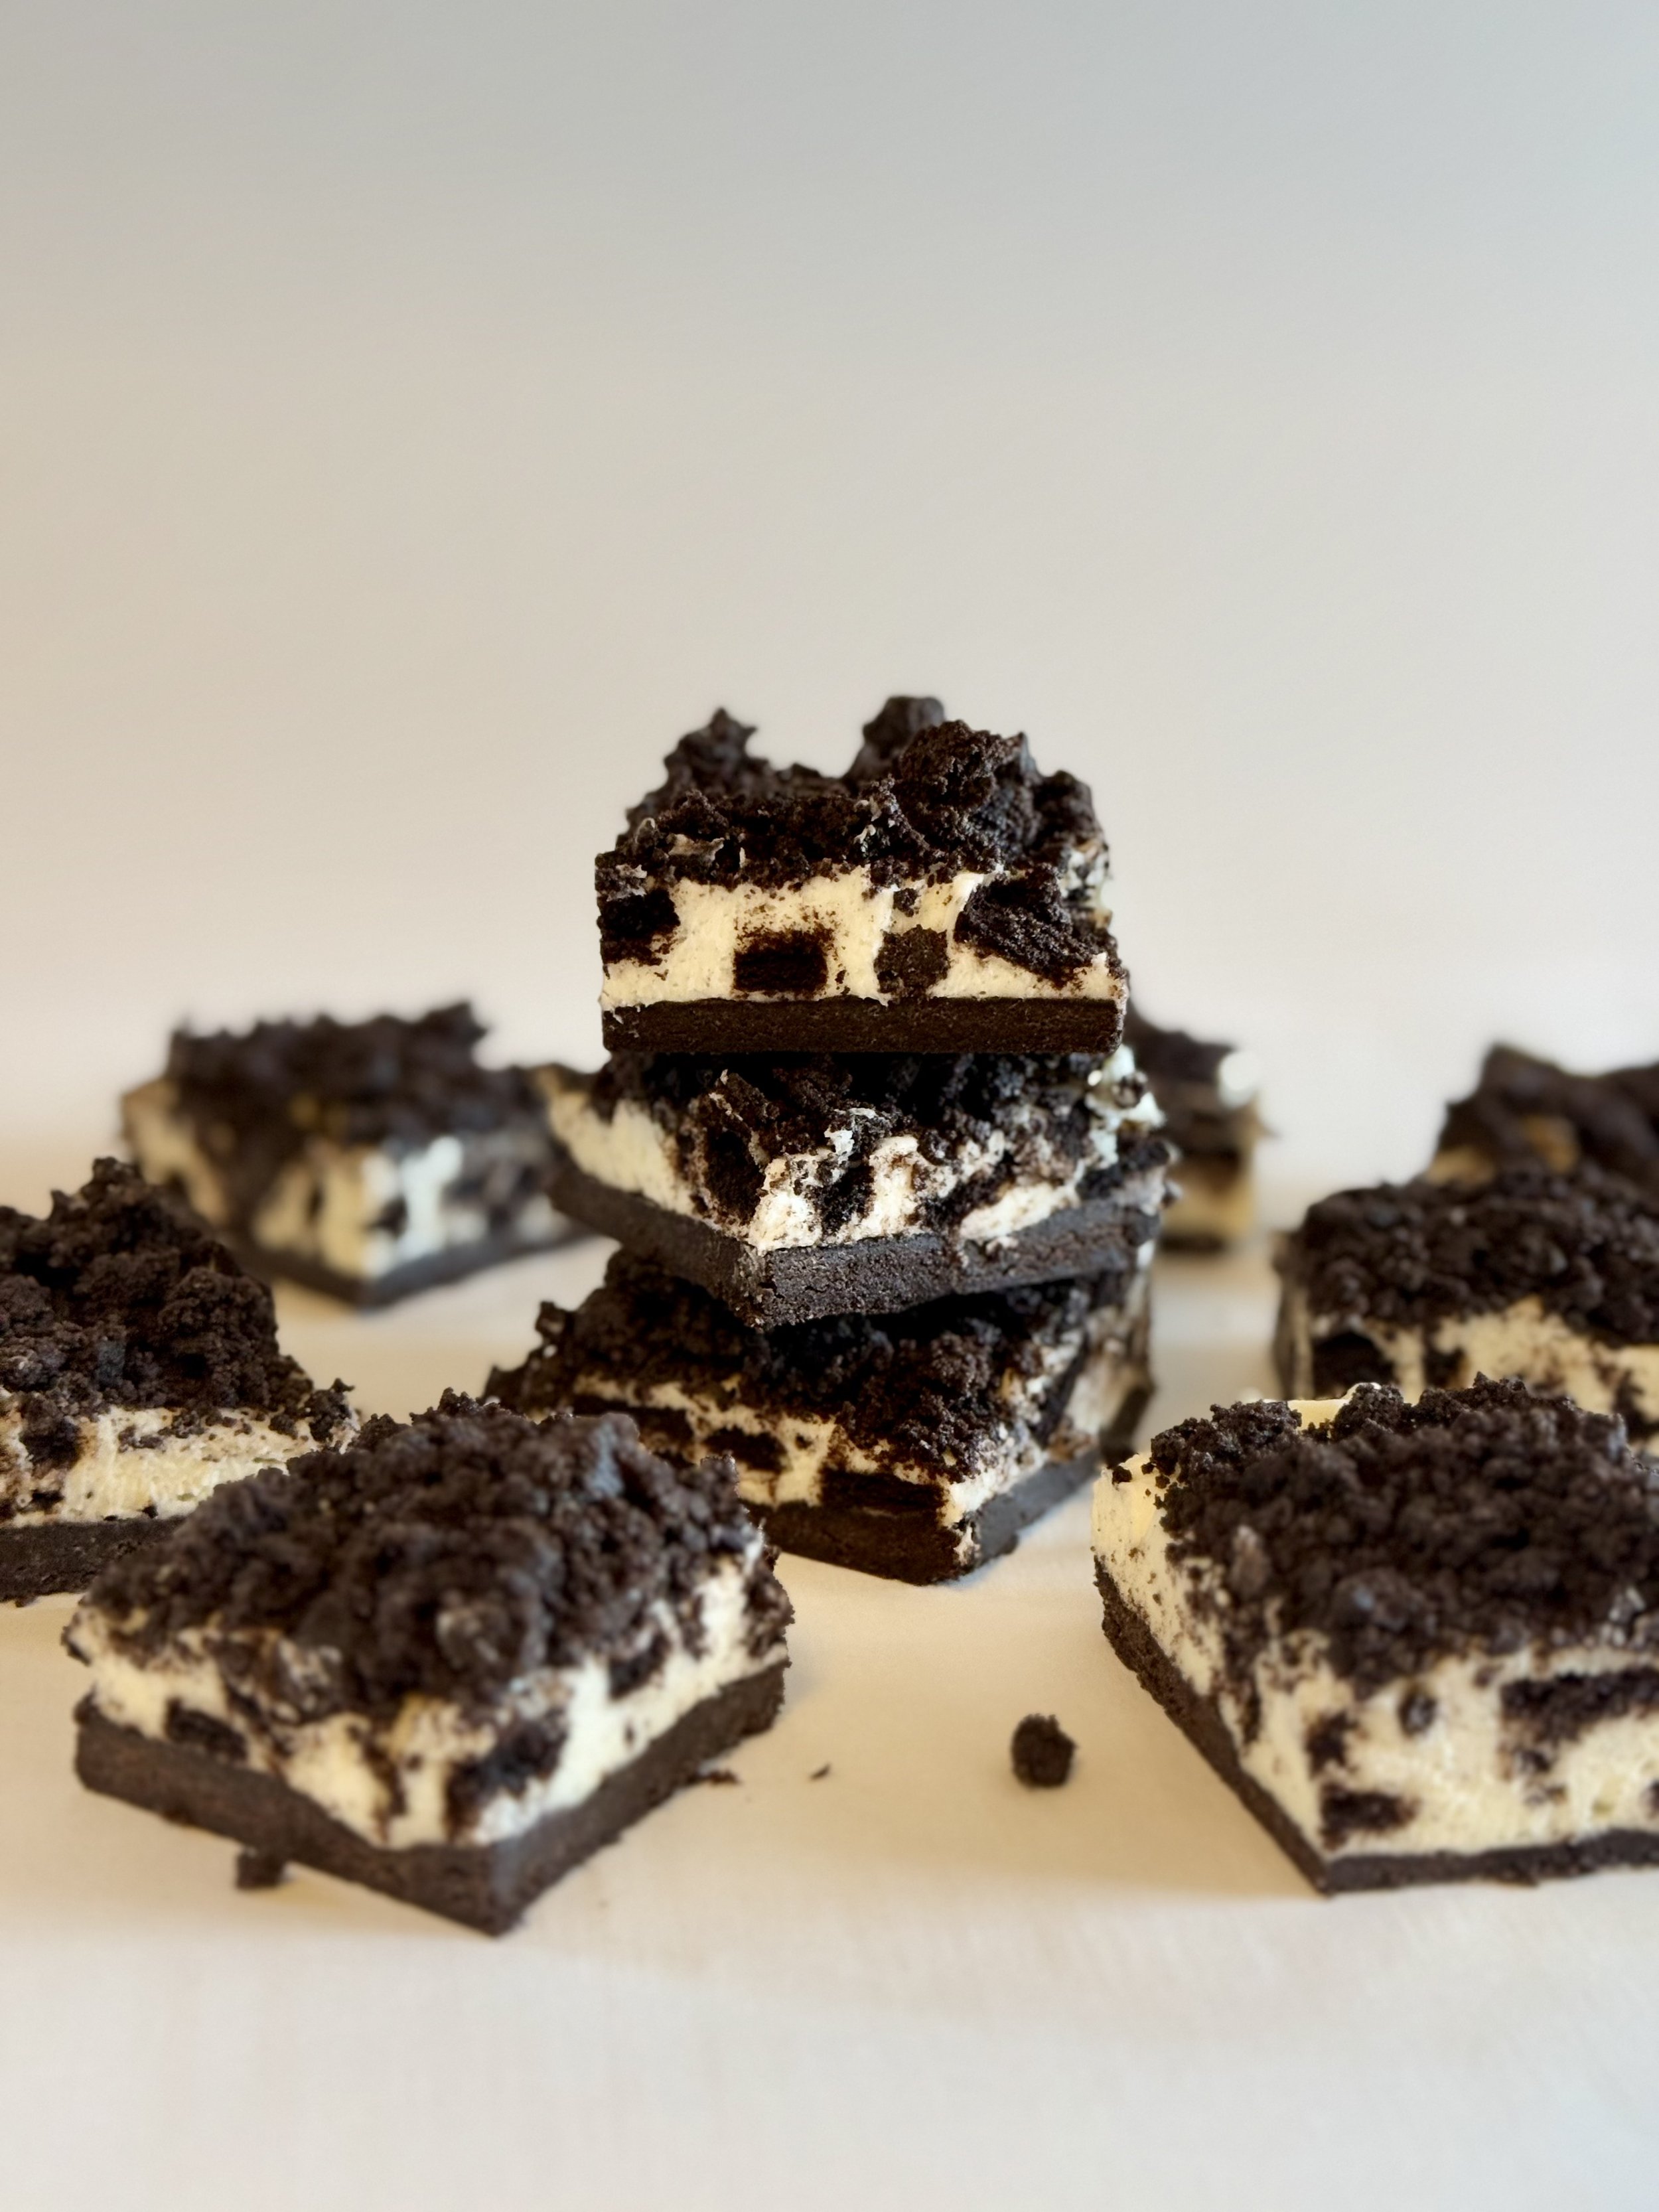
Storing no-bake cheesecake is easy, and with the right method, you can keep it fresh and delicious for several days. Here's how to store it properly:
Refrigeration: Since no-bake cheesecakes rely on chilling to set, the best way to store them is in the fridge. After you've made your cheesecake and it's fully set, cover the pan tightly with plastic wrap or aluminum foil to prevent it from absorbing other odors in the fridge. This will also help maintain its smooth texture. No-bake cheesecakes can be stored in the fridge for up to 4-5 days.
Serving Pieces: If you've already sliced the cheesecake into individual pieces, store them in an airtight container or wrap each slice in plastic wrap. You can place them in a single layer or add parchment paper between layers to prevent sticking.
Freezing: If you want to store your cheesecake for a longer period, freezing works well too. Simply slice the cheesecake or keep it whole, then wrap it tightly in plastic wrap, followed by aluminum foil. You can also place it in an airtight container or freezer bag for extra protection. It will stay fresh for up to 2-3 months. To enjoy, just thaw it overnight in the fridge or let it sit at room temperature for about 30 minutes before serving.
By following these simple storage tips, your no-bake cheesecake will stay fresh, creamy, and ready to enjoy whenever you're craving a sweet treat!
If you enjoy this recipe, let me know how you like them :)

No Bake Oreo Cheesecake Bars
Ingredients
- 42 Oreo's (32 for the base and crumb and 10 to mix in)
- 1/2 cup butter (1 stick)
- 16 ounces cream cheeses at room temperature (2 bricks).
- 1 cup powdered sugar
Instructions
- Line a 9x9 baking dish with parchment paper.
- In a blender or food processor, blend 32 Oreo's until completely crushed. Then add to a bowl.
- In a separate bowl melt the 1/2 cup of butter and add it to the crushed Oreo's. Using a spatula or your hands incorporate the mixture until it's thick and sticky.
- Reserve 1/3 of the mixture in a separate bowl to use as the crumb topping later. Place the remaining mixture in baking pan and pat into an even layer covering the bottom of the pan.
- In a stand mixer or bowl with hand mixer, add two bricks of cream cheese and 1 cup of powdered sugar, mixing until nice and fluffy.
- Break the remaining 10 Oreo's into large chunks and fold into the cream cheese mixture.
- Add the cream cheese mixture on top of the cookie layer in the baking dish and smooth out evenly.
- Using the remaining mixture, use a fork or your hands to create a crumble. Sprinkle the crumble over the cheesecake layer in the baking pan.
- Place in the refrigerator and allow to set for at least 6 hours before serving.
- Serve and enjoy!
- Blender
- Bowls
- Hand Mixer
- Spatula

Chewy M&M Blondies

Chewy M&M blondies with sprinkles are a playful twist on the classic blondie, offering a delightful combination of buttery richness, soft texture, and colorful bursts of sweetness. The chewy center of these blondies is packed with crunchy M&Ms that melt slightly during baking, creating pockets of chocolatey goodness throughout. Topped off with a generous sprinkle of vibrant, colorful sprinkles, these blondies are not only delicious but also a feast for the eyes, perfect for any occasion that calls for a little fun and whimsy.
What makes these blondies so much fun to make is the customization factor – you can swap in different types of M&Ms (like peanut butter or pretzel), add a mix of other fun toppings like white chocolate chips, or even use themed sprinkles for special holidays or events. The process itself is simple and easy, making it a great treat for kids to help with or for anyone looking to whip up something sweet without too much hassle. Plus, the best part is that they come together in one bowl, making clean-up a breeze. Whether you're baking for a party, a family gathering, or just because, these blondies will bring a burst of joy and flavor to any occasion!
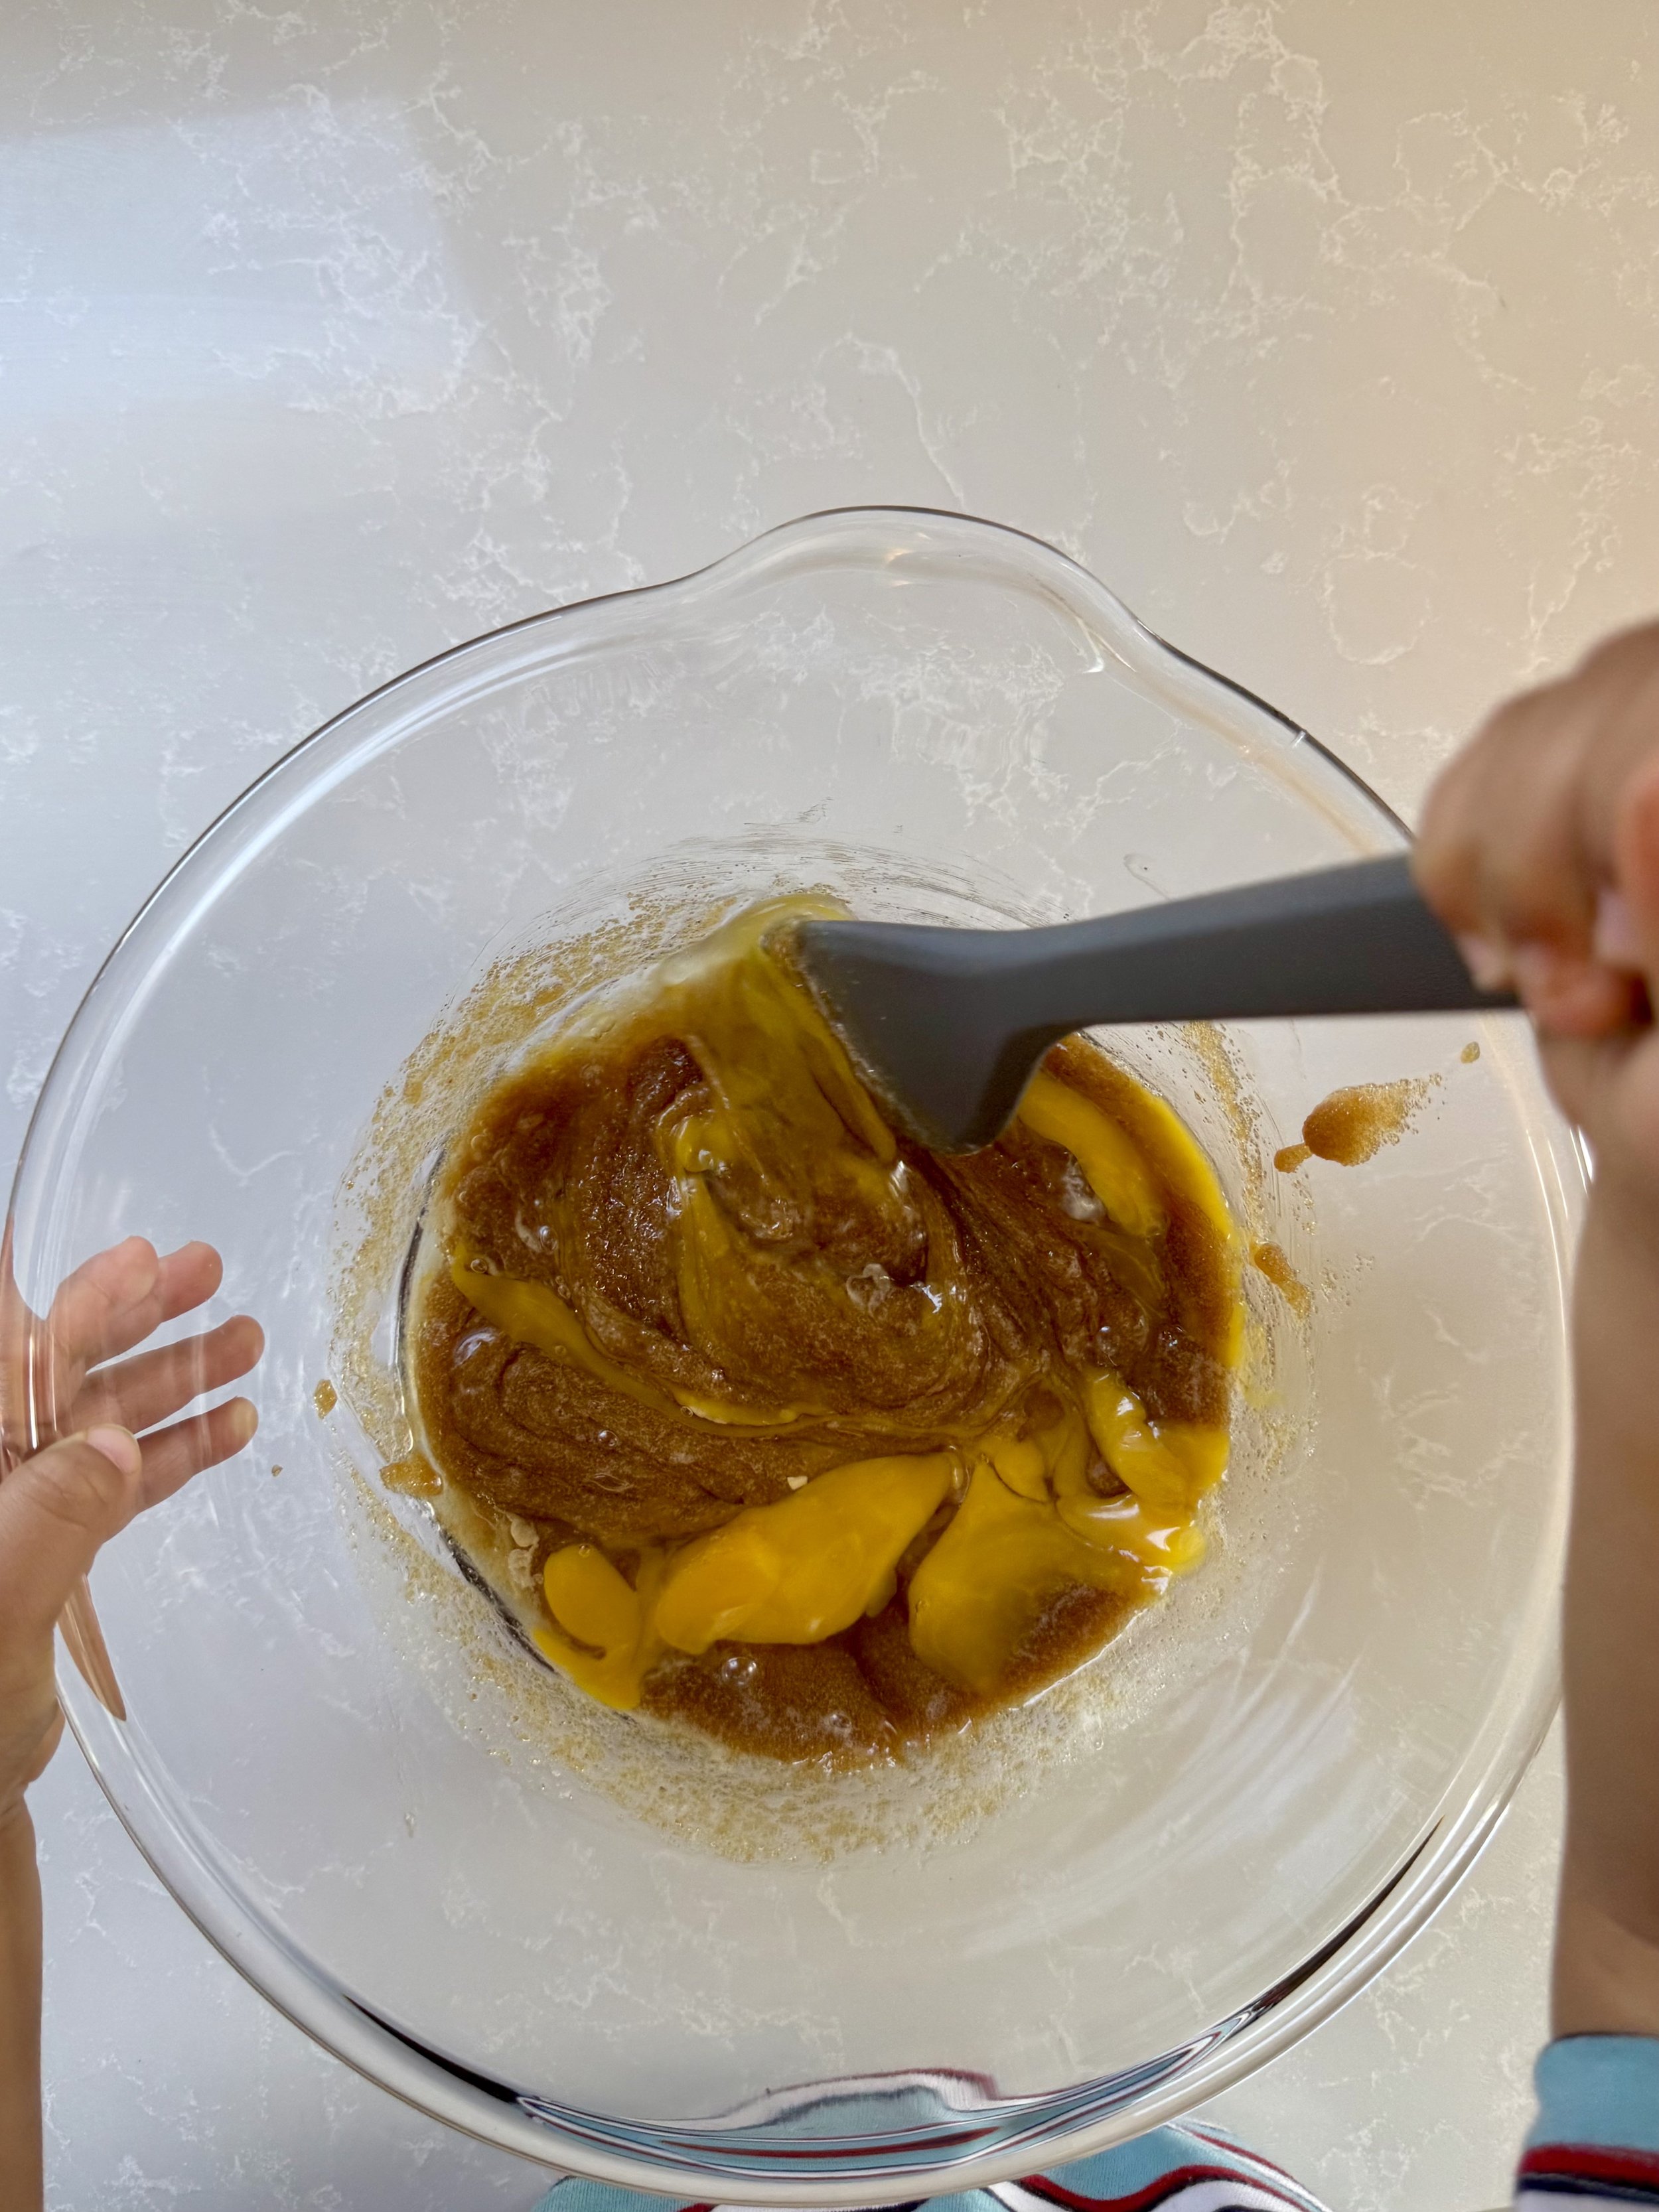
Using melted butter in blondies is key to achieving that rich, chewy texture and enhancing the overall flavor of the dessert. When you melt the butter, it helps create a denser, more tender crumb by providing moisture throughout the batter. This contributes to the signature chewiness that makes blondies so irresistible.
Additionally, melted butter blends more easily with the sugar, helping to dissolve it fully, which results in a smoother batter and a more uniform texture. The warmth of the melted butter also promotes the fat's ability to coat the flour proteins more effectively, which reduces the amount of gluten formed and keeps the blondies soft rather than cakey.
Another reason melted butter is used is for flavor. Butter, when melted, has a more pronounced, rich taste that adds depth to the sweetness of the blondies, balancing out the sugary sweetness of the M&Ms and sprinkles. This creates a perfectly balanced treat that’s both indulgent and satisfying!
I had helping hands with these blondies, whipping them up while babysitting my nephew. It was such a fun time, besides waiting for the blondies to cook and cool. Baking these with anyone is so fun!
The best part is that you can make these with simple ingredients.
Butter
Eggs
Vanilla
Flour
Baking Powder
Salt
Sprinkles
M&M’s

After baking your M&M blondies, storing them properly will help keep them fresh and delicious for as long as possible. Here’s how to store them after baking:
Cool Completely: Before storing, make sure your blondies are completely cooled. This prevents condensation from forming inside the storage container, which can make them soggy.
Room Temperature Storage: To keep your blondies soft and chewy, store them in an airtight container at room temperature. They will stay fresh for about 3-4 days this way. You can place a piece of parchment paper between layers to prevent them from sticking together.
Refrigeration: If you prefer, you can refrigerate your blondies to extend their freshness for up to a week. Just make sure they’re in an airtight container to prevent them from drying out. Before serving, let them sit at room temperature for a few minutes to regain their softness.
Freezing: If you want to store them for an even longer period, freezing is a great option! Wrap individual blondies tightly in plastic wrap or foil, then place them in a zip-top bag or airtight container. They can stay frozen for up to 2-3 months. To enjoy, just let them thaw at room temperature or warm them in the microwave for a few seconds for that fresh-baked taste.
By following these simple storage tips, your blondies will stay as delicious and chewy as the day they were baked!
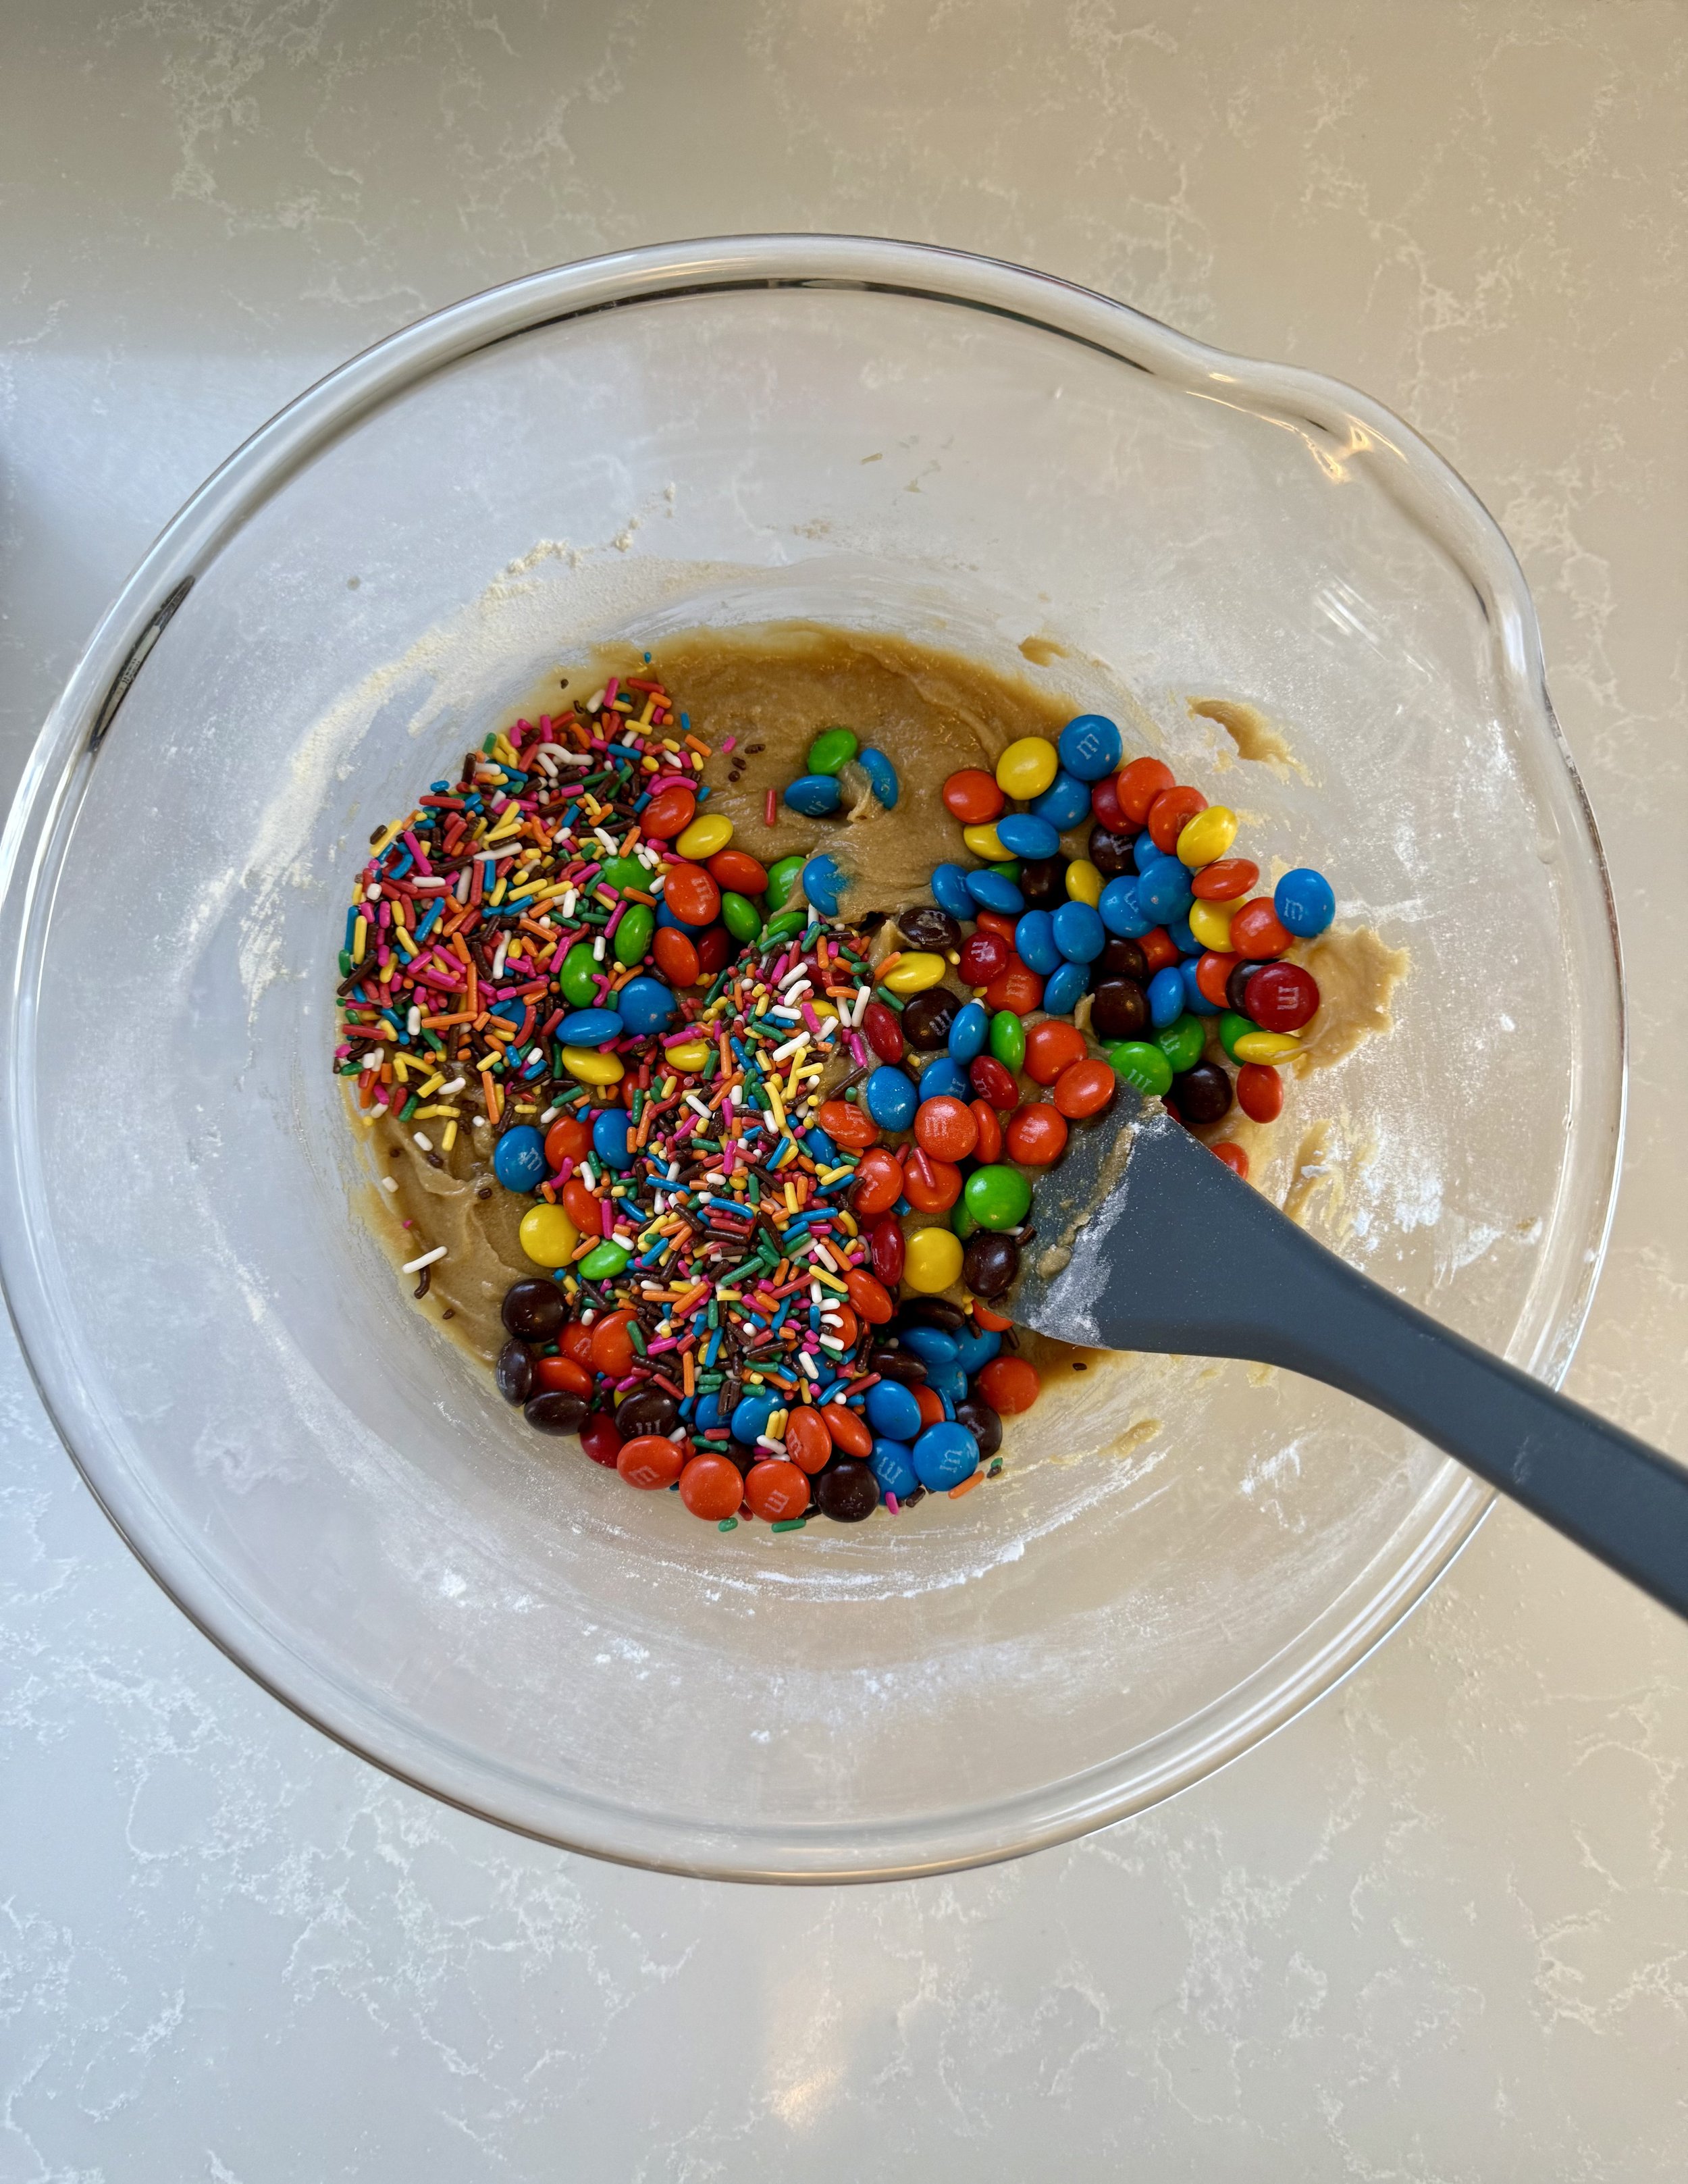
After all of this scrolling, I’m sure you’re ready to find the recipe! If you make and love these blondies feel free comment below how you liked them or tag me on my socials. Happy baking!

Chewy M&M Blondies
Ingredients
- ½ cup unsalted butter (melted)
- 1 cup brown sugar
- 2 eggs (room temperature)
- 1 tbsp vanilla extract
- 1 cup of all-purpose flour
- ¼ tsp of baking powder
- ½ tsp salt
- 1 cup M&M's (plus a few more to top)
- 1/4 cup sprinkles
Instructions
- Preheat the oven to 350 degrees and line a 9x9 pan with parchment paper.
- Melt the ½ cup of butter and allow to cool slightly.
- Add the melted butter and brown sugar to a mixing bowl in a separate bowl and mix with a spatula until combined.
- Add the eggs and vanilla extract and mix until just combined.
- Use a spatula to scrape down the sides and add the flour, baking powder, and salt. Fold the ingredients together until there are no clumps of flour without overmixing.
- Add your 1/4 cup of sprinkles and one cup of M&M's and incorporate them into the dough.
- Transfer to your prepared baking pan and bake for 30-35 minutes or until the edges are golden brown.
- Allow to cool and Enjoy!
- 9x9 baking pan
- Parchment paper
- Wire rack
- Spatula
- Bowls

Oreo Blondies
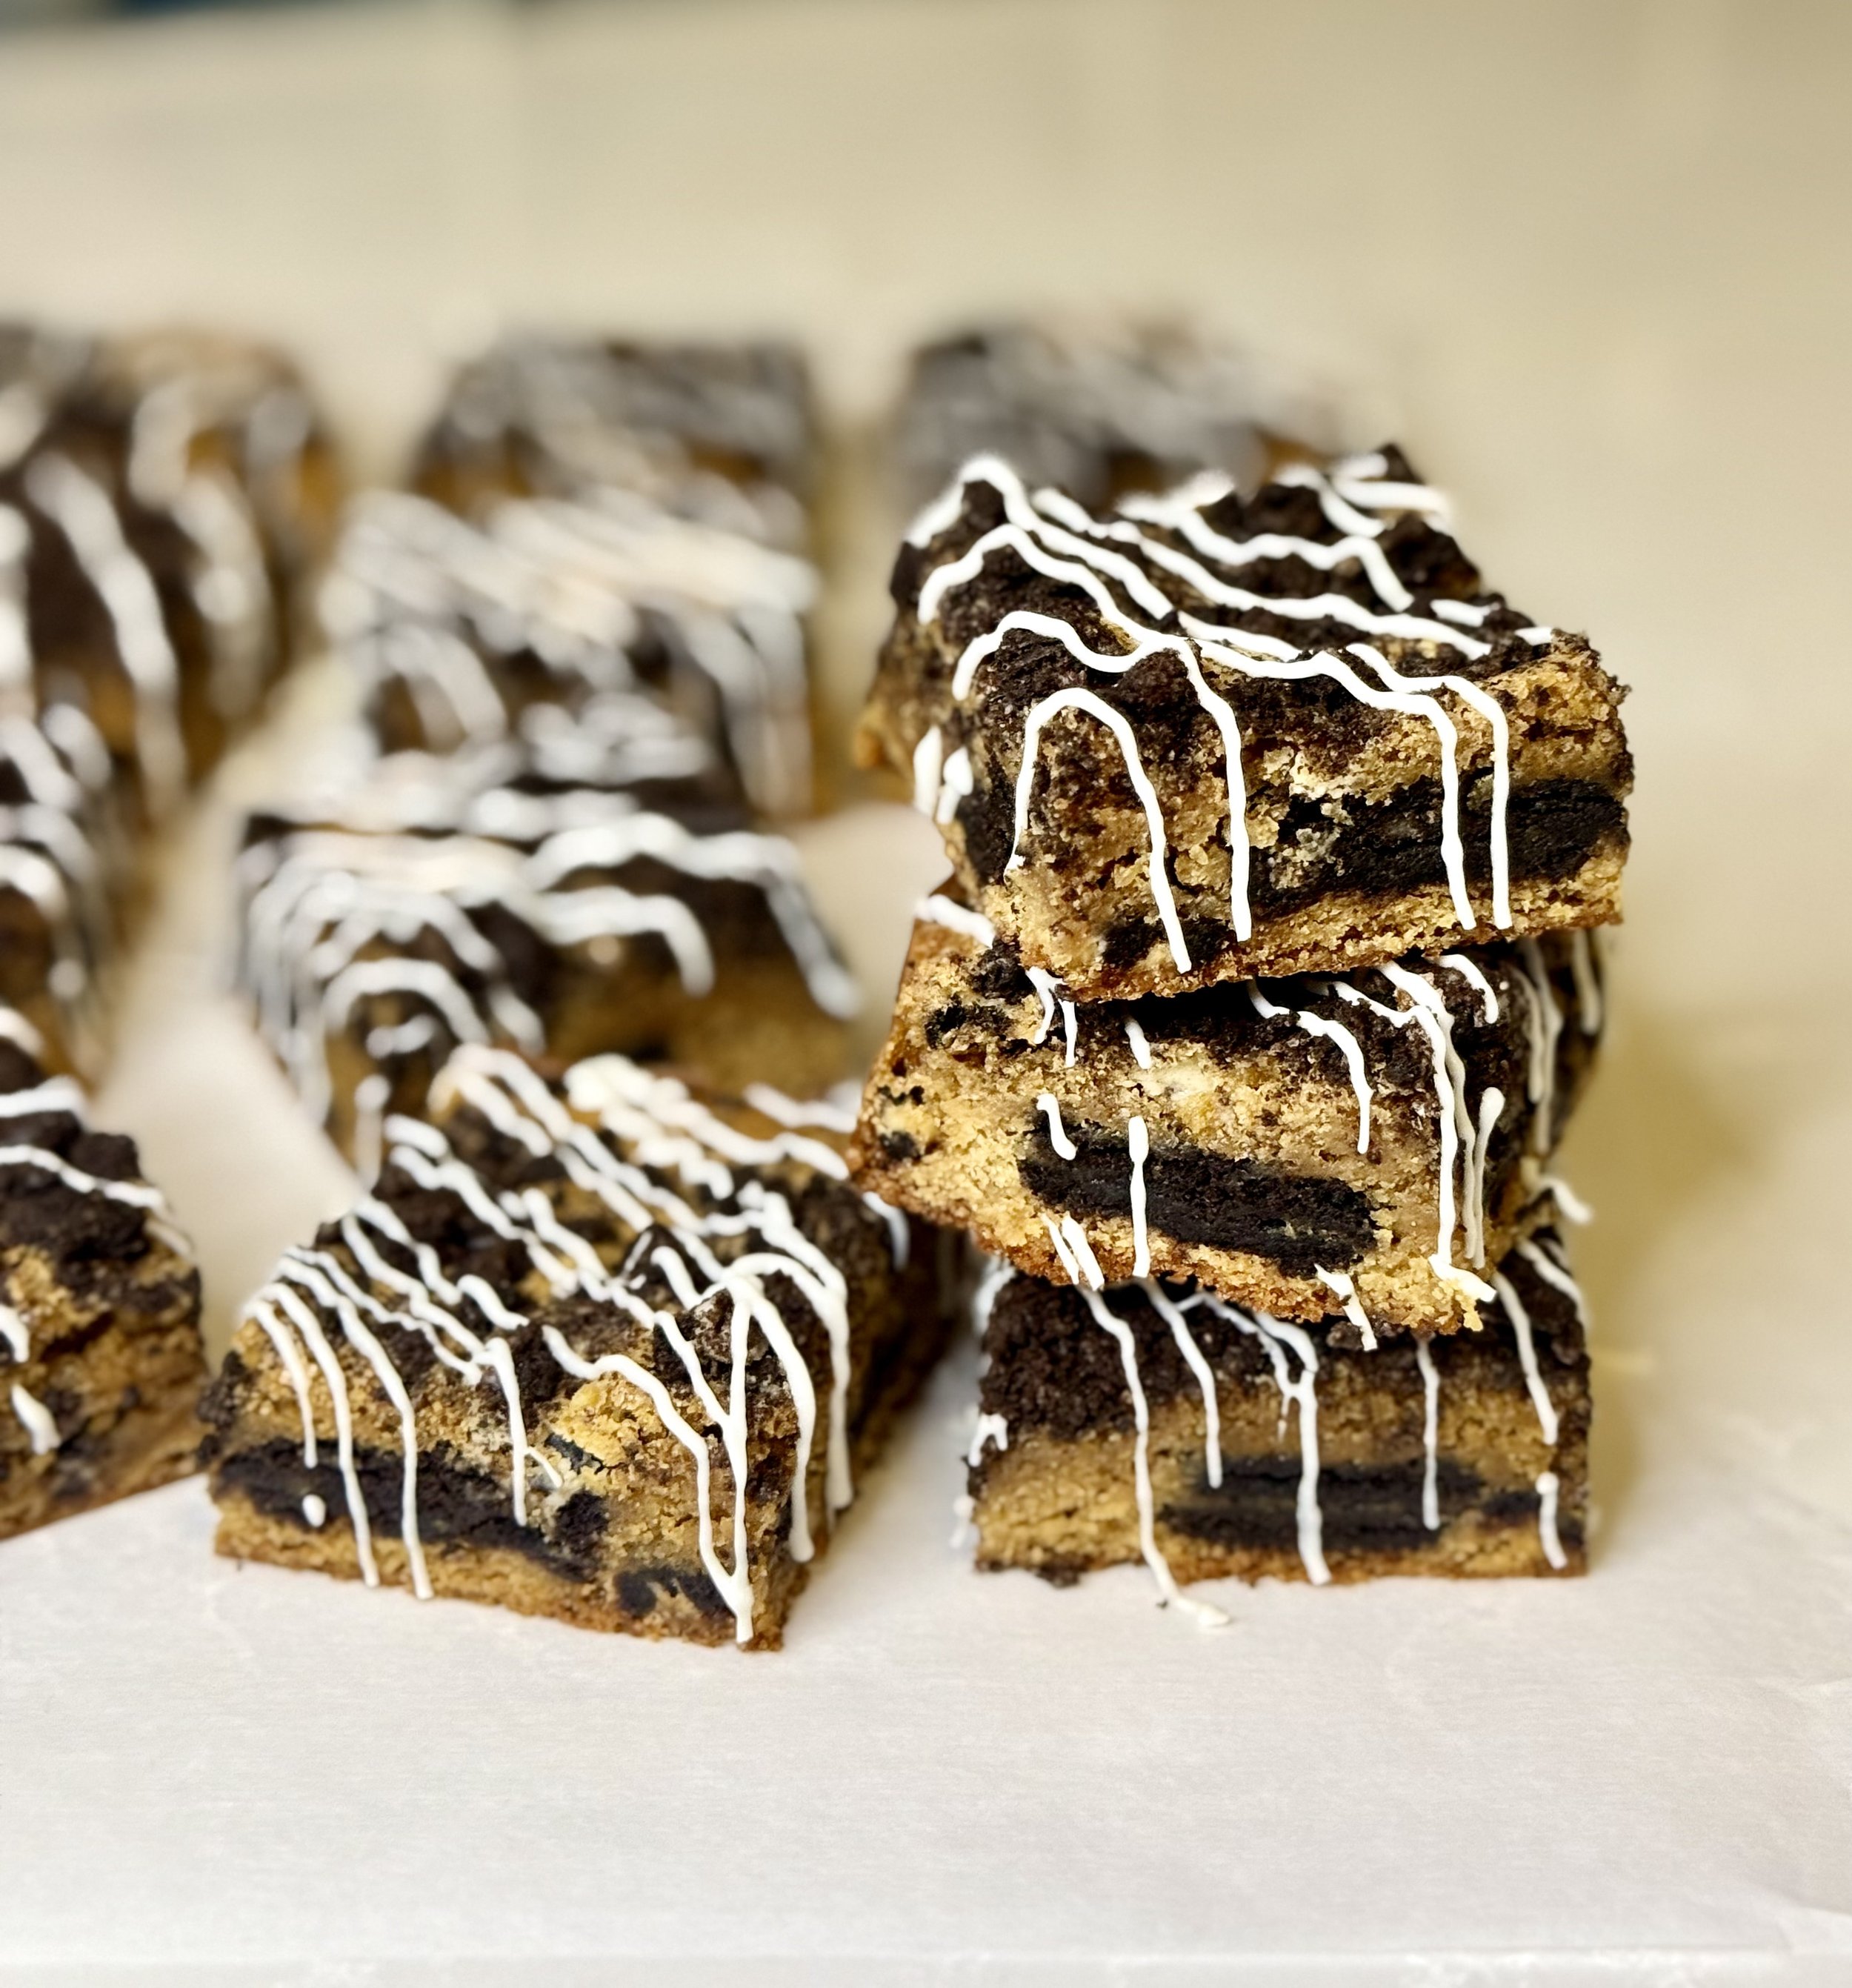
Oreo Blondies: The Ultimate Cookie Meets Dessert Mash-Up
I don’t know about you, but something about Oreos is so addicting, and I absolutely love how versatile they can be in desserts.
Are you ready to take your sweet tooth on a wild ride? Imagine the chewy, buttery goodness of a classic blondie, but with a twist—packed with irresistible Oreo cookies! These Oreo blondies are the dessert hybrid you didn’t know you needed, and once you try them, you’ll wonder how you ever lived without them.
I still wonder about this myself.
First, let's talk about the blondie base. It’s soft, slightly chewy, and has that rich, melt-in-your-mouth texture that only butter and brown sugar can provide. It's the perfect canvas for whatever delicious add-ins you want. But today, we’re all about the Oreos. These cookies add the perfect amount of crunch and a burst of chocolatey flavor that complements the sweet vanilla blondie base like a match made in dessert heaven.
Now, why Oreo blondies, you ask? Well, it's simple: Oreos are a classic, universally loved treat that everyone can agree on. Whether you're dunking them in milk, crumbling them over ice cream, or—wait for it—baking them right into your favorite desserts, they never disappoint. And in this blondie form, they're not just a topping or a mix-in; they become part of the magic. Each bite brings the nostalgic taste of an Oreo but with the added fun of gooey, rich blondie goodness.
What’s even better? These Oreo blondies are ridiculously easy to make. No need to fuss with complicated ingredients or techniques. Just melt, mix, and bake! They’re perfect for when you’re craving something sweet but don’t want to spend hours in the kitchen.

You’ll be the hero of your next get-together, bake sale, Netflix binge session, or for yourself to enjoy.
Storing
To keep your Oreo blondies fresh and delicious, follow these simple storage tips:
Room Temperature: If you plan to eat them within 3-4 days, just store them in an airtight container at room temperature. This will help maintain their chewy texture without them getting too dry.
Refrigeration: For longer storage (up to a week), you can place them in an airtight container in the fridge. Just let them come to room temperature before serving, or microwave for a few seconds for that freshly baked taste!
Freezing: If you want to keep them for a longer period, you can freeze them! Wrap the blondies tightly in plastic wrap, then place them in a freezer-safe bag or container. They’ll stay fresh for up to 3 months. Just thaw them at room temperature or warm them up in the microwave when you're ready to indulge!
Enjoy your delicious treats! 🍪✨- I’m now wondering why there isn’t an Oreo emoji.

If you haven’t scrolled down to the recipe and are still reading, first, thank you, but second, baking is so fun. I’ve been passionate about baking/cooking since a young age. Playing “restaurant” with my cousins and siblings or whipping the strangest concoctions. It’s so much fun and rewarding, especially when you make something people enjoy. However, baking comes with much trial and error, which is something I am still learning. The worst thing is when you make something so many times, and on this random occasion, it was messed up. - THE WORST
Anyway, after college, I decided to learn more about how to bake/cook, with much inspiration coming from TikTok videos. As I went back to college to pursue a master’s degree, I realized how therapeutic baking is for me, and whether or not it brings you the same joy, simply baking my favorite recipes, coming up with different concoctions, and sharing them with you continues to be so rewarding for me. If you’re still here, thanks for coming to my TedTalk ;).

If you find yourself making this recipe, I’d love to hear your thoughts and if you have any suggestions! Comment below or tag me on my socials! I hope you enjoy these blondies.

Oreo Blondies
Ingredients
- ½ cup unsalted butter (melted)
- 1 cup brown sugar
- 2 eggs (room temperature)
- 1 tbsp vanilla extract
- 1 cup of all-purpose flour
- 1 Hershey's Cookies and Cream Chocolate Bar (1.55 ounces)
- 24 Oreos (18 for filling, 6 for crushed topping)
- ¼ tsp of baking powder
- ½ tsp salt
- 1/2 cup white chocolate chips
- 1/2 tsp coconut oil
Instructions
- Preheat the oven to 350 degrees and line a 9x9 pan with parchment paper.
- Melt the ½ cup of butter and allow to cool slightly. While the butter cools, crush 6 of your Oreos for the topping and chop the Hershey's Cookies and Cream Chocolate Bar.
- Add the melted butter and brown sugar to a mixing bowl and mix with a spatula until combined.
- Add the eggs and vanilla extract and mix until just combined.
- Use a spatula to scrape down the sides and add the flour, baking powder, and salt. Fold the ingredients together until no clumps of flour remain without overmixing.
- Scoop a couple of dollops into the prepared baking pan, spreading a thin, even layer (it may be a little tough). Next, place 18 full oreos throughout the thin layer of mixture. Add the chopped chocolate bar pieces on top of the Oreos.
- Next, add the remaining batter and carefully spread the mixture over the blondies. Finally, sprinkle the crushed Oreos over the top of the blondies.
- Bake for 30-35 minutes or until the edges are golden brown. Allow to cool.
- Once cooled, make the white chocolate drizzle. Melt the 1/2 cup of white chocolate chips with 1/2 tsp of coconut oil (can use vegetable shortening) and microwave in 20-second intervals, mixing each time until smooth. Use a spoon, spatula, or zip-loc bag to drizzle the white chocolate over the blondies. Enjoy!
- 9x9 baking pan
- Parchment paper
- Wire rack
- Spatula
- Bowl

Cheesecake Brownies

Indulge in the perfect blend of rich, fudgy brownies and creamy cheesecake with these irresistible cheesecake swirl brownies. Each bite offers a melt-in-your-mouth experience, where the dense, chocolatey brownie base harmonizes beautifully with the smooth, tangy cheesecake swirl. It's a decadent treat that perfectly balances sweetness and tang, making it an unforgettable dessert for any occasion. Whether you're a chocolate lover or a cheesecake enthusiast, this dessert delivers the best of both worlds in one delicious bar.
I like to add mini Chocolate chips to the brownies, but you can use any chocolate chips you want! Mini chocolate chips are the perfect addition to cheesecake swirl brownies, offering an extra burst of chocolatey goodness without overpowering the rich, creamy texture of the cheesecake. Their small size allows them to melt evenly throughout the brownie batter, creating little pockets of gooey chocolate in every bite. The contrast between the smooth cheesecake swirl, the fudgy brownie base, and the melty chocolate chips enhances the overall flavor and adds a delightful texture that makes each bite even more satisfying. Plus, they add a touch of visual appeal, giving the brownies a little extra pop!

A cream cheese topping adds a luxurious, velvety finish to cheesecake swirl brownies that take them to the next level. To make it, simply blend cream cheese with a bit of sugar and egg until smooth and creamy, creating a rich, tangy contrast to the sweet, fudgy brownie base. Before you bake the brownies, drop spoonfuls of the cream cheese mixture onto the top, then swirl gently with a knife or toothpick for that signature marbled effect. The dollops of cream cheese add extra creaminess and elevate each bite with a burst of tangy goodness. The perfect finishing touch makes these brownies even more decadent and irresistible!

Baking brownies is one of those delightful experiences where the kitchen becomes a cozy little adventure. There's something so satisfying about mixing simple ingredients and watching them transform into a rich, fudgy masterpiece. Whether you're stirring in the chocolate chips, sneaking a taste of the batter (we all do it!), or swirling in the cream cheese topping, the process feels like an exciting, hands-on, creative project. The sweet aroma of brownies filling the house is an instant mood booster! Baking brownies is not just about making a delicious treat; it’s about enjoying the process and the joy of sharing something warm and homemade with friends or family. It's a guaranteed recipe for fun and flavor!
If you enjoy this recipe as much as I do, comment below and let me know!

Cheesecake Brownies
Ingredients
- 1/2 Cup unsalted butter (melted).
- 1 Cup sugar.
- 2 Eggs (room temperature).
- 1 Teaspoon vanilla extract.
- 1/3 Cup unsweetened cocoa powder.
- 1/2 Cup all-purpose flour.
- 1/4 Teaspoon salt.
- 1/4 Teaspoon baking powder.
- 1/2 Cup mini chocolate chips.
- 8 Ounces cream cheese (room temperature).
- 1 Egg (room Temperature).
- 1/3 Cup granulated sugar.
Instructions
- Preheat the oven to 350 degrees Fahrenheit. Line a 9x9 baking pan with parchment paper.
- Melt the 1/2 cup butter and allow to cool slightly.
- Using a spatula, mix the sugar into the melted butter until combined.
- Mix the eggs one at a time, then add the vanilla extract.
- Add all the dry ingredients, flour, cocoa powder, salt, and baking powder, and fold together until combined without overmixing. Then add the 1/2 cup of mini chocolate chips, fold into the batter, and pour into the prepared baking dish.
- Now, make the cream cheese topping. Combine the cream cheese, egg, and sugar into a mixing bowl. Mix using a handheld mixer until you have a nice creamy texture.
- Using a cookie scoop or spoon, place dollops of the cream cheese mixture throughout the brownie mixture. Using a butter knife, make large swirls to spread the cream cheese mixture.
- Bake for 28-30 minutes or until a toothpick inserted into the middle comes out clean. Allow to cook before cutting and serving.
- 9x9 baking pan
- Parchment paper
- Wire rack
- Spatula
- Bowls
- Hand Mixer
Notes
- You can cut these into 16 squares for more servings.
- You can add 1 tablespoon of red gel food coloring to make these red velvet brownies.
- You can also swap mini chocolate chips for chocolate chips of your liking.

Birthday Cake Blondies

Birthday Cake Blondies with Cream Cheese Frosting
These Birthday Cake Blondies are like a birthday party in every bite, chewy, rich, and loaded with melty white chocolate chips and rainbow sprinkles. Topped with a silky vanilla bean cream cheese frosting, they’re the ultimate treat for celebrations, bake sales, or just a little weekday joy. Whether you’re new to baking or a seasoned home baker, this easy recipe walks you through every step and explains the why behind the ingredients, so your blondies turn out perfect every time.
Ingredient Breakdown (and Why They Matter)
For the Blondies:
½ cup unsalted butter (melted)
Melted butter creates a soft, chewy blondie with that rich, almost caramelized flavor. Unsalted allows you to control the salt content.1 cup brown sugar
Brown sugar adds moisture and chew, thanks to its molasses content. It also brings a warm, deep sweetness that complements the white chocolate beautifully.2 eggs (room temperature)
Eggs bind everything together and provide structure and richness. Room temp eggs mix more evenly into batter, preventing a dense texture.1 tbsp vanilla extract
This boosts the overall flavor with a warm, sweet aroma. Don’t skimp, vanilla rounds out the entire dessert.1 cup all-purpose flour
Provides structure. Just the right amount keeps the blondies soft, not cakey.¼ tsp baking powder
Adds a subtle lift to keep the blondies from being too dense.½ tsp salt
Balances the sweetness and enhances the flavors. A small amount makes a big difference.1 cup white chocolate chips
Sweet and creamy, white chocolate melts into the batter for rich pockets of flavor.4 tbsp rainbow sprinkles
Adds fun color, texture, and whimsy! Use “jimmies” style sprinkles, they melt better into batter without bleeding.
For the Frosting:
¼ cup softened unsalted butter
Acts as a creamy base for the frosting, rich and smooth.2 tbsp softened cream cheese
Adds a tangy balance to the sweetness and gives the frosting structure.1 ½ cups powdered sugar
Sweetens and thickens the frosting to a smooth, spreadable consistency.¼ tsp salt
Cuts the sweetness and enhances flavor, yes, even in frosting!1 tsp vanilla bean paste
Brings a stronger, richer vanilla flavor with gorgeous specks. Vanilla extract works just as well if that’s what you have.1 tbsp milk
Thins the frosting slightly for that perfect creamy spreadability.

Step-by-Step Instructions
1. Prep Your Pan & Oven
Preheat your oven to 350°F (175°C). Line a 9x9 baking pan with parchment paper, letting it hang over the sides for easy lifting later.
2. Melt the Butter
In a microwave-safe bowl or saucepan, melt ½ cup unsalted butter. Let it cool slightly—this helps prevent scrambled eggs when mixing later.
3. Mix Wet Ingredients
In a mixing bowl, stir together the melted butter and 1 cup brown sugar until smooth. Add the 2 eggs and 1 tbsp vanilla extract. Mix until just combined, don’t overmix!
4. Add Dry Ingredients
Add 1 cup all-purpose flour, ¼ tsp baking powder, and ½ tsp salt to the bowl. Use a spatula to gently fold everything together just until you don’t see any dry flour. Overmixing can lead to dense blondies.
5. Add the Fun!
Fold in 1 cup white chocolate chips and 4 tbsp rainbow sprinkles. Stir until evenly distributed.
6. Bake
Pour the batter into your prepared pan and smooth out the top. Bake for 30–35 minutes, or until the edges are golden and a toothpick inserted near the center comes out with just a few moist crumbs.
Pro Tip: Ovens vary! Start checking at 28–30 minutes if your oven runs hot.
7. Cool
Let the blondies cool in the pan for at least 20–30 minutes before frosting. You can speed this up by placing the pan on a wire rack.
🎂 Make the Frosting
1. Cream the Butter & Cream Cheese
In a stand mixer (or with a hand mixer), beat ¼ cup softened butter and 2 tbsp cream cheese on medium-high until creamy and smooth, about 1 minute.
2. Add Sugar & Flavor
Add 1 ½ cups powdered sugar, ¼ tsp salt, 1 tsp vanilla bean paste (or extract), and 1 tbsp milk. Beat for 2–4 minutes until fluffy and creamy.
Texture Tip: If your frosting is too thick, add a splash more milk. Too thin? Add more powdered sugar.
3. Frost & Decorate
Once blondies are cool, spread frosting evenly over the top. Add extra sprinkles for that irresistible funfetti finish!
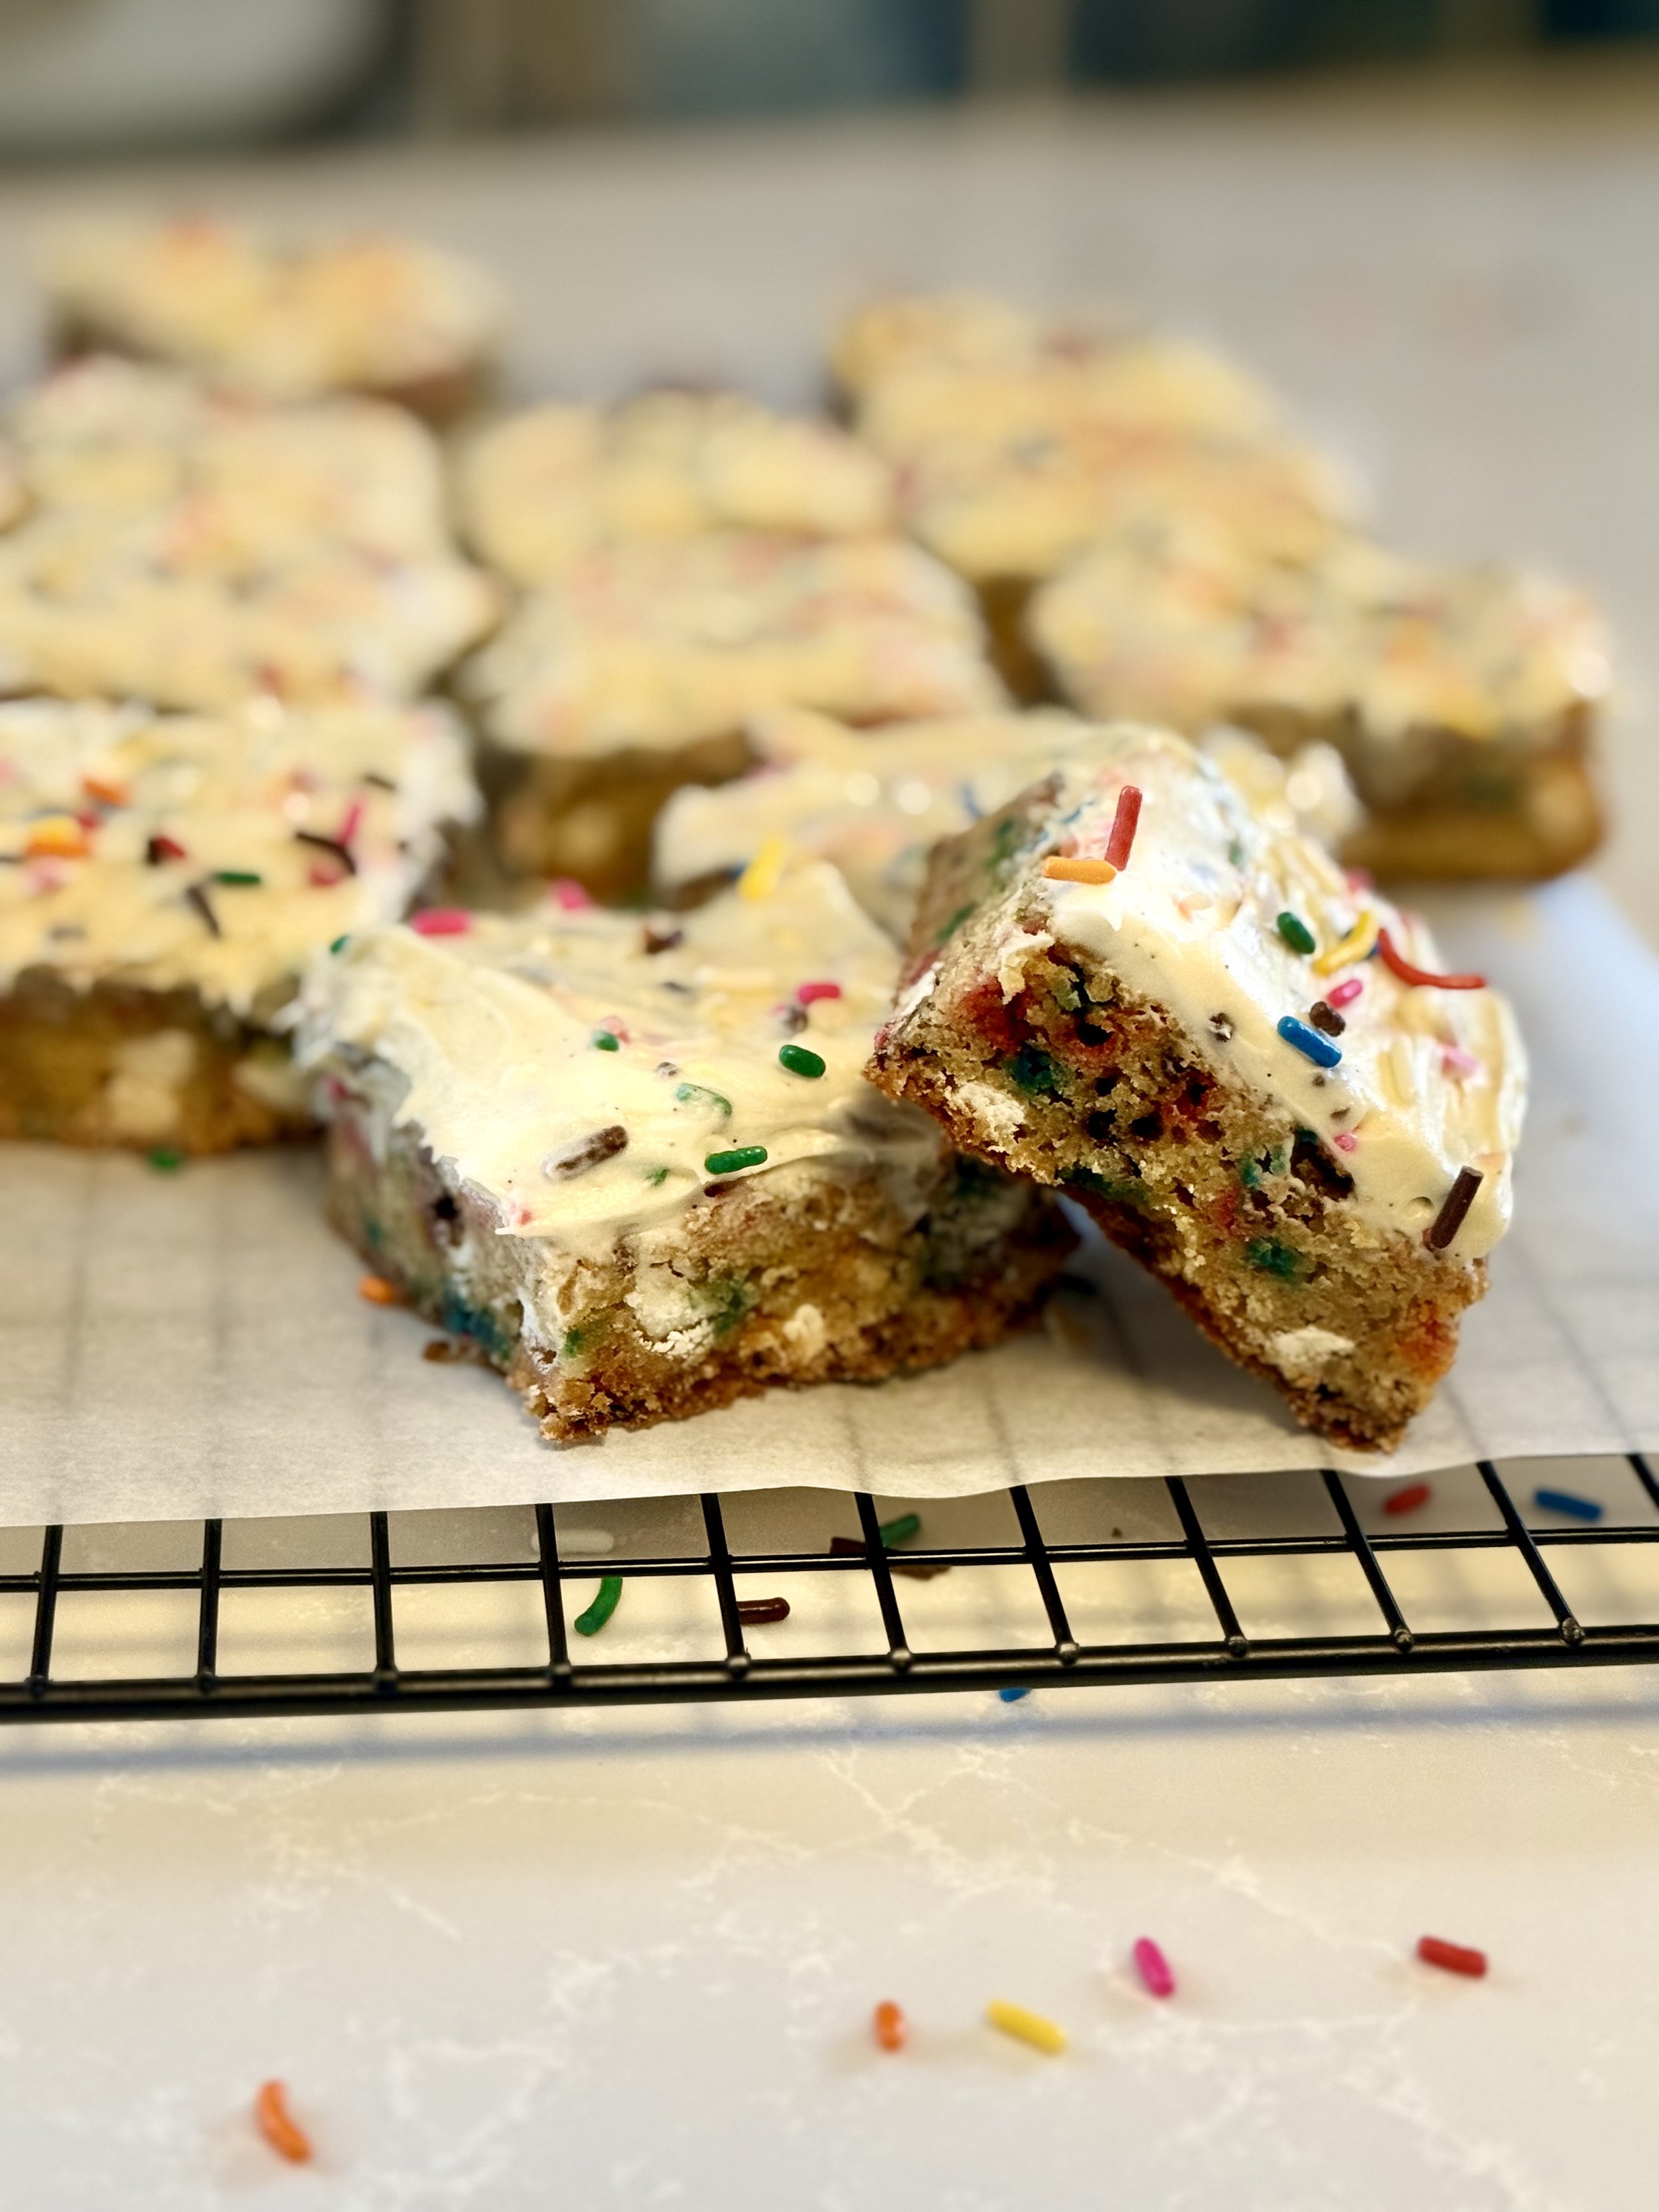
Storage & Make-Ahead Tips
Room Temperature: Store frosted blondies in an airtight container for up to 2 days.
Fridge: Lasts up to 5 days chilled. Let them sit at room temp for 10 minutes before eating.
Freezing: Freeze unfrosted blondies (whole or sliced) wrapped tightly for up to 2 months. Thaw overnight in the fridge and frost before serving.
Troubleshooting & Tips
| Problem | Solution |
|---|---|
| Blondies too dry? | Don’t overbake! Pull them when the edges are set but the center still looks slightly soft. |
| Blondies too dense? | Make sure not to overmix once you add flour. Gentle folding is key. |
| Frosting too runny? | Chill it for 10–15 minutes or add more powdered sugar. |
| Sprinkles bleeding color? | Use “jimmies” (long, rod-shaped) sprinkles, not nonpareils. |
Customize It!
Gluten-Free? Swap flour for a 1:1 gluten-free baking blend.
Extra Flavor? Try browning the butter before mixing for a nuttier, deeper flavor.
Make it a Cake? Double the recipe and bake in a 9x13 pan for ~40 minutes.
I love making and eating birthday cake blondies because they remind me of the joy and excitement of celebrating with friends and family, but without the pressure of a complicated cake. If you want other birthday-inspired desserts, you may like Funfetti Cookies or Sugar Cookie Bars, too!
I may be a little biased because I LOVE birthday cake-flavored everything, but give these a try and let me know in the comments below how you like them!

Birthday Cake Blondies
Ingredients
- ½ cup unsalted butter (melted)
- 1 cup brown sugar
- 2 eggs (room temperature)
- 1 tbsp vanilla extract
- 1 cup of all-purpose flour
- ¼ tsp of baking powder
- ½ tsp salt
- 1 cup white chocolate chips
- 4 tbsp Rainbow Sprinkles
- ¼ cup softened unsalted butter
- 2 tbsp softened cream cheese
- 1 ½ cup powdered sugar
- ¼ tsp salt
- 1 tsp vanilla bean paste
- 1 tbsp milk
Instructions
- Preheat the oven to 350 degrees and line a 9x9 pan with parchment paper.
- Melt the ½ cup of butter and allow to cool slightly.
- Add the melted butter and brown sugar in a separate bowl and mix with a spatula until combined.
- Add the eggs and vanilla extract and mix until just combined.
- Use a spatula to scrape down the sides and add the flour, baking powder, and salt. Fold the ingredients together until there are no clumps of flour without overmixing. Then add one cup of white chocolate chips and four tablespoons of rainbow sprinkles, mix, then transfer to your baking pan.
- Bake for 30-35 minutes or until the edges are golden brown.
- While the blondies cool, make the frosting. Add the softened butter and cream cheese in a stand mixer (or hand mixer). Mix on medium to medium-high speed until combined. Add the powdered sugar, salt, vanilla bean paste, and milk. Mix the ingredients until nice and creamy, roughly 2-4 minutes.
- Once the blondies are cooled enough, top them with the frosting and add some extra sprinkles if you want!
- Serve and Enjoy!
- 9x9 baking pan
- Parchment paper
- Wire rack
- Spatula
- Bowls
Notes
- If you don't have vanilla bean paste for the frosting, vanilla extract will also work!